Table of Contents >> Show >> Hide
- Before You Cook: 7 Smart Rules That Make Everything Better
- 10 Tasty Ways to Cook Pre-Marinated Chicken
- 1) High-Heat Sheet-Pan Roast (Best All-Around Weeknight Method)
- 2) Two-Zone Grilling (Best Smoky Flavor)
- 3) Air Fryer Crisp-Up (Best for Speed + Texture)
- 4) Cast-Iron Sear + Oven Finish (Best for Restaurant-Style Browning)
- 5) Broiler Blast (Best for Thin Cuts and Fast Caramelization)
- 6) Slow Cooker Then Broil (Best for Meal Prep and Ultra-Tender Bites)
- 7) Instant Pot + Quick Crisp Finish (Best for Busy Nights)
- 8) Fast Stir-Fry Strips (Best for Pre-Marinated Chicken Breast)
- 9) Skewer + Grill or Broil (Best for Party Food and Even Cooking)
- 10) Braise in Sauce (Best for Comfort Food and Leftovers)
- Common Mistakes That Ruin Pre-Marinated Chicken (And Easy Fixes)
- Flavor Pairing Cheat Sheet for Pre-Marinated Chicken
- 500-Word Kitchen Experience: What Real Pre-Marinated Chicken Nights Actually Feel Like
- Final Thoughts
Some heroes wear capes. Others come vacuum-sealed in your fridge, labeled “pre-marinated chicken,” quietly waiting to save your Tuesday night.
If you’ve ever stood in your kitchen at 6:43 p.m. wondering whether cereal can be considered “dinner with texture,” this guide is for you. Pre-marinated chicken is one of the easiest shortcuts to a meal that tastes intentionaleven when your day absolutely was not. The trick is not just what you cook, but how you cook it.
In this article, you’ll get 10 genuinely delicious ways to cook pre-marinated chicken, with practical timing ranges, texture goals, and flavor pairings. You’ll also get no-nonsense safety and quality tips so your chicken comes out juicy, browned, and worth repeating. Let’s turn “store-bought shortcut” into “house favorite.”
Before You Cook: 7 Smart Rules That Make Everything Better
1) Keep it cold, always.
Pre-marinated chicken should stay refrigerated until cooking time. If it’s frozen, thaw in the refrigerator, cold water, or microwavenot on the counter. This one move protects flavor and food safety.
2) Don’t wash raw chicken.
It sounds clean, but it spreads germs around your sink and counters. Cooking to the right internal temperature is what makes chicken safe, not rinsing it.
3) Use a thermometer, not vibes.
The safe internal temperature for chicken is 165°F. Pull it when it hits target in the thickest part (not touching bone), then rest before slicing.
4) Manage the marinade like a pro.
Marinade that touched raw chicken is not a finishing sauce unless you boil it first. Better idea: reserve a separate clean portion before cooking.
5) Watch sugar-heavy marinades.
Honey, brown sugar, teriyaki, barbecue, and sweet chili burn quickly over high heat. For these, lower heat slightly or finish with glaze late in cooking.
6) Give chicken space.
Overcrowding = steaming. Spacing = browning. Brown food tastes like effort. Steamed food tastes like compromise.
7) Rest after cooking.
Resting for 5–10 minutes helps juices redistribute. Cut too soon and your cutting board gets dinner before you do.
10 Tasty Ways to Cook Pre-Marinated Chicken
1) High-Heat Sheet-Pan Roast (Best All-Around Weeknight Method)
Why it works: High oven heat caramelizes the marinade while keeping the inside juicy. This is the easiest path to “I cooked” energy without creating 14 dirty dishes.
How to do it: Preheat oven to 425°F. Line a sheet pan with parchment or foil. Arrange chicken in a single layer with space between pieces. Roast until chicken reaches 165°F (often 20–35 minutes depending on cut thickness and bone-in vs. boneless).
Great with: Lemon-herb, garlic, or Mediterranean marinades plus potatoes, broccoli, onions, or peppers on the same tray.
Pro move: If the marinade is sugary, roast at 400°F first, then blast 2–4 minutes under the broiler at the end for color.
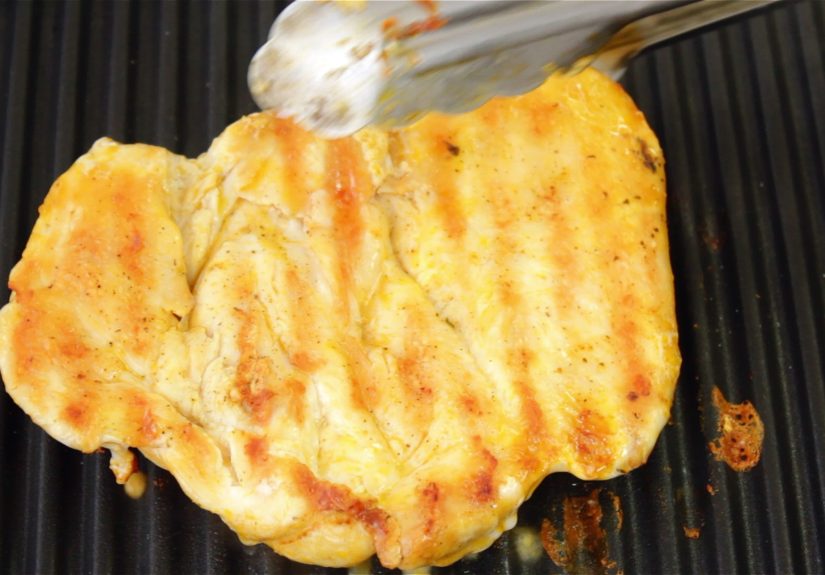
2) Two-Zone Grilling (Best Smoky Flavor)
Why it works: You get char from direct heat and control from indirect heat. It’s the difference between “perfectly grilled” and “oops, carbon.”
How to do it: Set up the grill with a hot side and a cooler side. Start chicken on direct heat for color, then move to indirect heat to finish gently to 165°F. Keep lid closed as much as possible for even cooking.
Great with: BBQ, chipotle-lime, honey-garlic, and herb marinades.
Pro move: Let excess marinade drip off before grilling to reduce flare-ups and bitter burnt spots.
3) Air Fryer Crisp-Up (Best for Speed + Texture)
Why it works: Fast circulating heat gives crisp edges with less fuss. It’s especially good for boneless thighs and smaller cuts.
How to do it: Preheat air fryer to around 360–400°F depending on your model. Arrange chicken in one layer (don’t stack). Cook, flipping halfway, until the thickest part reaches 165°F. Typical cook windows are 12–22 minutes depending on size and cut.
Great with: Teriyaki, cajun, jerk, and garlic-soy profiles.
Pro move: Lightly pat very wet marinade off the surface to improve browning; keep flavor by brushing a little clean sauce at the end.
4) Cast-Iron Sear + Oven Finish (Best for Restaurant-Style Browning)
Why it works: You get deep crust from stovetop heat, then controlled doneness in the oven. This method is pure confidence on a plate.
How to do it: Heat a cast-iron skillet over medium-high with a little oil. Sear chicken 2–4 minutes per side until browned, then transfer skillet to a 400°F oven to finish until 165°F.
Great with: Dijon-herb, garlic butter, paprika-forward, and peppery marinades.
Pro move: Deglaze the pan with stock, lemon, or a splash of vinegar after removing chicken for a quick pan sauce.
5) Broiler Blast (Best for Thin Cuts and Fast Caramelization)
Why it works: Broilers are basically upside-down grills. Intense top heat gives quick char and sticky, caramelized edges.
How to do it: Set oven rack 4–6 inches from broiler element. Use a metal tray (not glass). Broil chicken, turning once, until browned and cooked through to 165°F.
Great with: Yogurt-spice marinades, shawarma-style seasonings, and lemon-garlic blends.
Pro move: Watch constantlybroilers go from golden to “small kitchen emergency” fast.
6) Slow Cooker Then Broil (Best for Meal Prep and Ultra-Tender Bites)
Why it works: Slow cooking makes chicken fork-tender; a quick broil at the end adds color and texture so it doesn’t taste one-note.
How to do it: Add pre-marinated chicken to slow cooker with a little liquid if needed. Cook on low 4–6 hours (or high 2–3 hours, depending on cut/amount) until it reaches 165°F and is tender. Transfer to sheet pan and broil 2–4 minutes for browning.
Great with: Honey-garlic, soy-ginger, balsamic, and tomato-based marinades.
Pro move: Thicken leftover cooking liquid with a cornstarch slurry for an easy sauce.
7) Instant Pot + Quick Crisp Finish (Best for Busy Nights)
Why it works: Pressure cooking gets dinner done quickly and reliablyeven if your day ran off-script.
How to do it: Add chicken and marinade (plus a little extra liquid if needed) to the pot. Pressure cook on high; timing depends on cut and whether fresh or frozen. Check for 165°F after release. For better texture, brush with sauce and broil briefly.
Great with: BBQ, adobo-inspired, soy-garlic, and citrus-garlic styles.
Pro move: Sauté first for deeper flavor if using skin-on thighs.
8) Fast Stir-Fry Strips (Best for Pre-Marinated Chicken Breast)
Why it works: Thin pieces cook quickly and absorb wok-level flavor from aromatics and vegetables.
How to do it: Slice chicken evenly, pat lightly if very wet, and cook in batches in a very hot skillet or wok. Add vegetables and finish with a clean sauce portion. Cook until chicken is fully done (165°F).
Great with: Soy-sesame, ginger-garlic, orange, and spicy chili marinades.
Pro move: Overcrowding kills stir-fry texture. Small batches = better browning, better flavor.
9) Skewer + Grill or Broil (Best for Party Food and Even Cooking)
Why it works: Bite-size pieces cook faster and more evenly, and skewers are easy to serve for bowls, wraps, or appetizer platters.
How to do it: Cut chicken into even chunks. Thread onto skewers (metal or soaked wooden). Grill or broil, turning often, until charred and cooked through to 165°F.
Great with: Tandoori-style yogurt, lemon-oregano, peri-peri, and sweet-savory glaze profiles.
Pro move: Pair with onions and peppers on separate skewers so everything cooks at the right pace.
10) Braise in Sauce (Best for Comfort Food and Leftovers)
Why it works: Gentle simmering in sauce keeps chicken tender and creates built-in flavor for rice, noodles, or mashed potatoes.
How to do it: Sear briefly, then add broth/coconut milk/tomato base and simmer covered until chicken reaches 165°F and is tender. Reduce sauce uncovered for final richness.
Great with: Curry marinades, tomato-garlic blends, smoky paprika profiles, and Mediterranean herb mixes.
Pro move: Add fresh acid (lemon or vinegar) at the end to brighten rich sauces.
Common Mistakes That Ruin Pre-Marinated Chicken (And Easy Fixes)
- Mistake: Cooking fridge-cold chicken straight into screaming heat with sugary marinade. Fix: Use moderate heat first, finish hot.
- Mistake: Reusing raw marinade as dipping sauce. Fix: Boil it or use a separate clean batch.
- Mistake: Judging doneness by color alone. Fix: Thermometer to 165°F, always.
- Mistake: Overcrowding pan/air fryer basket. Fix: Cook in batches for real browning.
- Mistake: Skipping rest time. Fix: Rest 5–10 minutes before slicing.
Flavor Pairing Cheat Sheet for Pre-Marinated Chicken
If your package says:
- Teriyaki / Soy-Ginger: Serve with jasmine rice, cucumber salad, sesame green beans.
- Lemon Herb / Mediterranean: Pair with roasted potatoes, feta salad, warm pita.
- BBQ / Smoky: Add corn, slaw, baked beans, or skillet mac and cheese.
- Spicy Chili / Cajun: Try dirty rice, grilled vegetables, avocado-lime crema.
- Yogurt-Spice / Tandoori-Style: Go with basmati rice, charred onions, mint yogurt sauce.
500-Word Kitchen Experience: What Real Pre-Marinated Chicken Nights Actually Feel Like
The first time I leaned hard into pre-marinated chicken, it was not a glamorous culinary moment. It was one of those evenings where the only energy I had left was “open fridge and hope.” I had a pack of lemon-garlic chicken thighs, half a bag of carrots that looked like they’d seen things, and exactly zero desire to wash more than one pan. I threw everything onto a sheet tray, roasted it hot, and waited. What came out was crisp at the edges, juicy inside, and weirdly confidence-boosting. That night taught me something simple: convenience food doesn’t have to taste like compromise if you treat it with decent technique.
A few weeks later, I made the classic rookie mistakeair fryer basket overloaded like a subway at rush hour. I was aiming for crispy, but I got “humid chicken conference.” It wasn’t bad, but it wasn’t the golden, caramelized magic I wanted. The next night I cooked in two smaller batches, gave each piece breathing room, and suddenly everything changed: better browning, better texture, better flavor. Same chicken, same marinade, very different dinner. Space is not optional; space is strategy.
Then came grill season. I used a sweet barbecue-marinated pack and tossed it straight over high flames. The sugar charred almost instantly and turned bitter before the inside was done. That was my lesson in two-zone cooking. Ever since, I sear quickly over direct heat for color, then move pieces to indirect heat to finish gently. You still get smoky flavor and grill marks, but without the blackened sadness. I also learned to let excess marinade drip off before the grill, because flare-ups are dramatic and not in a fun way.
My favorite “I can’t even” solution is still the slow cooker plus broiler finish. On a packed workday, I drop in pre-marinated chicken in the morning, and by dinner it’s tender enough to shred for tacos, bowls, or wraps. A two-minute broil before serving gives those tasty browned bits that make everyone assume I spent hours planning. I did not. I spent minutes. The slow cooker did the emotional labor.
The Instant Pot version has its own personality. It’s less about deep browning and more about speed and consistency. If dinner needs to happen now, pressure cooking is unbeatable. I’ve learned to accept that “done fast” and “beautifully bronzed” are sometimes different goalsthen I cheat by brushing on sauce and broiling for a few minutes. Suddenly it looks intentional again, with glossy edges and that sticky finish people chase in takeout.
Another practical win: pre-marinated chicken turned into stir-fry strips on nights when the fridge has random vegetables and no coherent plan. Slice the chicken evenly, cook in small batches, toss in peppers/onions/snap peas, and dinner appears in about 20 minutes. It tastes fresh, colorful, and oddly organized, like I meal-prepped on purpose. (I did not.)
What surprised me most over time is how much tiny habits matter: thermometer instead of guessing, resting before slicing, separate clean sauce, and no washing raw chicken. Those steps sound boring until you realize they’re the difference between “fine” and “wow, make this again.” They also reduce the dinner roulette of dry centers, burnt sugar, and random food-safety anxiety.
So yes, pre-marinated chicken is convenient. But with a little method, it becomes more than a shortcutit becomes a repeatable system for good meals on real-life schedules. And honestly, any dinner strategy that delivers juicy chicken, fewer dishes, and fewer 8 p.m. snack regrets deserves a permanent spot in the rotation.
Final Thoughts
Pre-marinated chicken is one of the smartest shortcuts in the modern kitchenbut shortcuts still need steering. Pick the right method for your cut, respect heat level (especially with sweet marinades), cook to 165°F, and finish with texture. Do that, and you’ll get meals that are fast, flavorful, and repeatable.
In other words: less guesswork, more good food, and a lot fewer emergency cereal dinners.


