Table of Contents >> Show >> Hide
- Why Polished Aluminum Loses Its Shine (Even If You Compliment It Daily)
- Way #1: Clean It Gently (Because Polished Aluminum Scratches If You Look at It Funny)
- Way #2: Polish Smart (Small Sections, the Right Product, and Zero Panic)
- Way #3: Protect the Finish (Because Polishing Every Weekend Is a Lifestyle Choice)
- Common Mistakes That Make Polished Aluminum Dull (Fast)
- Quick Maintenance Schedule (So You Don’t Have to Guess)
- Real-World Experience: What Actually Keeps Aluminum Shiny (The “I Learned This the Hard Way” Section)
- Conclusion: Keep the Shine, Lose the Stress
Polished aluminum is basically the friend who looks incredible in photos but hates humidity, fingerprints, and “just a quick wipe” with a paper towel. One minute it’s a mirror. The next minute it’s a foggy, smudgy mystery. The good news: keeping polished aluminum shiny isn’t hardyou just need the right routine (and the self-control to stop attacking it with whatever rag is closest).
In this guide, you’ll get three easy, repeatable ways to keep polished aluminum bright: a safe cleaning method that won’t scratch, a polishing approach that actually restores shine (without drama), and a protection step that slows oxidation so you’re not polishing every other weekend. We’ll keep it practical, a little funny, and very friendly to Google and Bing.
Why Polished Aluminum Loses Its Shine (Even If You Compliment It Daily)
Aluminum naturally reacts with oxygen and forms a thin oxide film. That layer is part of why aluminum resists deep corrosion, but it also makes a polished surface lose that “just detailed” brilliance over timeespecially outdoors, near salt, or around grime that gets rubbed in. Add water spots, road film, fingerprints, and occasional “oops” moments with harsh cleaners, and the shine fades fast.
The secret isn’t one miracle product. It’s a simple cycle: clean gently → polish correctly → protect the finish. Do those three things, and polished aluminum stays shiny with less effort (and fewer existential crises).
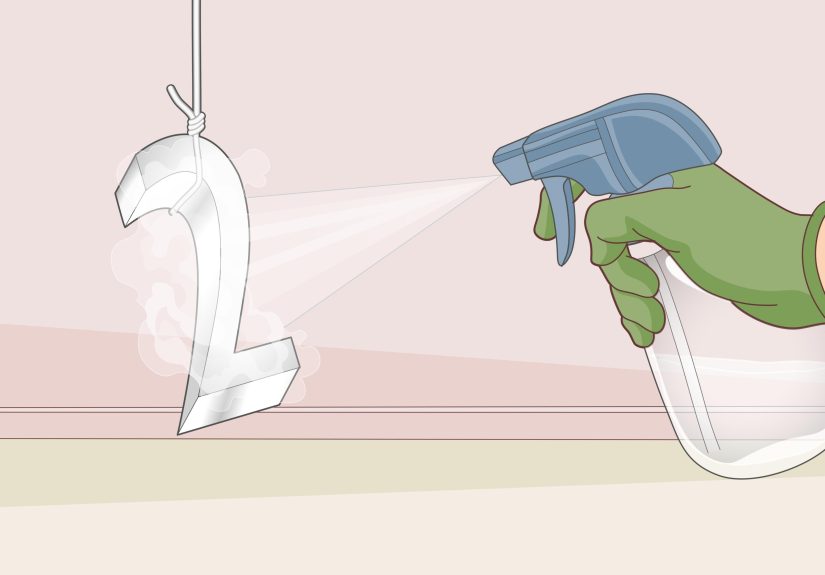
Way #1: Clean It Gently (Because Polished Aluminum Scratches If You Look at It Funny)
The #1 cause of dull polished aluminum isn’t “bad aluminum.” It’s micro-scratches from wiping dirt across a soft metal. So the first rule is: remove grit before you touch the surface. Think of it like rinsing sand off your feet before getting into bedyour sheets (and your shine) will thank you.
Step 1: Rinse First, Always
If the piece is outdoors (truck tanks, wheels, marine rails, patio furniture), start with a thorough rinse. The goal is to float off dust and grit so you’re not “polishing” with tiny rocks. If you can use a gentle hose rinse, great. If you’re dealing with heavy road film or salt, rinse longer than feels necessary.
Step 2: Wash with Mild Soap + Soft Tools
Use warm water and a mild dish soap. Use a soft microfiber wash mitt or non-abrasive clothno scouring pads, no steel wool “just to see if it works,” and no mystery sponge that’s been through wars.
- Do: wash in straight lines, light pressure, frequent rinsing of the cloth.
- Don’t: grind grime into the surface or scrub like you’re punishing it.
Step 3: Spot-Treat Oxidation and Water Stains (Safely)
If you see dull haze, chalky oxidation, or mineral spots, a mild acidic solution can help lift discoloration. A common approach is diluted vinegar or lemon juice in hot water, used briefly, then rinsed thoroughly. The key word is briefly. Acids aren’t “evil,” but letting them sit forever can cause etching.
For small parts (like cookware or smaller hardware), simmering a mild acidic solution can reduce discoloration, then you rinse and dry immediately. For large polished pieces, use a damp cloth with a light solution and keep moving.
Step 4: Dry Like a Professional Detailer
Air drying invites spots. Dry immediately with a clean microfiber towel. If you want the finish to look crisp, use a second towel for a final buff. It’s a small step that makes a big difference.
Pro tip: If it’s a food-contact item (like cookware), skip heavy metal polishes unless the product explicitly says it’s food-safe. For cookware, the shine game is mostly about cleaning and dryingnot aggressive polishing.
Way #2: Polish Smart (Small Sections, the Right Product, and Zero Panic)
Cleaning removes dirt. Polishing removes the dull layer and refines the surface. The mistake most people make is either (1) polishing too aggressively and creating swirls, or (2) using too much product and letting it dry into a stubborn haze.
Choose the Right Polish for the Job
For most shiny aluminum maintenance, a dedicated metal polish works well. Popular examples include aluminum-specific polishes used for wheels, trim, marine aluminum, and brightwork. If the aluminum is heavily oxidized, you may need a stronger restorer/polish (or a two-step approach: restore, then refine).
You don’t need a cabinet full of products. You need one polish you trust and a couple of clean microfiber cloths. (And you need to stop using the microfiber you dropped on the garage floor. That cloth is now a sandpaper coupon.)
Work in Small Areas (Seriously, Don’t Freehand a Whole Trailer)
Polishes perform best when you work a small section at a timethink about a 1–4 square foot area. Apply a small amount, rub with moderate pressure, and keep the polish moving. Many polishing systems recommend not letting the product dry on the surface; it’s easier to buff when it stays workable.
Expect the “Black Stuff” (It’s a Good Sign)
When you polish aluminum, your cloth may turn dark. That’s typically oxidation and residue being lifted off the metal. Keep folding to a clean section of cloth as you work. When the residue reduces and the surface starts reflecting cleanly, you’re winning.
Buff to Finish (Clean Cloth, Light Pressure)
After the polishing pass, use a fresh microfiber cloth and buff the area until it looks clear and mirror-like. This is where a lot of “meh” results become “wow” results. Buffing is not optionalit’s the glow-up.
Optional: Use a Polisher (If You Want Speed, Not Chaos)
For larger surfaces (pontoon rails, truck tanks, big panels), a machine polisher can save time. Use the correct pad, keep speeds moderate, and don’t cook the metal with heat. If you’re new, practice on an inconspicuous area first so your first attempt isn’t the most visible part of your pride and joy.
Way #3: Protect the Finish (Because Polishing Every Weekend Is a Lifestyle Choice)
Polishing makes it shiny. Protection keeps it shiny. Without a protective layer, aluminum is back in contact with oxygen, moisture, salt, and grime. That’s how dullness returns. A simple protectant step can dramatically reduce how often you need to polish.
Option A: Wax or Sealant (Easy, Affordable, Effective)
After polishing, apply a thin coat of wax or paint sealant (yes, even though it’s not paint). The goal is to create a barrier that slows oxidation and makes future washing easier. On wheels and outdoor aluminum, a sealant often lasts longer than a traditional wax.
- Best for: wheels, trim, tanks, rails, outdoor furniture.
- Maintenance rhythm: wash regularly, reapply protectant every few weeks to a couple of months depending on exposure.
Option B: Dedicated Metal Protectant Coatings (Longer-Lasting Shield)
If you’re protecting large exterior aluminumlike architectural frames, railings, or marine aluminumthere are wipe-on protective coatings designed specifically for bright metal. These can extend the time between full polishing sessions and help keep oxidation from coming back quickly. They’re especially helpful in high-UV or salty environments.
Option C: Clear Coat or Anodizing (Best for “Set It and Forget It,” with Trade-Offs)
For some projects, a clear coat can lock in shinebut success depends on prep, adhesion, and the part’s environment. Clear coats can change the look slightly and may fail if the surface isn’t properly prepared or if the part flexes and heats/cools frequently. Anodizing is a different path: it creates a controlled oxide layer that can improve durability and corrosion resistance, but it’s typically something you do during manufacturing or refinishing, not a quick DIY step for every item.
Translation: clear coat and anodizing can be fantastic, but they’re not always the simplest answer. For most people, wax/sealant or a metal-specific protectant coating gives the best balance of shine, ease, and upkeep.
Common Mistakes That Make Polished Aluminum Dull (Fast)
- Dry wiping dust: you’re basically sanding it with grit.
- Abrasive pads and harsh brushes: great for cast iron, terrible for mirror finishes.
- Letting cleaners dry on the surface: residue haze is the enemy of shine.
- Skipping protection: unprotected aluminum re-oxidizes quicker, especially outdoors.
- Using strong acids/alkalis casually: “strong” doesn’t mean “better” for polished metal.
Quick Maintenance Schedule (So You Don’t Have to Guess)
Here’s a simple schedule that keeps polished aluminum shiny without turning your life into a polishing montage:
- Weekly or biweekly: rinse + gentle wash + dry thoroughly.
- Monthly (or as needed): light polish on high-touch/high-exposure areas (wheels, rails, trim).
- Every 1–3 months: reapply wax/sealant or your chosen protectant (sooner in salt/UV).
- Once or twice a year: deeper polish session for full restoration if the environment is rough.
Real-World Experience: What Actually Keeps Aluminum Shiny (The “I Learned This the Hard Way” Section)
I’ve seen polished aluminum in every mood: show-car mirror, “just washed” bright, and “what happened here?” cloudy. And the biggest difference between the shiny setups and the sad ones usually isn’t the brand of polishit’s the routine. People who keep aluminum looking incredible do a few boring things consistently, and boring is wildly underrated.
One of the most common scenarios is polished aluminum on vehicleswheels, tanks, steps, trim. The owner polishes it once, gets that perfect mirror finish, and then treats it like a trophy that should stay perfect on its own. But then real life shows up: brake dust, road grime, rain, salty winter spray, and the occasional enthusiastic fingerprint from someone who just had to touch it. If you wait until it looks terrible before doing anything, you end up doing heavy correctionmore product, more rubbing, more time, and more chance of swirls. The people who stay shiny do the opposite: they do tiny maintenance early and often.
Another real-world lesson: the cloth matters more than your pride wants to admit. A clean microfiber is basically a cheat code. A dirty microfiber is a tiny sabotage gremlin. If you’ve ever wondered why your aluminum looks “hazy” after a wipe, it’s often because the cloth had leftover detergent, grime, or it was used on something else first. Dedicated “metal-only” towels sound extra, but they work. And if a towel hits the ground, it’s not a towel anymoreit’s a grit collector with excellent marketing.
If you live near the coast or deal with winter roads, protection becomes everything. Salt is relentless. You can polish to perfection on Saturday and watch it start to dull by the next week if it’s unprotected and exposed. A simple wax or sealant layer doesn’t just keep it shinierit makes washing easier because grime releases faster. That means fewer aggressive scrubs, which means fewer micro-scratches, which means the shine stays crisp longer. It’s a nice domino effect: protect → easier cleaning → less abrasion → longer shine.
Finally, don’t underestimate drying. Water spots are sneaky because they don’t always look like “spots” at first sometimes they look like a general dull veil. When you start drying immediately after washing, the finish looks cleaner, and you avoid chasing “mystery haze” later with more polish than you actually needed. If you want a simple, real-life rule: clean it gently, dry it immediately, protect it routinely. That’s the whole game.
Conclusion: Keep the Shine, Lose the Stress
Polished aluminum doesn’t need constant babyingit needs a repeatable plan. Start by rinsing and washing gently so you don’t grind grit into a soft surface. Polish in small sections with the right technique to restore reflectivity. Then protect the finish with wax, sealant, or a dedicated coating so oxidation slows down and cleaning gets easier. Do that, and your aluminum stays shiny enough to double as a “did I leave the lights on?” mirror.


