Table of Contents >> Show >> Hide
- Quick reality check: What kind of caulk are you fighting?
- Before you start: Tools, prep, and safety (aka “Don’t slip. Don’t scratch. Don’t regret.”)
- Way 1: Manual removal (Score, lift, peel, scrape)
- Way 2: Chemical softeners and commercial caulk removers (Let chemistry do the arguing)
- Way 3: Heat-assisted removal (Warm it up, don’t cook it)
- Cleaning the joint so new caulk actually sticks
- Specific examples: What removal looks like in real life
- Common problems and how to fix them
- When it’s smart to call a pro
- Conclusion
- Experiences: What people learn the hard way when removing old caulk (so you don’t have to)
Old caulk has one job: keep water, air, and mystery drafts from sneaking into places they don’t belong. When it’s fresh, it’s a tidy little bead.
When it’s old, it’s… a crusty science project with mildew freckles and a personality problem.
The good news: removing old caulking is absolutely DIY-friendly. The even better news: you don’t need to “sand it for three days and cry twice”
(that’s drywall). With the right method, you can strip old caulk cleanly and set the stage for a new, watertight seal that actually sticks.
Quick reality check: What kind of caulk are you fighting?
Choosing the right removal method gets a lot easier if you know what you’re removing. Most home caulk falls into two common categories:
latex/acrylic and silicone.
-
Latex/acrylic caulk is often paintable, a bit less rubbery, and more likely to soften with warm water and cleaners.
You’ll see it along trim, baseboards, and some interior gaps that don’t get soaked daily. -
Silicone caulk is rubbery, flexible, and water-resistant. It’s commonly used around tubs, showers, sinks, and tile joints.
It’s also the type most likely to leave behind an invisible “film” that stops new caulk from bonding if you don’t clean it thoroughly.
If you’re unsure, treat it like silicone (because silicone is the stubborn one). If it turns out to be latex, you’ll simply finish faster and feel
like a caulk-removal superhero.
Before you start: Tools, prep, and safety (aka “Don’t slip. Don’t scratch. Don’t regret.”)
Caulk removal is mostly a game of gentle separation: you’re breaking the bond between caulk and surface without gouging the tub, tile, counter,
or trim. These basics make the job smoother:
Grab these tools
- Utility knife (fresh blade) or razor scraper
- Caulk removal tool (plastic or polished steel is easier on surfaces)
- Plastic putty knife or plastic scraper (especially for acrylic/fiberglass)
- Needle-nose pliers (great for pulling long strips)
- Non-scratch scrub pad / sponge / old toothbrush for corners
- Rags/paper towels and a small trash bag
- Optional: chemical caulk remover (gel), mineral spirits, isopropyl alcohol, white vinegar
- Optional: hair dryer or heat gun (low setting)
Safety notes you’ll be happy you followed
- Ventilate if you use solvents or chemical removers. Open windows, run the bathroom fan, and take breaks.
- Wear gloves and consider eye protection when scraping overhead or using chemicals.
- Test first on an inconspicuous spot before using solvents, acetone, or removerssome finishes don’t appreciate surprise chemistry.
- Watch your footingespecially near tubs/showers. A slick floor plus a sharp blade is not the vibe.
Way 1: Manual removal (Score, lift, peel, scrape)
This is the classic method and the one you’ll use no matter what, even if you also use chemicals or heat. The goal is to cut the bead free on both sides,
then peel it out in strips, then scrape the leftovers.
Best for
- Loose, cracking, peeling, or already-failing caulk
- Latex/acrylic caulk that isn’t glued to your soul
- Areas where you want to avoid chemicals (or you just ran out)
Step-by-step
-
Score both edges of the bead. Run a utility knife along one side of the caulk where it meets the surface, then repeat on the other side.
Keep the blade as flat as possible to avoid scratching. - Lift an end. Use a caulk removal tool or plastic putty knife to get under a corner or end of the bead.
-
Peel in strips. If you can get a good grip, pull slowly. Needle-nose pliers can help you grab and pull long, satisfying ribbons of old caulk.
(This is one of the few home projects with a “peel” moment.) -
Scrape the residue. Hold a scraper at a shallow angle and work gently. For delicate surfaces like acrylic tubs or fiberglass surrounds, use a
plastic scraper and patience instead of a metal blade.
Pro tips for a cleaner finish
- Use fresh blades. Dull blades force you to press harder, which increases the chance of scratching tile, tub surfaces, or trim.
- Keep the angle low. A shallow angle reduces gouges and lets the tool glide under the caulk rather than dig into the surface.
- Work in small sections. If the caulk tears, don’t panicjust re-score and peel again.
Manual removal alone can be enoughespecially for caulk that’s already failing. But if you’re dealing with silicone or a bead that seems fused to the building,
it’s time to bring in reinforcements.
Way 2: Chemical softeners and commercial caulk removers (Let chemistry do the arguing)
Chemical removers don’t magically erase caulk (sadly), but they can soften it and break its bond to the surface so scraping becomes easier and less damaging.
This is especially helpful for stubborn silicone and thick, old beads.
Best for
- Old silicone around tubs, showers, sinks, and tile
- Thick, cured caulk that won’t peel cleanly
- When you want fewer scratches and less brute-force scraping
Option A: Commercial caulk remover gel
Commercial removers are designed to cling to vertical surfaces and stay wet long enough to soften cured caulk. They typically require a wait time
(often minutes, sometimes longer depending on the product and thickness).
- Remove what’s already loose first. Peel and scrape any easy sections so the remover can reach the stubborn parts.
- Apply remover along the bead. Follow the manufacturer’s directions and cover the caulk evenly.
- Wait. Use that time to do something fun, like reorganize the junk drawer you’ve been ignoring since 2019.
- Scrape and peel. Once softened, the caulk should come up more easily with a caulk tool or putty knife.
- Reapply if needed. Some caulk takes a second roundespecially older silicone.
Option B: Household softeners (for silicone: soak-and-wait)
For silicone-based caulk, a common approach is to soak a towel or cloth with a softening liquid and lay it over the caulk for an extended time.
This can help loosen residue and make scraping gentler.
- White vinegar (milder option)
- Isopropyl alcohol (great for wipe-down and residue)
- Mineral spirits (often used for silicone residuetest first)
- Acetone (effective but harsheruse carefully and test first)
After soaking, scrape gently and wipe residue away. Always ventilate and wear gloves. And if your surface is painted, delicate, or unknown, test first.
A quick test now beats an “Oops, I removed the finish too” later.
How to know it’s working
When caulk is softening, it may feel less rubbery and more “gummy,” and your scraper should slide under it with less resistance. If nothing changes,
give it more time or switch to a commercial remover designed for silicone.
Way 3: Heat-assisted removal (Warm it up, don’t cook it)
Heat can make old caulk more pliable and easier to slice and scrapeespecially when you’re dealing with thicker beads or stubborn residue.
The key word is gentle. You’re warming caulk, not auditioning it for a role in a volcano movie.
Best for
- Thicker beads that resist peeling
- Residue that’s too stubborn for manual scraping alone
- Small sections where a little softening makes a big difference
How to do it safely
- Use low heat. A hair dryer is often enough. If you use a heat gun, keep it on the lowest setting.
- Keep it moving. Don’t park the heat in one spotespecially on acrylic/fiberglass or painted surfaces.
- Warm a short section. Heat 6–12 inches at a time.
- Score and scrape immediately. While the caulk is warmer and more flexible, score the edges and lift it with a scraper.
- Repeat. Work along the bead in sections until it’s removed.
Heat is best as a helper, not a standalone solution. Pair it with scoring and scraping for the cleanest results.
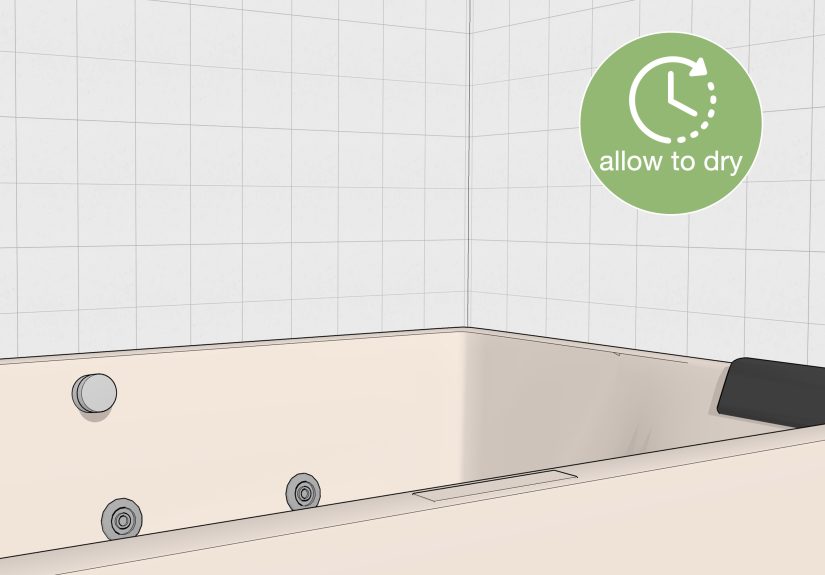
Cleaning the joint so new caulk actually sticks
Removing the bead is only half the job. The other half is removing the residue that can prevent new caulk from bondingespecially silicone film.
Think of it like painting: the prep is the project.
1) Remove residue
-
For silicone residue: wipe and scrub with mineral spirits or rubbing alcohol (test first), using a non-scratch pad.
Keep wiping until the surface feels clean, not slick. - For general grime/soap scum: wash with a bathroom cleaner, then rinse and dry thoroughly.
2) Address mold or mildew (if present)
If you uncover mold or mildew after removing caulk, clean it properly before re-caulking. A commonly recommended approach is a diluted bleach solution.
Never mix bleach with ammonia-based cleaners, and ventilate well.
3) Dry completely
New caulk won’t stick to damp surfaces, and trapped moisture is basically an engraved invitation for mold.
Dry the area thoroughly and consider using a fan to speed things up.
Specific examples: What removal looks like in real life
Example 1: Removing caulk around a bathtub
Tub caulk is often silicone and often gross (a technical term). Start with Way 1: score both edges and peel what you can. Then switch to Way 2:
apply a silicone-friendly remover or use a soaked cloth method to soften stubborn areas. Finish by scrubbing residue away, cleaning soap scum,
and drying thoroughly before reapplying new tub-and-tile silicone.
Example 2: Removing caulk on window trim
Window trim caulk is often paintable acrylic/latex. Manual removal is usually enough: score, peel, scrape lightly. If the caulk is brittle and flakes,
a flexible putty knife helps lift it without damaging the trim. Clean dust and residue so new caulk bonds well, then touch up paint if needed.
Example 3: Removing caulk from a backsplash joint
Backsplash joints can be tricky because tile edges and countertops scratch if you get aggressive. Use a plastic scraper where possible, keep blades flat,
and work slowly in short sections. If silicone film remains, wipe with alcohol and gently scrub until the surface is clean and ready for fresh caulk.
Common problems and how to fix them
“There’s a thin silicone film that won’t come off.”
This is normal and annoying. It’s also the reason new caulk sometimes peels right off. Use a solvent wipe (mineral spirits or rubbing alcohol, tested first)
and a non-scratch pad. Repeat until the slick feeling is gone.
“The corners look messy and I can’t get the last bits.”
Corners love to hoard caulk crumbs. Use a corner scraper on a caulk tool, an old toothbrush, or a plastic pick. Work gentlyespecially on acrylic or glossy finishes.
“I keep scratching the surface.”
Switch to plastic tools, reduce pressure, and lower the scraping angle. A fresh blade helps you cut cleanly without forcing the tool.
Also: don’t scrape like you’re trying to reveal a hidden treasure map. You’re separating a bond, not excavating.
“The caulk is moldy. Should I just caulk over it?”
Don’t. Caulking over mold is like putting a sticker on a leaking pipe. Remove the old bead, clean the area, let it dry completely, and then re-caulk.
Your future self will thank you loudly.
When it’s smart to call a pro
Caulk removal is usually a DIY winbut if you find soft drywall, crumbling grout, water damage behind the joint, or repeated leaks, you may have an underlying
issue (like failed waterproofing or hidden rot). In those cases, stopping to assess (or calling a pro) can save you from sealing in a bigger problem.
Conclusion
Removing old caulking isn’t glamorous, but it’s one of the fastest ways to make a bathroom or kitchen look cleaner, prevent leaks, and help new caulk last longer.
Use Way 1 (manual scoring and scraping) for most jobs, Way 2 (chemical softeners/removers) for stubborn silicone or thick beads,
and Way 3 (gentle heat) when you need extra help loosening tough sections. Finish with a careful clean-and-dry routine, and your next bead of caulk
will stick like it actually means it.
Experiences: What people learn the hard way when removing old caulk (so you don’t have to)
If you ask a group of homeowners about removing old caulk, you’ll hear the same theme: “I thought this would take 20 minutes.” That’s not pessimismit’s just
the caulk removal law of the universe. The good news is that the learning curve is short, and most “mistakes” are completely avoidable once you know what to expect.
One common experience is realizing that the first pass is never the final pass. People often peel off a beautiful long strip and assume the job is done,
only to discover a thin residue line that looks harmless but behaves like a non-stick pan when you apply new caulk. That leftover filmespecially from siliconecan cause
new caulk to bead up, lift at the edges, or peel within weeks. The fix is simple but not glamorous: wipe, scrub, repeat until the surface no longer feels slick.
Another frequent “aha” moment is how much surface type changes the strategy. Folks who scrape aggressively on tile might get away with it, but the same
approach on acrylic or fiberglass can leave permanent scratches. Many DIYers end up switching to plastic tools halfway through after seeing faint scrape marks in the light.
It’s also common to learn that the best technique is not strengthit’s angle and patience. A shallow angle with a sharp blade usually removes caulk more cleanly than pressing harder.
People also talk about the surprise of what they find under the caulk. Sometimes it’s just soap scum and old adhesive. Other times, it’s mildew or mold
that was trapped by moisture. That discovery can feel gross, but it’s actually helpful: it’s a chance to clean and dry the joint properly before sealing it again.
The most successful recaulk jobs happen when people treat cleaning and drying as part of the project, not an optional “extra.”
A very real experience (especially in bathrooms) is learning that time and ventilation matter. Chemical removers and solvents can be incredibly effective,
but people often rush themwiping too early, scraping too soon, or using too little productthen wonder why nothing changed. When DIYers slow down and let the remover
do its work, scraping becomes easier and the risk of scratching drops. Ventilation is another lesson learned fast: open a window, run the fan, and take breaks.
It makes the job more comfortable and keeps strong smells from turning your bathroom into a chemistry-themed escape room.
Finally, many homeowners report that the biggest upgrade isn’t a fancy toolit’s planning the cleanup. Having a trash bag nearby, wiping as you go,
and vacuuming or sweeping away crumbs makes it easier to see what’s left and prevents debris from smearing onto clean surfaces. It’s not exciting, but it’s the difference
between “I removed the caulk” and “I removed the caulk and the new bead looks professionally clean.”
If you take anything from other people’s caulk-removal adventures, let it be this: don’t rush the prep, don’t underestimate silicone residue, and don’t bring a metal blade
to an acrylic tub without a plan. Do those things, and you’ll finish with a clean joint that’s ready for fresh caulkand a bathroom edge that doesn’t look like it survived a tiny battle.


