Table of Contents >> Show >> Hide
- Start by Figuring Out What the Path Needs to Do
- Choose the Right Material for the Look and the Workload
- Get the Width, Shape, and Layout Right
- The Base Is the Real Hero
- Edging Is Not Optional for Loose Materials
- Drainage Can Make or Break the Whole Project
- How to Make the Path Look Expensive Even on a Real-World Budget
- Common Mistakes That Ruin Otherwise Good Paths
- Maintenance: Because Even Great Paths Like a Little Attention
- What People Learn From Building a Path the Hard Way
- Conclusion
A good path does more than get you from Point A to Point B without muddy shoes and mild regret. It organizes your yard, protects your lawn from becoming a shortcut-shaped casualty, and makes the whole landscape feel intentional. A great path can guide guests to the front door, lead you to the garden, connect a patio to a fire pit, and somehow make the entire property look like it has its life together.
The trick is that a perfect path is not just about pretty materials. It is about layout, drainage, base prep, width, edging, and choosing a surface that actually matches how the space is used. In other words, the secret is not the stone. It is what happens before the stone shows up.
If you want a walkway that looks sharp, feels stable underfoot, and still behaves after the first hard rain, here is how to build a path the right way.
Start by Figuring Out What the Path Needs to Do
Before you buy pavers, gravel, or flagstone because they looked dreamy in a photo, ask one simple question: what job will this path do?
Functional paths
If the path leads from a driveway to a front door, a back door to a shed, or a patio to a grill station, it needs to be direct, sturdy, and easy to walk on while carrying groceries, tools, or that giant bag of potting soil you absolutely did not need but bought anyway. These paths should feel smooth, solid, and obvious.
Decorative garden paths
If the goal is to slow people down and create a wandering garden experience, you can soften the design. Curves make more sense here, and materials like gravel, stepping stones, or flagstone can add a relaxed, natural look.
Accessible or high-comfort paths
If the path may be used by kids, older adults, strollers, carts, or anyone with mobility concerns, prioritize a firm, even surface and gentle transitions. Wider widths, smoother materials, and fewer abrupt level changes make a huge difference.
In short, a path should match the traffic it handles. A whimsical stepping-stone trail through ornamental grass is lovely. It is less lovely when you are trying to wheel a loaded garden cart over it like a pioneer in a historical reenactment.
Choose the Right Material for the Look and the Workload
The best path material is the one that fits your style, budget, maintenance tolerance, and local site conditions. There is no universal champion. There is only the material that makes the most sense for your yard.
Gravel
Gravel is one of the most affordable and forgiving path materials. It drains well, looks casual, and works beautifully in cottage gardens, side yards, and informal landscapes. It is also fast to install. On the downside, loose gravel can migrate, crunch loudly, and sneak into the lawn like it pays property taxes. Good edging is what keeps it civilized.
Pavers or brick
Pavers and brick create a crisp, structured look. They are excellent for front walks, formal gardens, and spaces where you want a durable, predictable surface. They also come in a wide range of sizes, colors, and patterns, which means you can go classic, modern, or somewhere in between. They usually need a more carefully built base, but the finished result looks polished and long-lasting.
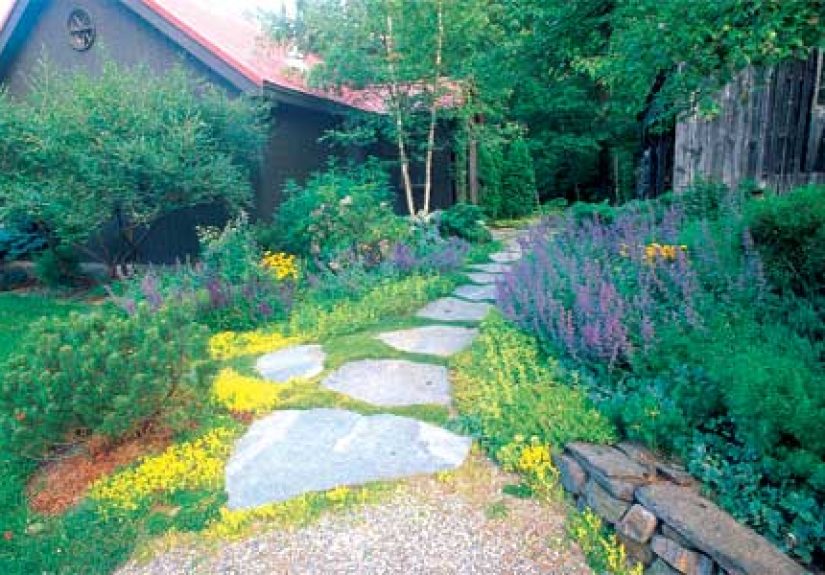
Flagstone or natural stone
Natural stone paths have a timeless, high-end look and blend especially well into planting beds and organic landscape designs. Flagstone can feel rustic or refined depending on the spacing and the joint material. It is often more expensive than concrete pavers, but it brings texture and character that manufactured materials cannot always fake.
Stepping stones
Stepping stones are ideal for lighter traffic and garden access. They can be set in gravel, mulch, or turf, and they work best where you want the path to feel informal. They are not the best choice for heavy daily use unless the spacing, leveling, and surrounding surface are done carefully.
Mulch or wood chips
These are budget-friendly and natural-looking, especially in woodland gardens. They are comfortable underfoot and easy to refresh, but they break down over time and are better for informal, lower-traffic areas than for a front entry path.
If you want the path to handle water better, permeable or pervious materials deserve a serious look. Gravel, porous concrete, and pervious pavers can help water soak into the ground instead of pooling on top. That is not just good for the path. It is good for the yard.
Get the Width, Shape, and Layout Right
One of the biggest mistakes in path design is making it too narrow. People notice narrow walkways every single time they use them, usually while awkwardly turning sideways to pass someone else or trying not to step in the flower bed.
As a general rule, a simple one-person path should feel comfortable at around 3 feet wide. If the path needs to allow two people to walk together, or if you want extra comfort, go wider. Front walks and main circulation routes often feel better at 4 to 4.5 feet or more. If you are planning around accessibility, aim for generous clear width and smooth edges rather than treating the minimum as your design goal.
Follow the natural route
The best path usually goes where people already want to walk. If everyone cuts across the grass in the same place, your lawn is not being rebellious. It is giving you design feedback. A path that ignores real movement patterns often gets ignored right back.
Use curves carefully
Curves can be beautiful, but they should feel purposeful. Gentle curves soften a garden and create a sense of discovery. Weird zigzags just make a person wonder who was holding the string line and what happened.
Respect slope
A little slope helps with drainage. Too much slope turns a path into a slip-and-slide with better branding. If the site is steep, you may need steps, terraces, or a more engineered solution instead of trying to force a flat-path idea onto a hilly reality.
The Base Is the Real Hero
Here is the part nobody posts glamorous before-and-after photos about: excavation, compaction, and base prep. This is also the part that determines whether your path stays beautiful or starts wobbling like a shopping cart with one bad wheel.
For many paver and brick paths, the usual recipe is a compacted gravel base topped with a thin bedding layer of sand. The exact depth depends on the material, soil, and site, but a substantial, compacted base is what creates stability and helps the path drain. Gravel paths also benefit from excavation and a stable crushed-stone foundation beneath the finish layer. Skipping this step is the landscaping version of building a cake on a trampoline.
Step 1: Mark the path
Use stakes, string, marking paint, or a garden hose to outline the shape. Walk it before you dig. Better yet, walk it several times carrying something awkward, because that is how the path will be used in real life.
Step 2: Excavate
Remove sod, roots, and loose soil. Dig deep enough for the full build-up of your base and finish material. The surface should finish at or slightly above surrounding grade in many cases, but not so high that it looks perched or creates a tripping edge.
Step 3: Compact the subgrade
Once the trench is dug, compact the soil underneath. This step is easy to underestimate and annoyingly important. On small projects, a hand tamper can work. On larger ones, a plate compactor is worth the rental fee.
Step 4: Add base material
Install and compact the gravel base in lifts rather than dumping it all in at once and hoping for the best. Layered compaction creates a stronger foundation and reduces settling later.
Step 5: Add bedding or finish prep
Pavers usually need a leveling layer of sand. Gravel paths often need landscape fabric and a topping layer of decorative gravel. Stone paths may need careful hand-leveling under each individual stone.
Edging Is Not Optional for Loose Materials
If your path includes gravel, shells, mulch, or decomposed granite, edging is what keeps the borders sharp and the materials in place. Without it, the path gradually spreads into the lawn and beds like it is expanding its empire one pebble at a time.
Metal edging gives a clean, modern look. Brick or stone edging feels classic. Plastic edging is often budget-friendly and easy to install, though it may not look as refined in every setting. The best edging choice depends on your design style, but some form of restraint is essential if the surface is loose.
Drainage Can Make or Break the Whole Project
Water is the silent critic of every outdoor project. It does not care how much the pavers cost. It will absolutely expose weak planning.
A good path sheds water instead of trapping it. That usually means building in a gentle slope, choosing permeable materials where appropriate, and avoiding low spots where runoff naturally collects. If the area already has drainage problems, address those first. In some yards, that may mean regrading nearby soil. In others, it may mean adding a swale, a French drain, or another drainage feature so the path does not become a decorative puddle tray.
Also pay attention to where runoff goes. The goal is not to move the problem from your path to your neighbor’s fence line. Good drainage planning solves the issue responsibly.
How to Make the Path Look Expensive Even on a Real-World Budget
You do not need a luxury budget to build a path that looks thoughtful and finished. You need consistency and restraint.
Repeat materials
If your home has brick accents, a brick border or warm-toned paver can tie the path into the architecture. If your landscape is informal, natural stone or gravel may feel more believable than a rigid geometric pattern.
Pay attention to transitions
The path should feel connected to the porch, patio, gate, or garden feature it leads to. Clean transitions make the whole design read better.
Use plants as softeners
Low grasses, groundcovers, lavender, thyme, or compact shrubs can soften the edges and make a hardscape path feel integrated instead of dropped into the yard like a surprise sidewalk.
Add lighting if the path is used at night
Path lights improve safety and atmosphere. Just do not overdo it until your garden looks like it is preparing for takeoff.
Common Mistakes That Ruin Otherwise Good Paths
- Making it too narrow: If the path feels cramped, people will notice every time they use it.
- Skipping compaction: Settling, wobbling, and uneven stones usually start below the surface.
- Ignoring drainage: Standing water is a preview of future repairs.
- Choosing the wrong material: Smooth decorative stone may look pretty but can be annoying for daily walking.
- Forgetting edging: Loose materials will travel. That is not a threat. It is a promise.
- Overcomplicating the design: A path should guide movement, not trigger a navigation puzzle.
Maintenance: Because Even Great Paths Like a Little Attention
No path is truly maintenance-free, but the right design can keep maintenance pleasantly boring.
Gravel paths may need occasional raking and topping off. Paver joints may need new sand over time. Weeds should be handled before they become tenants. Stone paths benefit from periodic leveling if frost, roots, or settling shift a few pieces. And if edging comes loose, fix it early before the whole border goes casual.
A quick seasonal check is usually enough: look for low spots, pooled water, loose stones, spreading gravel, and any place the surface has become a trip hazard. Small corrections are easy. Waiting until the path resembles archaeological ruins is less efficient.
What People Learn From Building a Path the Hard Way
There is a certain kind of optimism that appears at the beginning of every path project. It usually sounds like this: “How hard can it be?” This is a charming thought, and it tends to last right up until excavation begins. Then reality shows up with clay soil, hidden roots, and a wheelbarrow tire that suddenly seems very judgmental.
One of the most common experiences homeowners have is realizing that the hardest part of building a perfect path is not laying the surface. It is preparing for the surface. Digging is slower than expected. Getting a base level takes patience. Compaction feels repetitive. And yet that invisible work is exactly what separates a path that lasts from one that starts shifting before the patio furniture is even back in place.
Another common lesson is that a path reveals how people actually use the yard. A homeowner may plan a charming curved walkway, only to realize everyone still takes a shortcut across the grass because the route is not direct enough. That is not failure. That is useful information. The best landscapes often come from observing behavior and adjusting the design instead of forcing a pretty idea that does not fit daily life.
People also discover that material samples matter more than they think. Gravel that looks elegant in a product photo may feel loose underfoot. A paver color that seemed warm online may look oddly pink next to the house. Natural stone can be gorgeous, but each piece has its own thickness and personality, which means more fitting, more leveling, and more conversations with yourself that should probably stay private.
Then there is the weather factor. Many path builders remember the exact moment they learned where water really wants to go in their yard. Often, it is during the first solid rain after installation. Water has a talent for finding the one low spot, weak edge, or subtle dip you missed. Oddly enough, this is not always bad news. A path project often teaches homeowners more about grading and drainage than any amount of theory ever could.
And perhaps the most satisfying experience is what happens when the path is finally finished. The yard starts to feel easier to use. Feet stay cleaner. Garden beds look more intentional. Guests instinctively know where to walk. The house and landscape connect better. Even chores like taking out the trash or hauling compost feel slightly less annoying, which might be the highest compliment any path can earn.
So yes, building a path takes effort. It also teaches patience, planning, and the value of doing the unglamorous steps properly. In the end, a perfect path is not really perfect because every stone is flawless. It is perfect because it works beautifully, looks like it belongs, and makes everyday life outdoors a little smoother.
Conclusion
If you want to build a perfect path, think beyond the finish material. Start with purpose. Choose a route people will actually use. Size it for comfort. Build a solid base. Control drainage. Add edging where needed. Then finish it with a material that suits your house, your landscape, and the amount of maintenance you are realistically willing to do.
Do that, and your path will not just look good in photos. It will work in real life, in wet weather, under daily traffic, and through all the ordinary backyard moments that matter most. And that is the kind of “perfect” worth building.


