Table of Contents >> Show >> Hide
- Why Natural Flagstone + Fire Pit Is a Backyard Power Couple
- Plan First, Dig Second (Your Future Self Will Thank You)
- Materials That Matter (and the Ones That Just Look Like They Matter)
- Design Ideas That Feel “Natural” (Not Random)
- How to Build a Dry-Laid Natural Flagstone Patio
- Designing a Fire Pit That’s Safe, Comfortable, and Doesn’t Scorch Everything
- Common Mistakes (and How to Avoid the “Why Is This Crooked?” Moment)
- Maintenance: Keep It Pretty Without Making It a Part-Time Job
- Cost and Time: A Realistic Snapshot
- Real-World Experiences: What Building a Natural Flagstone Patio & Fire Pit Feels Like (A Composite DIY Diary)
- Day 1: Confidence, optimism, and a suspiciously small-looking excavation
- Day 2: The base is where the patio becomes “real”
- Day 3: The flagstone puzzle and the “audition” process
- Day 4: Fire pit decisionslocation, comfort, and safety reality checks
- Day 5: Joints, finishing touches, and the “it’s done!” glow
There are two kinds of backyards: the “we go out there sometimes” yard, and the “why are we paying rent to the living room?” yard. A natural flagstone patio with a fire pit is how you turn yours into the second onewithout building a full outdoor kitchen that somehow requires a second mortgage and a degree in plumbing.
Flagstone brings that “I casually live in a magazine spread” vibe: irregular edges, rich color variation, and a texture that looks expensive even when you got a deal. Add a fire pit, and suddenly your patio becomes a year-round hangouts’mores in fall, warm feet in winter (from a safe distance), and late-night conversations that start with “one quick toast” and end with “wait, it’s already midnight?”
This guide breaks down the real decisionsstone type, base depth, drainage, joint filler, and safe fire pit placementso you can build a patio that stays level, drains well, and doesn’t turn into a wobbly stone obstacle course by the next freeze-thaw cycle.
Why Natural Flagstone + Fire Pit Is a Backyard Power Couple
Flagstone is basically nature’s puzzle pieces: every slab has unique color, grain, and texture. That imperfection is the whole point. It also gives you a few practical benefits:
- Traction: Natural stone texture tends to be less slippery than smooth concrete when damp (still, don’t sprint in wet socksthis is a patio, not a cartoon).
- Heat tolerance: Stone handles heat better than composite decking or grass, making it a smart surface near a fire feature.
- Flexible style: You can go rustic, modern, desert-inspired, cottage-core, or “I bought these chairs on sale but I’m calling it curated.”
- Repairable: If a stone shifts, you can lift and reset itmuch easier than repairing cracked slabs.
Plan First, Dig Second (Your Future Self Will Thank You)
Pick the right location
Start with how you’ll actually use the space. A patio that’s too far from the house becomes a place you visit once a monthlike a museum exhibit titled “Outdoor Furniture, Untouched.” If you entertain, keep it reasonably close to the kitchen. If you want quiet time, tuck it away with a view of the yard.
Quick sizing guide:
- Small lounge zone: ~10′ x 10′ (two chairs + tiny table)
- Conversation set: ~12′ x 16′ (4–6 seats)
- Dining + seating: ~16′ x 20′ (table plus fire pit area)
Drainage is not optional
Water is the sneaky villain of patios. It pools, freezes, expands, and slowly convinces your stones to move out of alignment like they’re forming a rock band. Plan a gentle slope so water drains away from the house and doesn’t collect on the surface. Think “barely noticeable,” not “mini ski slope.”
Before you dig: safety and rules
In the U.S., it’s smart (and often required) to identify underground utilities before digging. Also check local rules for open flames, burn bans, HOA restrictions, and required clearances. A fire pit is fun; a surprise visit from the fire department is less fun.
Materials That Matter (and the Ones That Just Look Like They Matter)
Choosing flagstone: the basics
Common flagstone types for patios include bluestone, sandstone, limestone, granite, and slate. Your best choice depends on climate, availability, and the vibe you want:
- Bluestone: Dense, durable, often blue-gray; great for clean, modern lines.
- Sandstone: Warm tones; can be softer depending on the varietyask about durability for freeze-thaw regions.
- Limestone: Classic and bright; can weather beautifully, but some types may be more porous.
- Granite: Tough and long-lasting, often pricier; excellent in harsh climates.
- Slate: Dramatic color and texture; choose quality stone to avoid flaking.
How thick should flagstone be?
Thickness depends on how you’re installing it:
- Dry-laid over a compacted base: typically thicker stone is safer and more stable, especially with irregular pieces.
- Mortared over a concrete slab: you can often use thinner stone because the slab provides structural support.
If you’re building a DIY dry-laid patio (the most common approach for homeowners), prioritize stones that feel substantial and resist flexing. When in doubt, buy a little extra so you can “audition” stones and reject any that are too thin, cracked, or shaped like they’re trying to start drama.
Base materials: where patios win or lose
A long-lasting patio is basically a well-engineered base with pretty stones on top. Typical layers include:
- Excavated subgrade: native soil compacted and shaped to slope.
- Geotextile fabric (optional but helpful): separates soil from base, improves stability, and reduces mixing over time.
- Compacted crushed stone (base): your “load-bearing” layer.
- Bedding layer (leveling): often sand or stone dust, kept fairly thin so it doesn’t shift.
Joint filler: the personality of your patio
The gaps between stones aren’t just decorativethey affect stability, drainage, weeds, and maintenance. Your options:
- Stone dust / decomposed granite: natural look, good compaction, may need top-ups over time.
- Polymeric sand: firms up when activated with water; can help reduce weeds and washout when installed correctly.
- Low groundcover (like creeping thyme): gorgeous, softens the look, but needs a bit more care (and patience).
Design Ideas That Feel “Natural” (Not Random)
Choose your layout style
- Random ashlar: a mix of rectangles and squares; looks intentional but not rigid.
- Irregular mosaic: classic flagstone “puzzle” look; great for cottage, rustic, or natural landscapes.
- Large-format with tight joints: more modern; choose consistent stone thickness and flatter pieces.
- Border + field pattern: a neat border (cut stone or pavers) containing a more organic interior.
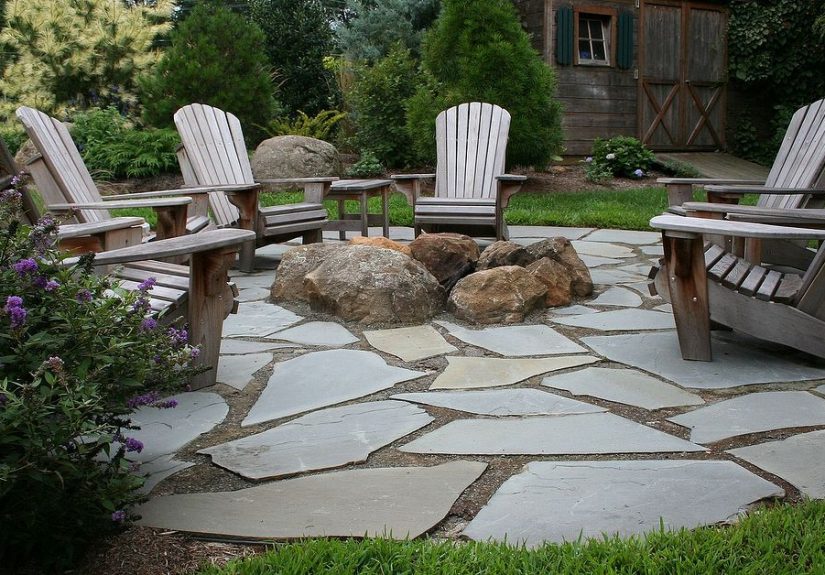
Make the fire pit the anchor
Think of the fire pit as the “stage,” and your seating as the audience. A common comfort guideline is leaving enough space so people aren’t roasting like marshmallows. Plan for circulation toonobody wants to shimmy sideways behind chairs holding a plate of food like they’re in a crowded airplane aisle.
Easy design upgrades that pay off:
- Built-in gravel or stone “pad” under the pit to keep ash and embers off your main patio area.
- Lighting: low-voltage path lights, step lights, or warm string lights.
- Wind direction: place seating where smoke is least likely to chase guests away.
- Storage: a tidy wood rack (away from the flame zone) keeps things looking intentional.
How to Build a Dry-Laid Natural Flagstone Patio
This overview focuses on a dry-laid patio (no mortar), set on a compacted base. It’s popular because it drains well and can be adjusted over time.
Step 1: Layout and excavation
- Mark the patio shape using stakes and string (or a garden hose for curves).
- Plan your finished height so it meets surrounding grade neatly.
- Excavate deep enough for your base + bedding layer + stone thickness.
- Compact the soil subgrade and establish a gentle slope away from the house.
Step 2: Fabric and base
- Lay geotextile fabric if you’re using it (overlapping seams).
- Add crushed stone base in lifts (thin layers), compacting each layer thoroughly.
- Take your time here. Most patio problems come from rushing the base.
Step 3: Bedding layer
Add a thin bedding layer (often around an inch). Screed it level to the planned slope so you’re not “fixing” everything with extra sand later. Too much loose bedding becomes a shifting layer that makes stones settle unevenly.
Step 4: Place and level the stones
- Dry-lay your stones first to see the puzzle.
- Start with larger pieces along the edges and at focal points.
- Set each stone, check for level and wobble, and adjust with bedding material underneath.
- Keep surface transitions smooth so chairs don’t teeter and toes don’t find surprise edges.
Step 5: Fill joints and finish edges
- Sweep in your chosen joint material (stone dust, polymeric sand, or a blend).
- Compact lightly and top up joints as needed.
- Install edging or a border to keep stones from creeping outward over time.
- Rinse and clean the surface (follow the filler instructions if using polymeric sand).
Designing a Fire Pit That’s Safe, Comfortable, and Doesn’t Scorch Everything
Wood-burning vs. gas: choose the lifestyle match
- Wood-burning: classic crackle, real flame experience, more smoke/embers, more cleanup.
- Gas (propane/natural gas): cleaner, instant on/off, often fewer sparks; may require permits and professional installation.
If you’re doing a DIY build, many homeowners choose a steel insert or fire ring for a wood-burning pit to protect surrounding stone and help the pit keep its shape.
Clearances and placement (the “don’t argue with physics” section)
General safety guidance often recommends keeping fire features at least 10 feet from structures and combustible materials, avoiding low branches and overhangs, and placing the pit on a stable, non-flammable surface like stone, gravel, or concrete. Also: always check local rules and burn bans before lighting anything.
A simple fire pit build concept that pairs well with flagstone
One of the cleanest-looking approaches is a slightly recessed fire pit zone inside the patio:
- Center circle: compacted base + a ring of stone or fire-rated block.
- Insert: steel ring or manufacturer-approved insert for wood burning.
- Surround: a border course (stone or pavers) that creates a visual “frame.”
- Surface transition: keep joints tight and the surrounding stones stable so chairs sit level.
Comfort planning: distance and seating
Build in enough room for movement and comfort:
- Seating distance: far enough back to avoid constant heat on knees, close enough to feel warmth.
- Walkway space: leave a clear path so people aren’t stepping over chair legs.
- Surface choice: stone or gravel around the pit makes ash cleanup easier than grass.
Common Mistakes (and How to Avoid the “Why Is This Crooked?” Moment)
Mistake 1: Skipping compaction
If the base isn’t compacted in layers, it settles laterusually right after you’ve posted the finished patio photo. Compact as you go, not as an afterthought.
Mistake 2: Using a thick, squishy bedding layer
A bedding layer is for fine leveling, not for “fixing” excavation errors. Too thick = shifting stones.
Mistake 3: Ignoring drainage
Flat patios look tidy until rain turns them into shallow ponds. Plan the slope and check it as you build.
Mistake 4: Letting the edge float
Edges are where movement starts. Install edging, a border, or some kind of restraint so stones don’t migrate outward over time.
Mistake 5: Building the fire pit like it’s a campfire anywhere
A backyard fire feature needs clearances, a stable base, safe fuel, supervision, and a plan to extinguish. Cozy should never mean careless.
Maintenance: Keep It Pretty Without Making It a Part-Time Job
- Seasonal sweep: remove leaves and debris so joints don’t become soil pockets.
- Joint touch-ups: top up stone dust or sand where it settles.
- Weed control: pull early, before roots establish; consider a gentle spot treatment if needed (follow label directions).
- Cleaning: use a mild cleaner and a stiff brush; avoid harsh acids unless you’re 100% sure your stone tolerates them.
- Winter care: shovel carefully with a plastic blade; avoid metal edges that can chip stone.
Cost and Time: A Realistic Snapshot
Costs vary wildly by region, stone type, and whether you’re hiring out. As a broad reality check:
- DIY flagstone patio: you’ll spend on stone, base materials, edging, and tool rental (like a plate compactor).
- Fire pit: ranges from a simple steel ring to a built-in feature with stone veneer; gas features add complexity and often require professional work.
Time-wise, a weekend can cover a small patio if you’re organized. Bigger patios often take multiple weekendsespecially if you’re moving heavy stone, fine-tuning levels, and letting your body recover from discovering muscles you didn’t know you owned.
Real-World Experiences: What Building a Natural Flagstone Patio & Fire Pit Feels Like (A Composite DIY Diary)
Let’s talk about the part most how-to guides politely skip: the experience. Not just the finished patio photothe actual process of turning “we should do a patio” into “wow, we really did that.” Here’s what many DIYers typically run into, bundled into one realistic, boots-on-the-ground storyline.
Day 1: Confidence, optimism, and a suspiciously small-looking excavation
The first hour feels fantastic. Stakes go in, string lines look professional, and you start picturing the future: friends gathered around the fire pit, laughter, the perfect outdoor glow. Then you start digging, and the ground is like, “Oh, you thought we were soft dirt? Cute.”
Most people are surprised by how much soil comes out of even a modest patio area. The hole looks shallow until you remember you still need base material, bedding, and stone thickness. There’s usually a moment where someone says, “Are we digging too deep?” and someone else replies, “I hope not,” with the exact confidence level of a person assembling furniture without instructions.
Day 2: The base is where the patio becomes “real”
Adding crushed stone and compacting it is the unglamorous hero of the project. This is the part where your patio either becomes a stable outdoor room or a future tripping hazard with great intentions. The plate compactor (if you rent one) feels like walking a friendly, vibrating robot. It’s loud, it’s oddly satisfying, and it turns loose aggregate into something that suddenly looks like a legitimate foundation.
DIYers often say the biggest mental shift happens here: once the base is compacted and sloped correctly, the project stops feeling like a messy hole and starts feeling like a build. You can see the shape. You can imagine furniture. You can also feel your arms.
Day 3: The flagstone puzzle and the “audition” process
Laying flagstone is part design, part patience, and part accepting that nature did not cut these pieces to match your timeline. Most people dry-fit stones first, rotating them like they’re solving a giant jigsaw puzzle where every piece is heavy, dusty, and capable of pinching your fingers.
A surprisingly common experience: you’ll pick up a stone, love it, set it down, and then realize it wobbles like a café table. That’s when you learn the real art of bedding adjustmentsadding a little, removing a little, tapping gently, checking again. It’s repetitive, but the reward is immediate: a stone that lands solidly feels like a tiny victory.
Many DIYers also discover they have a “pattern preference.” Some people naturally build with flowing irregular joints, others lean into tighter fits and cleaner lines. Neither is wrongwhat matters is consistency so the patio looks intentional, not accidental.
Day 4: Fire pit decisionslocation, comfort, and safety reality checks
Placing the fire pit often triggers the most “wait… are we allowed to do this?” questions. That’s a good thing. People usually walk the space, sit in chairs, measure clearances, and realize the ideal-looking center spot might be too close to a fence or under a branch that seemed harmless until you look up and imagine heat rising.
Comfort also becomes real: if the pit is too close to seating, guests feel like rotisserie chicken. Too far, and everyone leans forward like they’re trying to overhear a secret. Many homeowners end up adjusting the plan by a foot or two after doing a mock setup with chairsan easy step that saves regret later.
Day 5: Joints, finishing touches, and the “it’s done!” glow
Filling joints is where the patio suddenly looks complete. Even if the stones were set perfectly, the gaps can make it feel unfinished. Once the joints are filled and brushed clean, the surface reads as a unified space. This is also when people notice details they missedone stone slightly proud, one corner a little sharp, one edge that could use a cleaner border. Touch-ups now are easier than after everything settles.
And then comes the best part: that first evening. You bring out a chair. You test the spot where the fire pit will live. You realize the patio changed how you use the yardwithout needing a massive renovation. Even if the project took longer than planned (it usually does), the payoff is immediate. It doesn’t just look better; it works. It invites you outside.
If there’s one shared “lesson learned” from real projects, it’s this: spend extra effort on the base and placement, and everything else gets easier. A well-built patio is forgiving. A rushed base is not. And once you’ve got a sturdy flagstone surface and a safely placed fire pit, you’ll wonder why you waited so longright up until the next friend asks if you’ll help them build theirs.


