Table of Contents >> Show >> Hide
- Why This Matters More at a Cabin Than at Home
- First Decision: Shut It Down or Keep It Running?
- The End-of-Season Cabin Fridge Checklist (The “Do This, Not That” Edition)
- Step 1: Empty it like you mean it
- Step 2: Turn off ice maker and shut off the water supply (if you have one)
- Step 3: Remove the water filter (sometimes “remove and discard”)
- Step 4: Defrost (yes, even if it’s “frost-free”)
- Step 5: Wash removable parts (shelves, bins, drawers)
- Step 6: Clean the interior (and the gaskets, aka “the crumb canyon”)
- Step 7: Sanitize (optional, but smart for cabins)
- Step 8: Don’t forget the “hidden stink sources”
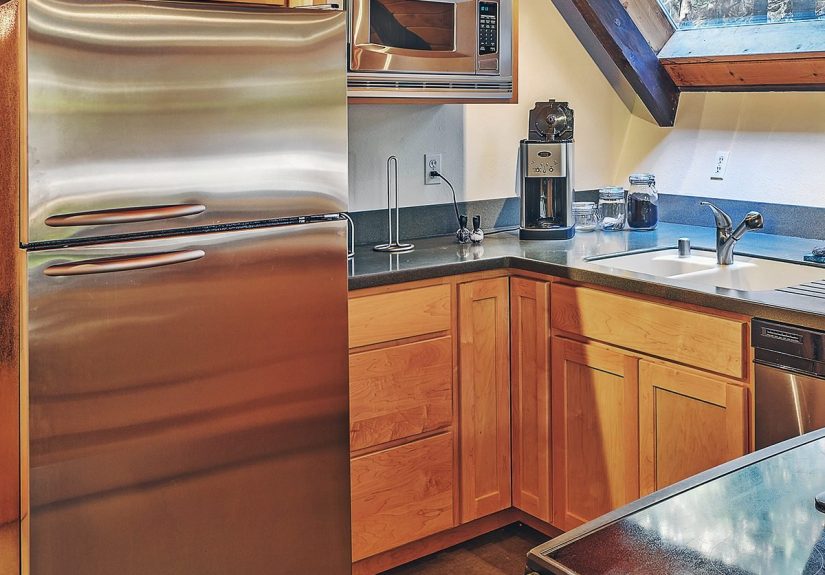
- Step 9: Clean the condenser coils (tiny chore, big payoff)
- Step 10: Dry it like you’re trying to defeat mold personally
- Step 11: Prop the doors open (non-negotiable if it’s off)
- Step 12: Add a low-drama odor absorber (optional, but comforting)
- What If Your Cabin Gets Very Cold?
- Spring Re-Opening: How to Bring the Cabin Fridge Back Without Regrets
- Troubleshooting: Common End-of-Season Fridge Problems (and Fixes)
- End-of-Season Cabin Fridge Stories & Lessons Learned (The Extra You Asked For)
Closing up a cabin is a little like sending your house to sleep for a few months. You turn off the water, lock the doors, set the thermostat (or don’t), and whisper,
“Please be exactly the same when I come back.” And then there’s the refrigeratorquietly judging you from the kitchen, full of condiments from 2019 and a mystery
container that has achieved sentience.
The end of the season is the perfect time to deal with your cabin refrigerator the right wayso you don’t return in spring to a science fair project, a mildew perfume
cloud, or cracked water lines from freezing. Below is a practical, step-by-step plan (with options) that works whether you have a basic fridge, a freezer-on-top model,
or a fancy unit with an ice maker and water dispenser that believes it’s the CEO of hydration.
Why This Matters More at a Cabin Than at Home
A cabin refrigerator lives a harder life than your everyday kitchen fridge. It may sit unused for months, face temperature swings, lose power during storms, and share
a building with curious critters who think “insulation” tastes like snacks. That combination makes end-of-season prep essential for:
- Preventing mold and mildew (closed, damp fridges are basically a spa resort for funky organisms).
- Avoiding freezing damage to water lines, valves, reservoirs, and filters.
- Stopping stubborn odors that can cling to plastic and gaskets like a grudge.
- Extending appliance life by cleaning coils and reducing mechanical strain.
First Decision: Shut It Down or Keep It Running?
Option A: Shut it down (most common for seasonal cabins)
If your cabin is unheated or you turn utilities off for winter, shutting the fridge down is usually the safest move. You’ll clean it, dry it thoroughly, and leave the
doors cracked open so air can circulate.
Option B: Keep it running (only if conditions are right)
Keeping your cabin refrigerator on can work if the cabin stays within normal indoor temperature ranges, power is reliable, and you’re able to monitor it. This option
is more common in four-season cabins that stay heated and visited regularly.
- Pros: No need to fully unload, no door-propping setup, freezer stays ready.
- Cons: Power outages can spoil food; very cold indoor temps can cause performance issues; you’re paying to refrigerate… mostly air.
If you choose Option B, set the refrigerator to safe temperatures (typically around 37–40°F for the fridge and 0°F for the freezer),
toss anything that won’t last, and consider a smart thermometer or monitoring device if you’re not visiting often.
The End-of-Season Cabin Fridge Checklist (The “Do This, Not That” Edition)
Step 1: Empty it like you mean it
Start by removing everythingfood, drinks, condiments, ice, and the sad lemon you keep moving from shelf to shelf like it’s going to pay rent.
Anything perishable should leave with you. Most cabin owners regret “I’ll just leave these unopened items” when they return to swollen containers or exploded cans.
Quick rule: If it can spoil, separate, curdle, or become an experimenttake it.
Step 2: Turn off ice maker and shut off the water supply (if you have one)
If your refrigerator has an ice maker and/or water dispenser, do not skip this. Freezing water expands, and your fridge’s internal plumbing does not have the vibe of
“I bend, therefore I live.”
- Turn OFF the ice maker (switch/arm/button depends on model).
- Shut off the water supply valve feeding the fridge (often under the sink or in the basement/crawl space).
- Dispense water for a few minutes (if your model allows) to help clear the line.
- Empty the ice bin and let the ice maker finish a final cycle if your manufacturer recommends it.
Pro tip: If your cabin is winterized by blowing out lines or using RV antifreeze, follow your broader winterization plan and your fridge’s manual.
Refrigerator water systems aren’t all identical, and guessing is how you end up learning the price of replacement valves.
Step 3: Remove the water filter (sometimes “remove and discard”)
Many manufacturers recommend removing the refrigerator’s water filter for long shutdowns. Filters can trap water and become a freezing/odor issue. If you’re leaving
for months, plan on installing a fresh filter when you return (or at least replacing it if taste/flow seems off).
Step 4: Defrost (yes, even if it’s “frost-free”)
If you have any ice buildup in the freezer, defrost it nowbefore it slowly melts into hidden crevices and turns into mildew soup. Unplug the unit and leave doors open.
Lay down towels. Expect some water. Expect more water than you expected.
- Remove freezer contents and shelves/bins if possible.
- Let ice melt naturally (avoid sharp toolspuncturing a liner is an expensive way to ruin a weekend).
- Wipe up meltwater as you go.
Step 5: Wash removable parts (shelves, bins, drawers)
Take out shelves and drawers. Wash them with warm, soapy water. If the cabin is closing in cold weather, let glass shelves warm slightly before washing to avoid cracks.
Dry everything completely before reinstallingor leave parts out to air-dry while you clean the interior.
Step 6: Clean the interior (and the gaskets, aka “the crumb canyon”)
Wipe the interior with hot, soapy water first. Pay special attention to corners, drawer tracks, and the rubber door gasket where spills and crumbs like to hide.
Then rinse with clean water and dry with a towel.
For odors and sticky residue, a baking-soda-and-water solution is a classic: it cleans gently and helps neutralize smells without turning your fridge into a chemical
warfare training facility.
Step 7: Sanitize (optional, but smart for cabins)
After cleaning, you can sanitize the interior using a diluted bleach solution (common guidance is 1 tablespoon of unscented liquid bleach per 1 gallon of water).
Apply, then allow to air dry or wipe dry according to product guidance. Keep the area ventilated and never mix bleach with ammonia or other cleaners.
Step 8: Don’t forget the “hidden stink sources”
If your fridge has a drip pan (often accessible from the front kick plate or rear), check whether it’s dirty. Some pans evaporate moisture and rarely need attention;
others can collect residue that smells like a swamp trying to start a band. If you can safely access it, clean it and dry it.
Step 9: Clean the condenser coils (tiny chore, big payoff)
Dusty coils make your refrigerator work harder. At the end of the season, unplug the fridge and vacuum the condenser coils and surrounding area using a brush attachment
(or a coil brush if your model calls for it). This is especially helpful in cabins where dust, pet hair, wood stove debris, or “everything from outdoors” finds its way inside.
Step 10: Dry it like you’re trying to defeat mold personally
This step is the difference between “fresh cabin” and “why does my kitchen smell like a wet basement wearing cheese?” After cleaning:
- Wipe every surface dry (including the door gasket folds).
- Leave doors open for at least a full day if you can (longer is even better).
- Make sure drawers and bins are fully dry before closing up the cabin.
Step 11: Prop the doors open (non-negotiable if it’s off)
If the refrigerator is powered down, prop the fridge and freezer doors open. You want airflow to prevent mold and lingering odors. Many fridges will try to “self-close,”
so use a towel, a door prop, or a purpose-made clip to keep them cracked open safely.
Important: Keep it open enough for air, but stable enough that it won’t swing and slam all winter.
Step 12: Add a low-drama odor absorber (optional, but comforting)
Once the interior is clean and dry, you can place an open box of baking soda, a small bowl of dry coffee grounds, or activated charcoal inside to help with residual smells.
(This is not a replacement for cleaningthink of it as deodorant, not a shower.)
What If Your Cabin Gets Very Cold?
Cold cabins add two special concerns:
- Freezing damage to any water-connected components (ice maker lines, valves, reservoirs, filters). This is why shutting off and draining water systems matters.
-
Performance issues if left running in an unheated space. Some refrigerators aren’t designed to operate in very cold ambient temperatures, and the cooling
system may not behave as you expect. If you’re determined to keep it on, confirm your model is suitable for cold environments (often marketed as “garage-ready” or similar).
Spring Re-Opening: How to Bring the Cabin Fridge Back Without Regrets
When you return for the new season, resist the urge to immediately stuff the fridge full of groceries like it’s a competitive sport.
1) Inspect first
- Look for mold, pests, or odd odors.
- Check door gaskets for cracks or gaps.
- Make sure the unit is level and doors seal properly.
2) Quick wipe-down
Even if you cleaned in the fall, a light wash in spring is smart. Dust happens. Life happens. Nature finds a way.
3) Reconnect water and replace filter (if applicable)
- Install a new water filter if your model uses one and it was removed/discarded.
- Turn water supply back on and check for leaks behind the fridge.
- Flush several minutes of water through the dispenser (if present).
- Dump the first batch(es) of ice to clear any stale water or “off” taste.
4) Power on and stabilize temperature
Give the fridge time to cool down before loading it. A good habit is to plug it in, set temps, and let it run empty for a few hours (or overnight) so it reaches stable,
safe temperatures.
Troubleshooting: Common End-of-Season Fridge Problems (and Fixes)
“It smells weird even though I cleaned it.”
- Re-clean the gasket folds and drawer tracksodors love hiding there.
- Check the drip pan (if accessible) and clean/dry it.
- Leave doors open longer to fully dry interior panels.
- Use activated charcoal for a few days after cleaning.
“There’s mold when I reopen.”
- Clean with hot soapy water, then sanitize if appropriate.
- Dry thoroughly and increase ventilation.
- Confirm doors were truly propped open during storage (even a “mostly closed” door can trap moisture).
“The ice maker doesn’t work after winter.”
- Confirm water valve is on and the ice maker is switched on.
- Check the filter and replace it if flow seems weak.
- Inspect for kinks in the water line behind the fridge.
- Give it timesome ice makers take hours to cycle after reconnecting.
“The fridge seems loud or runs constantly.”
- Clean condenser coils.
- Make sure there’s space for airflow behind the fridge.
- Check door seals with the “paper test” (close door on a sheet of paper; it should resist pulling out).
End-of-Season Cabin Fridge Stories & Lessons Learned (The Extra You Asked For)
Cabin fridges have a talent for turning small mistakes into unforgettable memories. Not “scrapbook” memoriesmore like “I can still smell it if I think about it”
memories. If you want motivation to do the end-of-season routine, here are some very real, extremely common experiences cabin folks swap like campfire stories.
The Condiment Museum Exhibit: Someone always leaves ketchup. Ketchup becomes the gateway condiment. Next thing you know, you’ve got three mustards
(yellow, Dijon, “stone ground artisan”), a bottle of barbecue sauce that expired during a different presidential administration, and pickles that have lost all emotional
connection to crispness. The lesson: if you shut the cabin down, empty the fridge completely. Condiments aren’t immortal; they’re just confident.
The “It Was Clean… Mostly” Mold Surprise: A lot of people clean the big surfaces, wipe the shelves, and declare victory. But the door gasketthose
rubber foldscan hold tiny crumbs and moisture. Over months, that becomes mold’s favorite Airbnb. The lesson: wipe the gasket like it owes you money, then dry it.
Mold loves hidden damp spots more than it loves your personal peace.
The Ice Maker Betrayal: If your fridge has an ice maker, it’s easy to forget the water line is still connected and still full of water. In a cold cabin,
frozen water expands. That can mean cracked tubing, a damaged valve, or a springtime leak that quietly floods the floor while you’re outside admiring the lake.
The lesson: shut off the water, turn off the ice maker, and drain what you can. Future-you will feel like a genius.
The Door That “Definitely Stayed Open”… Until It Didn’t: Many refrigerators slowly swing shut if the cabin floor shifts a bit, the fridge isn’t level,
or someone nudged the door while carrying out the last bag of trash. A door that’s only cracked open for ventilation in October can be fully closed by November.
Then it sits sealed for months, marinating in moisture and stale air. The lesson: use a solid door prop (towel, clip, purpose-made stopper) and give it a gentle tug-test.
If it wants to close, it will close. Fridge doors are patient like that.
The Springtime Overconfidence Move: You arrive, flip the breaker, toss in groceries, and head outside to do “real cabin stuff.” Then you come back and
the milk is lukewarm because the fridge never had time to stabilize. Or the freezer is still climbing down to 0°F. The lesson: power it up first, let it cool for a few
hours (or overnight), and only then load it. Refrigerators are not instant-on magic boxes; they’re hardworking machines that appreciate a warm-up lap.
The Coil Dust Blanket: Cabins collect dust in a special waylike the outdoors and indoors teamed up. When you finally pull the fridge out, the coils look
like they’re wearing a sweater. Dirty coils can make the fridge run harder, run warmer, and run longer. The lesson: take five minutes at closing time (or opening time)
to vacuum the coils. It’s the kind of boring chore that quietly prevents expensive problems, which is basically the adult version of a superhero origin story.
The best part? Once you do the end-of-season fridge routine a couple times, it becomes a simple rituallike shutting off the water, locking windows, and making sure you
didn’t leave a bag of marshmallows in a drawer where it will fuse into a single sticky brick by spring. Your cabin refrigerator will last longer, smell better, and stop
acting like it’s auditioning for a horror movie. And you’ll open the door in spring to clean, neutral airnot a cloud of regret.


