Table of Contents >> Show >> Hide
- What Makes a Bob Haircut So Popular?
- Before You Cut: Decide What Kind of Bob You Want
- Tools You Need to Cut a Bob at Home
- Should You Cut Your Bob Wet or Dry?
- Step-by-Step: How to Cut Your Own Hair into a Bob
- Step 1: Start with Clean, Detangled Hair
- Step 2: Choose Your Final Length, Then Add a Safety Buffer
- Step 3: Create a Center Part and Section the Hair
- Step 4: Establish Your First Guide
- Step 5: Match the Opposite Side
- Step 6: Cut the Back in Small Sections
- Step 7: Check the Perimeter
- Step 8: Refine After Styling
- How to Customize a Bob for Your Face Shape
- Tips for Cutting Curly, Wavy, or Textured Hair into a Bob
- Common DIY Bob Mistakes to Avoid
- How to Style Your New Bob at Home
- How Often Should You Trim a Bob?
- Hair Health Matters After the Cut
- Real-Life Experience: What Cutting a Bob at Home Actually Feels Like
- Conclusion
Cutting your own hair at home can feel like a bold act of independence, a budget-friendly beauty move, and a tiny personal rebellion against appointment calendars. It can also feel like standing in front of the bathroom mirror with scissors in one hand and regret quietly warming up in the corner. The good news? A simple bob haircut is one of the more approachable DIY haircuts when you plan carefully, use the right tools, and trim with patience instead of panic.
This guide walks you through how to cut your own hair at home with a focus on achieving a clean, wearable bob. We are not pretending your bathroom is suddenly a luxury salon with flattering lighting and cucumber water. But with smart sectioning, sharp haircutting shears, realistic expectations, and a slow hand, you can create a bob that looks polished enough for real life, video calls, brunch, and the occasional dramatic hair flip.
Before we begin, one honest note: if you want a dramatic transformation, a highly technical inverted bob, major layering, or a precision blunt bob worthy of a magazine cover, a professional stylist is still your best friend. But if your goal is to refresh your length, create a basic bob shape, or clean up an overgrown lob, this step-by-step guide will help you do it safely and stylishly.
What Makes a Bob Haircut So Popular?
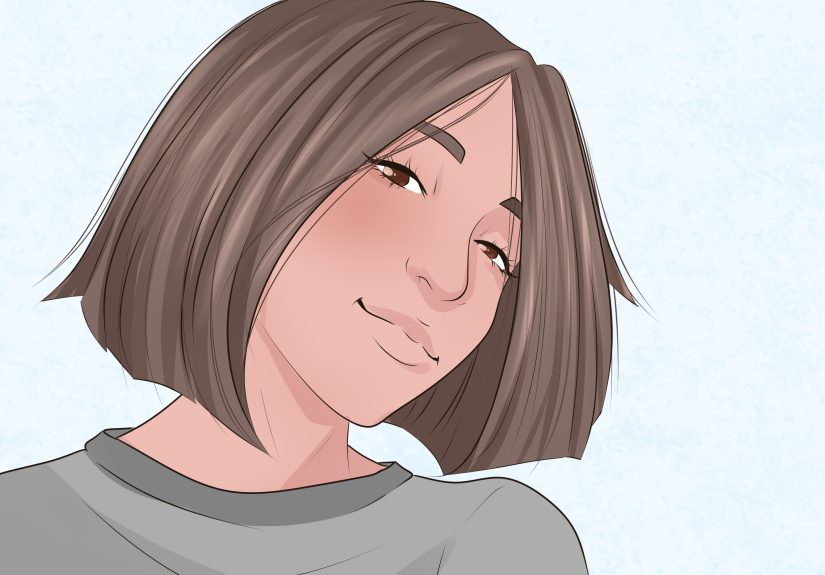
The bob haircut has survived decades of beauty trends because it is simple, chic, and surprisingly versatile. It can be sleek and classic, soft and wavy, blunt and modern, or textured and casual. A bob can sit at the jawline, graze the chin, fall just above the shoulders, or stretch into a longer lob. That flexibility is exactly why so many people love it.
A bob also works with many lifestyles. It is shorter than long hair, which usually means less blow-drying time, fewer tangles, and a lighter feel around the neck. At the same time, it is long enough to style with waves, tuck behind the ears, clip back, or dress up with accessories. In other words, a bob is the haircut equivalent of a white button-down shirt: classic, useful, and easy to personalize.
Before You Cut: Decide What Kind of Bob You Want
Do not start snipping until you know the shape you are aiming for. “A bob” is not one single haircut. It is a family of haircuts, and some family members are easier to handle at home than others.
Beginner-Friendly Bob Styles
A one-length bob is the easiest version for most beginners. The hair is cut at one general length around the head, usually somewhere between the jaw and shoulders. It looks clean and intentional without requiring complicated graduation or layering.
A long bob, also called a lob, is another smart choice. Because it sits closer to the shoulders, it gives you more room for correction. If one side ends up slightly longer, you have a little more length to fix it. A lob is the forgiving friend in the bob family.
A soft textured bob can also work well if you avoid heavy layers. Instead of cutting big chunks, you lightly point-cut the ends to soften the line. This is helpful if you do not want your bob to look too helmet-like. Nobody wants to look like their hair was assembled by a ruler with attitude.
Bob Styles Best Left to Professionals
A stacked bob, graduated bob, asymmetrical bob, or sharp A-line bob requires more technical skill. These styles depend on weight distribution, angles, and precise shaping at the back of the head, which is unfortunately the one place your eyes refuse to live.
If your dream cut involves a dramatic slope from back to front, a sculpted nape, heavy internal layers, or perfectly balanced face-framing pieces, book a salon visit. DIY is great. DIY surgery on your hairline? Less great.
Tools You Need to Cut a Bob at Home
The right tools make the difference between a clean haircut and a crime scene made of split ends. Do not use kitchen scissors. They are made for coupons, cardboard, and opening snack bags in moments of emotional need. Haircutting shears are sharper and designed to create cleaner lines without crushing the hair shaft.
Your At-Home Bob Haircut Kit
- Sharp haircutting shears
- Fine-tooth comb
- Wide-tooth comb for detangling
- Sectioning clips or alligator clips
- Two mirrors, including one handheld mirror for the back
- Hair ties or small elastics
- Spray bottle, if you prefer lightly damp hair
- Cape, towel, or old button-down shirt
- Flat iron or blow-dryer, if you need to smooth hair before checking the line
Good lighting is also non-negotiable. Natural daylight is ideal. If your bathroom lighting makes everyone look like a tired raccoon, move near a window. You need to see the line clearly before you cut more.
Should You Cut Your Bob Wet or Dry?
For most beginners, cutting dry hair is safer. Dry hair shows how your hair naturally falls, bends, flips, shrinks, or puffs. This matters because wet hair can look longer than it actually is. Curly and wavy hair especially can spring up after drying, turning “chin length” into “surprise, it is cheekbone length.”
If your hair is straight and easy to control, you may choose to cut it slightly damp. But avoid soaking-wet hair unless you know exactly how your texture behaves. A safe rule is this: if your hair changes shape dramatically as it dries, cut it dry or nearly dry.
Before cutting, wash and condition your hair, detangle gently, and style it the way you normally wear it. If you always wear a middle part, cut with a middle part. If you live in a side part, cut with that side part. Your bob should serve your real life, not a fantasy version of you who wakes up with salon hair and no responsibilities.
Step-by-Step: How to Cut Your Own Hair into a Bob
Now we get to the haircut itself. Take your time. A good at-home bob is built slowly, like a lasagna or a suspiciously complicated piece of furniture.
Step 1: Start with Clean, Detangled Hair
Comb through your hair until there are no knots. Knots can pull sections unevenly, and uneven sections lead to uneven cuts. If your hair is curly, coily, or highly textured, detangle gently and let your curls sit in their natural pattern before trimming. Cutting curl by curl is often safer than pulling everything tight and pretending shrinkage does not exist.
Step 2: Choose Your Final Length, Then Add a Safety Buffer
Decide where you want the bob to fall: chin, jawline, collarbone, or shoulder-skimming. Then cut less than you think you need to. If you want a chin-length bob, begin around the lower jaw or upper neck and refine from there. Hair cannot be glued back on, despite what late-night panic shopping may suggest.
Step 3: Create a Center Part and Section the Hair
Part your hair down the middle from the forehead to the nape of the neck. Then divide it into manageable sections. A simple setup includes two front sections and two back sections. Clip away the hair you are not cutting. Working in small sections keeps the haircut controlled and helps both sides stay balanced.
If your hair is thick, create more sections. Thick hair can hide unevenness underneath, and that hidden unevenness loves to reveal itself at the worst possible time, usually in bright sunlight or an elevator mirror.
Step 4: Establish Your First Guide
Start with one front section. Comb it straight down with light tension. Hold the hair between your fingers at the length you want to cut. Keep your chin level, shoulders relaxed, and head straight. Tilting your head can change the line, and suddenly your bob has opinions.
Make a small cut. Do not saw across the whole section in one dramatic motion. Trim little by little. This first piece becomes your guide for the rest of the haircut.
Step 5: Match the Opposite Side
Move to the other front section and use the first side as your guide. Comb both sides forward and compare the length under your chin. Trim carefully until they match. This is where patience pays rent. Check the balance several times before moving on.
Step 6: Cut the Back in Small Sections
The back is the trickiest part of a DIY bob. Use two mirrors or ask someone you trust to help. Ideally, this person should be calm, honest, and not the kind of friend who says “oops” too often.
Release a small back section near the nape. Split it down the middle and bring each side slightly forward over your shoulders. Use the front pieces as a guide and trim the back to match. Continue releasing small sections from the back, combing them down and trimming gradually.
Remember: the back should not be cut in one giant ponytail chop unless you are comfortable with unpredictable results. Small sections create more control and fewer emergency hats.
Step 7: Check the Perimeter
Once the rough bob shape is complete, comb all your hair down and check the perimeter. Look for long pieces, corners, and uneven spots. Turn your head slightly left and right. Use a handheld mirror to inspect the back. If you see a piece sticking out, trim it conservatively.
For a blunt bob, keep the line clean but avoid aggressive horizontal cutting. For a softer bob, use point cutting: hold the shears vertically and make tiny snips into the ends. This breaks up harsh edges and gives the bob a more natural finish.
Step 8: Refine After Styling
Style your hair the way you normally would. Blow-dry it smooth, air-dry your waves, diffuse your curls, or run a flat iron through the ends if that is part of your routine. Once styled, check the shape again. Hair often reveals small uneven areas only after it settles.
Make only tiny corrections. This is not the time to get brave. The haircut is almost finished, and bravery with scissors is how many people accidentally invent bangs.
How to Customize a Bob for Your Face Shape
A perfect bob is not about copying someone else’s haircut exactly. It is about choosing a length and shape that works with your face, texture, and daily routine.
If you have a round face, a lob or slightly longer bob can help create the look of length. Keeping the ends below the chin is usually more flattering than cutting right at the widest part of the face.
If you have an oval face, you have plenty of options. Chin-length bobs, blunt bobs, and soft textured bobs can all work beautifully.
If you have a square face, a bob with soft ends or subtle movement can balance a strong jawline. Avoid cutting a super-heavy line exactly at the jaw unless that is the bold look you want.
If you have a heart-shaped face, a chin-length bob or bob with gentle face-framing can add softness around the lower half of the face.
Face-shape advice is useful, but it is not a law. Your confidence, hair texture, and styling habits matter more than any chart. The best bob is the one you can actually live with on a Tuesday morning.
Tips for Cutting Curly, Wavy, or Textured Hair into a Bob
Curly and textured hair can look incredible in a bob, but it requires extra caution at home. Shrinkage is real. A curl that hangs at your collarbone when stretched may bounce to your jaw once dry.
Cut curly hair in its natural state whenever possible. Do not straighten it first unless you plan to wear it straight most of the time. Trim curl by curl or in very small sections. Focus on the overall shape rather than forcing every strand to match perfectly. Curly bobs look best when they respect the natural pattern of the hair.
If your curls vary around your head, cut less in tighter curl areas and check the shape frequently. A curly bob should feel balanced, not mathematically identical.
Common DIY Bob Mistakes to Avoid
Mistake 1: Cutting Too Much Too Fast
This is the big one. Take off half an inch, check, then decide whether to cut more. Do not chase perfection with increasingly shorter snips. That road leads to pixie territory.
Mistake 2: Using Dull or Household Scissors
Dull scissors can bend, chew, or fray hair. They also make clean lines harder to achieve. Haircutting shears are worth the small investment.
Mistake 3: Pulling Hair with Too Much Tension
If you pull hair too tightly while cutting, it may spring back shorter than expected. Use gentle, even tension, especially around the face and neckline.
Mistake 4: Ignoring Your Natural Part
Cutting with a middle part when you always wear a side part can create uneven-looking pieces later. Cut your hair as you actually wear it.
Mistake 5: Trying Advanced Layers
Layers can remove weight and add movement, but they can also create holes, shelves, and mystery chunks. If you are new to DIY haircuts, keep the bob mostly one length and use light point cutting only at the ends.
How to Style Your New Bob at Home
A bob haircut changes how your hair behaves. Shorter hair often has more bounce, but it may also flip at the ends or puff in new places. The right styling routine helps your DIY bob look intentional.
For a sleek bob, apply heat protectant, blow-dry with a flat or round brush, and smooth the ends with a flat iron if needed. Keep the iron moving and avoid clamping repeatedly over the same section.
For a wavy bob, apply a lightweight mousse or texture spray, then scrunch and air-dry or diffuse. You can also create soft bends with a curling iron, leaving the ends slightly straighter for a modern finish.
For a curly bob, use curl cream or gel on damp hair, scrunch upward, and dry with a diffuser on low heat. Once dry, gently fluff at the roots. Try not to touch curls too much while they dry unless frizz is your personal brand.
For a messy bob, use dry shampoo or texture spray at the roots and mid-lengths. Toss the hair lightly with your fingers and let the shape look effortless, even if you spent twelve minutes negotiating with your cowlick.
How Often Should You Trim a Bob?
A bob keeps its shape best with regular trims. If you like a sharp, precise line, plan to trim every six to eight weeks. If your bob is softer or longer, you may be able to stretch the time between trims. The shorter and blunter the bob, the more obvious growth becomes.
At home, you can maintain the ends by dusting small amounts from the perimeter. But if the shape starts looking heavy, uneven, or hard to style, it is time to see a professional. A stylist can rebalance the cut, remove bulk, and fix the back in ways that are difficult to do on yourself.
Hair Health Matters After the Cut
A fresh bob looks best when the hair is healthy. Use a gentle shampoo and conditioner suited to your hair type. Detangle carefully, especially when hair is wet and more fragile. Limit heat styling when possible, and always use heat protectant before blow-drying, curling, or flat ironing.
Do not believe the myth that cutting hair makes it grow faster. Hair growth starts at the scalp, not the ends. However, trimming can remove split ends and help the hair look fuller and healthier. Think of it like pruning a plant. You are not magically accelerating nature, but you are making the shape cleaner and stronger.
Real-Life Experience: What Cutting a Bob at Home Actually Feels Like
Cutting your own bob at home is not just a beauty task; it is an emotional journey with lighting issues. The first thing most people notice is how powerful the first snip feels. There is a tiny thrill in watching old length fall away. It feels fresh, brave, and slightly cinematic. Then reality arrives, usually around the time you remember that the back of your head exists.
The biggest lesson from DIY bob experiences is that preparation matters more than confidence. Confidence is nice. Confidence looks great in a robe. But sectioning, sharp shears, mirrors, and a realistic plan are what actually save the haircut. People who rush usually end up making the same mistake: they cut one side, panic because the other side looks longer, then keep trimming back and forth until the bob becomes shorter than planned. The fix is simple but not always easy: pause often. Comb the hair down. Step away from the mirror. Check again after five minutes.
Another common experience is discovering that hair does not behave the same on both sides of the head. One side may flip under perfectly while the other flips out like it is trying to leave the conversation. This does not always mean the cut is wrong. Growth patterns, cowlicks, density, and sleeping habits all influence how a bob sits. That is why styling after the cut is so important. A blow-dryer, round brush, flat iron, diffuser, or curl cream can reveal whether the line truly needs correction or whether the hair simply needs direction.
For beginners, the most satisfying at-home bob is usually not the most dramatic one. A collarbone-length lob or soft shoulder-grazing bob gives enough change to feel exciting without removing every safety net. Once the shape is cut and styled, many people realize the bob is easier to manage than expected. Shampooing feels faster. Drying takes less time. Earrings become more visible. Necklines suddenly matter. Even a basic T-shirt can look more styled because the haircut creates shape around the face.
There is also a practical learning curve. The bathroom floor will collect more hair than seems scientifically possible. Tiny cut pieces will cling to your neck, your sink, your socks, and perhaps your soul. Wearing a button-down shirt helps because you can remove it without dragging hair over your face. Placing a towel or sheet on the floor makes cleanup easier. A lint roller is surprisingly useful afterward.
The best personal rule for cutting your own bob is this: stop while the haircut still looks good. Do not keep “perfecting” the line forever. Human hair moves. A bob does not need to be laser-measured to look beautiful. It needs to look balanced, healthy, and wearable. If the front pieces match, the back is reasonably even, and the shape works with your natural texture, you have succeeded.
Finally, give yourself one full wash-and-style cycle before judging the result. Freshly cut hair can sit strangely at first, especially if you have removed several inches. After washing, conditioning, drying, and styling, the bob often relaxes into a better shape. And if it still needs help, that is not failure. That is what salons are for. A professional stylist can clean up a DIY bob, and you will walk in with a much clearer understanding of what you like, what your hair does, and how short you actually want to go next time.
Conclusion
Cutting your own hair at home and achieving a perfect bob is possible when you approach it with patience, good tools, and realistic expectations. The key steps are simple: choose a beginner-friendly bob style, cut clean and detangled hair, work in small sections, establish a guide, trim gradually, check the balance often, and refine only after styling. The goal is not to compete with a professional salon. The goal is to create a fresh, flattering bob that feels good, looks intentional, and does not require wearing a beanie until next season.
A bob haircut is timeless because it adapts. It can be polished, playful, sleek, wavy, curly, or casual. Whether you are maintaining an overgrown lob or trying a careful at-home chop, the secret is control. Cut less, check more, and remember that your hair is not a race. With the right method, your DIY bob can become one of those rare beauty wins: affordable, empowering, and only mildly terrifying.


