Table of Contents >> Show >> Hide
- Why This DIY Works So Well (A Little Analysis, Because We’re Adults)
- What You’ll Make
- Budget Breakdown (How the “$3” Happens)
- Materials and Tools
- Step-by-Step: The Fast Version (Chalkboard Vinyl Method)
- Alternate Method: Chalkboard Paint (More Durable, More Dry Time)
- Will Magnets Still Stick Through the Chalkboard Surface?
- Safety Notes (The “Read This Before You Hand It to a Toddler” Section)
- How to Clean and Maintain Your Portable Chalkboard
- Make It a Real “Travel Kit” (So You’re Not Hunting for Chalk at the Bottom of a Bag)
- 10 Kid-Tested Ideas to Use the Magnetic Chalkboard
- Variations and Upgrades (Because You’ll Want to Make a Second One)
- Troubleshooting
- Conclusion: A Tiny Board, A Big Win
- Real-Life Experiences With This DIY (The Extra You Asked For)
- Sources Consulted (No Links)
Need a screen-free kid “busy board” you can toss in a tote bag and deploy in restaurants, waiting rooms, or the backseat? Meet the humble hero: a cookie sheet turned into a portable magnetic chalkboard. It’s lightweight, surprisingly sturdy, and costs about the same as a fancy coffee… if you skip the fancy coffee and shop like a budget ninja.
Here’s the magic trick: most metal baking sheets are already magnetic. So you’re halfway to a magnetic board before you even start. Add a chalkboard surface on top, and you’ve got a two-in-one activity tool that helps kids draw, practice letters, build silly magnet stories, and stay busy long enough for you to finish a sentence without being interrupted by “Mom/Dad… watch this… MOM/DAD!”
Why This DIY Works So Well (A Little Analysis, Because We’re Adults)
Kids love activities that feel “official,” like they’re using a real tool instead of a toy. A chalkboard is inherently interactiveerase, redo, scribble, repeat. Add magnets and suddenly it’s not just drawing; it’s building, sorting, storytelling, and fine-motor practice.
From a parent perspective, the win is portability and speed. You can set this up in under 10 minutes. It stores flat. It doesn’t require charging. And it’s endlessly reusable, which is the closest thing we have to a parenting cheat code.
What You’ll Make
- A portable magnetic chalkboard (fits in a tote or backpack)
- A “grab-and-go” activity kit (chalk + eraser + magnets stored together)
- An easy-clean surface you can refresh anytime
Budget Breakdown (How the “$3” Happens)
The exact total depends on what you already have at home, but here’s the classic low-cost route:
- Small cookie sheet or baking tray: $1–$2 (dollar store, thrift store, or spare from your cabinet)
- Chalkboard contact paper/vinyl sheet: about $1
- Washi tape (or electrical tape): about $1 (optional, but nice)
Already have chalk and a small cloth/eraser? Then you can keep the out-of-pocket cost around $3. If you need to buy chalk and magnets too, you’re still usually under $8which is still a steal compared to most travel toys.
Materials and Tools
Core Supplies
- 1 small metal cookie sheet or baking tray (magnet-friendly steel works best)
- Chalkboard contact paper (aka chalkboard vinyl/adhesive chalkboard sheet)
- Washi tape or electrical tape (for edging and durability)
- Chalk (regular or dustless)
- Small felt eraser, microfiber cloth, or an old sock (yes, really)
- Kid-safe magnets (bigger is safermore on that below)
Helpful Extras (Optional but Awesome)
- Zip pouch or pencil case (for magnets + chalk)
- Sticky-back Velcro dot (to attach an eraser to the tray)
- Elastic band or hair tie (to keep chalk from escaping)
- Rubbing alcohol or dish soap (for cleaning the tray before applying vinyl)
- Scissors or craft knife + ruler (for clean cuts)
Step-by-Step: The Fast Version (Chalkboard Vinyl Method)
This is the quickest, least messy approach. Great if your attention span is currently measured in “snack intervals.”
Step 1: Pick the Right Tray
Choose a cookie sheet that’s magnetic. Most plain metal baking sheets are, but if you’re unsure, test with a fridge magnet. Also, look for a tray with rolled edges (safer and less sharp).
Step 2: Clean It Like You Mean It
Wash the tray with dish soap and warm water. Dry completely. Then wipe the surface with rubbing alcohol (or a degreaser) so the vinyl sticks well. If you skip this, the vinyl may peel later… usually at the exact moment your kid is emotionally attached to a chalk masterpiece.
Step 3: Cut and Apply the Chalkboard Vinyl
- Measure the flat writing area inside the raised edges.
- Cut the vinyl slightly smaller (leave a tiny border so edges don’t catch and peel).
- Peel the backing slowly and press down from one side to the other.
- Smooth bubbles with a credit card or ruler edge.
Step 4: Seal the Edges (The “Make It Last” Trick)
Run washi tape around the border where vinyl meets metal. This does three things:
- Protects the vinyl edges from peeling
- Softens corners and rough spots
- Makes it cuter (and kids love “their colors”)
Step 5: Add Storage for Chalk + Eraser
Make it truly portable with one of these easy hacks:
- Velcro dot: Stick a small eraser to the back of the tray.
- Elastic band: Wrap an elastic band around the tray to hold chalk.
- Mini pouch: Clip a zipper pouch to your bag and call it the “chalkboard kit.” (Fancy.)
Alternate Method: Chalkboard Paint (More Durable, More Dry Time)
If you want a tougher surface than vinylor you already have chalkboard paintthis method is great. It just requires patience, which is a resource parents famously have in unlimited supply. (Kidding. We do not.)
Quick Paint Notes
- Lightly sand/scuff the tray so paint adheres better.
- Apply thin coats (2–3 coats typically looks best).
- Let it cure fully before writing (often a few days).
- Season/condition the surface with chalk before first use for easier erasing.
Seasoning the Chalkboard (Don’t Skip This)
“Seasoning” means covering the entire surface with chalk (using the side of the chalk) and then wiping it off. It helps prevent ghosting and makes the board easier to erase later. Think of it as pre-heating a skillet, but for tiny artists who draw dinosaurs with six tails.
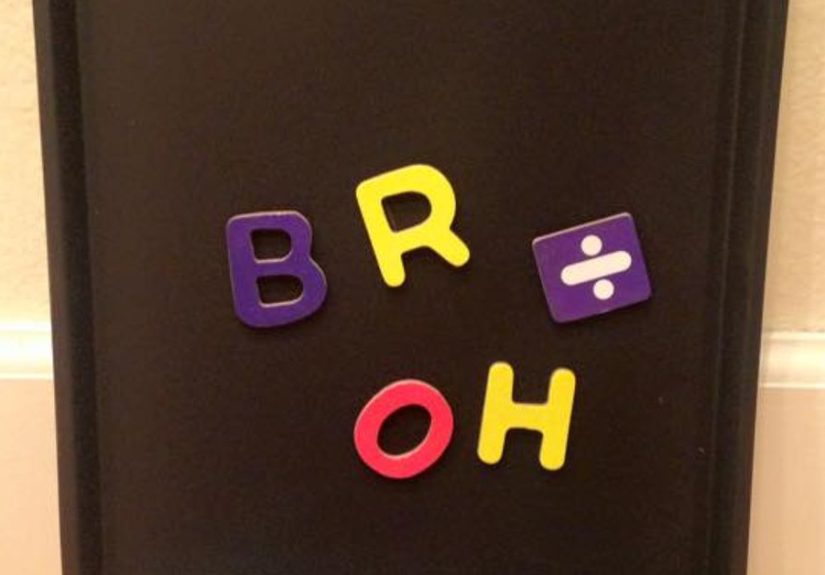
Will Magnets Still Stick Through the Chalkboard Surface?
Usually, yesespecially with vinyl or thin paint coats. The tray is still metal, so magnets can grip. The biggest factor is magnet strength and size. Big, flat magnets tend to work best. Tiny, super-strong magnets are not worth the risk in a kids’ kit.
Safety Notes (The “Read This Before You Hand It to a Toddler” Section)
- Magnets: Use larger, kid-safe magnets and supervise. Avoid small/high-powered magnets entirely, especially around young children.
- Edges: If the tray has sharp corners, cover them with tape or choose a rolled-edge tray.
- Chalk dust: If your child has allergies or asthma, try dustless chalk and wipe the board with a slightly damp cloth (once the surface is appropriate for wet cleaning).
- Mouths are fast: If something can fit in a mouth, assume it will try to.
How to Clean and Maintain Your Portable Chalkboard
Daily Quick Clean
- Use a felt eraser, microfiber cloth, or paper towel.
- Knock chalk dust into a trash can, not your car seat (learn from the rest of us).
Deeper Clean (When It Starts Looking “Ghosty”)
- Wipe gently with a barely damp cloth and dry immediately.
- If your surface is painted, follow the paint’s cure-time guidance before using water.
- Re-season the board after deep cleaning for best results.
Make It a Real “Travel Kit” (So You’re Not Hunting for Chalk at the Bottom of a Bag)
The board is great. The board plus a system is legendary. Here are a few pack-and-go setups:
Option A: The Zip Bag Method
Put magnets, chalk, and a small cloth in a gallon zip bag. Slide the tray in behind it. Done. (Also: a zip bag doubles as a “please don’t leak chalk dust” shield.)
Option B: The Pencil Case Upgrade
Use a small pencil case or cosmetic pouch. Label it “Chalkboard Kit” and instantly feel like a person who has their life together.
Option C: The Car Clip Method
Bring a binder clip and clip the pouch to your tote strap. When the “Are we there yet?” begins, you can deploy supplies without turning the car into a scavenger hunt.
10 Kid-Tested Ideas to Use the Magnetic Chalkboard
Here are practical, age-flexible prompts that work in real life:
- Name practice: Write their name big and let them trace it.
- Letter hunt: Put out 5 magnetic letters, ask them to “find the A.”
- Tic-tac-toe: Fast, classic, surprisingly intense.
- Draw-and-guess: You draw a mystery shape; they guess. Then reverse it and accept that “blob” is a valid answer.
- Magnet stories: Use animal magnets and create a 3-sentence story together.
- Shape builder: Draw shapes and have them place magnets inside each one.
- Mini math: “Draw 3 stars. Now erase 1. How many?”
- Road-trip bingo: Draw a 3×3 grid and fill with things you’ll see (stop sign, dog, truck).
- Emotion doodles: “Draw a happy face. Now a surprised face.” Great for emotional vocabulary.
- Restaurant planner: Let them “write the order” (even if it’s 12 desserts and a dinosaur).
Variations and Upgrades (Because You’ll Want to Make a Second One)
Double-Sided Board
Put chalkboard vinyl on one side and whiteboard contact paper on the other. Now you’ve got chalk + dry erase options. It’s like giving your kid a tiny office, which is either adorable or deeply ironic depending on your email inbox.
Theme Kits
- Alphabet kit: Letter magnets + traceable letter prompts
- Shapes kit: Shape magnets + “find the triangle” challenges
- Story kit: Character magnets + story starters (“Once upon a time…”)
- Quiet math kit: Number magnets + simple equations
Make It More “Grip-Friendly”
If little hands struggle to hold the tray steady, add two strips of non-slip shelf liner to the back corners. It helps the board stay put on a tableor your lapwithout sliding away like it has places to be.
Troubleshooting
My vinyl is bubbling
Peel back gently and reapply while smoothing with a card. Tiny pinprick bubbles can be released with a needle and smoothed down.
The edges keep peeling
That’s what the washi-tape border is for. Also: make sure the tray was fully degreased before applying vinyl.
Chalk won’t erase cleanly
If it’s painted, the board may not be fully cured or seasoned. If it’s vinyl, try re-seasoning lightly and use a clean microfiber cloth.
Magnets don’t stick well
Try larger, flatter magnets, and make sure your tray is steel (some trays are aluminum and won’t hold magnets at all).
Conclusion: A Tiny Board, A Big Win
A $3 portable magnetic chalkboard is the kind of DIY that feels almost unfairly effective. It’s cheap, fast, reusable, and adaptable to your kid’s age and interests. Plus, it turns everyday momentswaiting for food, sitting in the car line, killing time at grandma’sinto something calmer and more creative.
If you build one, don’t be surprised if you end up making a second… and then a third… and then you’re the household chalkboard engineer. It happens.
Real-Life Experiences With This DIY (The Extra You Asked For)
The first time I brought a cookie-sheet chalkboard into a restaurant, I felt like I’d discovered forbidden knowledgelike I’d hacked parenting with a piece of kitchen equipment. My kid sat down, pulled the tray out like a tiny professional, and immediately started drawing a “map” of the table: circles for plates, a rectangle for the napkin, and one suspicious blob labeled “dessert.” The waiter walked by and said, “That’s genius,” which is the adult equivalent of a gold star sticker.
But the real test wasn’t a restaurant. It was the car. Specifically, the kind of drive where you’ve been on the road long enough that snacks stop working and the conversation turns into existential questions like, “Why do clouds follow us?” I handed back the chalkboard kit at mile… who even knows… and it bought me a solid stretch of quiet concentration. Not silence, exactlythere was commentary (“I’m drawing a dragon!” “Now he’s eating the moon!”)but it was happy, focused commentary instead of restless whining. Huge difference.
There were some learning moments, too. For example: chalk dust has a way of teleporting. One day I forgot to include the cloth in the pouch, and my kid tried to erase the board with their sleeve. That’s how we learned the phrase “chalky forearm” and why black shirts are a bold fashion choice for small children. After that, I kept a microfiber cloth clipped inside the pouch and started using dustless chalk when we knew the board would be used in the car.
Another surprise? Magnets turn it into a storytelling machine. At home, magnets are mostly about spelling practice. On the go, they become characters in a drama. We had a full-on saga where a magnetic dog tried to open a “magnetic bakery,” and the magnetic cat kept stealing cupcakes. Nothing about this improved my understanding of feline ethics, but it did keep my kid engaged long enough for me to check out at the grocery store without juggling a meltdown and a loaf of bread.
I also noticed how this little DIY grows with your child. For toddlers, it’s about scribbles, circles, and placing magnets. For preschoolers, it becomes letters, simple shapes, and “draw the thing I’m thinking of.” For early elementary kids, it’s math problems, hangman, and drawing challenges (“Can you draw a penguin wearing a hat?”). When the same tool works across multiple ages, it’s not just a craftit’s a long-term sanity investment.
And yes, adults end up using it too. I’ve caught myself writing quick reminders on the board while packing a bag: “WATER. SNACKS. DO NOT FORGET SHOES.” The best kids’ tools are the ones that accidentally help adults, and this chalkboard absolutely qualifies.
Sources Consulted (No Links)
- This Old House
- Family Handyman
- Rust-Oleum (product guides/support)
- National Capital Poison Center (Poison.org)
- NASPGHAN (pediatric magnet ingestion guidance)
- Parents.com
- Associated Press (AP News)
- The Spruce
- HGTV
- Houzz
- Instructables
- One Little Project
- Uchida (chalkboard seasoning tips)
- ColormeThrifty (cookie sheet chalkboard vinyl)
- Sustain My Craft Habit (cookie sheet magnetic board concept)


