Table of Contents >> Show >> Hide
- Why Pillow Covers Beat Store-Bought Character Pillows
- Materials and Tools
- Design Planning: Make It Obviously Mickey and Minnie
- Step 1: Prewash, Press, and Prep (Yes, Even If You’re Impatient)
- Step 2: Sew the Pillow Cover Base (Envelope Back Method)
- Step 3: Add Mickey and Minnie Three Decoration Methods
- Make It “Minnie” and “Mickey” Without Overcomplicating It
- Care, Durability, and Kid-Proofing
- Troubleshooting (Because Crafting Loves Plot Twists)
- Cost and Time: What to Expect
- Real-World “Experience” Notes: What Usually Happens the First Time
- Wrap-Up: Your Couch, But Make It Disney
Want your living room (or kid’s room) to say “Disney magic” without permanently marrying a full-size character pillow
you’ll side-eye in six months? Removable pillow covers are the sweet spot: they’re washable, swappable, and way less
commitment than a tattoo of Mickey’s ears. This guide walks you through making Minnie and Mickey decorative pillow
covers using beginner-friendly sewing plus three decorating optionsappliqué, iron-on vinyl, or fabric paintso you
can choose your own adventure.
Friendly heads-up: This is fan-made DIY décor for personal use. Minnie and Mickey are trademarked
characters; avoid selling items featuring protected character designs unless you have the proper rights/licensing.
(Your sewing machine doesn’t come with a legal team. Mine doesn’t either.)
Why Pillow Covers Beat Store-Bought Character Pillows
Decorative pillows are basically throw blankets’ chatty cousinsalways hanging around, always judging your snack
crumbs. Covers give you control: you can match seasons, wash out sticky kid fingerprints, and keep your pillow forms
from getting tired and sad. They also let you upgrade a basic couch pillow into themed décor without storing a whole
extra pillow in your closet like it’s a plush witness protection program.
- Washable: Remove, wash, repeat. Your future self will clap.
- Customizable: Classic Mickey, polka-dot Minnie, or subtle silhouettes for “grown-up Disney.”
- Budget-friendly: Fabric + creativity usually costs less than boutique character décor.
Materials and Tools
You can sew covers from scratch, or start with plain store-bought covers and focus on decorating. Either way, pick
supplies that match how the pillows will be used (movie-night cuddling vs. “don’t touch, that’s for styling”).
Fabric and Notions
- Fabric for the cover: cotton canvas, duck cloth, home décor cotton, or quilting cotton (lined if lightweight)
- Pillow form: common sizes are 16"x16", 18"x18", or 20"x20"
- Thread: all-purpose polyester in matching colors
- Optional closure: envelope back (easy) or zipper (sleek)
- Iron-on fusible web: for fabric appliqué (often called “fusible adhesive”)
- Optional stabilizer: lightweight fusible interfacing (helps keep the front smooth)
Decorating Options (Pick One)
- Appliqué: fabric shapes fused and stitched onto the front
- Iron-on vinyl (HTV): crisp silhouettes, fast results (great if you own a cutting machine)
- Fabric paint/stencil: no fancy cutting requiredjust patience and a steady hand
Tools
- Sewing machine (or hand needle if you’re brave and/or fueled by caffeine)
- Scissors or rotary cutter + mat
- Measuring tape/ruler, fabric marker or chalk
- Pins or clips
- Iron + ironing board (the unsung hero of DIY)
- Optional: zipper foot, pressing cloth, lint roller (black fabric = lint magnet)
Design Planning: Make It Obviously Mickey and Minnie
The easiest way to make these instantly recognizable is to lean into iconic shapes and colors. Mickey’s silhouette is
three circles. Minnie is Mickey… plus a bow (and usually polka dots, because Minnie is extra and we love that for her).
Color Palette Ideas
- Mickey classic: black + red + yellow accents
- Minnie classic: black + red with white polka dots + bow detail
- Modern neutral: black silhouette on linen/cream, bow in muted blush or tan
- Kid-room pop: bright primary colors, glitter vinyl accents (tastefully… or not)
Size and Layout Tips
For a standard 18"x18" cover, a character silhouette around 9–12 inches wide usually feels balanced. Keep it
centered, or offset it slightly for a boutique look. If you’re adding Minnie’s bow, place it a little above and to one
side of the head circle so it looks intentionalnot like the ears grew a hat overnight.
Step 1: Prewash, Press, and Prep (Yes, Even If You’re Impatient)
Prewashing prevents future shrink surprises that can warp your design after the first wash. Pressing makes your fabric
behave like it’s had a good night’s sleep. If you’re decorating a pre-made cover, still wash and press it firstfactory
sizing can mess with adhesives and paint.
- Wash and dry fabric (or covers) according to their care label.
- Press flatespecially the area where the design will go.
- If painting, slip cardboard inside the cover so paint doesn’t bleed through to the back.
Step 2: Sew the Pillow Cover Base (Envelope Back Method)
Envelope-back covers are beginner-friendly and forgiving. They’re also secretly the fastest way to look like someone
who “just whips things up” (even if you watched three tutorials and took a snack break).
Quick Cutting Guide (Fits Most Square Pillow Forms)
You want the finished cover to fit snugly. Many DIYers cut pieces close to pillow form size, then use seam allowance to
create a neat fit. Here are two reliable approaches:
-
One-piece “wrap” method: cut one rectangle and fold to create the envelope overlap.
Example for an 18"x18" form: cut about 18.5" x 42" (this creates overlap on the back). -
Three-piece method: cut 1 front panel + 2 back panels that overlap in the center.
This method is great if you want cleaner pattern matching on the back.
Envelope Back (One-Piece Wrap) Steps
-
Cut: For an 18"x18" pillow form, start with a rectangle around 18.5" x 42" (adjust for your seam
allowance and desired overlap). -
Hem the short ends: On each short end, fold in 1/2", press, fold again 1/2", press, and stitch. These hems
become the neat edges of the envelope opening. -
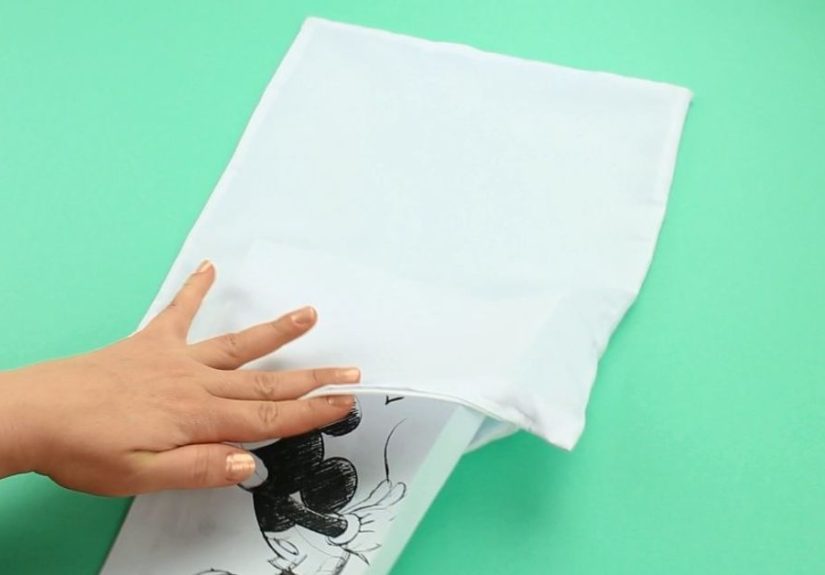
Fold into an envelope: With the right side of the fabric facing down, bring the hemmed ends toward the center so
they overlap by about 3–5 inches. - Pin/clip: Secure layers around the perimeter. Make sure the overlap stays centered.
- Sew: Stitch around all four sides using a consistent seam allowance (commonly 1/2").
- Trim and turn: Clip corners (don’t cut your stitching), turn right-side out, poke corners neatly, and press.
Step 3: Add Mickey and Minnie Three Decoration Methods
Choose the method that matches your tools and patience level. All three can look fantastic; the difference is how much
time you want to spend and how “stitched” you want the final vibe.
Method A: Fabric Appliqué (Classic, Textured, Wash-Friendly)
Appliqué is perfect if you love a cozy, handmade look. The basic idea: fuse the shapes onto the cover, then stitch around
them so they survive real life (couch naps, pillow fights, and the occasional juice box incident).
-
Make a simple template: For Mickey’s head, draw one large circle and two smaller circles for ears (or trace bowls).
Arrange them like the classic silhouette and tape paper together to create one template. - Trace onto fusible web: Trace the template onto the paper side of fusible adhesive. Cut roughly around it.
- Fuse to appliqué fabric: Iron the fusible web onto black fabric (follow your product’s heat settings).
- Cut the shape cleanly: Cut along the traced lines, then peel the paper backing off.
- Position and fuse: Place the shape on the pillow front, measure to center, then press to bond.
- Stitch it down: Use a zigzag or satin stitch around the edges to prevent fraying and lock it in.
Minnie upgrade: Add a bow! Cut it from red fabric (or red-with-white-polka-dots). You can appliqué the bow, or make a
tiny stuffed bow and tack it on for 3D drama. If you want Minnie’s look to read instantly, make the bow a little oversized.
Method B: Iron-On Vinyl (Crisp Silhouettes, Fast Finish)
If you love clean lines (or you’ve got a cutting machine itching for a job), heat transfer vinyl can give you a sharp
Mickey silhouette in minutes. Just be sure to press properly so it doesn’t peel after two washes and a dramatic couch flop.
- Create or select a simple silhouette (keep it bold; tiny details are harder on fabric).
- Mirror your design before cutting HTV (the most common “oops” in the craft universe).
- Weed the excess vinyl, then position the design on the cover.
- Press with an iron or heat press using firm, even pressure (follow the vinyl’s temperature/time).
- Let it cool as directed, then peel the carrier sheet and re-press briefly to seal.
Style idea: Do Mickey in matte black HTV and Minnie’s bow in glitter red HTV. It’s a tiny sparkle moment that feels
intentionallike earrings for your pillow.
Method C: Fabric Paint + Stencil (No-Sew Decorating)
Painting works especially well if you’re starting with store-bought covers. The key is preventing bleed-through and
using less paint than you think you need. Paint is like garlic: a little is great, too much is a personality.
- Insert cardboard inside the cover to block paint from transferring to the back.
- Tape your stencil in place (or use a light adhesive spray made for stencils).
- Use a pouncing motion with a stencil brush or spongedon’t drag paint under the edges.
- Build color in thin layers until opaque. Let dry between layers if needed.
- Heat-set if your paint instructions recommend it, then cure fully before washing.
Make It “Minnie” and “Mickey” Without Overcomplicating It
The charm is in the cues. Here are a few detail ideas that don’t require an art degree or an emotional support glue gun.
Easy Mickey Details
- Buttons: add two yellow circles near the bottom for that classic outfit nod
- Color blocking: black top + red bottom panels gives a bold, graphic feel
- Minimalist: just the head silhouette on a neutral background looks modern
Easy Minnie Details
- Bow: the “Minnie signal” visible from across the room
- Polka dots: use dotted fabric, or paint dots with a round sponge
- Lashes (optional): three tiny stitches or paint flicks can suggest Minnie without turning into a cartoon face
Care, Durability, and Kid-Proofing
These covers are meant to be used, not placed behind velvet ropes. A few practical choices can help them survive real
households where pillows double as forts, trampolines, and emotional support objects.
- Prewash fabric: prevents later shrinkage that can wrinkle appliqué or vinyl.
- Stitch appliqué edges: fusible web alone can lift over time; stitching makes it last.
- Choose durable fabric: canvas/duck cloth holds up better than thin quilting cotton.
- Wash inside out: protects vinyl and paint.
- Avoid high heat drying: air dry or low heat can extend life of HTV and paint.
Troubleshooting (Because Crafting Loves Plot Twists)
My appliqué edges are fraying.
Switch to a zigzag or satin stitch around the edge, and shorten your stitch length. If you already stitched with a
straight stitch, a tight zigzag over the edge can still help.
My vinyl is peeling at the corners.
You may need more pressure, slightly more time, or a cleaner fabric surface. Re-press with a pressing cloth and firm
pressure, and avoid moving the iron around like you’re skating.
My paint bled under the stencil.
Use less paint and pounce vertically. Secure the stencil better (tape or stencil adhesive), and consider thicker fabric.
A little bleed can sometimes be “saved” by outlining with a small brushlike eyeliner for your pillow.
My cover doesn’t fit right.
Pillow covers should be snug. If it’s too loose, reduce seam allowance slightly next time or use a slightly larger pillow
form. If it’s too tight, increase seam allowance or add a small zipper panel.
Cost and Time: What to Expect
- Time: 45–90 minutes per cover (faster if you batch cut and decorate assembly-line style)
- Cost: often $8–$25 per cover depending on fabric choice and whether you already own supplies
- Skill level: beginner to intermediate (appliqué satin stitching is the “level up” move)
Real-World “Experience” Notes: What Usually Happens the First Time
Most people go into this project thinking, “It’s just a pillow coverhow hard can it be?” and then discover that fabric,
much like toddlers, has moods. The most common first-time surprise is how much pressing matters. Skipping the iron seems
harmless until your silhouette goes on slightly crooked, and suddenly Mickey looks like he’s leaning into a strong breeze.
A quick centerline crease (fold and press lightly) can save you from the “why is it off by half an inch?” spiral.
The second thing crafters notice is that black fabric attracts lint with the enthusiasm of a golden retriever greeting a
guest. You’ll finish a gorgeous Mickey appliqué, step back proudly, and then notice a constellation of fuzz that wasn’t
there two seconds ago. Keep a lint roller nearby and consider trimming threads as you go. If you’re using canvas or duck
cloth, the lint situation is usually calmerbut quilting cotton and fleece can be dramatic.
Appliqué beginners often underestimate edge stitching. Fusible web feels secure at first, and it is… until the cover gets
washed a few times, or a kid decides the ears are the perfect handle for swinging the pillow around. Stitching the edges
isn’t just “extra”it’s what turns “cute for a photo” into “still cute after movie night.” A narrow zigzag is a friendly
first step if satin stitch feels intimidating. Your goal is confidence, not perfection.
If you try iron-on vinyl, the big lesson is pressure and patience. People tend to hover the iron like they’re afraid of
commitment, then wonder why corners lift. Firm pressure, correct heat, and not moving the iron around too much makes a
difference. Also: remember that pillows are squishy. Pressing on a soft surface can reduce adhesion. Using a firm base
(like a pressing mat or hard tabletop with protection) helps your vinyl bond like it actually wants to be there.
Paint-and-stencil fans usually learn the “less paint” rule the hard way. The first stencil layer feels too light, so you
add more, and then the paint sneaks under the stencil edges like it’s auditioning for a heist movie. Thin layers win.
Pouncing straight up and down keeps edges crisp, and slipping cardboard inside the cover prevents the “bonus Mickey on
the back” effect. Once you get the hang of it, stenciling becomes weirdly relaxinglike coloring, but with higher stakes.
Finally, the most satisfying experience is the moment someone walks into the room and instantly says, “Mickey and Minnie!”
That’s when you know you nailed the recognizable details: the silhouette proportions, the bow placement, the classic color
cues. And because they’re covers, you can swap them out whenever your style changesmeaning you get the joy of themed décor
without the clutter of permanent character pillows multiplying in your house like cheerful, fabric gremlins.


