Table of Contents >> Show >> Hide
- Why Track Lighting Still Works So Well
- 14 Easy Steps to Plan and Install Track Lighting the Smart Way
- Step 1: Decide whether track lighting is actually the best solution
- Step 2: Figure out whether your project is plug-in or hardwired
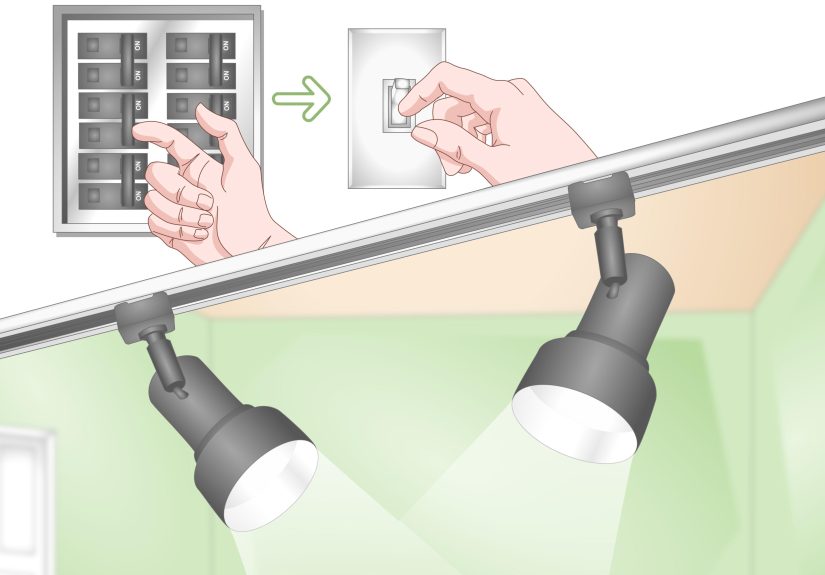
- Step 3: Start with the existing electrical box location
- Step 4: Identify what you want the lights to hit
- Step 5: Measure the placement carefully
- Step 6: Keep safe clearances in mind
- Step 7: Choose the right track type and shape
- Step 8: Pick the right heads for the job
- Step 9: Choose LED bulbs or integrated LED heads
- Step 10: Match the color temperature to the room
- Step 11: Check dimmer compatibility before you buy
- Step 12: Think about code, permits, and professional help early
- Step 13: Let the installer handle the electrical connection and mounting
- Step 14: Aim, test, and fine-tune after installation
- Common Mistakes to Avoid
- Best Rooms for Track Lighting
- Experience Section: What Real-Life Track Lighting Projects Usually Teach You
- Conclusion
Track lighting is the Swiss Army knife of ceiling lights. It can spotlight artwork, brighten a kitchen counter, rescue a gloomy hallway, and make your living room feel less like a cave with a couch. The reason people love it is simple: it is flexible. You can move the heads, change the beam direction, and usually swap bulbs or styles without redoing the whole ceiling. That said, hardwired track lighting is still electrical work, and electricity is a terrible lab partner if you are guessing.
So this guide takes the smart route. Instead of pretending everyone should grab a screwdriver and start flirting with a ceiling box, these 14 steps walk you through how to plan, choose, position, and finish a track lighting project the right way. Think of it as the “look organized, stay safe, avoid regret” version of installation. Your ceiling deserves ambition, but not chaos.
Why Track Lighting Still Works So Well
Track lighting remains popular because it handles task lighting and accent lighting beautifully. A single system can throw focused light on a countertop, wash light across a wall, or highlight shelves, artwork, and architectural details. It is especially useful in rooms where one lonely center fixture is trying, and failing, to do the job of three lights. In other words, track lighting is a practical upgrade, not just a style move.
14 Easy Steps to Plan and Install Track Lighting the Smart Way
Step 1: Decide whether track lighting is actually the best solution
Before buying anything, ask what the room needs. Do you want bright task lighting over a kitchen work zone? Do you want to aim light at art, bookshelves, or a dining wall? Do you want to brighten a small room without adding several fixtures? Track lighting shines when you need adjustable, directional light. If you need broad, even whole-room illumination, a standard ceiling fixture or layered lighting plan may work better.
Step 2: Figure out whether your project is plug-in or hardwired
This is the fork in the road. Some track systems plug into an outlet, while most permanent residential systems are hardwired to an existing ceiling-mounted electrical box. If your plan involves opening a ceiling box, changing wiring, or dealing with permits, that is the moment to bring in a licensed electrician or a qualified adult who knows local code. This is not the place for confidence built entirely on watching one video and saying, “Yeah, I get the vibe.”
Step 3: Start with the existing electrical box location
The electrical box usually decides more than your design mood board does. Many track lighting layouts are planned around an existing, switch-controlled ceiling box because that makes the project simpler and cleaner. If the box is off-center, you may need a floating design, a feed kit, or a different fixture layout to make the final look intentional instead of “the light landed wherever destiny put it.”
Step 4: Identify what you want the lights to hit
Track lighting works best when every head has a job. Aim one at art, one at open shelving, one toward a reading chair, or several toward work areas in a kitchen. Good track lighting is not random. It should feel deliberate. Make a list of the surfaces or zones you want illuminated before you ever choose the track length.
Step 5: Measure the placement carefully
Placement matters more than people expect. In many room layouts, guides suggest positioning track lighting roughly 18 to 24 inches from the wall or the object you want to light. That helps you avoid awkward shadows and overly harsh hotspots. Measure from both ends so the track runs straight and parallel. Your tape measure is doing emotional labor here. Respect it.
Step 6: Keep safe clearances in mind
Clearances are not decorative suggestions. Manufacturer instructions commonly warn against placing track fixtures too close to curtains or similar combustible materials. A good rule is to keep at least 6 inches of separation from drapes and other flammable materials. Many track system instructions also specify that the system should not be installed lower than 5 feet above the floor. If your room has tricky ceiling lines, tall shelving, or soft fabric nearby, double-check every clearance before installation day.
Step 7: Choose the right track type and shape
Track lighting comes in straight, curved, suspended, and connector-based configurations. Straight runs look clean and modern in kitchens, hallways, and offices. Curved systems can soften the look in living spaces and help you reach multiple focal points from one feed point. Connector pieces make it possible to extend coverage in longer rooms or unusual layouts. The trick is choosing the shape that serves the room instead of turning the ceiling into a roller coaster.
Step 8: Pick the right heads for the job
Not all track heads behave the same way. Some work like spotlights for artwork and architectural details. Others offer a wider spread that is better for walls, counters, or general brightness. If you want layered light, mix head styles or beam spreads across the same track system. This is how you stop a room from looking like either a museum exhibit or a suspiciously dramatic interrogation set.
Step 9: Choose LED bulbs or integrated LED heads
LED is usually the smartest move for modern track lighting. LEDs are energy efficient, long-lasting, and available in dimmable options, smart-compatible versions, and a range of color temperatures. They also work well in fixtures where you want reliable light without replacing bulbs every time your ladder starts judging you. For hard-to-reach ceilings or tracks installed over islands and stair areas, LED convenience is not a luxury. It is self-respect.
Step 10: Match the color temperature to the room
Color temperature changes the mood more than most people realize. Warmer light tends to feel softer and more relaxing, which works well in living rooms and bedrooms. Cooler, whiter light is often better for reading, task zones, and work surfaces. A kitchen track system can look amazing with crisp, clean illumination, while an art wall may benefit from a warmer tone that feels less clinical. The goal is to make the room look intentional, not like three bulbs from different planets were invited to the same party.
Step 11: Check dimmer compatibility before you buy
If you want flexible mood control, check that the track heads, bulbs, and dimmer all speak the same language. Not every LED is dimmable, and not every dimmer plays nicely with every LED product. A little compatibility homework now can save you from later issues like flickering, humming, or that annoying moment when “romantic glow” turns into “haunted pantry.”
Step 12: Think about code, permits, and professional help early
Electrical work rules vary by location, and some projects require permits or inspections. If the system will be hardwired, fed from an existing junction box, or added to a more complex ceiling layout, get code questions sorted out before you shop emotionally. This is also the stage to decide whether a licensed electrician should handle the install. Spoiler: if you are unsure, yes, that is usually the right call.
Step 13: Let the installer handle the electrical connection and mounting
Once your layout, system type, head style, and bulb plan are set, the actual hardwired mounting and electrical connection should be handled by a qualified adult or licensed electrician. That includes working with the ceiling box, track feed, grounding, mounting hardware, and any system-specific polarity requirements. This is the least glamorous step, but also the one that keeps the project from becoming an expensive story that starts with, “Well, it sparked a little at first.”
Step 14: Aim, test, and fine-tune after installation
After the system is safely installed, take time to adjust each head. Turn lights toward artwork, corners, shelves, counters, or seating areas and walk around the room. Watch for glare, dark spots, and weird shadows. Small angle changes can make a big difference. This final step is where track lighting earns its reputation: you are not stuck with one fixed beam. You can tweak the room until it finally feels bright, balanced, and a little more expensive than it actually was.
Common Mistakes to Avoid
The biggest mistake is choosing track lighting before knowing the purpose of the light. The second is ignoring clearances, dimmer compatibility, and ceiling box location. Another common issue is using track lighting as the only light source in a room that really needs layered lighting. Track heads can do a lot, but they are not magicians. If a room needs ambient light, task light, and accent light, plan for all three.
People also underestimate visual balance. A track that is too short can look stingy. A track that is too long can feel like the ceiling is wearing a seatbelt. Good proportions matter. So does choosing the right finish. Matte black feels crisp and modern. Brushed nickel looks classic and practical. White blends quietly into ceilings. Pick the finish that supports the room instead of fighting with it.
Best Rooms for Track Lighting
Track lighting performs especially well in kitchens, hallways, home offices, living rooms, and rooms with art or display shelving. In kitchens, it can brighten prep zones and visually stretch narrow layouts. In living rooms, it can spotlight bookshelves or wall art while adding controlled ambient light. In offices, it can direct light exactly where reading and screen work happen. It is also a smart choice in older homes where you want more flexibility without opening up the ceiling for a full recessed lighting project.
Experience Section: What Real-Life Track Lighting Projects Usually Teach You
Here is the funny thing about track lighting: before installation, people talk about it like a fixture. After installation, they talk about it like a strategy. That is because the real experience of living with track lighting is less about the metal rail and more about what the room suddenly becomes. A dim kitchen starts looking more usable. A dark hallway feels finished. A once-ignored gallery wall begins acting like it always knew it was the star.
One of the most common experiences homeowners describe is surprise at how much better the room feels when light is aimed instead of simply dropped from the ceiling. Standard fixtures often spill light everywhere and nowhere at the same time. Track lighting feels more intentional. People notice that corners are less gloomy, counters are more functional, and rooms that looked flat begin showing texture, color, and depth.
Another real-world lesson is that planning matters more than product hype. A stunning track system will still disappoint if the heads are aimed poorly or the color temperature is wrong for the room. On the other hand, a simple midrange system can look fantastic when the placement is thoughtful, the beam spread makes sense, and the bulbs match the mood of the space. In plain English: a smart plan beats a fancy box.
There is also the dimmer revelation. Many people do not think they need dimming until they have it. Then suddenly they are adjusting brightness for dinner, movie night, morning cleanup, reading, or working from home and acting like they invented civilization. Dimming makes track lighting feel less like a utility upgrade and more like a comfort upgrade.
People also learn that flexibility is the real long-term win. Furniture changes. Artwork moves. Kids grow up. A reading corner becomes a work zone. Shelves become display walls. Track lighting adapts. That is why it continues to make sense in homes that change over time. It lets your lighting move with your life instead of forcing your room to stay frozen in one layout forever.
And finally, homeowners often say the same thing after the project is done: they wish they had planned the lighting sooner. Not because it is trendy, but because good lighting changes how a room works every single day. That is the quiet magic of track lighting. It is not shouting for attention. It is just up there, making everything look more useful, more polished, and significantly less like you are searching for your keys in a cave.
Conclusion
If you want an easier way to upgrade a room, track lighting is one of the smartest options available. It offers flexibility, focused illumination, and strong design value without requiring an army of fixtures. The key is to approach installation with a plan: know your room, respect clearances, choose the right heads and LEDs, confirm dimmer compatibility, and bring in a qualified professional when the project involves hardwired electrical work. Do that, and your track lighting will not just brighten the room. It will make the whole space behave better.


