Table of Contents >> Show >> Hide
If you’ve ever stared at your living room and thought, “This space needs help… but my bank account says no,” this easy wicker basket coffee table DIY is about to be your new best friend. It’s budget-friendly, fast, and looks like something you’d casually say you “picked up at a little boutique.” No one has to know your secret weapon was a basket and some glue.
Inspired by popular Hometalk-style projects and trending Ikea and Target basket hacks, this project turns a simple wicker or rattan basket into a stylish coffee table with hidden storage. You get texture, warmth, and a cozy boho vibe without splurging on a pricey designer piece.
Why a Wicker Basket Coffee Table Just Works
Before we dive into the how-to, let’s talk about why the wicker basket coffee table has become such a DIY star.
1. It’s incredibly budget-friendly
Ready-made rattan or wicker coffee tables can be surprisingly expensive. DIYers have shown that you can create a similar look using a large basket and a simple tabletop for a fraction of the cost. In many tutorials, the full project comes in under $100, sometimes even under $60 depending on where you shop and what you already own.
2. You get built-in storage
Most large wicker baskets are hollow and roomy, which makes this project perfect for small spaces. Flip the basket upside down and you instantly have a base. Use a removable tray or round top, and you can still store blankets, toys, or extra pillows inside. It’s form, function, and clutter control in one cute piece.
3. It adds texture and warmth
Wicker and rattan automatically bring in warmth and natural texture. Whether your home leans farmhouse, boho, coastal, or modern, a woven coffee table can soften sharp lines and make the room feel more inviting. It’s like adding a little vacation vibe right in your living room.
4. It’s renter- and beginner-friendly
You don’t need power tools, a workshop, or a carpentry diploma to pull this off. Most versions use basic supplies: a sturdy basket, a round wood top or tray, adhesive or screws, and optional paint or stain. If you can handle a glue gun and a measuring tape, you can handle this project.
Supplies You’ll Need
Here’s a basic supply list you can tweak based on your style and what you already have:
- 1 large wicker or rattan basket (sturdy, with a flat or even rim)
- 1 round tabletop:
- Pre-cut wood round from the hardware store, or
- A large serving tray, or
- A stained or painted plywood circle you cut yourself
- Strong construction adhesive or epoxy (designed for wood + wicker)
- Optional: small L-brackets and screws for extra reinforcement
- Sandpaper (medium and fine grit)
- Paint, stain, or clear finish for the top
- Clear protective topcoat (polyurethane or water-based polycrylic)
- Optional: 3–4 furniture legs or casters if you want extra height
- Optional: felt pads to protect your floors
- Measuring tape and pencil
- Clamps or heavy books to hold the top in place while the glue dries
Step-by-Step: Easy Wicker Basket Coffee Table DIY
Step 1: Choose the right basket
Look for a basket that is:
- Wide enough to function as a coffee table (typically 20–30 inches in diameter for a living room).
- Sturdy and rigid, not floppy. Give it a gentle shake in the store. If it wobble-dances, keep looking.
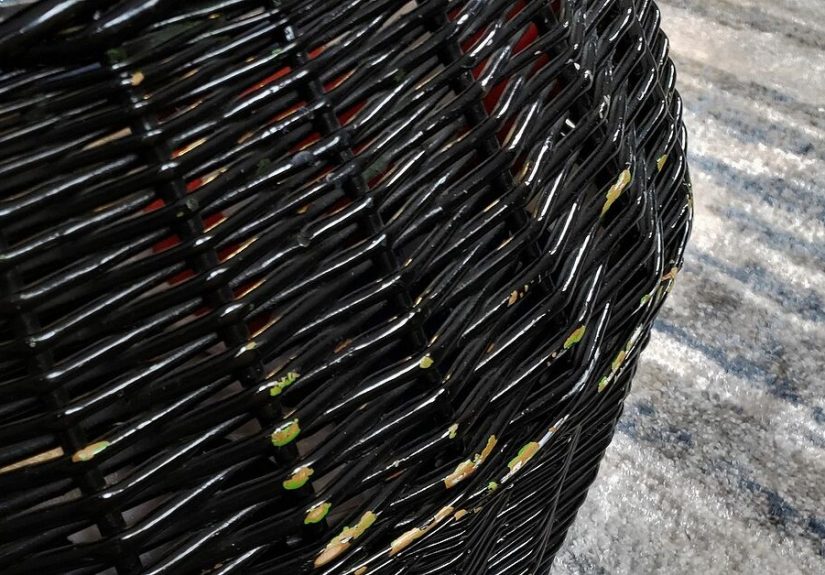
- Free of major cracks or broken weaves. Minor imperfections are fine and add character, but structural damage is not your friend.
Round baskets tend to look most like high-end rattan coffee tables, but large square or rectangular baskets can also work if you prefer a more modern shape.
Step 2: Prep the basket base
Once you’ve found “the one,” it’s time to prep:
- Wipe down the basket with a damp cloth to remove dust.
- If any strands are loose, tuck them in or secure them with a dab of clear-drying glue.
- Decide which end will be the top. Most DIYers flip the basket upside down, using the bottom as the part that sits on the floor and the open side as the top to attach the wood round.
If you want hidden storage, you can keep the basket right-side up and create a removable lid-like top instead. In that case, you’ll want a tray or top that can easily lift off so you can access everything inside.
Step 3: Prep and finish the tabletop
The tabletop is where you can really customize the look:
- Sand your wood round until it feels smooth, starting with medium grit and finishing with fine grit.
- Stain for a warm, natural wood look, or paint for a modern, colorful vibe.
- Once dry, seal with a clear topcoat to protect against water rings, coffee spills, and late-night snack crumbs.
If you’re using a tray instead of a solid wood round, you may not need to sand or finish it at alljust make sure it’s sturdy and flat. A tray with handles can double as serving ware, which is a fun bonus.
Step 4: Attach the tabletop to the basket
Now for the magic moment: turning a basket into a table.
- Center the tabletop over the basket and mark its position lightly with a pencil.
- Apply a generous bead of construction adhesive or epoxy along the rim of the basket where the top will sit.
- Set the tabletop back in place, lining it up with your marks.
- Press down firmly, then add weightheavy books, paint cans, or clampsto keep everything snug while the adhesive cures.
If you want extra strengthespecially if kids, pets, or very enthusiastic snackers will be involvedyou can add small L-brackets inside the basket rim, screwing them into the underside of the wood. This is optional, but useful for tables that will see daily use.
Step 5: Adjust the height (optional)
If your basket is shorter than a typical coffee table, you have a few options:
- Add short furniture legs to the underside of the basket.
- Attach casters for a rolling coffee table that’s easy to move.
- Layer a rug or use thicker sofa cushions so the height feels more balanced.
Most living room coffee tables sit around the same height as your sofa seat (or slightly lower), so aim for that range if you want a traditional look.
Step 6: Style your new wicker basket coffee table
This is where it goes from “Hey, cool DIY” to “Wait… you made that?”
- Add a tray on top for stability and organizationperfect for candles, remotes, and drinks.
- Layer books, a small plant, and a decorative bowl or bead garland.
- Pair the table with soft throws and textured pillows to echo the woven look.
Because the wicker basket table has such a strong visual texture, you don’t need to overdecorate. A few curated pieces will do the trick.
Design Ideas and Easy Variations
Once you’ve built one basket coffee table, it’s dangerously easy to want more. Here are some creative twists:
Make a matching side table set
Use two smaller baskets to create side tables that coordinate with your main coffee table. You can keep the same finish on the wood tops or paint them in a contrasting color for a playful, layered look.
Try a rope-wrapped look
If your basket is plastic or not quite your style, you can wrap it in jute or cotton rope first. Many DIY rope basket projects use hot glue and inexpensive rope to transform basic bins into high-end-looking woven pieces. This can be a great way to repurpose a laundry basket or old bin that has the right size but the wrong finish.
Experiment with color
You can keep the wicker natural for a coastal or boho feel, or you can lightly whitewash or paint the basket for a modern or farmhouse twist. A soft white or greige paint can tone down orange-toned wicker, while a black base with a natural wood top can look sleek and contemporary.
Create an outdoor-ready version
Using a weather-resistant basket and exterior-grade finish on the wood top, you can create a patio coffee table. Just be sure your materials can handle moisture and sunlight, and store the piece indoors or under cover during harsh weather.
Safety, Durability, and Maintenance Tips
A cute coffee table is great, but a sturdy one is even better. Keep these tips in mind:
- Weight limits: Your wicker basket coffee table is made for drinks, books, and decornot for standing or sitting. Avoid treating it like a step stool.
- Clean gently: Dust the basket with a soft brush or vacuum using a brush attachment. Wipe the tabletop with a damp cloth and dry it afterward.
- Protect from spills: A good clear coat on the tabletop will make cleanup easier. Use coasters if you’re placing hot or cold drinks directly on wood.
- Keep away from direct heat: Don’t place the table too close to fireplaces, heaters, or candles that drip; wicker can dry out or scorch.
With basic care, your DIY wicker basket table can last for years and still look charmingly intentionalnot like a “temporary” project you meant to replace someday.
Real-Life Experiences and Lessons Learned from Wicker Basket Coffee Table DIYs
After browsing through countless Hometalk-style projects, Ikea basket hacks, and real-life DIY stories, a few common themes and “wish I had known” moments pop up. Learning from other people’s experiments (and mishaps) can save you time, money, and maybe a few frustrated sighs.
Lesson 1: Measure twice, buy once
One of the most frequent comments DIYers share is that they underestimated or overestimated the size of the basket. A basket that looks huge in the store can suddenly feel tiny once it’s sitting in front of a full-sized sofa. Take a minute to measure the space between your couch and TV or fireplace, then tape out a circle or rectangle on the floor at home. That quick step can help you decide whether you need a 20-inch basket, a 24-inch one, or something even larger.
DIYers also point out that height matters as much as width. If your basket is too low, it can look more like a decorative ottoman than a coffee table. Some people fixed this by adding legs or stacking two baskets, but planning height ahead of time is easier (and cheaper) than retrofitting later.
Lesson 2: Not all baskets are created equal
Another common experience: the “cute but flimsy” basket. It’s tempting to grab the least expensive option and run to the checkout, but a thin, loosely woven basket may sag or warp once a tabletop is glued on. DIYers who are happiest with their project usually choose a sturdier basket with a thicker weave and a stronger frame. It might cost a little more up front, but it feels more like real furniture and less like a prop.
People who used Ikea’s structured baskets, high-quality rattan hampers, or solid woven storage baskets often report that their finished piece looks surprisingly high-endlike something from a catalog rather than a craft corner.
Lesson 3: Adhesive choice makes a big difference
Several makers have shared that regular hot glue alone didn’t hold up over time for a coffee table that’s used daily. It’s great for positioning or light-duty projects, but if you expect the table to hold drinks, books, and the occasional laptop, a stronger construction adhesive or epoxy is the way to go.
Some DIYers combine the two: they use hot glue to “tack” the tabletop into place, then run a bead of heavier adhesive around the joint for long-term strength. That combo offers the instant gratification of hot glue with the durability of a serious bond.
Lesson 4: Trays are your secret weapon
One of the smartest hacks people share is using a tray instead of permanently attaching the top. A large round tray placed on top of the basket still gives you a flat, stable surface but remains removable. This way, you can lift the tray, toss in blankets or toys, and pop it back on in seconds. Parents and pet owners especially love this featureit’s basically a disguise for storage chaos.
Tray tops also help protect the table. If you decide later that you want a different color or style, it’s much easier to swap a tray than to rebuild the whole piece.
Lesson 5: Styling makes the table look “finished”
Many people say their basket coffee table didn’t fully come to life until they styled it. A bare round top can look a little plain, but add a stack of books, a candle, and a plant, and suddenly it feels intentional and polished. The trick is to balance height and texturemix something tall (like a vase), something flat (like a book), and something soft or organic (like a small plant or bead garland).
Real-life photos from DIYers show that the same wicker basket coffee table can lean coastal with blue accents and seashells, farmhouse with white ceramics and greenery, or boho with patterned textiles and warm-toned decor. The table becomes a chameleon that shifts with your style.
Lesson 6: It’s an easy “gateway” DIY
A lot of people mention that this simple wicker basket coffee table DIY was one of the first furniture projects they ever triedand it gave them the confidence to tackle more. Once you successfully build something you use every day, you start seeing potential everywhere: side tables from baskets, nightstands from crates, and custom storage from rope-wrapped bins.
In other words, don’t be surprised if this project sparks a whole season of home makeovers. And honestly? That’s part of the fun. You’re not just making a coffee table; you’re proving to yourself that you can shape your space, one clever DIY at a time.
Wrapping It Up
Turning a simple wicker basket into a coffee table is one of those rare DIY projects that checks every box: affordable, stylish, functional, and beginner-friendly. With a sturdy basket, a round top, strong adhesive, and a bit of creativity, you can build a piece that looks like it came from a boutiquenot the clearance bin.
Whether you’re decorating your first apartment, refreshing a tired living room, or just love the cozy, textured look of woven furniture, this wicker basket coffee table DIY inspired by Hometalk-style projects is an easy win. And if anyone asks where you bought it, you can just smile and say, “Oh this? It’s a one-of-a-kind piece.”


