Table of Contents >> Show >> Hide
- Step 0: Decide What You’re Applying For (Book, Card, or Both)
- How to Apply for a New Passport (Adults 16+ Applying in Person)
- 1) Fill out the right form (and don’t sign it yet)
- 2) Gather proof of U.S. citizenship
- 3) Bring acceptable photo ID (and a photocopy)
- 4) Get a passport photo that follows the rules (no “creative” lighting)
- 5) Find a passport acceptance facility and schedule an appointment
- 6) Pay the fees (yes, there are usually two payments)
- Common fee examples (Adults 16+ applying in person)
- 7) Submit your application in person
- 8) Track your application status
- How Long It Takes (And Why “Mail Time” Matters)
- Renewals: If You Already Have a Passport, You May Not Need an Appointment
- How to Apply for a Child’s Passport (Under 16)
- Need It Faster? Expedited Service and Urgent Travel
- Common Mistakes That Delay Passport Applications
- One-Page Checklist: What to Bring to a First-Time Appointment
- Real-World Experiences: What It’s Actually Like (The “I Wish Someone Told Me” Section)
- Experience #1: The first-time adult applicant who thought “I’m organized” (until the photocopies)
- Experience #2: The family passport appointment (feat. a wiggly toddler and two stressed parents)
- Experience #3: The online renewal that felt easyuntil the “six-week travel” reality check
- Experience #4: The “urgent travel” scramble (and the lesson it teaches)
- Wrap-Up
A passport is basically your “Yes, I’m a real human and I belong to this country” bookexcept it’s
far more useful than your gym membership. Whether you’re planning an international trip, need a
REAL ID-friendly backup, or you’re simply tired of being the only person in the group chat who
can’t say “I’m abroad” unironically, this guide walks you through how to apply for a U.S. passport
the right waywithout getting tripped up by tiny details like signing the form too early
(yes, that’s a real thing).
This article covers first-time adult applications, renewals, kids’ passports, fees, photos, timing,
and the most common mistakes that cause delays. Think of it as a passport checklist with personality.
Step 0: Decide What You’re Applying For (Book, Card, or Both)
Passport book
The classic passport book is what you need for international air travel and pretty much all
international trips. If you’re flying overseas, the book is the safe choice.
Passport card
The passport card is more limited, but it’s handy if you’re traveling by land or sea to certain
nearby destinations (like Canada, Mexico, the Caribbean, and Bermuda). It’s also wallet-friendly and
works as a federally recognized ID in many situations.
Both
If you’re the “I like options” type, you can apply for both at the same time. It costs more upfront,
but you won’t have to re-apply later just to add the card.
Quick reality check: If you’re not sure, get the book. It covers more travel scenarios, and it
saves you from learning the hard way that the card can’t do what the book can.
How to Apply for a New Passport (Adults 16+ Applying in Person)
If you’re applying for your first U.S. passport (or you don’t qualify to renew), you’ll usually apply
in person at a passport acceptance facilityoften a post office, clerk of court, or local government office.
1) Fill out the right form (and don’t sign it yet)
Most first-time adult applicants use Form DS-11. You can complete it ahead of time, print it,
and bring it with you. The key detail: do not sign DS-11 until you’re instructed to do so at your appointment.
The acceptance agent has to witness your signature.
Example: If you excitedly sign it at your kitchen table like you’re autographing a contract with your future-self,
you may have to start over with a fresh form. The passport office is not impressed by enthusiasm.
2) Gather proof of U.S. citizenship
You’ll need to submit evidence of citizenship. Common examples include:
- a certified U.S. birth certificate (not a photocopy),
- a previously issued U.S. passport (in some situations),
- a Certificate of Naturalization or Certificate of Citizenship.
Bring the original document (or a certified copy, depending on the document type) and also bring
photocopies as required. If you’re missing your evidence, you may be able to request a file search in specific situations,
but that can add time and costso it’s better to gather your documents up front.
3) Bring acceptable photo ID (and a photocopy)
You’ll present a valid, government-issued photo ID. Many applicants use a driver’s license.
You’ll also typically provide a photocopy of the front (and sometimes back) of the ID on standard letter-size paper.
Pro tip: If you’re applying in a different state than your ID was issued, some facilities may ask for a second form of ID.
It’s not personal; it’s paperwork’s love language.
4) Get a passport photo that follows the rules (no “creative” lighting)
Passport photos are a special kind of humbling. The goal isn’t glamourit’s compliance.
Most U.S. passport photos must be:
- 2 x 2 inches in size,
- taken recently, with a plain white or off-white background,
- sharp, properly exposed, and not filtered,
- with a neutral expression or natural smile,
- without eyeglasses (in most cases).
Save yourself stress: use a reputable photo service (many pharmacies, shipping stores, and some post offices offer passport photos).
If you take your own, follow the official requirements carefullybecause “it looks fine on my phone” is not the same as “it passes review.”
5) Find a passport acceptance facility and schedule an appointment
Many locations accept passport applications, including participating U.S. post offices and local government offices.
Some take walk-ins; many require appointments. If you use a post office, you’ll typically schedule through their appointment system.
Bring your completed DS-11 (unsigned), your documents, photocopies, photo, and payment.
Think “organized folder,” not “crumpled papers in a tote bag.”
6) Pay the fees (yes, there are usually two payments)
Here’s the part that surprises people: if you apply in person using DS-11, you typically pay:
(1) an application fee to the U.S. Department of State, and
(2) an execution/acceptance fee to the facility that processes your application.
Fees can change, so always check current amounts before you go. As of the most recent official fee schedule, common totals look like this:
Common fee examples (Adults 16+ applying in person)
| What you’re applying for | Application fee (to State Dept.) | Execution fee (to facility) | Typical total |
|---|---|---|---|
| Passport book | $130 | $35 | $165 |
| Passport card | $30 | $35 | $65 |
| Passport book + card | $160 | $35 | $195 |
Optional add-ons may include expedited processing and faster return delivery for passport books.
If you’re in a hurry, budget accordingly.
7) Submit your application in person
At the facility, you’ll swear that your application is true, sign the DS-11 in front of the acceptance agent,
and submit everything. They’ll review your packet and send it for processing.
8) Track your application status
After you apply, you can track your status online. Many applicants also receive email updates once the application moves into processing.
If you’re traveling soon, tracking helps you spot issues early instead of discovering them at the worst possible time.
How Long It Takes (And Why “Mail Time” Matters)
Processing times vary depending on demand, but the official estimates are typically measured in weeksnot days.
Importantly, the processing clock usually starts when your application reaches a passport agency/center, not the day you drop it off.
Mailing time can add additional weeks total (there and back).
Realistic planning advice: If you know you’ll travel in the next few months, apply early.
Many countries also prefer that your passport be valid for several months beyond your travel dates, so last-minute renewals can snowball into bigger problems.
Renewals: If You Already Have a Passport, You May Not Need an Appointment
Renewals can be simpler than first-time applicationsif you qualify. Many eligible adults can renew
either online (routine service only) or by mail using Form DS-82.
Renew online (if you meet the requirements)
Online renewal is only available through the official government site. Generally, eligibility includes factors like:
- you’re age 25 or older,
- the passport you’re renewing was valid for 10 years,
- it’s expiring within a year or expired less than five years ago,
- you’re not changing key personal information (like name or sex),
- you’re not traveling internationally soon (online renewal is typically routine service only).
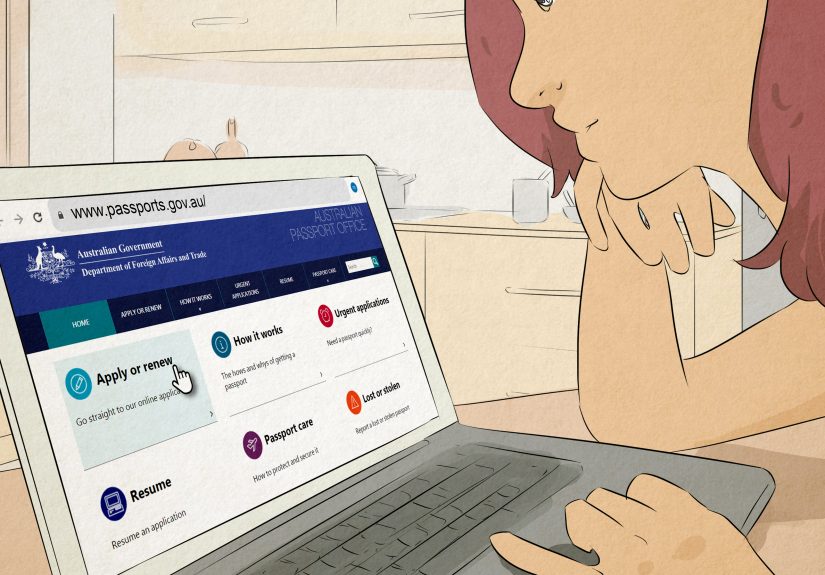
If you qualify, online renewal can feel like upgrading your life from “printer drama” to “tap, upload, pay, done.”
You’ll need a digital passport photo and a payment method.
Renew by mail (DS-82)
Mail renewal is a classic option for eligible applicants. You’ll send DS-82 with your most recent passport,
a new passport photo, and the fee. One nice detail: there’s no execution/acceptance fee for DS-82,
since you’re not applying in person.
Not sure if you can renew? Use the official form finder or renewal guidance. If you’re not eligible to renew,
you’ll likely need DS-11 and an in-person visit again.
How to Apply for a Child’s Passport (Under 16)
Kids’ passports come with extra safeguardsand extra steps. Children under 16 generally must apply in person using DS-11.
In most cases, both parents or legal guardians must appear with the child to give consent.
What you’ll typically need
- DS-11 (completed, printed, unsigned until instructed),
- evidence of the child’s U.S. citizenship,
- evidence of your relationship to the child (often a birth certificate listing parents),
- parents’/guardians’ photo IDs plus photocopies,
- a compliant passport photo for the child.
If one parent can’t come
If one parent/guardian can’t appear, you may need a notarized consent form (commonly DS-3053) or documentation showing sole legal authority,
depending on the situation. This is one of the biggest “read the instructions carefully” moments in the entire passport process.
Common fee examples (Children under 16 applying in person)
| What you’re applying for | Application fee (to State Dept.) | Execution fee (to facility) | Typical total |
|---|---|---|---|
| Child passport book | $100 | $35 | $135 |
| Child passport card | $15 | $35 | $50 |
| Child passport book + card | $115 | $35 | $150 |
Child passports have different validity rules than adult passports, so plan aheadespecially if you travel regularly as a family.
Need It Faster? Expedited Service and Urgent Travel
Expedited service
If you’re traveling soon, expedited service can reduce the official processing time (for an additional fee),
though mailing time still matters. This is a good choice when your trip is coming up and you still have a little breathing room.
Urgent travel (appointments required)
If you have urgent international travel in the near term, you may need an appointment at a passport agency or center.
These appointments have restrictions and documentation requirements, and availability can be limitedso don’t assume it’ll be easy to snag one at the last minute.
Common Mistakes That Delay Passport Applications
- Signing DS-11 too early. Wait until the acceptance agent tells you to sign.
- Photo problems. Wrong size, shadows, filters, eyeglasses, or an unacceptable background.
- Missing photocopies. Bring copies of citizenship evidence and ID as required.
- Name mismatches. If your documents don’t match your current name, you may need additional documentation.
- Incorrect payment method. In-person applications often involve two payments with different accepted methods.
- Waiting too long. Processing plus mailing can take longer than people expect.
One-Page Checklist: What to Bring to a First-Time Appointment
- Completed DS-11 (printed, unsigned)
- Evidence of U.S. citizenship (plus photocopy)
- Valid photo ID (plus photocopy)
- One passport photo (2×2 inches)
- Payment for application fee + execution fee (and optional expedited/delivery fees)
- Any additional documents you may need (name change paperwork, parental consent forms for minors, etc.)
Real-World Experiences: What It’s Actually Like (The “I Wish Someone Told Me” Section)
People talk about passport applications like they’re a quick errand. In reality, they’re more like a mini quest:
gather the sacred documents, defeat the photocopy dragon, and arrive at the acceptance facility with your forms
un-signed and your wallet emotionally prepared. Here are a few common real-life scenarios that show what the process
feels like and what tends to go wrongso you can dodge the classic traps.
Experience #1: The first-time adult applicant who thought “I’m organized” (until the photocopies)
A typical first-time applicant shows up to a post office appointment feeling confident: DS-11 printed? Check.
Birth certificate? Check. Passport photo? Check. Then the acceptance agent asks for photocopies of the citizenship
document and the IDand suddenly you’re bargaining with the universe because you brought the originals but not the copies.
Some locations can make copies, some can’t, and even when they can, it may slow everything down or cost extra.
The “organized folder” strategy wins here: originals in one pocket, photocopies in another, and everything laid out
in the same order the checklist uses. The biggest lesson people learn is that passport rules are less about what makes
sense and more about what is verifiable and standardized.
Experience #2: The family passport appointment (feat. a wiggly toddler and two stressed parents)
Parents applying for a child’s passport often assume it’s basically the same as an adult applicationjust smaller.
Then they discover the consent rules: both parents generally need to appear, and the relationship evidence must be clear.
Families who breeze through it usually do two things: (1) they double-check that the child’s citizenship document
also shows the parents (or they bring the additional relationship document), and (2) they plan the photo in advance.
Kids’ passport photos can be surprisingly challengingbecause “neutral expression” is not a popular toddler mood.
Families who succeed often take multiple photo attempts or use a service experienced with children’s photos.
The biggest takeaway: build extra time into the day, bring snacks, and assume someone will need a bathroom break
at the exact moment your name is called.
Experience #3: The online renewal that felt easyuntil the “six-week travel” reality check
Online renewal can be wonderfully straightforward for eligible applicants: upload a digital photo, pay, submit, done.
But many people get tripped up by eligibility rulesespecially travel timing. Some applicants only realize after they start
that online renewal is typically routine service only, and there are restrictions about near-term international travel.
The practical move is to look at your calendar first: if you’re traveling soon, you may need expedited service
and should consider whether online renewal fits your timeline. The people who have the best experience treat the online
process like filing taxes: do it early, while you’re calm, not while you’re panic-refreshing flight prices.
Experience #4: The “urgent travel” scramble (and the lesson it teaches)
The most stressful stories usually start the same way: “My trip is in two weeks and I just realized my passport is expired.”
Urgent travel options exist, but they come with rules, documentation requirements, and limited appointment availability.
The applicants who get through this scenario often have strong proof of travel, carefully follow the appointment instructions,
and stay flexible about where they can go for service. The biggest lesson is painfully simple: don’t wait.
If there’s even a chance you’ll travel internationally this year, check your passport now. The best time to apply is
when it’s boring and you have plenty of time. The worst time to apply is when your suitcase is already on your bed.
If there’s one universal passport truth, it’s this: the process is easiest for people who treat it like a project,
not an errand. Make a checklist, gather documents early, follow the photo rules, and apply well ahead of travel.
Your future selfstanding in an airport with a coffee and zero panicwill be incredibly grateful.
Wrap-Up
Applying for a passport isn’t hard, but it is picky. The winning formula is simple: choose the right passport type,
use the correct form, bring the right documents (plus photocopies), follow the passport photo requirements, and plan for realistic
processing times. Do that, and you’ll be ready to travelwithout starring in your own “passport emergency” story.