Table of Contents >> Show >> Hide
- What Makes a Shed Ramp “Good”?
- Step 1: Plan the Ramp (The Part That Saves You Twice)
- Step 2: Gather Materials and Tools
- Step 3: Build a Stable Base (Don’t Skip This)
- Step 4: Frame the Ramp (Like a Mini Deck)
- Step 5: Set the Ramp Angle and Install Supports
- Step 6: Deck the Ramp (Make It Grippy, Not Slippery)
- Step 7: Add Safety Features (Small Details, Big Payoff)
- Step 8: Weatherproof and Maintain It
- Common Shed Ramp Mistakes (So You Don’t Join the Club)
- FAQ
- DIYer Experiences and Lessons Learned (Extra )
- Conclusion
A shed ramp is one of those “tiny projects” that somehow turns into a daily quality-of-life upgrade. No more deadlifting a lawn mower like you’re auditioning for a strongman competition. No more wheelbarrow stoppies at the threshold. Just a smooth, sturdy path into your shed that works in rain, leaves, and real life.
This guide walks you through planning, framing, decking, and finishing a ramp that’s safe, durable, and sized for what you actually roll in and outmowers, bikes, snow blowers, dollies, and that mystery item you swear you’ll organize “this weekend.”
What Makes a Shed Ramp “Good”?
A ramp can look fine and still be annoying (or dangerous) if it’s too steep, too narrow, too slick, or too wobbly. A good shed ramp checks these boxes:
- Gentle slope (easy to push, easy to pull, easy on your knees)
- Solid framing (built like a small deck, not like a hope and a prayer)
- Non-slip surface (because wet leaves have zero respect)
- Stable base (no sinking, heaving, or shifting every season)
- Durable materials (rated for ground contact where needed)
Step 1: Plan the Ramp (The Part That Saves You Twice)
Measure the Rise
Rise is the vertical distance from the ground where the ramp will start to the shed floor/threshold where the ramp ends. Measure from the ground up to the top of the shed floor at the doorway. If your ground slopes, measure at the spot where your ramp will touch down.
Pick a Slope That Fits Your Body and Your Stuff
Slope is where most ramp regrets are born. A gentler ramp is safer and easier to use, but it needs more length.
- Best all-around: about 1:10 to 1:12 (1 inch of rise for every 10–12 inches of run)
- Short on space: 1:8 can work for light rolling gear, but it feels noticeably steeper
- Accessibility-friendly: 1:12 is a widely used maximum guideline for wheelchair-style access; gentler is even better when possible
Quick math:
Run (inches) = Rise (inches) × chosen ratio
Example: Shed floor is 12 inches high.
At 1:12 → Run = 12 × 12 = 144 inches (12 feet).
At 1:10 → Run = 12 × 10 = 120 inches (10 feet).
Pro tip: If you’ll be pushing a heavy mower up the ramp, err on the gentler side. Your future self will thank you. Your lower back will send a thank-you note too.
Choose a Width
Width depends on what you’re moving:
- Minimum practical: 36 inches
- Comfortable for mowers and wheelbarrows: 42–48 inches
- If you use a cart/dolly often: go wider rather than longer when you can
Decide: Attached Ramp or Freestanding Ramp?
- Attached (ledger board fastened to shed): clean transition at the threshold, very solid when done correctly.
- Freestanding (ramp is its own structure): ideal if you don’t want to penetrate shed framing/siding or if the shed is lightweight.
- Hinged (flip-up section): handy for tight yards and snow, but needs sturdy hardware and careful alignment.
Step 2: Gather Materials and Tools
Materials (Typical Wood Ramp)
- Pressure-treated lumber (ground-contact rated where it touches soil)
- Decking boards (pressure-treated deck boards or composite)
- Exterior-rated fasteners (hot-dip galvanized or approved structural screws)
- Joist hangers (optional but recommended for clean, strong framing)
- Gravel and pavers or concrete blocks (for a stable base)
- Anti-slip add-ons: grit tape, traction strips, outdoor anti-skid coating, or cleats
Tool List
- Tape measure, level (4 ft helps), and a straightedge/chalk line
- Circular saw and/or miter saw
- Drill/driver + bits
- Shovel and rake (for the base)
- Speed square, clamps (nice to have)
- Safety gear: eye protection and hearing protection
Step 3: Build a Stable Base (Don’t Skip This)
The best ramp frame in the world can still fail if it sits on soft soil and starts sinking like a slow-motion elevator.
Simple, Effective Base
- Mark the ramp footprint on the ground.
- Remove sod/organic material (it decomposes and shifts).
- Dig 3–6 inches deep (more if your soil is soft).
- Add compacted gravel.
- Set pavers or concrete blocks where the ramp will land and where intermediate supports will sit.
If you live where frost heave is a thing: A permanent ramp may need deeper footings or a design that can float slightly without twisting. When in doubt, build it like a small deck or go freestanding with adjustable supports.
Step 4: Frame the Ramp (Like a Mini Deck)
Option A: Attached Ramp with a Ledger Board
This is the classic approach: a ledger board fastened to the shed at the doorway, then joists/stringers run down to the landing end.
- Locate solid framing. You want to fasten into structural membersnot just siding or trim. If needed, remove a small strip of siding at the ledger location.
- Install the ledger board. Set it slightly below the shed threshold so your decking ends up flush with the floor (no toe-stubber ridge).
- Use proper fasteners. Exterior structural screws or lag screws with washers are common choices. Avoid “random box screws” that aren’t rated for structural loads or treated lumber.
- Keep fasteners staggered. Staggering helps prevent splitting and improves holding strength.
- Flash if needed. If water can run behind the ledger, add flashing or a water barrier so your shed wall doesn’t rot over time.
Option B: Freestanding Ramp (No Attachment to Shed)
A freestanding ramp is great for plastic/resin sheds, very small sheds, or anyone who prefers not to bolt into the shed structure.
- Build the ramp frame as a complete unit.
- Set it close to the threshold with a small gap for drainage/expansion.
- Add a transition strip at the top if needed for a smooth roll-in.
Stringers and Joists: Your Support Skeleton
Most shed ramps use either:
- Stringers: long angled members (often 2×8 or 2×10) that support the slope
- Joists: cross pieces running side-to-side (often 2×6) supported by side rails or beams
Simple framing layout (very common):
- Two outer side rails (stringers) sized for your span
- Cross joists spaced about 16 inches on-center for strength and a solid feel underfoot
- Blocking at ends to keep the frame square and stiff
Example frame for a 12-foot ramp, 48 inches wide:
- (2) 2×8 side rails at 12 feet (adjust per your design)
- (8–10) 2×6 joists at ~45 inches (depending on your exact width and hardware)
- Joist hangers (optional but sturdy and tidy)
Step 5: Set the Ramp Angle and Install Supports
This is where “close enough” becomes “why does my mower feel like it weighs a thousand pounds?”
How to Set the Angle
- Dry-fit the frame: rest the top at the shed threshold height, and let the bottom land on your pavers/blocks.
- Check slope with a level and tape measure: for every 12 inches of run, you should drop about 1 inch (for a 1:12 slope).
- Adjust the landing end: add gravel, reset pavers, or shift the ramp length until it feels right.
Add Intermediate Support (If Needed)
If your ramp is long or will carry heavy equipment, add supports under the frame:
- Concrete blocks/pavers at midspan
- Posts on footings (deck-style)
- Adjustable deck blocks (helpful for fine tuning)
Rule of thumb: the longer and heavier the use, the more your ramp should behave like a deck: supported, braced, and unbothered by bounce.
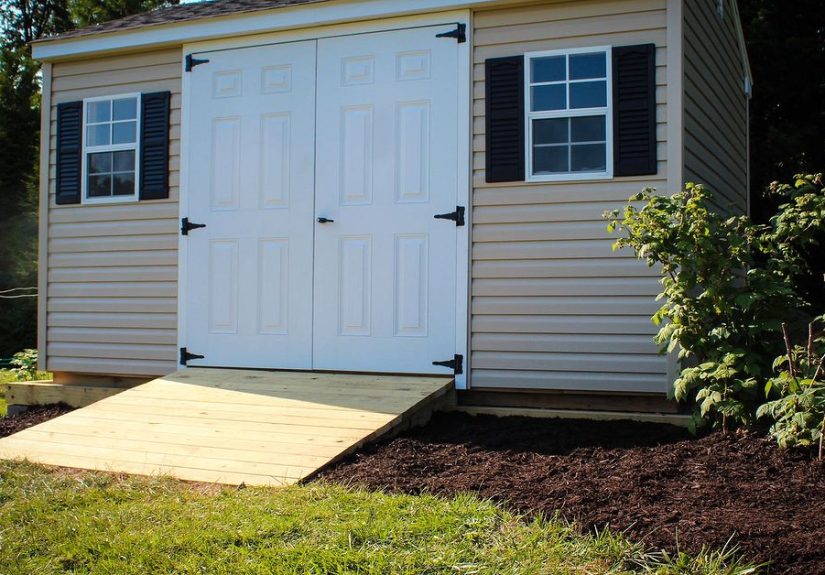
Step 6: Deck the Ramp (Make It Grippy, Not Slippery)
Deck Board Orientation and Gaps
Install decking perpendicular to the direction of travel (side-to-side across the ramp). That provides better traction and distributes load nicely. Leave small gaps between boards for drainage (especially outdoors).
Non-Slip Options That Actually Help
- Traction strips or grit tape (simple, effective, replaceable)
- Grooved decking or textured composite boards
- Outdoor anti-skid coating (best on dry, clean wood)
- Cleats (thin strips across the ramp every 8–12 inches). These add major grip, but can catch small wheelsso they’re better for foot traffic or large-wheeled gear.
Important: If you’re using pressure-treated lumber, it may be wet from treatment. Some coatings and tapes stick better after the wood dries. If you need traction immediately, use mechanical solutions (textured strips screwed down) rather than relying only on adhesives.
Step 7: Add Safety Features (Small Details, Big Payoff)
Curbs / Wheel Guards
Add a 2×2 or 2×4 curb along both sides to keep wheels from drifting off the edge. It’s cheap insurance, especially if you’re backing in a mower.
Handrails (Optional, But Nice)
If your ramp is steep, long, or used by kids/older adults, a handrail can be a game-changer. Even a single rail on one side helps with balance.
Top Transition
The top is where wheels love to catch. Make the transition smooth:
- Keep the decking flush with the shed floor
- Consider a thin threshold strip for a seamless roll
- Avoid leaving a lip that can snag small wheels
Step 8: Weatherproof and Maintain It
Your shed ramp lives outside. Outside is basically a 24/7 obstacle course for wood.
- Seal or stain after treated wood has dried (check the label guidance)
- Inspect annually: fasteners, soft spots, and wobble
- Keep it clean: leaves and algae turn ramps into slip-n-slides
- Re-tighten hardware if anything loosens with seasonal movement
Common Shed Ramp Mistakes (So You Don’t Join the Club)
- Too steep: works “fine” until you’re pushing 200 lbs uphill in the rain.
- Too narrow: forces awkward angles and increases fall risk.
- No base prep: the ramp sinks and twists over time.
- Wrong fasteners: untreated or incorrect screws corrode or fail outdoors.
- Slippery decking: smooth boards + moisture = instant figure skating.
- Attaching to non-structural shed parts: siding is not a structural beam (even if it looks confident).
FAQ
How long should my ramp be?
Take your rise (in inches) and multiply by 10–12 for a comfortable slope. Example: 8-inch rise → 80–96 inches (about 6.5–8 feet) of run.
Can I use plywood?
For a temporary ramp, maybebut plywood outdoors degrades quickly unless it’s exterior-rated and protected. For a long-lasting shed ramp, decking boards (or composite) over a framed structure is far more durable and safer.
Do I need permits?
Many small ramps for private sheds don’t require permits, but rules vary by city and HOA. If your ramp is large, elevated, or attached to a structure in a way that changes drainage or egress, it’s worth checking local requirements.
How do I make it safe in snow and rain?
Use textured decking or traction strips, keep the slope gentle, and make sure water can drain through board gaps. In icy climates, plan for snow shovel clearance and consider removable traction mats.
DIYer Experiences and Lessons Learned (Extra )
When people talk about building a shed ramp, the conversation usually starts with lumber sizes and ends with: “I wish I’d made it longer.” That’s the most common real-world takeaway. On paper, a steeper ramp seems like a clever space-saver. In practice, it’s a daily workout you didn’t sign up forespecially when you’re pushing a mower that suddenly feels powered by regret.
Another consistent lesson: the ground is the project. Plenty of DIYers build a gorgeous ramp, set it on bare soil, and then wonder why it starts rocking like a porch swing after a few rains. The fix is rarely glamorous: pull it up, dig down, add gravel, compact, reset pavers, and finallysweet stability. It’s not exciting content, but it’s the difference between “nice ramp” and “ramp you’re still using five years later.”
There’s also a category of hard-earned wisdom around traction. Many ramps feel great when dry and turn treacherous when wet. DIYers who live in damp or leafy areas often end up adding traction strips after the first “whoa!” moment. A common strategy is installing a good surface from day one (textured boards or screw-down traction strips), then adding a second layer later if needed. It’s much easier to add traction than it is to explain to your family why the shed entrance became a slapstick routine.
Fasteners are another theme that comes up in “what I’d do differently” stories. Outdoor projects expose hardware to moisture and the chemicals in pressure-treated wood. People who used interior screws often notice rust streaks or corroded heads surprisingly fast. The happy ending is switching to exterior-rated screws and structural fasteners designed for treated lumber. It costs more up front, but it’s cheaper than rebuilding the ramp because your screws turned into orange dust.
One more experience-based tip: build for the widest thing you ownnot the narrowest thing you can squeeze through today. You might roll in a push mower now, but someday it’s a snow blower, a bigger mower, or a cart loaded with pavers because you watched one home-improvement video and got ambitious. A few extra inches of width and a simple side curb make the ramp feel forgiving, not fussy.
Finally, don’t underestimate the value of a smooth top transition. DIYers often mention that the “bump” at the threshold was the most annoying part of their first build. Even if the ramp is solid, a small lip can catch wheels and jolt whatever you’re pushing. The fix is usually simpleadjust the ledger height, add a transition strip, or tweak the decking thicknessbut it’s easiest to think about before everything is screwed down tight.
If you take anything from these shared lessons, let it be this: a shed ramp isn’t just a slope. It’s a tiny piece of daily infrastructure. Build it like you’re going to use it a lotbecause you are.
Conclusion
Building a shed ramp is a straightforward DIY project when you treat it like a small deck: plan the slope, prep the base, frame it solid, and finish it with traction. Aim for a gentle incline, use exterior-rated materials, and don’t skimp on stability. Do it right once, and every trip into your shed becomes smoother, safer, and a lot less “why is this so hard?”


