Table of Contents >> Show >> Hide
- First, Identify Your Fire Pit Type (Because Soap Isn’t a Universal Language)
- Safety Prep: Do This Before You Touch Anything
- What You’ll Need: The Simple Fire Pit Cleaning Kit
- Quick Clean After Every Fire (10–15 Minutes That Saves Hours Later)
- Deep Clean: Metal Wood-Burning Fire Pits (Steel, Cast Iron, Copper)
- Deep Clean: Stone, Brick, and Masonry Fire Pits (Without Ruining the Finish)
- How to Clean a Gas Fire Pit (Propane or Natural Gas)
- Rust, Soot, and “Uh-Oh” Problems: Practical Fixes
- How to Keep Your Fire Pit Cleaner Longer (Maintenance That Actually Works)
- What to Do With Ash (Once It’s Completely Cold)
- When to Call a Pro (Because “DIY” Shouldn’t Stand for “Danger, Yikes”)
- of Real-World “Been-There” Fire Pit Cleaning Experiences
- Conclusion
A fire pit is basically a tiny outdoor fireplace… that lives outside… where weather, leaves, bugs, and the laws
of physics conspire to turn “cozy night” into “why does my fire smell like wet socks?”
The good news: cleaning a fire pit is simple, mostly cheap, and oddly satisfyinglike power-washing videos, but
with more s’mores.
This guide covers how to clean wood-burning, gas, and stone/brick fire pits safely, with practical steps,
specific examples, and pro-level tricks that don’t require a degree in backyard engineering.
First, Identify Your Fire Pit Type (Because Soap Isn’t a Universal Language)
Cleaning goes faster when you know what you’re working with:
- Metal wood-burning pit: steel, cast iron, copper, or “mystery metal” from a big-box store.
- Masonry pit: stone, brick, pavers, or a built-in ring with a metal insert.
- Gas fire pit: propane or natural gas with a burner, media (lava rock or glass), and a control valve.
Each type has different “don’t do that” moments. (Example: some cleaning products that are fine on steel can
permanently change the look of stone or brick. And gas burners? They’re like grills: treat them gently, keep
ports clear, and never ignore weird flame behavior.)
Safety Prep: Do This Before You Touch Anything
1) Let it coolseriously
If you can still feel warmth, it’s not ready. For wood-burning pits, embers can hide under ash longer than
you’d expect. The cleanest-looking ash pile can still be a tiny dragon.
2) Gear up (you don’t need a hazmat suit… but close)
- Heat-resistant gloves (or sturdy work gloves)
- Dust mask if ash is dry and fluffy (ash gets airborne fast)
- Eye protection if you’re brushing rust or scrubbing soot
- Old clothes you wouldn’t mind turning “campfire chic”
3) Set up a “mess zone”
Put down a tarp or cardboard near the pit. If you have fire media (lava rock or glass), you’ll want a clean
place to set it while you vacuum and wipe the interior.
4) Ash disposal basics
Use a metal container with a lid for ash. Keep it outside, away from anything combustible,
until you’re sure it’s fully cold and ready for disposal. Never use plastic or cardboard containers for ash
storage, and don’t park the ash bucket on a wooden deck “just for a second.”
What You’ll Need: The Simple Fire Pit Cleaning Kit
- Small shovel or ash scoop
- Metal ash bucket with lid
- Stiff nylon brush (and/or a soft scrub brush)
- Microfiber cloths or old rags
- Mild dish soap
- Warm water + bucket
- Vacuum (or ash vacuum) only when ashes are completely cold
- For rust: wire brush, fine steel wool, or sandpaper; optional baking soda paste
- For stone stains: baking soda paste; optional stone-safe cleaner
- For gas pits: small brush, pipe cleaner, and compressed air (optional)
Keep it gentle. Abrasive cleaners and harsh chemicals can damage finishes, discolor masonry, or create more
work than they save.
Quick Clean After Every Fire (10–15 Minutes That Saves Hours Later)
Step 1: Remove big debris
Pick out unburned wood chunks, soggy leaves, and the mystery item that fell in during your last party
(hopefully it’s not a phone). Use tongs if needed.
Step 2: Scoop out ash (don’t let it pile up forever)
Ash buildup can block airflow in wood-burning pits, which makes fires smoky and harder to start. Scoop ash
into a metal container with a lid. If you use your pit weekly, a quick ash removal routine is the difference
between “easy lighting” and “why is my fire sulking?”
Step 3: Wipe the interior dry if it got wet
If rain hit your pit, dry it out once everything is cold. Water + ash can turn into a caustic, gritty sludge
that stains surfaces and speeds up corrosion on metal parts.
Step 4: Cover it
A cover is not just a fashion accessory for your fire pit. It keeps out water, leaves, bugs, and that one
neighborhood squirrel who treats everything as a storage unit.
Deep Clean: Metal Wood-Burning Fire Pits (Steel, Cast Iron, Copper)
Plan a deeper clean every few weeks during heavy seasonor at least at the start and end of your main
fire-pit months.
1) Empty everything
Remove all ash and debris. If you use a vacuum, confirm ashes are fully cold, and use the
right attachment (and common sense). Many people skip this and learn the hard way that “vacuum + ash” can
become “dust storm in your garage.”
2) Wash with warm, soapy water
Mix mild dish soap with warm water. Scrub the bowl and interior surfaces with a soft brush or sponge. Rinse
with clean water and dry thoroughly.
3) Rust check: decide if it’s a problem or a feature
Some fire pits are designed to develop a protective rust layer (like weathering steel). Others are just
plain rusting because moisture moved in and never paid rent.
- Light surface rust on regular steel/cast iron: scrub with a wire brush or fine steel wool.
- Stubborn spots: use a baking soda + water paste, scrub, then rinse and dry.
- Copper: be carefulsome common DIY cleaners can tarnish it quickly, changing the look.
4) Protect the metal
Once the pit is clean and bone-dry, follow the manufacturer’s guidance for protection. Some people lightly
coat certain metal surfaces with an appropriate protectant to slow corrosion (the key word here is
“appropriate”not every coating belongs on every metal, and not every product is safe near heat).
Example: weekly user routine
If you burn fires every weekend: scoop ash Monday, wipe out moisture if it rained, and deep clean once a
month. That schedule prevents most rust and keeps airflow strong.
Deep Clean: Stone, Brick, and Masonry Fire Pits (Without Ruining the Finish)
Masonry looks toughand it isbut many stones and mortars can be etched or discolored by harsh acids or the
wrong cleaner. Your goal: remove soot and grime without permanently “redecorating” the stone.
1) Remove ash and loose debris
Empty the pit. If there’s a removable metal insert, clean that separately like a metal pit (soapy water,
scrub, dry).
2) Start gentle: soap and water
Use mild dish soap in warm water and scrub with a nylon brush. Rinse lightly and avoid blasting mortar joints
with high pressure unless you know your masonry can handle it.
3) For soot stains: use a mild paste first
A baking soda paste (baking soda + a little water) works well for many soot marks. Apply, let it sit for
about 10 minutes, scrub gently, then rinse. Repeat rather than escalating to harsh chemicals.
4) Consider sealing (if your pit’s materials allow it)
Some homeowners use a masonry sealer to help prevent deep staining on certain stone or pavers. If you go this
route, choose a product rated for high-heat, outdoor use and compatible with your stone type.
Example: “why is my stone pit turning black?”
If soot is building up quickly, you may be burning damp wood or starving the fire of oxygen (too much ash in
the bottom, or wood stacked too tightly). Improving airflow and fuel quality reduces future stains more than
any cleaner ever will.
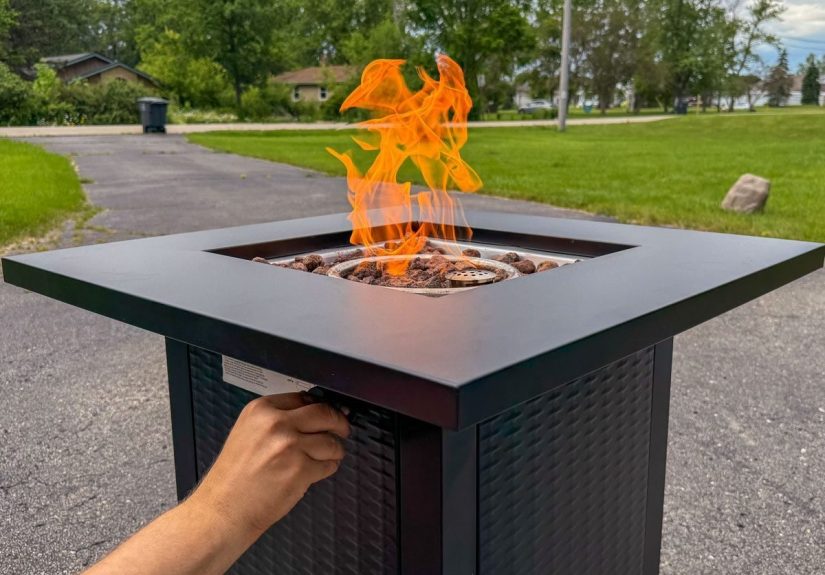
How to Clean a Gas Fire Pit (Propane or Natural Gas)
Gas fire pits are lower-mess than wood, but they still collect dirt, bugs, leaves, and soot. A good rule:
do a light clean every couple of months during heavy use, and a deeper inspection at the start of the season.
1) Shut off the gas
Turn the control knob off and shut off the propane tank valve (or the supply line shutoff for natural gas).
Let everything cool completely.
2) Remove the fire media (lava rock or glass)
Place it on a tarp. If it’s dusty, rinse gently with water and let it dry completely before reinstalling.
Wet media can cause sputtering or weird performance when you relight.
3) Vacuum and wipe the interior
Use a vacuum or soft brush and dustpan to remove debris. Then wipe down surfaces with a damp cloth.
Avoid soaking fittings and avoid pushing debris into the burner.
4) Clean burner ports (the part that makes the fire happen)
Burner ports can clog with dust, insects, or spider webs. Use a soft brush, pipe cleaner, or compressed air
to clear openings. If your flames look uneven, weak, or “lazy,” this step often fixes it.
5) Reassemble only when fully dry
Once everything is clean and dry, put the media back, restore the cover, and do a quick visual check for
anything that looks out of place.
Red flags: stop and troubleshoot
- You smell gas: shut everything off and don’t use the unit until the source is identified and fixed.
- Flames are uneven: inspect burner ports and air intake areas for blockage.
- Soot is excessive: check for airflow problems or incorrect media placement that’s choking the burner.
Rust, Soot, and “Uh-Oh” Problems: Practical Fixes
Rust on steel and cast iron
For common portable steel pits, rust usually starts when water sits in the bowl or the finish gets scratched.
Remove rust mechanically (wire brush / steel wool), wipe clean, and keep the pit dry and covered.
Heavy soot and black residue
Soot is normal, but thick buildup can mean poor combustion (wet wood, poor airflow, or too much ash). Cleaning
helps, but improving how you burn prevents the return.
Don’t drown your fire pit (unless it’s an emergency)
Dousing a fire with water creates wet ash sludge and can accelerate rust and staining. Let fires burn down
naturally when possible, then clean once everything is cold.
How to Keep Your Fire Pit Cleaner Longer (Maintenance That Actually Works)
- Scoop ash regularly so airflow stays strong and smoke stays low.
- Use a cover to prevent water pooling, rusting, and soggy ash paste.
- Store portable pits out of the elements when you won’t use them for a season.
- Burn dry, seasoned wood for cleaner flames and less soot.
- For gas pits, keep the burner area clear and check flame quality at the start of each season.
What to Do With Ash (Once It’s Completely Cold)
If you’ve been tossing ash straight in the trash, you’re not alone. But ash can stay warm longer than expected,
so the safe move is: cool completely, store in a covered metal container outside, and only then dispose.
If your ash is from clean, untreated wood (no trash, no painted wood, no mystery materials), some people reuse
small amounts in the yardlike sprinkling lightly in garden areas or compost to add minerals. The key is
moderation because ash can raise alkalinity.
When to Call a Pro (Because “DIY” Shouldn’t Stand for “Danger, Yikes”)
- Gas smell, repeated ignition issues, or strange flame behavior that cleaning doesn’t fix
- Cracked masonry that looks structural, not cosmetic
- Severe rust-through on metal pits (holes, weakened supports)
Sometimes the safest fix is replacing a damaged part or having a qualified technician inspect the gas
componentsespecially if you’re dealing with fuel supply lines.
of Real-World “Been-There” Fire Pit Cleaning Experiences
Here are a few common experiences homeowners and backyard hosts run intoand what they learn after the first
“why is this happening to me?” moment.
The “Ash Pancake” After a Rainstorm
Someone forgets the cover, a surprise storm rolls in, and now the fire pit looks like it’s holding a gray
oatmeal contest. Wet ash doesn’t scoop like dry ashit smears. The practical fix is to let everything dry out
fully (sun helps), then scrape and scoop in layers. The lesson most people take away: a cover isn’t optional,
and removing ash before bad weather is the easiest cleaning you’ll ever do.
The “Why Does My Fire Smoke So Much?” Mystery
A lot of folks blame the pit, but the usual culprits are (1) too much ash blocking airflow, and (2) wood that
isn’t actually dry. After they start scooping ash regularly and switching to seasoned wood, the smoke drops,
the fire lights faster, and suddenly the group isn’t doing the “campfire cough” between laughs. The cleaning
lesson: soot on the pit is often a symptom, not the disease.
The Rust Panic (and the Rust Acceptance)
First-time owners see orange spots and assume the fire pit is “ruined.” In reality, light surface rust on many
steel pits is common and easy to remove with a brush and a little elbow greaseespecially if caught early.
The bigger lesson is learning the difference between normal rust on ordinary steel and intentional patina on
weathering steel that’s designed to look rustic. Once people realize some finishes are meant to age, they stop
fighting it like it’s a personal enemy and focus on preventing the damaging kind: standing water, soaked ash,
and uncovered storage.
The Gas Fire Pit That Starts Acting Like a Drama Queen
You turn it on, the flames are uneven, and the fire pit looks offended by your presence. Often it’s not a big
repairit’s debris, dust, or insects in burner ports or air intakes. People who do a quick seasonal inspection
(and gently clear ports with a brush or pipe cleaner) find that “weak flame season” disappears. The bigger
lesson: gas fire pits are low-maintenance, not no-maintenance. Treat the burner area like you’d treat a grill:
keep it clean, keep openings clear, and don’t ignore performance changes.
The Unexpectedly Satisfying Finish
After the scrubbing and wiping, there’s a moment when the pit looks ready againclean bowl, cleared airflow,
media rinsed and dry, everything reassembled. That’s when people realize fire pit cleaning isn’t just chores;
it’s pre-game. A clean pit lights faster, burns cleaner, and smells bettermeaning your next night outside
starts with relaxation instead of troubleshooting. The final lesson most people learn: small, regular cleaning
beats the once-a-year “archaeological dig” every time.


