Table of Contents >> Show >> Hide
- Quick Checklist Before You Start (Save Yourself 20 Minutes)
- Method 1: Connect iPad to TV with AirPlay (Wireless)
- Method 2: Connect iPad to a TV or Monitor with an Adapter (Wired)
- AirPlay or Adapter? Pick Based on Your Situation
- Troubleshooting: When Your iPad Refuses to Cooperate
- Pro-Level Moves: Make Your iPad + Display Setup Feel Like a Real Workstation
- Conclusion: The Best Way to Connect an iPad to a TV
- Real-World Experiences (): What Actually Happens When You Try This
Your iPad has a gorgeous screen. Your TV has a gigantic screen. Nature clearly intended them to be friends.
Whether you’re trying to watch a movie without squinting, show off vacation photos to relatives who insist on “seeing every single one,”
or run a presentation without doing the awkward “everyone gather around my tablet” routine, connecting an iPad to a TV or external display
is easier than it used to beand still occasionally dramatic enough to keep things interesting.
There are two main paths: AirPlay (wireless) and adapters/cables (wired).
AirPlay is the “no cables, no problem” optionuntil Wi-Fi decides it wants attention. A wired adapter is the “this will work even during a Wi-Fi meltdown”
optionuntil you realize you grabbed a charge-only USB-C cable. We’ll cover both, plus the tricks that make each method feel effortless.
Quick Checklist Before You Start (Save Yourself 20 Minutes)
- Know your iPad port: USB-C (most newer iPads) or Lightning (many older models).
- Know your TV/display inputs: HDMI is most common; some monitors also have USB-C or DisplayPort; projectors might have VGA.
- Update software: Keeping iPadOS and your TV/streaming device updated prevents a lot of “why isn’t it showing up?” moments.
- Decide what you need: streaming video (best quality), full screen mirroring (shows everything), or extended desktop (on supported iPads).
Once you’ve got those basics, the rest is mostly button-tapping… and the occasional deep breath.
Method 1: Connect iPad to TV with AirPlay (Wireless)
AirPlay is Apple’s built-in way to send audio and video from your iPad to a TV or displayusually through an Apple TV,
an AirPlay 2–compatible smart TV, or a streaming box that supports AirPlay (Roku is a common one).
The big idea: your iPad stays in your hands, and your TV becomes the big-screen version of whatever you’re watching or showing.
AirPlay vs. Screen Mirroring (They’re Not the Same)
AirPlay comes in two flavors, and choosing the right one can be the difference between “wow, this looks great” and “why is my video tiny?”
-
AirPlay streaming (from within an app): Best for movies, YouTube, sports, photos, and music. The TV plays the content directly,
often with better quality and less lag. -
Screen Mirroring (from Control Center): Duplicates your iPad screen on the TV. Great for web browsing, apps without AirPlay buttons,
games (casual ones), and presentations where you want the audience to see exactly what you’re doing.
How to AirPlay Video from an iPad (The “Cleanest” Option)
- Connect your iPad and TV/streaming device to the same Wi-Fi network.
- Open an app that supports AirPlay (Photos, Apple TV app, many streaming apps, etc.).
- Look for the AirPlay icon (often a rectangle with a triangle) and tap it.
- Select your TV, Apple TV, or AirPlay device.
- If a code appears on the TV, enter it on your iPad (this is normal, not a hostage negotiation).
When streaming works, it’s usually smoother than mirroringespecially for long videosbecause your TV handles playback.
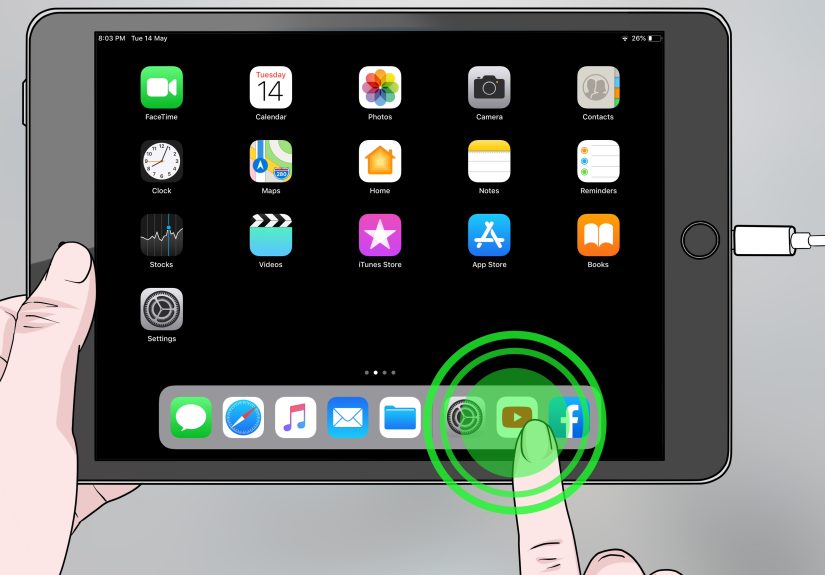
How to Mirror an iPad Screen to a TV
- Make sure both devices are on the same Wi-Fi.
- Open Control Center on the iPad (typically swipe down from the top-right).
- Tap Screen Mirroring.
- Select your Apple TV or AirPlay-compatible TV.
- Enter the on-screen passcode if prompted.
Now your TV shows whatever your iPad showsapps, notifications, and the moment you accidentally open the wrong tab.
(Pro tip: use Focus mode if you’re presenting.)
AirPlay Tips That Make You Look Like You “Always Do This”
- For presentations: Turn on Focus/Do Not Disturb, disable loud notifications, and lock orientation if rotation is a problem.
- For smooth playback: Use a strong Wi-Fi signal; if your router supports it, 5 GHz can reduce congestion and lag.
- If the TV doesn’t appear: Check that AirPlay is enabled on the TV/streaming device settings and that both devices are truly on the same network.
- Keep power handy: Mirroring can drain battery faster than you’d expectespecially if brightness is high.
Method 2: Connect iPad to a TV or Monitor with an Adapter (Wired)
If AirPlay is the friendly, wireless option, a wired connection is the dependable friend who shows up early and brings snacks.
For gaming, conference rooms, shaky Wi-Fi, or anything “high-stakes,” a cable-and-adapter setup is often the best way to connect an iPad to a TV.
Step One: Identify Your iPad Port (USB-C or Lightning)
This matters because the adapter you need depends on the iPad model:
- USB-C iPads: Many modern iPads use USB-C and can output video through compatible USB-C adapters, hubs, or direct USB-C display cables.
- Lightning iPads: You’ll typically use a Lightning Digital AV Adapter (HDMI) or a Lightning to VGA adapter.
USB-C iPad to HDMI: The Most Common Wired Setup
For most TVs, HDMI is the goal. With a USB-C iPad, you have a few clean options:
- USB-C to HDMI adapter (simple, reliable)
- USB-C multiport adapter (HDMI plus USB ports, plus charging pass-through)
- USB-C to HDMI cable (fewer pieces, fewer things to lose)
- Plug the adapter (or USB-C to HDMI cable) into your iPad’s USB-C port.
- Connect an HDMI cable from the adapter to your TV (unless it’s a single-piece cable).
- Switch your TV to the correct HDMI input (HDMI 1, HDMI 2, etc.).
- Your iPad should mirror automatically. If it doesn’t, try unplug/replug, switch HDMI ports, or restart the iPad.
Quality note: Some iPad and adapter combinations can output higher resolutions (including 4K) and higher refresh rates, but it depends on the iPad model
and whether your adapter supports modern HDMI standards. If you care about crisp text and smooth motion, use a reputable adapter and a good HDMI cable.
Lightning iPad to HDMI: What to Expect (And Why It’s Still Useful)
Lightning iPads can absolutely connect to TVsjust with a different adapter. The usual pick is Apple’s Lightning Digital AV Adapter,
which outputs video up to 1080p and works well for streaming, slides, and casual viewing.
- Connect the Lightning Digital AV Adapter to your iPad.
- Connect an HDMI cable from the adapter to the TV.
- Set the TV to the right HDMI input.
- If you’ll be connected for a while, plug a charger into the adapter’s extra Lightning port.
Translation: it’s not the newest setup, but it’s dependableand it’s saved many a last-minute presentation.
Connecting to a Monitor via USB-C (Sometimes Even Without HDMI)
Many monitors support USB-C video (often via DisplayPort Alt Mode). If your monitor has a USB-C input that supports video,
you may be able to connect USB-C to USB-C with a video-capable cableno HDMI required.
The big gotcha: not all USB-C cables are equal. Some are “charge + basic data” only. If your iPad charges the monitor connection but never sends video,
the cable may be the culprit. Use a cable specifically rated for video/display output.
Projectors and Old-School Displays (VGA Still Exists, Somehow)
If you’re connecting to a projector in an older classroom or meeting room, you may run into VGA.
The good news: both USB-C and Lightning iPads can connect to VGA with the appropriate adapter.
The less-good news: VGA is analog, so don’t expect razor-sharp text like HDMI.
AirPlay or Adapter? Pick Based on Your Situation
Choose AirPlay if you want:
- No cables and quick setup at home
- Easy streaming for videos, music, and photos
- Freedom to walk around with your iPad while the TV plays content
Choose a wired adapter if you want:
- Maximum reliability (especially in offices, hotels, classrooms)
- Lower lag for games or live demos
- Fewer Wi-Fi variables (no “guest network” issues, no router drama)
A simple rule: if it’s casual entertainment, AirPlay is delightful. If it’s important enough to make you sweat, pack the adapter.
Troubleshooting: When Your iPad Refuses to Cooperate
Sometimes everything is “correct” and it still doesn’t work. Welcome to consumer electronics: the plot twist genre.
Here are the fixes that solve most problems.
If AirPlay Isn’t Working
- Confirm the same Wi-Fi network: “Same router” isn’t always “same network,” especially with mesh systems or guest Wi-Fi.
- Restart everything: iPad, TV/streaming device, and (yes) the router. This is the tech equivalent of turning it off and on againbecause it works.
- Update software: AirPlay reliability improves with updates on both ends.
- Check AirPlay settings on the TV device: Some TVs/streamers let you restrict AirPlay or require a passcode every time.
- Watch out for VPNs and network isolation: VPNs or “client isolation” settings can block device discovery.
If a Wired Adapter Isn’t Working
- Try a different HDMI port: TVs can be picky; HDMI ports can be weirdly temperamental.
- Confirm the cable supports video: Especially with USB-Csome cables charge but don’t carry display signals.
- Use a reputable adapter: Cheap adapters can be hit-or-miss, especially with higher resolutions.
- Streaming app shows black screen: Some apps restrict output in certain situations due to copy protection. Try in-app AirPlay streaming instead of mirroring, or switch apps to test.
- Power matters: If you’re using a hub, try plugging in power. Some setups behave better with pass-through charging.
One Weird Tip That Helps More Than It Should
If your TV is AirPlay-capable but doesn’t show up, disconnect it from power for 10–15 seconds, then plug it back in.
It sounds like a folk remedy, but it can reset the network module more effectively than a normal “off” toggle.
Pro-Level Moves: Make Your iPad + Display Setup Feel Like a Real Workstation
Once you’ve connected your iPad to an external display, you can level up beyond simple mirroringdepending on your iPad model and settings.
Extended Display vs. Mirroring (Stage Manager Notes)
Many iPads will mirror to an external display by default. On certain iPads and iPadOS versions, you can use Stage Manager to treat an external monitor
more like a second workspace (rather than a giant duplicate). If you’re doing editing, writing, spreadsheets, or multitasking, this can be a game-changer.
- Mirroring: TV shows the same thing as the iPad. Simple and universal.
- Extended desktop (supported models): External display can show separate app windows and layouts.
Make It Smoother (Keyboard, Mouse, and Audio)
- Keyboard + trackpad/mouse: Great for presentations and productivity on an external monitor.
- Audio routing: With HDMI, audio usually goes to the TV automatically. With AirPlay, you can often choose separate audio targets.
- Keep a “presentation kit”: Adapter + short HDMI cable + charger. Future You will be grateful.
Conclusion: The Best Way to Connect an iPad to a TV
If you want convenience, AirPlay is usually the quickest way to connect an iPad to a TVespecially if you already have an Apple TV,
an AirPlay 2 smart TV, or a compatible streaming device. If you want rock-solid reliability (and fewer surprise variables), a USB-C to HDMI
or Lightning to HDMI adapter is still the MVPespecially for travel, classrooms, or any moment where “it must work” is non-negotiable.
The best setup is the one that fits your life: wireless for the couch, wired for the conference room, and both for anyone who has ever said,
“I swear it worked at home.”
Real-World Experiences (): What Actually Happens When You Try This
Let’s talk about the part guides rarely admit: connecting an iPad to a TV is easyright up until it’s not. In real life, it’s less like flipping a switch
and more like assembling a tiny ritual that depends on your Wi-Fi mood, your cable collection, and whether the TV was last used by someone who thinks
“Input” is a suggestion, not a button.
At home, AirPlay feels magical when you’re streaming from a supported app. You tap the AirPlay icon, select the TV, and suddenly your living room becomes
a mini theater. The iPad stays responsive, and you can even keep browsing while the TV plays (depending on the app). That’s the best-case scenario,
and it’s common enough that AirPlay earns its popularity.
But the most frequent “why isn’t it working?” moment happens when your iPad and TV are on different networks. This is especially common with mesh Wi-Fi systems,
guest networks, or routers that combine 2.4 GHz and 5 GHz under the same name. Everything looks identical in the Wi-Fi list, yet your TV vanishes from the
AirPlay picker like it has commitment issues. The fix is usually boring: confirm both devices are truly on the same network, then restart the TV and router.
Boring fixes are still fixes.
For travel, the wired adapter becomes the hero. Hotel Wi-Fi can be slow, restricted, or require sign-in pages that confuse streaming devices.
In those moments, plugging in a USB-C to HDMI adapter (or Lightning Digital AV Adapter) is the difference between watching your show and watching
the hotel’s “Welcome” channel for the 40th time. The only travel mistake is assuming any random cable will work. Many USB-C cables are built for charging,
not video. The iPad will charge, the TV will stay blank, and you’ll spend five minutes questioning reality. Pack a known-good cable.
In work settings, reliability matters more than elegance. AirPlay can be great in a modern office with strong Wi-Fi and an Apple TV in every conference room.
It can also be a headache in corporate networks that block device discovery. A wired connection tends to win hereespecially for training sessions,
demos, and anything where people are waiting and you can feel their eyes measuring your competence. (Don’t worry. Everyone has been there.)
The biggest “aha” experience for many people is realizing that mirroring is not always the best viewing option for video.
When you mirror, you’re duplicating the whole iPad screennotifications, aspect ratio quirks, and all. When you AirPlay-stream from within the app,
the TV often plays the video more cleanly, and you can use the iPad as a remote. Once you notice the difference, you’ll start defaulting to in-app streaming
whenever possibleand saving mirroring for presentations, web pages, and apps that don’t offer an AirPlay button.
The real “pro move” is not choosing AirPlay or adapter. It’s having both available and knowing when to switch. That’s the moment you stop troubleshooting
and start feeling like the person who “just knows how to make it work.”


