Table of Contents >> Show >> Hide
- The Truth About “Installing” a Gas Dryer
- Before Installation Day, Prep the Room Like You Mean It
- Use the Right Vent Material, Not Whatever Was in the Garage
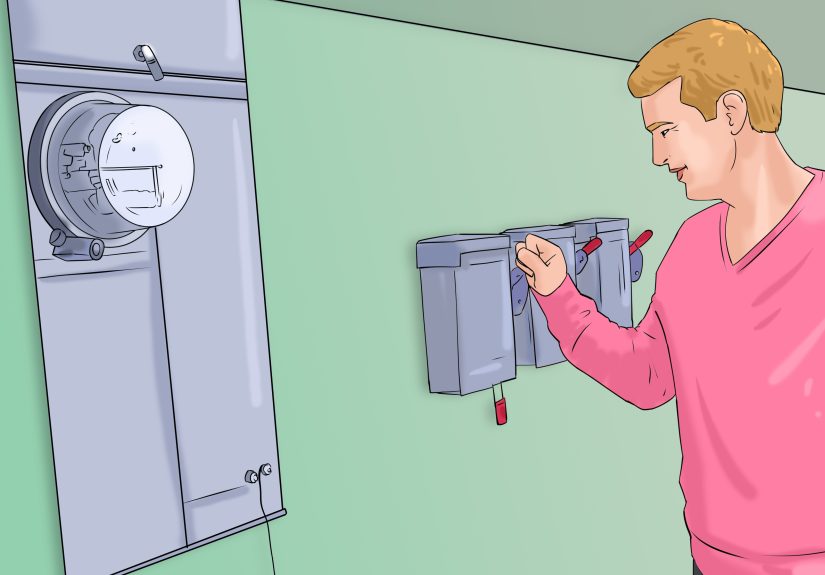
- What a Qualified Installer Should Handle
- Common Mistakes That Ruin a Gas Dryer Setup
- A Smart Homeowner Checklist Before the Installer Arrives
- How to Know the Installation Went Well
- Maintenance Starts the Minute Installation Ends
- Real-World Experiences With Gas Dryer Installation
- Conclusion
Installing a gas dryer sounds simple right up until you realize you are dealing with heat, airflow, combustion, electricity, local code rules, and the world’s most dramatic household byproduct: lint. In other words, this is not the ideal project for pure optimism and a random toolbox. A gas dryer can be a fantastic appliance. It dries fast, runs efficiently, and often costs less to operate than an electric model. But it also demands a little more respect than a plug-it-in-and-hope-for-the-best setup.
That is why the smartest approach to how to install a gas dryer is not “How do I wing this?” but “How do I prepare the space correctly, avoid expensive mistakes, and make sure the actual gas hookup is handled safely?” That mindset saves time, protects your home, and keeps your laundry room from becoming a cautionary tale told in appliance forums for years.
The Truth About “Installing” a Gas Dryer
When people search for how to install a gas dryer, they are usually thinking of the whole journey: buying the unit, getting it into the house, making sure the room is ready, connecting the vent, checking the outlet, and turning it on without panic. The catch is that gas appliances are not the same as snapping together flat-pack furniture with one suspicious leftover screw.
A safe gas dryer installation usually breaks into two parts. First, there is the homeowner prep work: measuring the space, cleaning or replacing the vent, checking the electrical outlet, and confirming the dryer matches the home’s gas type. Second, there is the professional side: gas connection, leak testing, code compliance, conversion work if needed, and a final operating check.
If that sounds less thrilling than a full DIY victory lap, good. Laundry should be boring. Boring is safe. Safe is beautiful.
Before Installation Day, Prep the Room Like You Mean It
Measure Everything, Then Measure the Things You Forgot
Before your dryer arrives, measure the laundry area, the doorway, the hallway, and any tight turns the appliance has to make. A gas dryer that technically fits in the room but cannot get past the doorframe is not installed. It is merely a very large sculpture.
Also measure for working clearance behind and around the machine. Exact spacing varies by model, so the dryer’s installation manual should be treated like a rulebook, not an optional bedtime story. Some dryers need more room than others for the vent elbow, gas connection, and door swing.
Check the Power Setup
One detail that surprises a lot of people is that many U.S. gas dryers still need electricity. They use gas for heat, but the controls, drum, and ignition system rely on electrical power. In many homes, that means a standard grounded outlet near the appliance. Do not assume the old setup is correct just because a previous dryer lived there peacefully for twelve years.
If the outlet is damaged, loose, ungrounded, or positioned awkwardly, fix that issue before delivery day. This is one of those problems that feels small until the appliance is halfway installed and everyone in the room suddenly becomes a philosopher.
Confirm the Gas Type
Most gas dryers are configured for natural gas unless clearly labeled otherwise. If your home uses propane, the dryer may need an approved conversion by a qualified technician. This is not the place for improvisation, borrowed parts, or a confident sentence that begins with “I saw a guy online do it.” Match the dryer to the fuel source before installation starts.
Make Sure the Dryer Can Vent Outdoors
A gas dryer vent is not optional decoration. Gas dryers need proper exhaust to the outdoors so moisture, lint, heat, and combustion byproducts leave the house instead of hanging around your laundry room like unwanted guests. If your space does not have an appropriate outdoor vent path, stop there and address that first.
This is also why gas dryers are a poor match for spaces where people hope to “just vent it inside for now.” “For now” has a suspicious habit of lasting seven years.
Inspect the Existing Vent
If you are replacing an old dryer, do not automatically trust the existing vent setup. Check whether the duct is crushed, kinked, clogged, too long, or made from flimsy material that should have retired long ago. A fresh dryer connected to a terrible vent is like buying new running shoes and then jogging through wet cement.
The goal is simple: a short, direct route to the outside using approved metal ducting and smooth airflow. The more twists, bends, and lint traps your vent system has, the harder your dryer has to work and the less happy everyone becomes.
Use the Right Vent Material, Not Whatever Was in the Garage
One of the most important parts of gas dryer installation is vent material. In plain English: use proper metal ducting. Plastic vent hose and flimsy foil-style duct are famous for sagging, trapping lint, restricting airflow, and making technicians sigh in a very specific way.
Rigid or semi-rigid metal duct is usually the better choice because it holds its shape, supports airflow, and reduces the chance of lint buildup. It also makes cleaning easier later, which matters more than people think. Dryer maintenance is never glamorous, but it is a lot more glamorous than a laundry-room fire.
Keep the run as short and straight as possible. Every turn adds resistance. Every unnecessary elbow gives lint another place to settle in and start paying rent.
What a Qualified Installer Should Handle
There is a big difference between preparing for a gas dryer and pretending to be a gas appliance installer because you own two adjustable wrenches. A qualified installer or gas technician should handle the parts of the job that involve the gas connection itself, fuel-specific compliance, and final safety verification.
That usually includes connecting the dryer to the gas supply, checking fittings and approved components, confirming the shutoff arrangement meets local requirements, verifying the appliance is properly leveled, inspecting the vent connection, and running a startup test to confirm safe operation and strong exhaust flow.
If the dryer needs propane conversion, this becomes even more important. Fuel conversion is not a side quest. It is a technical safety issue.
Professional installation is also the smart move when the laundry area is in a closet, garage, older home, or any space with unusual clearance, ventilation, or code questions. Once local code enters the chat, guesswork should leave the room.
Common Mistakes That Ruin a Gas Dryer Setup
Using the Wrong Vent
The classic mistake is leaving an old crushed vent in place or reusing ducting that should have been replaced years ago. Bad venting leads to longer dry times, extra wear, more lint buildup, and more heat where you do not want it.
Ignoring the Manual
Even experienced homeowners get tripped up by model-specific details. A dryer manual tells you the required clearance, vent path limitations, and fuel information for that exact machine. Skipping it because “all dryers are basically the same” is how small errors become expensive service calls.
Forgetting the Delivery Path
Yes, the dryer may fit the room. But can it fit the hallway? Can it make the turn near the stairs? Can the door to the laundry closet close afterward? A surprising amount of installation drama happens before the appliance ever reaches the gas line.
Assuming the Old Setup Was Correct
Many people replace one gas dryer with another and assume the existing vent, spacing, and connections were all properly done the first time. Sometimes that is true. Sometimes it is a lovely fantasy.
Skipping a Thorough Vent Cleaning
A brand-new dryer connected to a lint-packed vent system is like serving gourmet coffee in a dirty mug. The machine may be new, but the performance will still be disappointing.
A Smart Homeowner Checklist Before the Installer Arrives
Here is the practical version of how to install a gas dryer safely without wandering into dangerous DIY territory:
- Make sure the dryer model matches your home’s fuel type.
- Confirm there is a proper outdoor vent path.
- Replace damaged or outdated vent material with approved metal ducting.
- Clean the existing vent and outside hood before the new unit is connected.
- Check the nearby outlet and make sure it is grounded and accessible.
- Measure the room, doorway, and appliance path carefully.
- Read the installation manual for model-specific spacing and vent requirements.
- Arrange qualified help for the gas hookup, any conversion work, and the final safety check.
That list may not earn applause from action-movie fans, but it is exactly how you prevent delivery-day chaos.
How to Know the Installation Went Well
A properly installed gas dryer does not feel dramatic. It feels calm. The machine sits level. The door opens cleanly. The vent is not crushed behind the unit. The room does not smell like gas. Air moves strongly through the outdoor exhaust. Dry times feel normal instead of endless. The laundry room stays comfortable rather than turning into a tropical weather system with socks.
If clothes take unusually long to dry, the outside flap barely moves, moisture builds up indoors, or you smell gas, stop using the dryer and get it checked right away. Those are not quirky appliance personality traits. They are warning signs.
Maintenance Starts the Minute Installation Ends
A lot of people treat installation like a finish line. It is really the opening scene. Once the dryer is in place, basic upkeep matters just as much as the original setup.
Clean the lint screen regularly. Check the outside exhaust hood from time to time to make sure air is flowing freely. Look behind the dryer occasionally to confirm the duct has not been crushed out of shape. Pay attention to dry times. A machine that suddenly needs two cycles to finish a normal load is usually trying to tell you something, and that something is rarely polite.
Think of gas dryer maintenance the same way you think about changing the oil in a car. Ignore it long enough, and the machine will eventually file a complaint in the form of bad performance, higher energy use, or a repair bill that arrives with emotional damage attached.
Real-World Experiences With Gas Dryer Installation
Talk to enough homeowners about installing a gas dryer, and you start hearing the same stories over and over. Nobody says, “The highlight of my month was reading a venting diagram.” What they usually say is, “I thought this would take an hour,” followed by a long pause and the kind of laugh that means it absolutely did not take an hour.
One of the most common experiences is realizing that the old vent setup was far worse than expected. People pull the old dryer away from the wall and discover a crushed hose, a mountain of lint, and an outside hood that has not opened properly since at least one presidential administration. Suddenly the “simple dryer swap” becomes a mini laundry-room intervention. The good news is that fixing those hidden problems often makes the new dryer perform dramatically better from day one.
Another common lesson is that measurements save lives, or at least save weekends. Homeowners regularly assume the new dryer is the same size as the old one, only to learn that a slightly deeper cabinet or a different vent outlet position changes everything. That extra inch behind the machine matters. The angle of the vent matters. The location of the outlet matters. Laundry-room geometry has humbled many confident adults.
Then there is the emotional roller coaster of delivery day. People often spend more time choosing the finish color than checking the actual installation path. The result is a team standing in the hallway, staring at a tight corner, while someone mutters, “It looked bigger in the showroom.” This is why the least glamorous prep work is often the most valuable.
Many homeowners also report that the best money they spent was not on a fancier dryer feature but on doing the setup correctly. A professionally connected gas dryer with proper venting tends to feel quieter, dry clothes faster, and create fewer ongoing problems. That means less second-guessing, fewer service appointments, and far fewer moments of standing in the laundry room asking why a towel is still damp after two cycles.
There is also a surprising amount of satisfaction that comes from simply getting the room ready before the installer arrives. Clearing the space, cleaning the vent path, confirming the outlet, and reading the manual may not be thrilling, but it changes the whole experience. Instead of installation day feeling chaotic, it feels organized. Instead of scrambling for answers, you already know what model you have, what fuel it uses, and whether the vent route makes sense.
Perhaps the most repeated experience of all is this: people who take gas dryer safety seriously rarely regret it. People who rush, assume, or improvise often wish they had slowed down. And that may be the real secret hiding inside every search for how to install a gas dryer. The smartest installation is not the flashiest one. It is the one that turns a potentially stressful job into a safe, efficient, low-drama setup that works exactly the way it should.
Conclusion
If you are figuring out how to install a gas dryer, the smartest move is to separate the job into what you can responsibly prepare and what a qualified pro should complete. You can measure the space, confirm the power setup, clean or replace old venting, read the manual, and make sure the dryer fits your home’s fuel type. What you should not do is treat the gas connection like a casual weekend experiment.
A gas dryer works best when the room is ready, the vent is correct, the clearances are right, and the final hookup is done safely. Do that well, and your reward is wonderfully boring laundry: fast drying, fewer issues, and no mystery smells. Honestly, that is the dream.


