Table of Contents >> Show >> Hide
- What Is a C5 Envelope (and What Fits Inside It)?
- Plan First: The Quick Math That Saves Paper (and Tears)
- Choose the Right Paper (Because “Random Printer Paper” Has Limits)
- Tools You Need (and a Few That Make You Feel Like a Stationery Wizard)
- Method 1: Template Method (Fast, Consistent, Beginner-Friendly)
- Method 2: Measurement Method (No Printer Needed, Just Good Lines)
- Scoring, Folding, and Sealing Like You Meant It
- Make It Look Expensive (Without Actually Spending Expensive)
- Mailing Notes for the U.S. (Don’t Skip This Part)
- Common Mistakes (and Easy Fixes)
- Real-World Experience: What I Learned Making C5 Envelopes (So You Don’t Have To)
- Conclusion
A C5 envelope is the stationery world’s sweet spot: big enough to feel important, small enough to feel intentional, and just fancy enough to make your mail look like it has a tiny résumé. Whether you’re sending invitations, a folded letter, a brochure, or a lovingly curated “please read this” document, making your own C5 envelope lets you control the look, the feel, and the vibe (technical term).
In this guide, you’ll learn two reliable ways to make a C5 envelope: the template method (fast, consistent, printer-friendly) and the measurement method (no printer, just ruler-powered confidence). We’ll also cover paper choices, scoring and folding like a pro, sealing without warping, adding liners, and a few mailing realitiesbecause nothing ruins a handcrafted masterpiece like discovering it needs different postage at the counter.
What Is a C5 Envelope (and What Fits Inside It)?
C5 is an international envelope size standard. The finished envelope is 162 × 229 mm (roughly 6.4 × 9 inches). You’ll sometimes see it listed as 229 × 162 mm depending on whether the seller lists width first or height firstsame rectangle, just rotated.
A C5 envelope comfortably fits:
- A5 paper (148 × 210 mm) flat
- A4 paper folded in half (so it becomes A5)
- Invitation suites, brochures, and thicker stationery (with a little planning)
In the U.S., C5 isn’t as “default” as a #10 envelope, but it’s popular for invitations, art mail, and anything you want to feel more boutique than “bank statement chic.”
Plan First: The Quick Math That Saves Paper (and Tears)
Every envelope is basically a center rectangle (the finished pocket) plus flaps that fold in and seal. If you’re building from measurements, use this simple formula:
- Sheet width = finished width + (2 × side flap)
- Sheet height = finished height + top flap + bottom flap
For a C5 envelope pocket, the “finished” area is 162 mm × 229 mm. Your flap sizes determine what paper you need. Bigger flaps feel sturdier and give you more glue surface, but they require a larger sheet.
Paper Size Reality Check: A4 vs. U.S. Letter
If you have A4 paper (210 × 297 mm), making a C5 envelope is pleasantly straightforward because C-sizes were designed to play nicely with A-sizes. If you’re using U.S. Letter (8.5 × 11 inches / 216 × 279 mm), it still worksyou just need slightly shorter flaps so everything fits neatly.
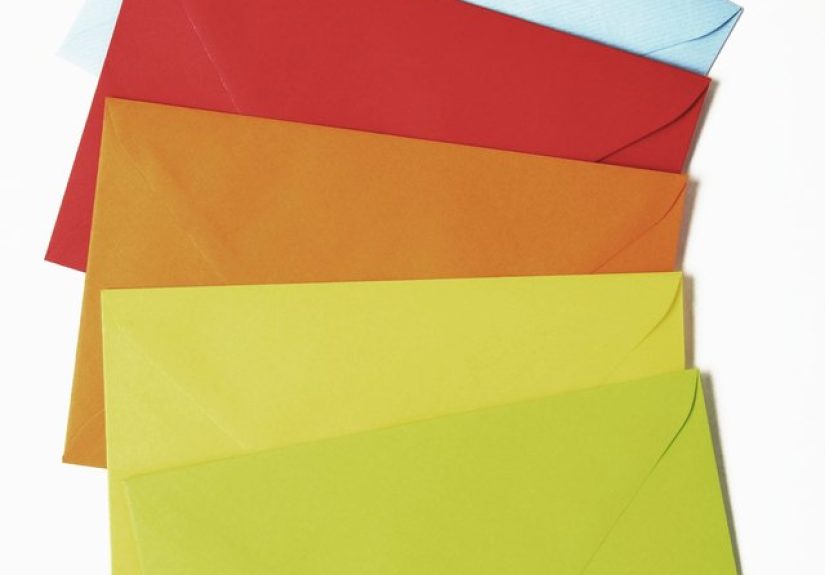
Choose the Right Paper (Because “Random Printer Paper” Has Limits)
You can make an envelope from regular copy paper. It will function. It will hold a letter. It will also feel like you wrapped your message in a polite grocery list. If you want your DIY C5 envelope to look intentional, pick paper based on what you’re mailing.
Good Paper Options for DIY Envelopes
- Text-weight paper (around 80 lb text / ~118 gsm): A great all-around choice for sturdy envelopes that still fold cleanly.
- Light cardstock: More durable, great for invitationsjust score carefully to avoid cracking.
- Kraft paper: Forgiving, hides scuffs, looks rustic-modern, and pairs well with white ink or bold stamps.
- Decorative paper: Beautiful, but test firstsome coatings resist glue and some prints rub off.
Thickness Tip: Match Paper to the Insert
If you’re mailing a thick invitation suite (invite + RSVP + details card + maybe a map for the inevitable “Where do I park?”), choose sturdier paper and plan slightly wider side flaps. If it’s just a single A5 sheet, you can go lighter.
Tools You Need (and a Few That Make You Feel Like a Stationery Wizard)
- Ruler (metal is best if you’re cutting with a blade)
- Pencil (mechanical pencils are precise; drama is optional)
- Scissors or a craft knife + cutting mat
- Bone folder (or the back of a spoon in a pinch)
- Glue stick or double-sided tape (cleaner than liquid glue for most papers)
- Clips or a heavy book (for pressing seams flat while drying)
- Scoring board (optional, but excellent for crisp folds and consistency)
Method 1: Template Method (Fast, Consistent, Beginner-Friendly)
The template method is the easiest way to get a clean, repeatable shapeespecially if you’re making multiple envelopes (wedding invites, holiday letters, or a dramatic series of handwritten apologies).
Step-by-Step: Make a C5 Envelope Using a Template
- Get a C5 envelope to trace (store-bought works) or create a template once using the measurement method below, then reuse it forever.
- Place the template on the back of your decorative paper and trace around it lightly with pencil.
- Cut out the traced shape carefully. Clean edges matter more than you think.
- Score the fold lines where flaps meet the center pocket. (Scoring = pressing a line so the paper folds neatly without cracking.)
- Fold side flaps inward first, then fold the bottom flap up.
- Adhere the bottom flap to the side flaps using double-sided tape or glue stick. Press firmly.
- Fold the top flap down to check alignment. Don’t seal it yetunless you enjoy redoing things.
- Insert your A5 item, then seal the top flap with tape, a sticker, or a lick-and-stick style adhesive if you’re going vintage.
Method 2: Measurement Method (No Printer Needed, Just Good Lines)
This method builds a C5 envelope from a flat sheet by drawing a center pocket and adding flaps around it. It’s perfect when you don’t have a printer, want exact control, or enjoy the calm authority of a ruler.
Decide Your Envelope Style
For DIY C5 using common paper sizes, the easiest style is an open-end envelope (the flap closes over the 162 mm side). It’s a great fit for invitations and A5 inserts. If you prefer a long-side opening (more like many commercial C5 envelopes), you’ll typically need larger paper to allow generous flaps.
Measurement Set A: C5 Envelope from A4 Paper (210 × 297 mm)
This version uses the full width of A4 and gives you comfortable flaps.
- Place A4 paper in portrait orientation (297 mm tall).
- Draw the center pocket: Make a rectangle 162 mm wide × 229 mm tall. Center it horizontally and leave room above and below for flaps.
- Add side flaps: From each vertical side of the pocket, measure 24 mm outward and draw lines. These are your side flaps.
- Add bottom flap: From the bottom of the pocket, measure 30 mm down and draw a line.
- Add top flap: From the top of the pocket, measure 38 mm up and draw a line.
- Shape the top flap (optional but pretty): Angle the corners of the top flap to create a point, or round them for a softer look.
- Cut the outer perimeter of the whole shape.
- Score along the pocket edges (all four sides of the center rectangle).
- Fold side flaps in, then fold bottom flap up.
- Seal side seams (tape or glue stick), press flat, then test-fit your insert before sealing the top.
Measurement Set B: C5 Envelope from U.S. Letter Paper (8.5 × 11 in / 216 × 279 mm)
U.S. Letter is shorter than A4, so we’ll use slightly shorter flaps to avoid awkward trimming. This still produces a functional, tidy envelopejust with a “no wasted space” efficiency.
- Place Letter paper in portrait (11 inches tall).
- Draw the center pocket: Rectangle 162 mm wide × 229 mm tall (about 6.38 × 9.02 in).
- Add side flaps: Measure 27 mm (about 1.06 in) outward on both sides.
- Add bottom flap: Measure 22 mm (about 0.87 in) below the pocket.
- Add top flap: Measure 28 mm (about 1.10 in) above the pocket.
- Cut the outer perimeter. If you have tiny leftover margins, trim them evenly (your future self will thank you).
- Score the fold lines around the pocket.
- Fold and adhere side flaps first, then bottom flap. Press seams flat under a heavy book for a minute.
- Test-fit, then seal the top flap.
Scoring, Folding, and Sealing Like You Meant It
Why Scoring Matters
Scoring creates a controlled fold line so the paper bends cleanly instead of cracking, wrinkling, or doing that “I’m a cheap takeout menu” crumple. A scoring board makes it faster, but a ruler + bone folder works just fine.
Best Adhesives for DIY Envelopes
- Double-sided tape: Clean, instant bond, great for crisp seams.
- Glue stick: Quick and widely available; choose a stronger craft version if possible.
- Liquid glue: Strong but can warp paperuse sparingly and press flat while drying.
For a polished look, apply adhesive in a thin strip near the edge of the flap, then press firmly with a bone folder. If the paper is delicate, test glue on a scrapsome coated papers resist adhesive like it’s a personality trait.
Make It Look Expensive (Without Actually Spending Expensive)
Add an Envelope Liner
Liners are the easiest way to make a DIY C5 envelope look boutique. Cut a liner shape that sits inside the envelope and attaches to the underside of the top flap (or lines the full interior if you’re feeling ambitious). Use a smooth adhesive that won’t create bumpsthin double-sided tape is your friend.
Try a Decorative Closure
- Wax seal (classic, dramatic, slightly medievalin a good way)
- Sticker seal (modern, easy, and less likely to melt in transit)
- Washi tape (cute, but test stickiness if mailing)
Addressing Tips for Clean Layout
If you’re handwriting, lightly pencil guidelines first (then erase). If you’re printing addresses, print on labels or carefully align a test sheet before feeding your final envelope. A little planning prevents the “why is the address drifting downhill?” moment.
Mailing Notes for the U.S. (Don’t Skip This Part)
Here’s the practical part: a C5 envelope is about 6.4 inches on its shorter side. In USPS terms, a letter-size envelope must be no more than 6-1/8 inches high (among other requirements). That means many C5 envelopes may be classified as a large envelope/flat rather than a standard letter, depending on orientation and how USPS measures the piece.
What to do:
- Measure your finished envelope (height, length, thickness) before mailing.
- Keep it rectangular and flat for easiest processing.
- If it exceeds letter-size limits, expect it to mail as a flat.
Common Mistakes (and Easy Fixes)
- Bulky seams: Use thinner adhesive strips and trim flap corners slightly so layers don’t stack.
- Warping: Switch to tape or glue stick, and press under a heavy book for 1–2 minutes.
- Insert doesn’t fit: Increase the pocket size by a few millimeters or reduce seam overlap. Also check if your paper is thick and stealing interior space.
- Flap won’t stay closed: Use a stronger seal (double-sided tape, sticker, or a proper envelope adhesive).
- Crooked folds: Score first, fold slowly, and use a bone folder to sharpen the crease.
Real-World Experience: What I Learned Making C5 Envelopes (So You Don’t Have To)
The first time I tried to make a C5 envelope, I approached it with peak optimism and minimal mathtwo traits that pair beautifully right up until scissors get involved. I grabbed a sheet of paper, eyeballed a center pocket, folded the corners in, and sealed it with whatever adhesive was closest (which, for the record, was not designed for paper). The result looked less like a refined envelope and more like a confused origami project that had given up halfway through college.
Here’s what actually made the difference once I started doing it “the smart way.” First: scoring is non-negotiable. If you skip scoring, your folds will wander, the paper will buckle, and the envelope will develop that permanent wrinkled expression like it just read an awkward text thread. A simple ruler and bone folder changed everythingsuddenly my flaps met at the corners instead of passing each other like strangers in a hallway.
Second: paper choice is basically your envelope’s personality. Copy paper works in a pinch, but it’s flimsy and tends to wrinkle when you apply glue. When I switched to a heavier text-weight sheet, the envelope instantly felt “real”like something you’d actually keep instead of recycling while walking back from the mailbox. Kraft paper was especially forgiving: it hides tiny imperfections, handles adhesive well, and looks intentionally stylish even if you’re not feeling intentionally stylish.
Third: adhesive can make or break the whole thing. Liquid glue is strong, sure, but it’s also a chaos agent. Too much and your seam ripples; too little and the flap pops open like it’s trying to escape. Double-sided tape became my go-to for side seams because it’s clean, instant, and doesn’t soak into the fibers. When I did use glue, pressing the seams under a heavy book for a minute stopped the warping and gave the envelope that crisp, “store-bought but better” finish.
Fourth: I learned to test-fit the insert before sealing the top flap. This sounds obvious, but you’d be amazed how easy it is to forget when you’re in the crafting flow. A5 paper is supposed to fit a C5 envelope comfortably, but thick paper, liners, and seam overlap can steal interior space. I now do a quick slide test before the final sealbecause nothing is more annoying than prying open your own envelope like you’re breaking into your own house.
Finally, I discovered the “secret sauce” for making DIY envelopes look high-end: tiny finishing touches. A neatly trimmed flap shape, a liner that peeks out by a hair, a sticker seal that matches the ink colorthese details take almost no extra time but elevate the whole piece. The envelope stops looking like a craft experiment and starts looking like intentional stationery. And that’s the whole point: you’re not just packaging paper. You’re packaging the moment someone opens it.
Conclusion
Making a C5 envelope is a satisfying blend of simple geometry and creative freedom. Start with the method that fits your toolstemplate for speed, measurements for controlthen level up with better paper, clean scoring, and a sealing method that won’t wrinkle your work. Once you’ve made one, you’ll realize you don’t just have an envelope. You have a custom envelope. Which is basically the stationery equivalent of showing up to a potluck with homemade dessert instead of a bag of chips.


