Table of Contents >> Show >> Hide
- What This Experiment Shows
- Materials You Need
- How to Make a Water Bottle Cap Pop off with Air Pressure: 10 Steps
- Step 1: Pick the Right Bottle
- Step 2: Inspect the Bottle and Cap
- Step 3: Put on Eye Protection
- Step 4: Choose a Safe Direction
- Step 5: Place the Cap Loosely on the Bottle
- Step 6: Hold the Bottle at the Middle
- Step 7: Squeeze Gently
- Step 8: Watch for the Pop
- Step 9: Repeat with Small Adjustments
- Step 10: Record What You Notice
- The Science Behind the Pop
- Why the Cap Should Be Loose, Not Tight
- Common Mistakes to Avoid
- Safe Variations for Better Learning
- Real-Life Examples of Air Pressure
- Experience Notes: What It Feels Like to Run This Experiment
- Final Thoughts
Important safety note: This guide explains a gentle, low-pressure science demonstration using hand pressure only. Do not use pumps, compressors, dry ice, chemicals, heat, glass bottles, or sealed high-pressure containers. A flying bottle cap can still surprise you, so wear eye protection, point the bottle away from people and pets, and keep the “pop” small. Science is more fun when nobody has to explain a forehead dent.
What This Experiment Shows
Air may look like “nothing,” but it behaves like something very real. It has mass, takes up space, moves around, and pushes on surfaces. When you squeeze a flexible plastic water bottle, you reduce the space inside it. The air trapped inside gets compressed, meaning the same air is forced into a smaller volume. That creates a small increase in pressure. If the bottle cap is placed loosely on top, the trapped air can push upward until the cap pops off.
This simple water bottle cap air pressure experiment is a fun way to introduce gas pressure, compression, force, volume, and Newton’s laws without needing a lab coat or a machine that makes scary noises. It is not a “rocket” project. It is a small tabletop demonstration designed to help you see how invisible air can create visible motion.
Materials You Need
- One empty, clean, flexible plastic water bottle
- The original plastic cap
- Safety glasses or goggles
- A clear table, counter, or outdoor area
- A towel or soft surface to catch the cap
- Optional: masking tape to mark a “cap landing zone”
Choose a thin, flexible bottle that can be squeezed easily by hand. Avoid thick soda bottles, damaged bottles, glass bottles, metal bottles, or anything designed to hold pressure. The goal is not maximum power. The goal is a small, controlled pop that demonstrates air pressure safely.
How to Make a Water Bottle Cap Pop off with Air Pressure: 10 Steps
Step 1: Pick the Right Bottle
Start with an empty plastic water bottle that is clean, dry, and flexible. A lightweight disposable water bottle works best because it compresses with gentle hand pressure. Do not use a carbonated drink bottle for this activity. Those bottles are sturdier and can encourage people to squeeze harder than necessary. That is exactly when a harmless experiment starts auditioning for a blooper reel.
Step 2: Inspect the Bottle and Cap
Check that the bottle is not cracked, sharply dented, or split. Look at the cap too. It should be clean, undamaged, and able to rest on the bottle opening without being screwed down tightly. If the cap threads are rough or broken, choose another cap. A cap that sticks can release unpredictably, and “unpredictable” is not a great lab partner.
Step 3: Put on Eye Protection
Before testing anything that may pop, snap, flick, bounce, or fly, wear safety glasses. Even a lightweight plastic cap can surprise your eyes at close range. If you are doing this with younger students, make goggles part of the routine before the bottle even appears. It helps turn safety into a normal part of experimenting, not a dramatic pause before chaos.
Step 4: Choose a Safe Direction
Point the bottle opening away from faces, pets, windows, screens, food, and anything fragile. A good setup is to aim the bottle toward an empty wall from several feet away, or to do the experiment outdoors with the cap pointed toward a soft landing area. Do not aim at anyone, even “just joking.” The joke gets old at the speed of a flying bottle cap.
Step 5: Place the Cap Loosely on the Bottle
Set the cap on top of the bottle opening without tightening it. The cap should sit evenly but loosely. If you screw it on, the air may not escape, and the bottle will simply crumple under your hand. If it is too loose, the cap may fall off before the pressure builds. You want the cap balanced enough to stay put, but free enough to lift when the air pushes upward.
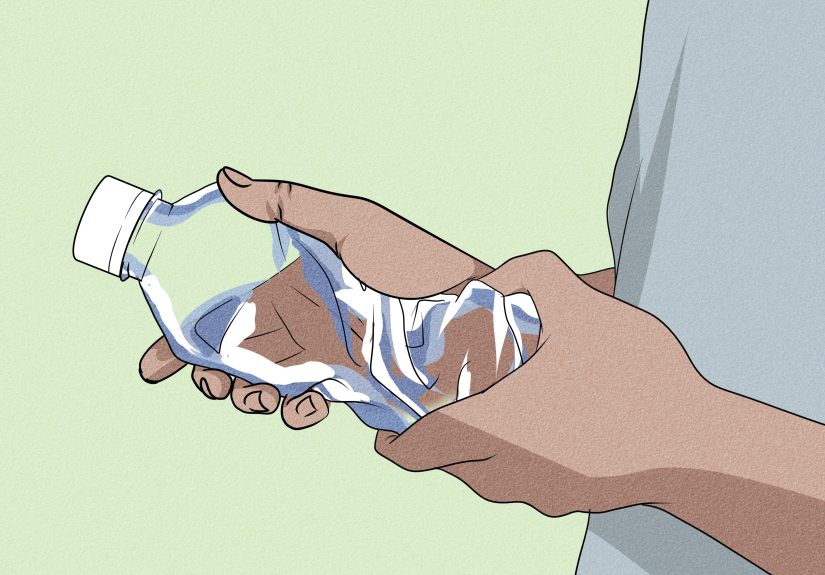
Step 6: Hold the Bottle at the Middle
Grip the bottle around the middle, not at the neck. Holding the bottle in the middle gives you better control and keeps your fingers away from the cap. Keep the bottle angled slightly away from you. Make sure nobody is standing in front of the opening. This is the moment when your inner scientist should be louder than your inner prankster.
Step 7: Squeeze Gently
Apply slow, steady pressure with your hand. Do not slam, stomp, crush, or squeeze with tools. As you squeeze the bottle, the air inside has less room. Because the air molecules are packed into a smaller space, the pressure inside the bottle rises slightly. That pressure pushes in all directions, including upward against the cap.
Step 8: Watch for the Pop
When the upward force from the compressed air becomes strong enough to overcome the cap’s weight and friction, the cap pops off. The cap may hop a few inches or make a soft snapping sound. That is enough. A tiny pop still proves the point: air pressure can create motion. You do not need a dramatic launch to learn the science.
Step 9: Repeat with Small Adjustments
Try the experiment again with tiny changes. Place the cap slightly tighter, then slightly looser. Squeeze slowly once, then try a quicker but still gentle squeeze. Compare what happens with a dry cap versus a cap with a tiny drop of water around the rim. Keep all changes small and controlled. Real experimentation is not “do it harder.” It is “change one thing and observe carefully.”
Step 10: Record What You Notice
Write down what happened. Did the cap pop higher when it was looser or tighter? Did squeezing near the middle work better than squeezing near the bottom? Did the bottle shape matter? These observations turn a simple bottle cap trick into a real science activity. Bonus points if your notes are clearer than “it went pew.”
The Science Behind the Pop
The key idea is pressure. Pressure is force spread over an area. Inside the bottle, air molecules are constantly moving and bouncing against the walls, the bottom, the sides, and the cap. When the bottle is not squeezed, the air inside and the air outside are close to balanced. Nothing exciting happens. The cap sits there, living its quiet plastic life.
When you squeeze the bottle, the inside volume decreases. The air molecules have less space to move around, so they collide with the inside surfaces more often. That creates higher pressure inside the bottle. Since the cap is the easiest part to move, the air pushes it upward. Once the upward force is greater than the cap’s resistance, the cap pops off.
This connects to a basic gas-law idea: when the volume of a gas decreases, its pressure can increase if the amount of gas and temperature stay mostly the same. In everyday words, squeezed air pushes back. You have probably felt this before when squeezing a sealed bag of chips, pressing on a balloon, or pushing air through a straw.
Why the Cap Should Be Loose, Not Tight
A loose cap turns the experiment into a simple pressure-release demonstration. A tight cap can trap air too well, causing the bottle to crumple or the cap to release suddenly if it is forced. That is why this activity should use only a loosely resting cap and hand pressure. The experiment works best when the cap is barely held in place, not when it is locked down like it is guarding a secret treasure.
Keeping the cap loose also makes the result easier to repeat. Students can test small changes and see cause and effect clearly. Too tight, and nothing happens. Too loose, and the cap falls before pressure builds. Just right, and the cap pops gently. Congratulations: you have entered the Goldilocks zone of bottle-cap physics.
Common Mistakes to Avoid
Using Too Much Force
The most common mistake is squeezing too hard. More force does not make the lesson better. It only makes the cap harder to control. Use gentle hand pressure and stop once the cap pops.
Aiming the Cap at Someone
Never aim the bottle at a person or animal. Even a small cap can hurt if it hits an eye. Always point the opening toward a safe area.
Using Pumps or Compressed Air
Do not connect the bottle to a bike pump, air compressor, inflator, or pressurized gas source. That changes a simple demonstration into a pressure hazard. This article is only about a low-pressure, hand-squeezed bottle.
Trying It with Heat or Chemicals
Do not heat the bottle, shake chemical mixtures inside it, use dry ice, or create gas reactions to pop the cap. Those methods can build pressure quickly and unpredictably. This experiment does not need drama. It already has a cap that thinks it can fly.
Safe Variations for Better Learning
Once you understand the basic pop, try safe variations that keep the pressure low. Use different empty water bottles and compare which shape works best. Test caps from the same brand versus different brands. Place a ruler behind the cap’s path and estimate how high it jumps. Try squeezing with one hand versus two fingers. Record your results in a simple table.
You can also turn this into a mini science fair project. Your question might be: “How does cap tightness affect how easily a bottle cap pops off with air pressure?” Your hypothesis could be: “A loosely placed cap will pop off with less squeezing force than a cap that is pressed down firmly.” Then test several trials and compare results.
Real-Life Examples of Air Pressure
Air pressure is not only a classroom topic. It appears all over daily life. A bicycle tire stays firm because air inside pushes outward. A suction cup sticks because outside air pressure helps press it against a smooth surface. A straw works because pressure differences help move liquid upward. Weather systems form partly because air pressure varies from place to place. Even your ears popping on an airplane is a pressure-change moment, although your ears are much less amused than your science teacher.
The water bottle cap pop is a tiny example of the same big idea: pressure differences can create motion. When pressure is higher in one place than another, air tends to move from the high-pressure area toward the lower-pressure area. In this activity, the compressed air inside the bottle pushes the cap out of the way so it can escape.
Experience Notes: What It Feels Like to Run This Experiment
The first time you try the water bottle cap air pressure experiment, the most surprising part is how little force it actually takes. Many people expect to squeeze the bottle like they are trying to crush a soda can in a superhero movie. But with the right cap position, a gentle squeeze is enough. The cap gives a tiny hop, makes a quick pop, and suddenly everyone in the room understands that air is not just empty space.
In a classroom, this activity works best when the teacher or group leader demonstrates it once before letting students test it themselves. That first demo sets the safety rules: goggles on, bottle pointed away, cap loose, hand pressure only. Once students see that the pop is small and controlled, they usually become more interested in the science than in turning it into a contest. That is the sweet spot. The activity becomes a question machine: Why did it pop? Why did it not pop that time? What changed? Why did this bottle work better?
One useful experience is to let students try a “failed” version on purpose. Place the cap too loosely and watch it fall off before pressure builds. Then place it too firmly and notice that the bottle simply dents inward. Finally, place it just loosely enough to seal the opening for a moment. The pop becomes a clear result of balance: enough contact to hold the cap briefly, but not so much that the cap cannot move. This helps students understand that science is often about conditions, not magic.
Another helpful observation is the sound. A soft pop usually means the air escaped quickly after building a small amount of pressure. No sound may mean the cap leaked air slowly or never sealed well enough. A louder snap may mean the cap was pressed too tightly, which is a sign to reduce force and reset the experiment more gently. Listening carefully gives students another way to collect data.
For home use, this experiment is best done on a table with a towel behind the bottle. The towel catches the cap and prevents the classic household mystery known as “Where did that tiny plastic thing go?” If several people are watching, have everyone stand beside or behind the person holding the bottle, never in front of it. The setup takes less than a minute, but the habit of arranging a safe test area is a valuable lesson by itself.
The best part of this activity is that it turns an ordinary object into a science tool. A plastic bottle becomes a pressure chamber, the cap becomes a movable plug, and your hand becomes the force that changes the bottle’s volume. Nothing fancy is required. The experiment is simple, repeatable, and easy to explain. It also gives students a reason to ask better questions, which is basically the entire point of scienceplus a tiny pop for entertainment.
Final Thoughts
Learning how to make a water bottle cap pop off with air pressure is really learning how gases behave when squeezed. The cap moves because air inside the bottle is compressed into a smaller space and pushes outward. With a loose cap, that push becomes visible as a small pop. Keep it gentle, wear eye protection, aim safely, and treat the activity as a science demonstration rather than a stunt.
Done correctly, this experiment is quick, memorable, and surprisingly educational. It proves that air is active, pressure is powerful, and even a humble bottle cap can become the star of a physics lesson. Not bad for something that was probably headed for the recycling bin five minutes ago.


