Table of Contents >> Show >> Hide
- What Does “Highlight Details Without Distressing” Actually Mean?
- Why DIYers Love This Look
- Step 1: Start With Proper Prep
- Step 2: Choose the Right Base Coat
- Step 3: Pick a Highlight Color That Creates ContrastNot Chaos
- Step 4: Use the Dry Brush Technique for Crisp Highlight Details
- Step 5: Try a Glaze for Softer, More Dimensional Highlights
- Step 6: Keep the Finish Clean, Not Distressed
- Best Places to Add Highlight Details
- Common DIY Mistakes to Avoid
- How to Seal the Finish
- Simple Color Ideas for a Non-Distressed Highlighted Look
- Final Thoughts
- DIY Experience Notes: What Real Projects Teach You About Highlighting Details Without Distressing
Note: The article below is an original synthesis based on current U.S. home-improvement, paint-brand, and safety guidance, including Better Homes & Gardens, The Spruce, This Old House, Sherwin-Williams, Benjamin Moore, BEHR, Rust-Oleum, Lowe’s, Home Depot, KILZ, Valspar, PPG, and EPA. Across these
US EPA
+5
Lowe’s
+5
kilz.com
+5
or adhesion or stain-blocking, use a durable furniture/trim finish, apply highlight color with a nearly dry brush or controlled glaze, avoid overloading edges, and use lead-safe practices on pre-1978 surfaces.
US EPA
+12
Better Homes & Gardens
+12
Lowe’s
+12
If you love the look of furniture, trim, and cabinetry with beautiful little detailsbut you do not want the “found this in a dusty barn and cried artistically over it” vibegood news: you can absolutely make details pop without distressing anything. In fact, this cleaner, more polished approach often looks more expensive, more intentional, and a whole lot easier to live with.
Whether you are working on a dresser with carved trim, a mirror frame with fancy corners, beadboard, cabinet doors, molding, or a thrift-store side table that deserves a glow-up, the trick is not sanding through the finish for a worn look. The trick is controlled contrast. You are using paint to highlight raised details, edges, grooves, and architectural features so they catch the eye without looking chipped, scraped, or “accidentally dragged through history.”
This guide walks you through exactly how to paint highlight details without distressing, which tools make the job easier, how to choose colors that actually work, and how to avoid the classic DIY mistakes that turn “subtle elegance” into “why is this trim yelling at me?”
What Does “Highlight Details Without Distressing” Actually Mean?
In DIY painting, distressing usually means intentionally creating wear by sanding edges, rubbing back topcoats, or applying antique finishes that mimic age. Highlighting without distressing is different. You keep the finish clean and intact, then use a lighter, darker, metallic, or slightly contrasting paint to emphasize details.
Think of it like makeup contouring for furniture. No fake damage. No rough patches. No dramatic life story required. You simply draw attention to the parts that deserve it.
This technique works especially well on:
- Carved wood furniture
- Cabinet doors with routed profiles
- Mirror and picture frames
- Baseboards, crown molding, and trim
- Beadboard and paneling
- Drawer fronts with raised patterns
- Decorative appliqués and furniture overlays
Why DIYers Love This Look
There is a reason this method keeps showing up in stylish DIY projects: it gives dimension without making the piece look old, shabby, or overworked. It is ideal if you want a finish that feels crisp, elegant, cottage-inspired, classic, modern farmhouse, or even a little glamwithout wandering into distressed territory.
It also gives you flexibility. You can go barely-there and refined with two shades from the same color family, or bolder with black and brass, navy and gold, white and taupe, sage and cream, or charcoal and warm wood tones. The highlight can whisper or it can flirt. It does not have to shout.
Step 1: Start With Proper Prep
Every beautiful painted finish begins with boring prep. Sorry. There is no charming way around this. If your surface is dirty, greasy, glossy, flaky, or dusty, your pretty highlight details will not save it.
Clean first
Wipe the surface thoroughly to remove dust, wax, oil, and grime. Kitchen cabinets, old side tables, and thrifted pieces are especially sneaky here. They may look innocent, but they are often coated in residue that can ruin adhesion.
Scuff-sand glossy surfaces
If the existing finish is slick, lightly sand it so primer and paint can grip. You do not need to sand the life out of it. You just want to dull the sheen and smooth rough spots.
Prime when needed
Primer is especially helpful if you are painting raw wood, stained wood, laminate, heavily used trim, dark surfaces you want to lighten, or anything with uneven porosity. A good primer creates a more even, durable base and helps the final color look true.
Repair before painting
Fill dents, caulk small trim gaps, and smooth damaged areas before you start. Highlight paint is extremely rude: it loves to emphasize flaws you hoped no one would notice.
Step 2: Choose the Right Base Coat
Your base coat is the main color of the piece. For a non-distressed finish, this coat should look solid, smooth, and intentional. It is the foundation that makes the highlight details feel crisp instead of chaotic.
Best paint choices for a smooth DIY finish
- Cabinet and furniture paint: Great for dressers, side tables, built-ins, and cabinets
- Trim enamel: Excellent for molding, doors, frames, and detailed woodwork
- Acrylic or latex enamel: Durable and beginner-friendly
- Waterborne alkyd formulas: Useful when you want a harder, furniture-quality finish
Satin, semi-gloss, and soft gloss finishes are usually the sweet spot for highlighted details. Flat finishes can mute the dimension, while high gloss can magnify every brush mark like it is entering a competition.
Step 3: Pick a Highlight Color That Creates ContrastNot Chaos
This is where the magic happens. Your highlight color should be different enough to define the detail, but not so aggressive that the piece looks striped, muddy, or clown-adjacent.
Easy highlight color formulas
- Subtle look: Use a shade that is one or two steps lighter or darker than the base color
- Classic contrast: Pair white with taupe, navy with brass, black with wood tones, or sage with cream
- Elegant shimmer: Use soft metallics like champagne, antique gold, bronze, or pewter on small details
- Clean modern style: Try monochromatic layering with different sheens instead of drastically different colors
If you want the safest route, test your highlight on the back or underside first. Color chips are optimistic little liars. Real surfaces tell the truth.
Step 4: Use the Dry Brush Technique for Crisp Highlight Details
The easiest way to paint highlight details without distressing is with a dry brush technique. This is not the same as messy, rustic dry brushing for a weathered look. Here, the brush is nearly dry so you can kiss the raised details with color instead of smearing paint into every corner.
What you need
- Small angled brush, stencil brush, or artist brush
- Paper towel or lint-free cloth
- Your highlight paint
- Good lighting and a little patience
How to do it
- Dip just the tips of the bristles into the highlight paint.
- Wipe most of the paint off on a paper towel or cloth.
- Lightly drag the brush across the raised details, corners, trim edges, carvings, or molding profiles.
- Build the color slowly with multiple light passes.
- Stop before the paint fills grooves or collects in corners.
The goal is gentle contact on high points only. If you see blobs, streaks, or paint settling into recesses, the brush is too wet. Back away. Blot. Breathe. Return with less paint and more dignity.
Step 5: Try a Glaze for Softer, More Dimensional Highlights
If you want a softer, more layered look, a glaze can be a beautiful option. Glaze adds transparency, which means the highlight looks more blended and less flat than straight paint.
This works especially well on trim, carved furniture, faux-finished pieces, and architectural details where you want depth without a heavily aged appearance.
How glaze helps
- It extends working time
- It softens contrast
- It creates depth in carved or recessed details
- It allows you to wipe back excess before it dries
For this method, brush the glaze mixture lightly over the detail, then wipe or feather it so the emphasis stays controlled. Glaze is excellent when you want the piece to feel decorative, polished, and dimensional rather than rustic or intentionally worn.
Step 6: Keep the Finish Clean, Not Distressed
This is the line many DIYers accidentally cross. They start with “I just want subtle highlighted details,” and suddenly they are rubbing edges, sanding corners, and making the nightstand look like it survived three wars and a leaky attic.
To avoid a distressed finish:
- Do not sand through the topcoat on purpose
- Do not apply dark wax heavily into corners unless you want an aged effect
- Do not use too much paint on the brush
- Do not outline every detail like a coloring book
- Do not create random wear patterns where real wear would never happen
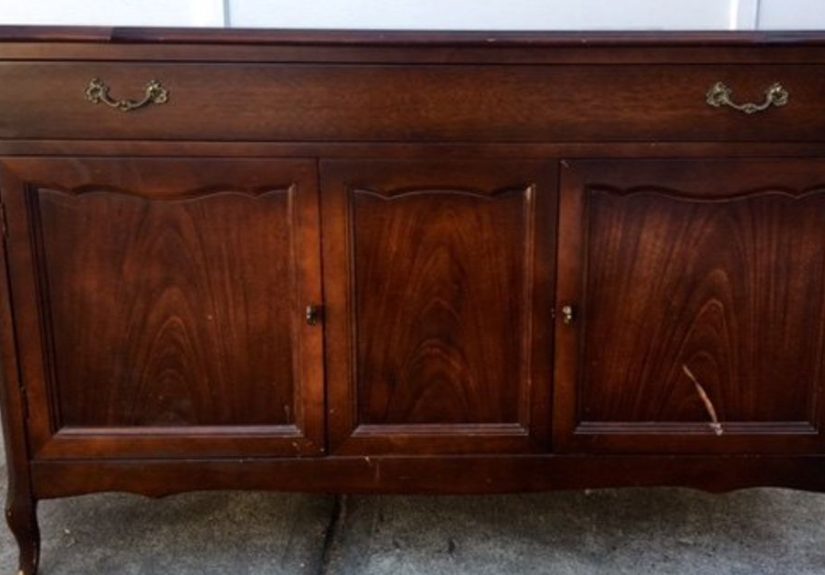
Highlighting should feel selective and believable. Raised scrollwork, bead edges, trim profiles, and molded corners are your best targets. Large flat areas usually do not need the extra attention.
Best Places to Add Highlight Details
Furniture
On dressers and sideboards, focus on drawer trim, decorative feet, carved corners, and raised center panels. A soft metallic on carved floral details can look upscale without feeling flashy.
Cabinets
Use highlight paint along routed edges, center panel frames, or decorative crown pieces. Keep it subtle so the kitchen does not start looking like it wants applause every time you open a drawer.
Frames and mirrors
This is one of the easiest DIY projects for beginners. Frames are smaller, easier to control, and perfect for experimenting with soft gold, champagne, cream, or darker accents.
Trim and molding
On interior trim, use a slightly different sheen or a tone-on-tone contrast to define architectural details. This works beautifully in older homes where you want to celebrate trim profiles without making the room feel fussy.
Common DIY Mistakes to Avoid
- Using too much paint: The number one problem. Your brush should feel almost disappointingly dry.
- Skipping prep: Dirty or glossy surfaces sabotage even the prettiest finish.
- Choosing too much contrast: High drama can look accidental instead of elegant.
- Rushing between coats: Let the base cure enough before adding highlights.
- Ignoring safety on older surfaces: If a home or painted item may contain old lead paint, use proper precautions before sanding or disturbing the finish.
How to Seal the Finish
If the piece will get a lot of uselike a side table, kitchen cabinet, vanity, or chairit is worth protecting your work. Choose a clear topcoat that matches the look you want. Water-based polycrylic-style finishes are popular for painted surfaces because they help preserve color clarity and are easier for many DIYers to use indoors.
Use a light hand. A heavy topcoat can drag the highlight color or create drips in detailed areas. Thin, even coats always win. Yes, always. Even when your inner chaos gremlin says, “One thick coat will be faster.” It will not.
Simple Color Ideas for a Non-Distressed Highlighted Look
- Warm white base + soft taupe highlights
- Charcoal base + antique gold detail accents
- Sage green base + cream dry-brushed trim
- Navy base + muted brass highlights
- Black base + satin wood-tone or bronze accents
- Greige base + slightly brighter ivory detailing
If you want timeless rather than trendy, tone-on-tone combinations are especially forgiving and elegant. They add depth without locking you into a very specific style.
Final Thoughts
Learning how to paint highlight details without distressing is one of those DIY skills that makes a piece look custom instead of crafty. The process is simple in theory: prep well, paint a smooth base, choose a thoughtful accent color, and apply it sparingly with a very dry brush or a soft glaze. But the real secret is restraint.
You do not need dramatic sanding, fake age, or heavy antiquing to create depth. You just need contrast in the right places. Let the detail do the talking, keep your brush light, and trust slow layering over big gestures. Your furniture, trim, or cabinets will look polished, dimensional, and deliberately designednot like they just survived a theatrical dust storm.
DIY Experience Notes: What Real Projects Teach You About Highlighting Details Without Distressing
One of the funniest things about this technique is that it looks fancy, but the learning curve is mostly about self-control. The first time many DIYers try to highlight painted details, they think the problem is color choice or brush quality. Usually it is enthusiasm. Too much paint. Too much pressure. Too much “I can fix it as I go.” That is how subtle trim turns into a loud outline.
In real projects, the biggest breakthrough usually comes when you stop trying to see instant transformation. On a carved dresser, for example, the first pass with a dry brush may look like almost nothing happened. That is actually a good sign. The best highlight work builds slowly. You add one whisper of color, then another, and suddenly the details start catching light in a way that looks expensive and intentional.
Another common experience is discovering that certain pieces do not need highlighting everywhere. A cabinet door may look far better if you accent only the outer profile and leave the inner panel alone. A mirror frame may need just a touch of metallic paint on the top ridges, not a full lap around every groove. This is where beginners often improve quickly: they realize the project gets better when they edit instead of decorate every square inch.
Lighting also changes everything. A highlight that looks dramatic under a work lamp in the garage may read much softer in a bedroom or hallway. That is why seasoned DIYers often step back several times, move the piece into natural light if possible, and look at it from normal viewing distance. Up close, every brushstroke feels personal. From across the room, only the overall effect matters.
Texture matters, too. Raised appliqués, beadboard grooves, carved corners, and routered trim practically beg for highlight paint. Flat laminate? Not so much. Many people learn through experience that the most successful pieces already have some architectural character. The paint is not inventing detail; it is revealing it.
There is also a very practical lesson that shows up again and again: the base finish needs to be truly dry before adding highlights. When DIYers rush this step, the detail coat can drag, smear, or create muddy patches. Waiting is annoying, but it is a lot less annoying than repainting a drawer front while muttering dramatic things under your breath.
And then there is color confidence. At first, people tend to choose either no contrast at all or way too much. Experience teaches balance. A cream highlight on a white base might be too shy. Bright gold on pale gray might be too loud. But a soft champagne on greige, or a muted ivory on sage, often lands beautifully. The more projects you do, the better you become at spotting that sweet spot between “barely there” and “why is this furniture wearing stage makeup?”
Perhaps the best experience-based advice is this: stop before you think you are finished, walk away, and come back later. Highlight painting rewards patience. Many DIYers find that the piece looked perfect ten minutes before they decided to “just add a little more.” In this category of DIY, restraint is not a boring virtue. It is the entire aesthetic.
“` :


