Table of Contents >> Show >> Hide
- Why Paint Quotes on Walls?
- Supplies You’ll Need
- How to Paint Quotes on Walls: 13 Steps
- Step 1: Choose the Right Quote
- Step 2: Pick a Font That Matches the Mood
- Step 3: Decide on the Painting Method
- Step 4: Measure the Wall Space
- Step 5: Create a Layout Before Painting
- Step 6: Prepare the Wall Surface
- Step 7: Protect the Area Around the Quote
- Step 8: Transfer the Quote to the Wall
- Step 9: Test Your Paint and Brush
- Step 10: Use Thin Layers of Paint
- Step 11: Remove the Stencil or Tape Carefully
- Step 12: Touch Up the Lettering
- Step 13: Let It Cure and Style the Space
- Best Paint Types for Wall Quotes
- Common Mistakes to Avoid
- Design Ideas for Painted Wall Quotes
- Extra Experience: What Painting Quotes on Walls Teaches You
- Conclusion
- SEO Tags
Painting quotes on walls is one of those DIY projects that looks wildly impressive but does not require a fine arts degree, a studio apron, or the ability to casually say “negative space” at dinner parties. With the right preparation, a steady layout, and a little patience, you can turn a blank wall into a personal statement piecewhether that statement is “Dream big,” “Coffee first,” or “Please do not ask me what’s for dinner.”
The secret is not magical handwriting. The secret is planning. A beautiful wall quote starts long before the brush touches the wall. You need a clean surface, the right paint, a layout that fits the room, and a technique that prevents fuzzy edges. This guide walks you through how to paint quotes on walls in 13 practical steps, from choosing the words to touching up the final letter.
Why Paint Quotes on Walls?
Wall quotes add personality without taking up floor space. They work in bedrooms, nurseries, kitchens, home offices, entryways, classrooms, and creative studios. Unlike framed art, painted lettering feels built into the room. It can be bold and dramatic above a sofa, soft and sweet over a crib, or funny and slightly sarcastic near a coffee station.
Another advantage is flexibility. You can paint a wall quote by hand, use a stencil, trace a printed template, project the text, or cut vinyl stencil film. The method you choose depends on your comfort level, wall texture, budget, and how crisp you want the letters to look.
Supplies You’ll Need
- Printed quote design, stencil, projector, or vinyl stencil film
- Painter’s tape
- Level or laser level
- Pencil or chalk pencil
- Measuring tape or ruler
- Drop cloth
- Mild soap, sponge, and microfiber cloth
- Fine-grit sanding sponge, if needed
- Interior wall paint or acrylic craft paint
- Small artist brushes, stencil brush, foam pouncer, or mini roller
- Paint tray or paper plate
- Transfer tape, if using vinyl stencil film
- Touch-up paint matching the wall color
How to Paint Quotes on Walls: 13 Steps
Step 1: Choose the Right Quote
Before you grab a paintbrush, choose a quote that fits the room and the people who use it. A nursery may call for something gentle. A kitchen might deserve a line about gathering, gratitude, or snacks. A home gym can handle a motivational quote, although “Just five more reps” may feel personally aggressive after leg day.
Keep the quote short if you want a clean, readable design. Long paragraphs can look cluttered on a wall unless you are intentionally creating a mural-style typography piece. For most homes, one to three lines works best.
Step 2: Pick a Font That Matches the Mood
The font matters as much as the words. Script fonts feel romantic or elegant, but they can be harder to paint because of thin strokes and loops. Bold sans-serif fonts are easier for beginners and look modern. Serif fonts feel classic and literary, perfect for reading nooks or office walls.
For your first wall quote, avoid fonts with extremely tiny details. If the letter looks tricky on your computer screen, it will feel like a tiny obstacle course on the wall. Choose a font that is beautiful but paintable.
Step 3: Decide on the Painting Method
There are four popular ways to paint quotes on walls:
- Freehand painting: Best for confident artists or loose, handmade lettering.
- Stencil painting: Great for crisp, repeatable letters.
- Projection tracing: Useful for large quotes and custom fonts.
- Vinyl stencil film: Excellent for sharp edges and professional-looking results.
If you are a beginner, a stencil or projector is the most forgiving choice. Freehand painting can look charming, but it also has a way of revealing that your “straight line” has taken a scenic route across the wall.
Step 4: Measure the Wall Space
Measure the width and height of the area where the quote will go. Consider furniture, light switches, shelves, doors, windows, and artwork nearby. A quote above a headboard should usually be centered over the bed, not necessarily centered on the entire wall. A quote in an entryway should be readable from the natural viewing angle.
Use painter’s tape to mark a temporary rectangle on the wall. This helps you visualize the size before committing. Step back several feet and look at it from different points in the room. If the taped area feels too large, shrink it. If it looks like the wall swallowed your quote for breakfast, go bigger.
Step 5: Create a Layout Before Painting
Design the quote on your computer or sketch it on paper. Pay attention to line breaks. The phrase “Home is where the heart is” looks balanced when split naturally, but awkward spacing can make even a lovely quote feel clumsy.
For example:
Good layout:
Home is where
the heart is
Awkward layout:
Home is where the
heart is
The goal is visual rhythm. Keep important words together when possible. If using a script font, make sure the letters are not so close that paint fills the spaces between them.
Step 6: Prepare the Wall Surface
A clean wall is the foundation of a clean quote. Dust, grease, and fingerprints can stop paint from sticking well. Wipe the area with a mild soap solution, then rinse lightly with a damp sponge and let the wall dry completely.
If the wall has bumps, old paint drips, or rough patches, lightly sand the area and wipe away dust. Fill small holes or dents with spackle, let it dry, sand smooth, and touch up the base wall color if needed. Lettering looks best on a smooth, even surface.
Safety note: If your home was built before 1978, avoid sanding or scraping painted surfaces until you know whether lead-based paint may be present. Lead dust can be dangerous, especially for children and pregnant people. When in doubt, use lead-safe practices or consult a certified professional.
Step 7: Protect the Area Around the Quote
Even small lettering projects can create paint splatters. Paint is sneaky. It waits until you relax, then lands on the floor like it pays rent there. Place a drop cloth under your work area and move nearby furniture away from the wall.
If your quote is near trim, shelves, or wall fixtures, protect those edges with painter’s tape. Press tape firmly so paint cannot creep underneath. A plastic putty knife or old gift card can help seal the tape edge without damaging the wall.
Step 8: Transfer the Quote to the Wall
Now it is time to get the words onto the wall. Choose the transfer method that matches your plan:
- Stencil: Tape the stencil in place and check alignment with a level.
- Projector: Project the quote onto the wall, adjust the size, then trace lightly with pencil.
- Graph method: Draw a grid over your printed design and a larger matching grid on the wall, then copy one square at a time.
- Vinyl stencil: Apply transfer tape, burnish from the center outward, position it on the wall, and smooth it carefully.
Use a level for every line, especially with longer quotes. Human eyes can detect crooked text quickly. Your guests may not know why the room feels odd, but their brains will quietly whisper, “That sentence is sliding downhill.”
Step 9: Test Your Paint and Brush
Before painting the actual quote, test your paint on cardboard or a hidden wall area. Make sure the color contrasts well with the wall. A pale gray quote on a white wall can look elegant in theory and completely invisible in real life.
Use a small artist brush for detailed lettering, a stencil brush for stencils, or a foam pouncer for larger block letters. For very large letters, a mini foam roller can work, but use very little paint to avoid bleeding under the stencil edges.
Step 10: Use Thin Layers of Paint
The biggest mistake in wall quote painting is loading the brush with too much paint. More paint does not mean better coverage. It usually means blurry edges, drips, and regret. Dip the brush lightly, then dab off the excess on a paper towel or plate.
For stencils, use a gentle dabbing motion instead of brushing back and forth. Brushing sideways can push paint under the stencil and create fuzzy letters. Apply one thin coat, let it dry, then add another if needed.
For hand-painted letters, outline the shape first, then fill in the center. Keep your wrist steady and move slowly. If your hand shakes a little, take a break. This is wall art, not a timed cooking show challenge.
Step 11: Remove the Stencil or Tape Carefully
If you are using a stencil, remove it while the paint is still slightly wet unless the stencil product instructions say otherwise. Pull it away slowly and evenly. If you used painter’s tape around the design, peel it back at an angle rather than yanking it straight off.
Do not panic if you see small imperfections. Nearly every DIY wall quote has a few tiny flaws at this stage. The magic happens during touch-up, which is basically the editing process for paint.
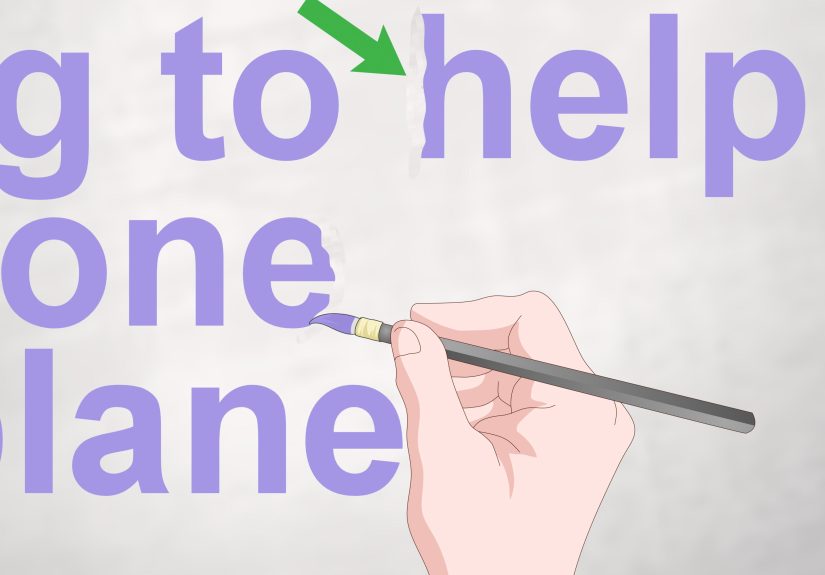
Step 12: Touch Up the Lettering
After the quote dries, inspect it in natural daylight and room lighting. Use a fine artist brush to sharpen edges, fill thin spots, and correct small gaps. Keep some of the original wall paint nearby to clean up any smudges or overpainted areas.
If a letter edge looks fuzzy, paint over the mistake with the wall color, let it dry, then repaint the letter edge. This small back-and-forth process can make a DIY quote look much more polished.
Step 13: Let It Cure and Style the Space
Paint may feel dry quickly, but it often needs more time to cure fully. Avoid rubbing or cleaning the quote for several days. Once it is fully dry, style the surrounding area. Add a bench under an entryway quote, pillows beneath a bedroom quote, or plants near a reading nook quote.
The goal is to make the wall quote feel intentional, not like a sentence that wandered into the room and got lost.
Best Paint Types for Wall Quotes
For most indoor wall quotes, high-quality interior latex paint or acrylic craft paint works well. Latex wall paint is ideal if you want the quote to match other painted features in the room. Acrylic craft paint is useful for small designs because it comes in many colors and is easy to handle with small brushes.
Choose the finish carefully. Matte and eggshell finishes look soft and modern, while satin and semi-gloss are easier to wipe clean. A subtle design can be created by using the same color as the wall but in a different sheen. For example, a matte wall with a satin quote can create a tone-on-tone effect that appears when light hits it.
Common Mistakes to Avoid
Using a Quote That Is Too Long
A long quote may look inspiring on a phone wallpaper, but on a wall it can feel crowded. Edit ruthlessly. Your wall is not a novel.
Skipping the Level
Even if you have a good eye, use a level. Straight lettering is one of the fastest ways to make the project look professional.
Painting Too Quickly
Rushing causes smudges, uneven lines, and accidental sleeve marks. Slow down and work in sections.
Using Too Much Paint
Heavy paint is the enemy of crisp lettering. Thin layers give you more control and cleaner edges.
Ignoring Wall Texture
Textured walls make sharp lines harder. If your wall is heavily textured, choose bold fonts, larger letters, and a dabbing technique.
Design Ideas for Painted Wall Quotes
Need inspiration? Try one of these ideas:
- Kitchen: “Gather here” above a breakfast nook.
- Home office: “Start where you are” above a desk.
- Nursery: “Loved beyond measure” over the crib area.
- Entryway: “Welcome home” near the front door.
- Bedroom: “Rest your beautiful mind” above the headboard.
- Laundry room: “Loads of fun” for people who enjoy puns and clean socks.
You can also add simple decorative elements like leaves, stars, lines, flourishes, or small painted frames. Just do not overdecorate. The quote should remain the star of the wall.
Extra Experience: What Painting Quotes on Walls Teaches You
The first time you paint a quote on a wall, you may feel a strange mix of confidence and fear. The confidence comes from watching a few tutorials and thinking, “Yes, I am absolutely the kind of person who does custom wall lettering now.” The fear arrives when you stand in front of the blank wall holding a tiny brush, suddenly aware that walls are large and mistakes are visible.
One of the biggest lessons is that preparation feels boring until it saves the project. Cleaning the wall, measuring, taping guidelines, testing the paint, and stepping back to check the layout may not be glamorous, but these steps prevent most disasters. A quote that is perfectly painted but slightly off-center will bother you forever. You may pretend it does not. You may even say, “It gives the room character.” But deep down, every time you walk past it, your soul will reach for a level.
Another experience many DIYers share is learning that less paint is better. Beginners often want to cover the letter in one thick coat. That is how paint sneaks under stencils and turns elegant lettering into something that looks like it was painted during an earthquake. The better approach is light pressure, thin coats, and patience. It feels slower at first, but the final result is cleaner.
Wall texture is another teacher. Smooth walls are friendly. Orange-peel or knockdown texture is more dramatic. On textured walls, small script fonts can become difficult because the brush skips over raised areas. Larger letters, simple fonts, and stencil brushes work better. If your wall has texture, do not fight it. Design around it.
You also learn the value of distance. Up close, every tiny wobble looks enormous. From six feet away, most small imperfections disappear. This does not mean you should ignore mistakes, but it does mean you should judge the final design from normal viewing distance. Nobody is going to inspect your wall quote with a jeweler’s loupe unless your friends are unusually intense.
Finally, painting a quote on a wall teaches you that DIY projects do not need to be perfect to be meaningful. A painted quote can mark a season of life, encourage your family, welcome guests, or simply make a plain room feel more like you. The best wall quotes are not just decorative. They tell the room what kind of energy to hold.
Conclusion
Learning how to paint quotes on walls is a beginner-friendly DIY project when you break it into clear steps. Choose a short quote, plan the layout, prepare the wall, transfer the design carefully, and paint with thin, controlled layers. Whether you use a stencil, projector, vinyl stencil film, or freehand technique, the key is patience. Measure twice, paint lightly, and keep touch-up paint nearby like a loyal sidekick.
A painted wall quote can make a room feel warmer, smarter, funnier, or more personal. And if the first attempt is not flawless? That is what touch-ups are for. In the world of DIY wall lettering, a small brush and a calm attitude can fix almost anything.


