Table of Contents >> Show >> Hide
- Why Stencils Are Perfect for Apartment Decor
- Before You Start: Know Your Rental Rules
- Choose the Right Stencil for Your Space
- Stencil Supplies You Actually Need
- How to Stencil an Apartment Wall Like a Pro
- Best Places to Use Stencils in an Apartment
- Common Stenciling Mistakes to Avoid
- How to Make a Stenciled Apartment Look Designer, Not DIY
- Real-Life Experiences With Apartment Stenciling
- Final Thoughts
Apartment living can be a little like dating someone who says, “Be yourself,” and then hands you a list of rules. You want your place to feel warm, stylish, and unmistakably you, but you also do not want to lose your security deposit over one enthusiastic design decision involving a sponge roller and a dream. That is exactly why stencils deserve a standing ovation. They are budget-friendly, surprisingly versatile, and capable of turning a plain apartment wall, door, headboard, or even a sad little corner into something with real personality.
If wallpaper feels too pricey, murals feel too intimidating, and hanging one more framed print feels like emotional surrender, stencils land in the sweet spot. They let you create custom patterns, faux-wallpaper effects, bold accent walls, subtle borders, and artistic details without needing the hand of Michelangelo or the wallet of a luxury designer. Better yet, stencil projects can be scaled up or down depending on your lease, your courage level, and how much coffee you have had.
In this guide, we will break down how to personalize your apartment using stencils in a way that is stylish, practical, and smart for renters. You will learn how to choose the right stencil, where to use it, how to avoid common mistakes, and how to get a designer look without accidentally creating what can only be described as “abstract panic.”
Why Stencils Are Perfect for Apartment Decor
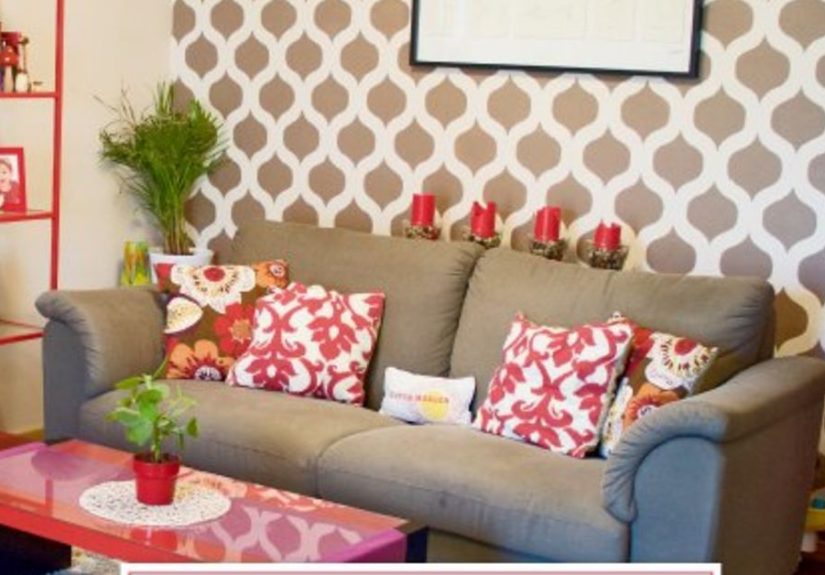
Stencils work beautifully in apartments because they offer high visual impact without requiring a full renovation. A repeating stencil pattern can mimic wallpaper, but usually at a lower cost and with far more control. You can go bold with a geometric accent wall in the living room, soft and airy with a leafy pattern in the bedroom, or playful with arches, dots, or art-deco motifs in a hallway or breakfast nook.
They are also wonderfully flexible. You can stencil directly on a wall if your lease allows painting. If it does not, you can apply the same idea to removable panels, canvas art, drawer fronts, closet doors, side tables, lampshades, storage boxes, fabric curtains, or a DIY headboard. In other words, stencils are not just a wall treatment. They are a personality delivery system.
Another reason stencils shine in small homes is that they help define zones. Studio apartment? Use a stencil treatment behind the bed to create a faux headboard wall. Tiny dining nook? Add a repeated pattern to make the corner feel intentional instead of like your table lost a housing battle. Entryway that is basically just “the place where shoes happen”? A stenciled section can make it feel curated and welcoming.
Before You Start: Know Your Rental Rules
Before you open a paint can with the confidence of a home-renovation TV host, check your lease. Some landlords allow painting if the walls are returned to their original color before move-out. Others do not want you touching the walls at all. If the policy feels vague, ask for permission in writing. That tiny step can save you a giant headache later.
If painting is off the table, do not abandon the stencil idea. Just redirect it. You can stencil on removable wallpaper panels, framed poster boards, canvas drops, peel-and-stick surfaces, or thrifted furniture pieces. This approach gives you the same custom look while keeping the actual apartment walls gloriously drama-free.
Also think about reversibility. The best apartment decorating ideas are the ones that feel personal today and practical on move-out day. Stylish now, sensible later. That is the renter’s creed.
Choose the Right Stencil for Your Space
The best stencil pattern depends on the mood you want and the size of the room. In a compact apartment, scale matters a lot. A huge oversized motif can look amazing on one focal wall, but it may overwhelm a narrow hallway or tiny bathroom. On the flip side, a very intricate small pattern can make a wall feel busy if the room already contains strong colors, open shelving, or lots of visible belongings.
Popular stencil styles for apartments
Geometric patterns are modern, clean, and ideal for living rooms or work-from-home corners. Botanical and floral designs soften a space and work beautifully in bedrooms or bathrooms. Moroccan or tile-inspired stencils can give kitchens and entryways a boutique-hotel vibe. Minimal arches, lines, or dots are perfect if you want something stylish but subtle.
Color choice matters just as much as the pattern. Tone-on-tone stenciling, like a soft taupe pattern on a warm beige wall, creates texture without screaming for attention. High-contrast designs, like white over navy or charcoal over blush, feel more graphic and dramatic. Neither is wrong. One whispers. The other enters the room like it owns stock in confidence.
Stencil Supplies You Actually Need
You do not need a truckload of fancy tools. Most stencil projects succeed because of technique, patience, and paint restraint rather than gadget overload.
Basic stencil toolkit
A typical project calls for a stencil, paint, painter’s tape, a stencil brush or small foam roller, a tray, drop cloths, a level, a pencil for light guide marks, paper towels or a rag, and a step stool if you are working high on a wall. Optional but helpful extras include low-tack spray adhesive, a measuring tape, and a small artist brush for touch-ups.
The biggest surprise for beginners is this: you need less paint on your tool than you think. Then less than that. Then probably a little less. Most stencil disasters happen because the brush or roller is overloaded, which causes paint bleed under the edges.
How to Stencil an Apartment Wall Like a Pro
1. Prep the surface
Make sure the wall is clean, dry, and free of dust. Wipe it gently if needed and let it dry fully. If the wall has fresh paint, give it enough time to cure before stenciling. A stencil on a tacky wall is like socks on a wet floor: technically possible, emotionally unwise.
2. Pick your placement carefully
Decide whether you want a full accent wall, a repeated upper border, a framed panel effect, or a small decorative zone. Measure the wall and find a starting point that keeps the pattern visually balanced. In many rooms, beginning near the top center or from the most visible corner works best. Use a level so your pattern does not slowly drift into “haunted house” territory.
3. Test before committing
Always do a test section. This is not a sign of fear. This is wisdom in sweatpants. Try the stencil on poster board, cardboard, a hidden area, or a removable sample panel first. Testing lets you check paint coverage, spacing, color contrast, and whether you love the design enough to repeat it forty-seven more times.
4. Secure the stencil
Attach the stencil with painter’s tape. If needed, use a very light tack adhesive designed for stencil work. Smooth the stencil flat so the edges sit snugly against the surface. Any air gap is an open invitation for paint bleed.
5. Use less paint than your heart suggests
Dip your stencil brush or foam roller lightly into the paint, then blot off the excess on paper towels or the tray. The tool should feel almost dry. This is the secret sauce. Apply paint with a dabbing, stippling, pouncing, or light swirling motion rather than sweeping back and forth like you are brushing hair. Multiple thin layers are far better than one thick coat.
6. Build the color slowly
Stencil painting rewards patience. Add thin layers until the coverage looks right. If you rush, the edges blur. If you work steadily, the pattern looks crisp and intentional. Congratulations, you are now one controlled wrist movement away from a faux custom finish.
7. Move and align with care
Peel the stencil away gently and reposition it using guide marks or built-in registration marks on the stencil. Work section by section. Step back every few repeats to make sure the pattern is lining up and the spacing still looks balanced. This is where many DIY projects are won: not with talent, but with periodic backing-up and squinting.
8. Remove tape carefully and finish strong
Once the section is done, remove tape slowly and touch up tiny imperfections with a small brush. If your project includes painter’s tape edges around a border or frame, remove the tape carefully for clean lines. Then let the whole piece dry fully before styling the room around it.
Best Places to Use Stencils in an Apartment
Accent walls
This is the classic choice for a reason. A stenciled accent wall behind the sofa, bed, or dining area adds instant personality without covering the entire apartment in pattern. It is ideal if you want a big transformation from one project.
Entryways and hall nooks
Small spaces love detail. A stencil pattern in the entry creates a memorable first impression and makes even the tiniest pass-through feel designed. Pair it with a slim bench, mirror, and a tray for keys, and suddenly your apartment says, “Yes, I have my life together,” even if your junk drawer disagrees.
Closet interiors and office nooks
If you work from home or have open storage, a stenciled back wall inside a closet office or book nook adds charm without dominating the whole room. It is a smart way to create a surprise moment that looks great on video calls and even better in person.
Doors, headboards, and furniture
No wall permission? No problem. Stencil a flat-panel door, a thrifted nightstand, a dresser front, or a homemade plywood headboard. These pieces give you the same custom feel while staying portable. When you move, the design moves with you. Unlike that one shelf bracket you installed wrong in college.
Fabric panels and curtains
Stenciling drapery panels or hanging fabric panels is a renter-friendly trick with designer energy. It adds softness, pattern, and color without requiring permanent wall changes. This works especially well in bedrooms, living rooms, and dining areas that need a little vertical interest.
Tile-look projects
If you want the look of patterned tile in a kitchen backsplash zone, on a tray, or on a movable panel, tile-inspired stencils are fantastic. They can create a polished, high-end look on a smaller scale and help tie together color schemes in kitchens and bathrooms.
Common Stenciling Mistakes to Avoid
Using too much paint: the number one mistake. Blot more than you think you need. Then blot once more just for your future self.
Skipping the test run: what looks charming in your head can look strangely aggressive on the wall. Test first.
Choosing the wrong scale: tiny dense patterns in a small cluttered room can feel chaotic. Oversized motifs in awkward narrow spaces can look cut off and clumsy.
Ignoring room function: a busy high-contrast pattern in a sleep space may not feel restful. Meanwhile, a soft repeated stencil in a work nook may be exactly the quiet visual texture the area needs.
Forgetting move-out reality: if you rent, think about removal and repainting before you begin. Personal style is excellent. Surprise repair bills are less glamorous.
How to Make a Stenciled Apartment Look Designer, Not DIY
The difference usually comes down to restraint and styling. Pick one main stencil moment and let it breathe. Repeat a color from the stencil elsewhere in the room through pillows, art, bedding, or ceramics so the design feels connected. Keep surrounding decor edited enough that the stencil reads like intention rather than background noise.
You can also create a high-end look by treating the stencil like architecture. Frame a stenciled section with trim, paint a faux panel shape first, or use repeated arches to mimic built-in alcoves. Even a simple monochrome stencil can look expensive when the room around it is calm and coordinated.
And remember: perfection is not the goal. Slight variation gives hand-painted work character. You are not trying to manufacture a wallpaper clone in a factory. You are creating a home that feels layered, lived in, and personal. A little soul beats sterile every time.
Real-Life Experiences With Apartment Stenciling
One of the most interesting things about using stencils in an apartment is that the emotional payoff often arrives before the project is even finished. The first time a plain wall starts developing pattern, the room suddenly stops feeling generic. It no longer looks like a unit someone else approved in a leasing office. It starts looking like a place with a point of view. That shift matters more than people expect.
Many renters discover that stenciling scratches a very specific itch: the need to personalize without overcommitting. You are not knocking down walls. You are not ordering custom millwork. You are making a small but visible design move that says, “This space has a human in it with taste, opinions, and perhaps too many throw pillows.” For people living in apartments where every finish feels builder-basic, that can be incredibly satisfying.
There is also a practical side to the experience. A stencil project often teaches people how they actually want to live in the room. Someone may start out thinking they want a full patterned wall, then realize a framed stenciled panel behind the bed gives them all the drama they need. Another person may test a dark geometric design in the dining nook and discover the room feels smaller, then switch to a soft tone-on-tone pattern that adds texture without visual weight. In that sense, stenciling becomes part design project, part self-discovery, part very affordable therapy.
The process itself has a rhythm to it. At first, it feels slow. You tape, dab, blot, line up, step back, and repeat. Somewhere around the fourth or fifth repeat, however, the method starts to click. The work becomes almost meditative. You stop worrying about whether you are “good at DIY” and start focusing on the simple pleasure of making something by hand. That is one reason stencils have lasted as a decorating trick for so long: they are accessible. You do not need elite artistic skills. You need patience, decent lighting, and the willingness to admit that less paint really is more.
Another real-world advantage is flexibility. Apartment dwellers often move more frequently than homeowners, and stencil projects can adapt to that reality. If you create your design on a removable panel, thrifted furniture piece, or DIY headboard, you can take the look with you to the next place. Even when the stencil is painted directly on the wall, many people feel the project was worth it because of the enjoyment they got while living with it. Home is not only about resale logic or move-out strategy. It is also about daily pleasure.
Perhaps the best experience of all is the reaction from other people. Guests almost always assume a good stencil project cost more than it did. They ask where the wallpaper came from. They lean in. They look impressed. You get to casually say, “Oh, that? I did it with a stencil,” which is the decorating equivalent of dropping the mic in slow motion.
Final Thoughts
If you want to personalize your apartment using stencils, the formula is simple: know your lease, choose a pattern that fits the room, prep carefully, use very little paint, and let patience do the heavy lifting. Whether you create a bold accent wall, a delicate faux-wallpaper finish, or a renter-friendly design on a movable surface, stencils make it possible to add character without spending a fortune.
Most apartments start out as blank boxes. That is not an insult. It is an opportunity. With the right stencil, even the most forgettable wall can become a feature, a backdrop, a conversation starter, or the thing that makes the whole room click. And in a home full of ordinary surfaces, that is no small magic trick.


