Table of Contents >> Show >> Hide
- What Sistering a Wall Stud Actually Means
- When Sistering Makes Sense
- When Sistering Is Not Enough
- Load-Bearing vs. Non-Load-Bearing: Why It Changes Everything
- What a Proper Sistering Repair Usually Involves
- Code-Aware Details Homeowners Should Know
- Common Mistakes That Make a Sistering Repair Worse
- Sistering vs. Replacing the Stud
- Real-World Experiences With Sistering Wall Studs
- Conclusion
If a wall stud is cracked, notched too aggressively, chewed up by old leaks, or weakened by a plumbing adventure that got a little too creative, sistering is often the smartest fix. In plain English, sistering means fastening a new stud alongside the damaged one so the new piece helps carry the load and stiffen the wall. It is a practical, common framing repair that can save time, preserve surrounding materials, and keep a minor problem from turning into an expensive “why is the drywall suddenly waving at me?” situation.
That said, sistering is not magic. It is not a cure-all for every structural issue, and it is not the same thing as ignoring damage and hoping paint will handle it. The right repair depends on whether the wall is load-bearing, how badly the stud is damaged, whether the bottom or top plate is compromised, and whether plumbing, wiring, or HVAC created the problem in the first place.
This guide explains how reinforcing a wall stud by sistering works, when it makes sense, when it does not, and what a proper repair typically involves. It is written for readers who want a clear, realistic overview they can use to plan a safe, code-aware repair or talk intelligently with a contractor.
What Sistering a Wall Stud Actually Means
Sistering a wall stud means attaching a new framing member directly beside an existing stud so the two pieces act together. Think of it as adding a strong backup singer to a lead vocalist who has lost their voice. The original stud may still be there, but the new stud takes on some or all of the structural work depending on the situation.
In a simple non-load-bearing partition wall, sistering may be used to stiffen a bowed stud, strengthen a cracked section, or create a flatter surface for drywall. In a load-bearing wall, however, the repair usually needs to restore continuous load transfer from the top plate down to the bottom plate. That is why full-height sister studs are commonly required for structural repairs, while short patch pieces are usually reserved for limited, non-bearing situations.
The goal is not just to make the wall look better. The goal is to restore strength, keep the wall plumb, protect finishes, and prevent future movement.
When Sistering Makes Sense
Sistering is usually a good option when the damage is limited to one or a few studs and the rest of the wall assembly is still sound. Common examples include:
Cracks, splits, or checks in a stud
A stud that is split lengthwise or cracked near a fastener can often be reinforced if the surrounding wall is otherwise healthy. A sistered stud helps reduce flex and restores stiffness to the wall face.
Studs weakened by plumbing or electrical work
This is the classic remodeling surprise. Someone wanted to run a pipe, drain, or cable and removed more wood than the framing could comfortably spare. In those cases, reinforcement may involve sistering, an approved stud shoe, or both, depending on the size and location of the cut.
Localized water or termite damage
If damage is limited and you still have solid wood available for fastening, sistering can be part of the repair. But if rot extends into the plates, the sheathing, or multiple adjacent studs, a partial fix is usually not enough. The moisture source or pest issue has to be solved first, or the new lumber will just be joining a losing team.
Minor bowing or twist
When a stud is more annoying than dangerous, sistering can help flatten the wall and make drywall installation easier. This is especially useful during remodels when the wall is already open.
When Sistering Is Not Enough
There are situations where sistering alone is not the right answer. If the wall is load-bearing and the damage is severe, a full replacement or engineered repair may be necessary. The same goes for walls with extensive rot, multiple cut studs in a row, sheathing damage, or signs that the load path above has already shifted.
You should also be cautious around exterior walls, walls under beams, walls that run perpendicular to floor joists, and walls that line up with supports in a basement or crawlspace. Those clues often suggest the wall may be structural. Once you enter that territory, “pretty good” is not the standard. The repair needs to be right.
In plain terms: if the wall supports a roof, second floor, large opening, or heavy point load, get professional confirmation before anyone starts cutting, shimming, or improvising.
Load-Bearing vs. Non-Load-Bearing: Why It Changes Everything
The biggest difference in any sistering repair is whether the wall carries weight. A non-load-bearing wall mostly supports itself and the wall finish. A load-bearing wall helps transfer weight from above down to the foundation.
That distinction affects the repair strategy in a major way. In a non-load-bearing wall, a sister piece may only need to extend well beyond the damaged section to stiffen it effectively. In a load-bearing wall, the safer standard is typically a full-length sister stud that bears from plate to plate. That continuous member restores the path that the damaged stud may no longer provide.
Homeowners often guess wrong here, especially in older houses, remodels, and additions. A wall can look ordinary and still be doing important structural work. Exterior walls are often load-bearing, but interior walls can be too. A wall under a beam, perpendicular to joists, or stacked over another wall below deserves extra caution.
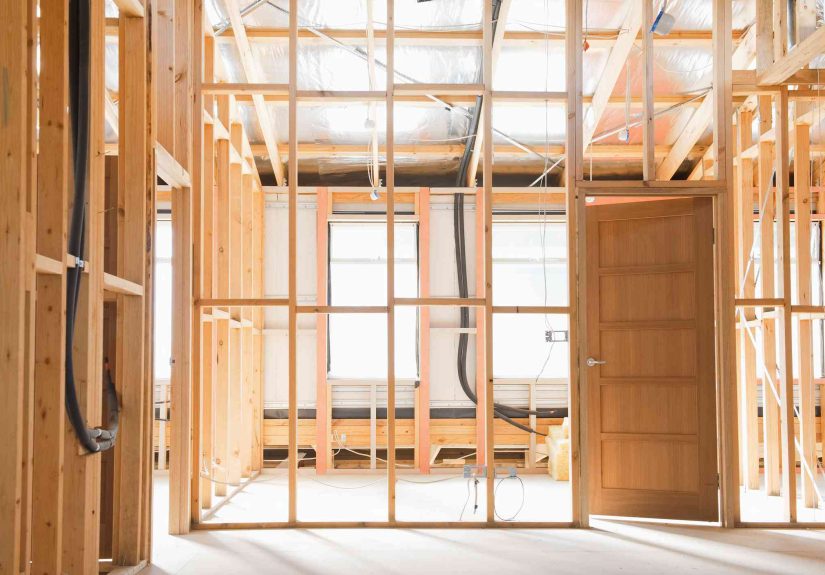
What a Proper Sistering Repair Usually Involves
A professional-quality repair usually follows a straightforward logic, even if the details vary by house.
1. Open the wall enough to see the whole story
You cannot evaluate a stud through optimism alone. The wall covering needs to be opened enough to inspect the stud, the plates, nearby utilities, blocking, sheathing, and any signs of water intrusion or insect damage. Many “one bad stud” projects turn out to be “one bad stud plus a sketchy bottom plate and a pipe that has been playing fast and loose with physics.”
2. Confirm the cause of the damage
If the stud was cut for plumbing, the pipe layout may need correction. If the damage came from a leak, fix the moisture source first. If the stud is crushed or split because of settlement, window loads, or structural movement, sistering alone may not address the real issue.
3. Match the new stud to the wall
The new framing member should match the existing stud depth and wall layout. Flush faces matter. A sister stud that sits proud or recessed can create a new drywall headache even if the structural repair is sound.
4. Restore a continuous load path where needed
For load-bearing walls, the replacement member generally needs to run from the bottom plate to the top plate. The idea is simple: weight from above must travel down through solid framing, not through hope, caulk, and a motivational speech.
5. Fasten the members together securely
The new stud must be attached firmly to the existing stud and, when required, to the top and bottom plates. Many practical guides recommend fastening at regular intervals along the length of the repair so the two members work together instead of merely standing next to each other like awkward strangers at a bus stop.
6. Restore what was removed
If fireblocking, insulation, shield plates, or finishes were removed during the repair, they need to go back. This is one of the most overlooked parts of the job. Structural repair is only part of a wall system. A proper close-up also considers fire safety, utility protection, air sealing, and finish quality.
Code-Aware Details Homeowners Should Know
You do not need to memorize code language to understand the big ideas behind a good repair. A few rules come up again and again in stud repairs.
First, there are limits on how much a stud can be notched or bored before reinforcement is required. In general, bearing and exterior walls allow less material removal than non-bearing walls. That is why a drain line that “barely fit” might actually have turned a structural stud into decorative lumber.
Second, protection matters. If pipes or wires run close to the face of a stud, protective metal plates are often required so future nails or screws do not punch into them. That tiny guard plate can be the difference between a finished remodel and an indoor fountain.
Third, fireblocking is not optional just because it is hidden. If wall cavities were opened and blocking was removed, it usually must be restored before closing the wall. Inspection checklists regularly flag missing fireblocking because concealed wall cavities can spread fire and smoke fast.
Finally, engineered products and specialty connectors come with their own rules. If a repair involves trusses, LVLs, I-joists, or oversized holes through studs, do not freestyle it. Those members and connectors need manufacturer-approved or engineer-approved methods.
Common Mistakes That Make a Sistering Repair Worse
Using a short patch where a full-length repair is needed
This is the big one. A short piece may stiffen a non-bearing wall, but it does not magically create proper load transfer in a bearing wall.
Ignoring the plates
If the bottom plate is rotten, split, or loose, reinforcing only the stud is like buying new running shoes for a broken staircase. The assembly is only as good as the parts it bears on.
Closing the wall without fixing the root problem
Leaks, pests, recurring moisture, and over-cut plumbing layouts must be addressed first. Otherwise the wall gets prettier and weaker at the same time.
Forgetting utility protection
A repaired stud with an unprotected pipe or cable near the edge is just setting up the next emergency call.
Assuming “straight enough” is good enough
A sistered stud should support structure and help create a flat wall plane. If it is badly out of alignment, the repair may still leave visible waves in drywall, trim, or tile.
Sistering vs. Replacing the Stud
Sistering is often preferred because it is less invasive. Fully removing a stud can be messy, especially in exterior walls where sheathing, siding, or dense nailing patterns make access difficult. A sister repair can preserve more of the original wall while still restoring strength.
But replacement is sometimes the better call. If a stud is badly rotted from end to end, if both ends are compromised, or if the wall layout has already been altered in a way that prevents a solid sister repair, replacement may be cleaner and more reliable. In structural work, easier is not always better. Better is better.
Real-World Experiences With Sistering Wall Studs
One of the most common real-life stories starts in a bathroom. A homeowner opens the wall for a remodel, feels confident, and then discovers that an old drain line was installed by someone who apparently believed studs were more of a suggestion than a building component. The pipe fits, sure, but the stud now looks like it lost a fight with a beaver. In many cases, that is when sistering enters the conversation. What people learn quickly is that the actual repair is not just about adding wood. It is about deciding whether the wall carries load, whether the pipe should stay where it is, and whether the original damage affected neighboring studs too.
Another frequent experience comes from leak repairs. A small stain on drywall turns into an opened wall cavity, which turns into the discovery that the bottom few inches of one stud are soft, the insulation is tired, and the bottom plate has seen better decades. Homeowners often hope they can patch only the visibly bad section. Sometimes that works in a very limited non-bearing context, but often the lesson is that damage is rarely as tidy as it appears from the room side. Sistering can still be part of the fix, yet the successful projects are usually the ones where the leak source is solved first and the full stud bay is evaluated before any closing work begins.
There is also the classic “I just wanted to hang drywall on a straight wall” experience. In older homes, some studs are not broken at all; they are simply bowed, twisted, or slightly out of plane. Sistering in these cases is less about rescue and more about creating a flatter surface. People are often surprised by how much easier finishing becomes when the framing is corrected before drywall goes back up. Mud can hide a lot, but it cannot perform miracles forever.
Contractors also talk about the psychological side of sistering. It feels like a small repair, so people underestimate it. Once the wall is open, though, they discover electrical cables too close to the stud face, missing fireblocking, random shims, mystery holes, and one lonely screw doing the emotional labor of six fasteners. The repair becomes a reminder that walls are systems, not just boards standing upright.
The best experiences usually have one thing in common: patience. The person doing the work takes time to inspect the entire cavity, measure carefully, verify alignment, and think about how loads, finishes, and utilities all interact. The worst experiences usually begin with a sentence like, “I figured I’d just slap another two-by-four next to it.” That phrase has launched many unnecessary second repairs.
In the end, sistering earns its reputation because it is practical. It can save a wall from full demolition, restore confidence in a damaged section, and make a remodel cleaner and stronger. But the real-world lesson is consistent: sistering works best when it is treated as a thoughtful framing repair, not a shortcut dressed up as craftsmanship.
Conclusion
Reinforcing a wall stud by sistering is one of the most useful framing repair concepts a homeowner can understand. When done appropriately, it can restore strength, improve wall straightness, and preserve more of the existing structure than a full tear-out. It is especially valuable for localized damage caused by cracks, minor rot, over-boring, or remodel-related cuts.
The key is knowing where the line is. Non-load-bearing walls offer more flexibility. Load-bearing walls demand a more complete repair strategy, often with a full-height sister stud and careful attention to load transfer. Add in code limits on cuts and holes, utility protection, and fireblocking, and it becomes clear that sistering is simple in concept but not casual in execution.
If you remember one thing, make it this: the best sistering repair does not merely hide damage. It restores the wall as a functioning system. That is what separates a durable repair from a future callback.


