Table of Contents >> Show >> Hide
- Step 1: Safety First (Yes, Before You Touch Anything)
- Step 2: Diagnose the Problem Like a Pro
- Step 3: Common Washing Machine Problems and Easy Fixes
- Step 4: Front-Load vs. Top-Load: Does It Change the Repair?
- Step 5: Repair or Replace? Doing the Math
- Step 6: Preventive Maintenance to Avoid Future Repairs
- Real-World Experiences: What DIY Washer Repairs Are Really Like
- 1. Your washer is full of your life story (in tiny objects)
- 2. The hardest part is often just moving the washer
- 3. You learn to respect “a little water”
- 4. You might save hundreds of dollars in under an hour
- 5. You also learn when to say “Nope”
- 6. Maintenance stops feeling like a chore
- 7. Confidence carries over to other appliances
- Final Thoughts
Few sounds are as terrifying as a washing machine that suddenly starts banging, buzzing, or just… stopping.
The good news? Many washer problems look scarier than they are, and with a little patience (and a towel or two),
you can safely tackle a lot of washing machine repair jobs yourself and save serious money on service calls.
This guide walks you through how to repair your washing machine step by step: from basic safety and diagnosis,
to fixing common issues like a washer that won’t drain, fill, spin, or stop smelling like a swamp.
We’ll also talk about when it’s smarter to repair vs. replace, and share real-world DIY experiences so you know what to expect.
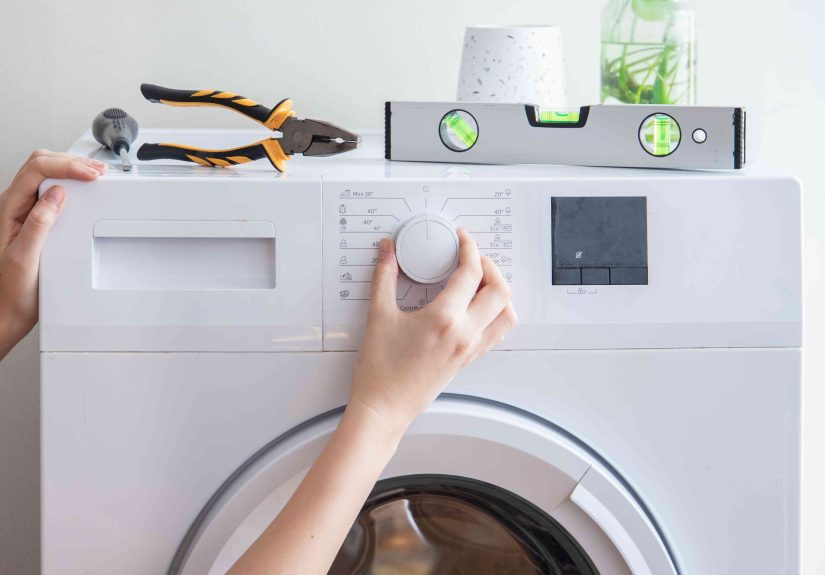
Step 1: Safety First (Yes, Before You Touch Anything)
Before you turn into a weekend appliance warrior, think like a safety inspector. Appliance repair pros repeat the same rule:
always disconnect power and water before working on a washing machine. Unplugging the unit and flipping the breaker off
dramatically lowers the risk of electric shock and damage to electronics.
Basic safety checklist
- Unplug the washer. Never work on a live appliance, even for “just a second.”
- Shut off the water supply. Turn off both hot and cold valves to avoid leaks while you disconnect hoses or move the machine.
- Wear protection. Closed-toe shoes, gloves, and safety glasses help protect you from sharp edges and surprise splashes.
- Keep towels and a shallow pan handy. Many repairs involve draining water from hoses or the pump.
- Check the floor. Water + soap + tile = DIY skating rink. Mop up spills as you go.
Once the machine is safe to touch, you’re ready to diagnose the problemno stethoscope required.
Step 2: Diagnose the Problem Like a Pro
A washing machine usually tells you what’s wrong by how it misbehaves.
Before you start ordering parts, identify the main symptom:
- Washer won’t turn on
- Washer won’t fill
- Washer won’t drain
- Washer won’t spin or leaves clothes sopping wet
- Washer is leaking
- Washer smells terrible
- Washer is noisy (banging, grinding, or squealing)
Modern washersespecially front-load modelsare more complex than older top-loaders, but most common failures still come
down to clogs, stuck parts, worn belts, or user habits like overloading. Home repair resources and appliance pros note that
a handful of straightforward fixes can solve a majority of washer breakdowns.
Step 3: Common Washing Machine Problems and Easy Fixes
Problem 1: Washer Won’t Drain
A washer that won’t drain is one of the most common DIY repair situations. Typically, either:
- The drain hose is kinked or clogged.
- The pump filter is full of lint, coins, or mystery objects.
- The drain pump itself is jammed or failing.
How to fix a washer that won’t drain
- Unplug the machine and turn off water.
- Inspect the drain hose. Pull the washer forward, locate the hose at the back, and check for kinks, twists, or visible blockages.
Straighten it and clear any clogs. - Clean the pump filter. Many front-load washers have a filter behind a small access panel on the lower front.
Place a shallow pan or towel underneath, open the cap slowly, and let trapped water drain. Remove lint, buttons, and debris, then reinstall. - Check the pump. If the pump hums but doesn’t move water, a small object may be stuck in the impeller.
In some models you can access it from the front or underside by removing a few screws. If the pump is broken or burned out,
replacing it is usually a straightforward bolt-and-hose job.
If, after cleaning the hose and filter, your washer still won’t drain, a faulty pump or control board may be to blamethis is the point
where many people call in a pro, especially on newer machines.
Problem 2: Washer Fills Very Slowly (or Not at All)
If your washer takes forever to fillor never fills enough to start the cyclethe problem is often:
- Water valves not fully open
- Clogged inlet screens at the back of the machine
- A failing water inlet valve assembly
How to fix a slow-filling washer
- Confirm valves are fully open. Turn both hot and cold water valves all the way on.
- Clean inlet screens. Unplug the washer, shut off the water, disconnect the hoses, and
remove the small mesh screens inside the valve inlets. Rinse away mineral deposits and debris, then reinstall. - Test the water inlet valve. If cleaning the screens doesn’t help, the valve may be failing.
Many homeowners replace this part themselves by removing the old valve, transferring hoses and wires one at a time,
and installing a new OEM or high-quality replacement.
Problem 3: Washer Won’t Spin or Clothes Are Sopping Wet
Poor spinning can be caused by:
- Drain problems (water still in the tub)
- Unbalanced loads or overloading
- Worn drive belt or motor coupler
- Faulty lid switch (on many top-load washers)
How to fix a spin problem
- Check for standing water. If the tub is full, fix the drain problem firstit often solves the spin issue too.
- Rebalance the load. Heavy items like towels and blankets can bunch up on one side and trigger out-of-balance protection.
Redistribute clothing and try again. - Inspect the lid switch (top-load). If your washer only spins when you press the lid down,
the switch may be worn or broken and will need replacement. - Check the drive belt (if equipped). On belt-driven models, access the belt from the rear or bottom panel.
Look for cracks, glazing, or breakage. Replace if worn.
Problem 4: Washer Leaks
Leaks usually come from:
- Loose or damaged hoses
- A clogged or cracked drain pump
- A torn door seal (gasket) on front-load washers
Tracking down a leak
- Check the hoses. Inspect fill and drain hoses for cracks, loose clamps, or corrosion. Tighten or replace as needed.
- Inspect around the pump. Look for drips around the pump housing or where hoses connect.
- Inspect the door gasket. On front-load machines, gently pull back the rubber gasket and check for tears, mold buildup,
or trapped items like coins. Cleaning mild mold can help; tears usually mean it’s time for a new gasket.
Problem 5: Washer Smells Bad
Front-load washers in particular are famous for funky smells thanks to trapped moisture, detergent residue, and built-up grime.
Experts recommend leaving the door or lid open between loads, cleaning the gasket, and running regular cleaning cycles to keep odor at bay.
How to freshen a smelly washer
- Leave the door open. Let the interior air dry after each load.
- Clean the gasket monthly. Wipe around and under the rubber seal with a mild cleaner or diluted vinegar to remove residue.
- Run a cleaning cycle. Use the washer’s “clean tub” cycle with a washer cleaner or hot water and a cleaning product formulated for washing machines.
- Use the right detergent. High-efficiency (HE) machines need HE detergent; too much soap leads to residue and odor.
Step 4: Front-Load vs. Top-Load: Does It Change the Repair?
Front-load washers tend to be more water- and energy-efficient and gentler on clothes, but they also have more parts that need attention,
like door gaskets and more complex drain systems.
- Front-load positives: Great cleaning, lower water use, gentler tumble action.
- Front-load negatives: More prone to moldy smells, vibration if not leveled, and gasket issues.
- Top-load positives: Simpler design, often easier DIY repairs, faster access to clothes mid-cycle.
- Top-load negatives: Some models tangle clothes, can be harder on fabrics, and may use more water.
The basic DIY washing machine repair stepssafety, diagnosis, hose and filter checksare similar for both.
The main differences are what panels you remove and how you access the pump, belt, or gasket.
Step 5: Repair or Replace? Doing the Math
At some point, every washing machine forces The Big Question: is it worth repairing, or should you replace it?
Consumer testing groups suggest using age, repair cost, and machine quality to decide.
Rules of thumb
- If the repair will cost more than 50% of a new washer, consider replacing.
- If your washer is 10+ years old, even a moderate repair might not be worth it.
- High-quality machines sometimes justify a bigger repair because they tend to last longer.
- Multiple serious issues (pump + control board + bearings) usually mean it’s time to shop.
Also factor in efficiency: newer front-load and high-efficiency top-load washers use much less water and can lower
long-term utility bills, which helps offset the cost of replacement.
Step 6: Preventive Maintenance to Avoid Future Repairs
The cheapest repair is the one you never have to make. Many common issuesslow draining, smells, leaks, and even broken partscome from
overloading, poor maintenance, or using the wrong products.
Simple habits that extend washer life
- Don’t overload. Overloading strains the motor, bearings, and suspension, and can even damage the basket and pump.
- Clean the washer monthly. Run a cleaning cycle and wipe detergent drawers and gaskets.
- Leave the door open after use. This reduces mold and odor, especially in front-loaders.
- Inspect hoses and cords. Replace cracked hoses and damaged cords before they fail.
- Know what not to wash. Soggy, super-heavy bath mats and similar items can overload modern high-speed machines and cause expensive damage to bearings and brackets.
A few minutes of maintenance each month can help avoid many of the breakdowns that send people shopping for a new washer years too early.
Real-World Experiences: What DIY Washer Repairs Are Really Like
Reading a repair guide is one thing; standing in front of a half-disassembled washer with a handful of wet coins is another.
Here’s what many homeowners discover when they tackle DIY washing machine repair for the first time.
1. Your washer is full of your life story (in tiny objects)
It’s amazing how much “lost” stuff hides in the pump filter and drain system: coins, paper clips, hair ties, LEGO pieces,
and the occasional credit card. People who open their pump filter for the first time are often shocked at how much debris is trapped there
and how fast their draining problem disappears once it’s cleaned. It’s a strangely satisfying reminder to check your pockets before washing.
2. The hardest part is often just moving the washer
For many DIYers, the biggest challenge isn’t diagnosing the problem; it’s gently pulling the machine away from the wall to access hoses and panels
without scratching the floor or wrenching their back. Furniture sliders, a helper, and a little patience make this step much easier.
Once the washer is out in the open, the actual repairremoving a few screws, cleaning a filter, swapping a hoseusually feels manageable.
3. You learn to respect “a little water”
Even when you think the drum is empty, there’s almost always water hiding in the pump, hose, or sump.
DIYers quickly learn the value of a shallow pan, plenty of towels, and opening any drain caps slowly.
That first surprise gush may be annoying, but after you’ve handled it once, you go into future repairs preparedand more confident.
4. You might save hundreds of dollars in under an hour
Service calls add up fast, especially for simple issues like clogged drain hoses or filters.
Many homeowners report that their washer repair ended up costing them nothing more than time and maybe a few dollars for a replacement clamp or generic part.
When the alternative is a $150–$300 visit for a 20-minute fix, DIY starts to look very attractive.
5. You also learn when to say “Nope”
Experienced DIYers often develop a healthy sense of boundaries. They might feel comfortable cleaning filters, replacing hoses, swapping a pump,
or changing a belt, but draw the line at complicated electronic controls, sealed tubs, or major bearing replacements that involve special tools.
Learning to recognize the difference between “this is a Saturday project” and “this could turn into a mechanical nightmare” is part of the journey.
6. Maintenance stops feeling like a chore
Once you’ve seen the sludge that can build up behind a detergent drawer or under a gasket, it’s easier to justify a quick monthly clean.
Many people say that after one nasty repair, they automatically leave the door open, wipe the gasket, and run regular cleaning cycles because
they know what happens if they don’t. A little routine care feels like an easy trade compared with a smelly drum or standing water.
7. Confidence carries over to other appliances
Fixing a washing machine is a gateway skill. Once you’ve successfully diagnosed a drain issue, safely unplugged and shut off water,
removed panels, and replaced parts, other appliances become less intimidating. Homeowners often report that repairing a washer gave them the confidence
to tackle a dryer that squeaks, a dishwasher that doesn’t drain, or a fridge with a clogged defrost drain.
In short, learning how to repair your washing machine doesn’t just save money on this one applianceit builds your overall
DIY skill set. You get cleaner clothes, a quieter laundry room, and a new sense of “I can handle this” whenever something in the house starts acting up.
Final Thoughts
Washing machines work hard, but they’re not mysterious. With solid safety habits, a clear diagnosis, and a willingness to remove a few screws,
you can handle many common problems yourselfespecially issues with draining, filling, spinning, smells, and small leaks.
When repairs get too complex or too expensive, you’ll also know when it’s smart to invest in a new, more efficient machine instead.
Start with the basics: unplug, shut off water, check hoses and filters, clean the gasket, and don’t overload.
Your washer will run better, last longer, and cost you far less in surprise breakdowns. And if you do end up with a handful of coins and a Lego pirate
from the pump filter, consider it your well-earned DIY trophy.


