Table of Contents >> Show >> Hide
Keep your spuds snowy-white, safe, and ready when you arewithout sogginess or weird flavors.
At a Glance
- Best short-term method: Submerge in cold water and refrigerate.
- Time limit: Use within ~24 hours for best quality; cook sooner if you can.
- Bonus: A splash of lemon juice or vinegar slows browning.
- Fridge target: ≤ 40°F / 4°C.
- Safety rule: Don’t leave cut potatoes at room temp longer than 2 hours.
- Going beyond 1 day? Blanch, then freeze (details below).
Step-by-Step: The 9-Step Method (with Pictures)
1) Pick the right potatoes
Russets, Yukon Golds, and red potatoes all store similarly once peeled. Avoid green-tinged or heavily sprouted potatoes; they’re lower quality and may contain elevated glycoalkaloids that taste bitter.
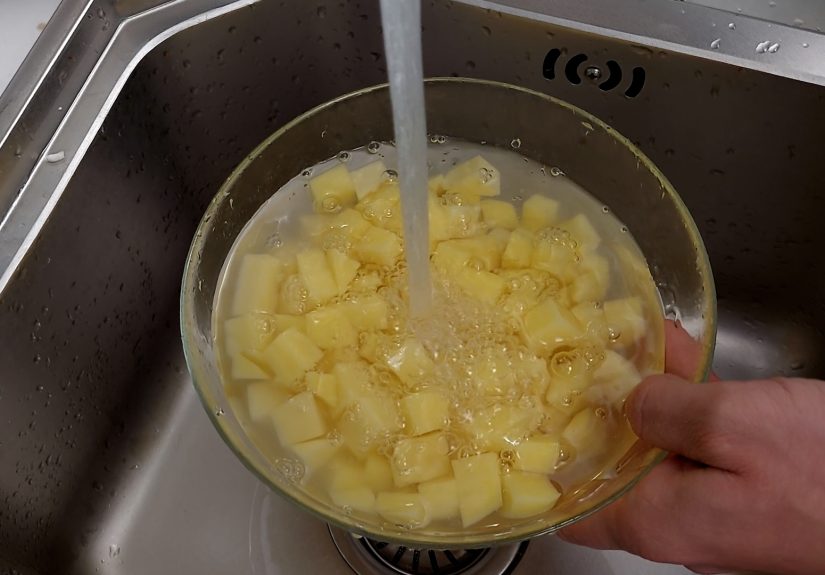
2) Wash well, then peel
Give potatoes a quick rinse after peeling to remove residual starch that promotes cloudiness in the water bath.
3) Set up a cold-water bath
Fill a non-reactive bowl (glass or stainless steel) with cold water. Add a handful of ice if your kitchen is warm.
4) Optional: Acidulate to slow browning
This gentle acid shift helps keep cut surfaces bright. It’s optionalbut useful if you’re prepping far in advance or doing large batches for holidays.
5) Submerge immediately
Exposure to air is the enemy here. Fully submerging prevents the browning enzyme from meeting oxygen.
6) Refrigerate at ≤ 40°F (4°C)
Place the covered bowl in the coldest, most stable zone of your fridge. Aim for 35–38°F if possible. Consistent cold keeps quality up and risk down.
7) Change the water if storing a bit longer
Refreshing the water after 12–24 hours can improve appearance and taste if you’re not ready to cook yet. Keep the potatoes submerged between changes.
8) Respect the time window
If you’re making mashed potatoes or potato salad, try to peel and cook the same day. Storing up to a day is fine for most home kitchens; beyond that, quality gradually declines (flavor, texture, and some nutrients).
9) Dry well before cooking
Drain, rinse briefly if needed, and dry thoroughly. Drier surfaces brown better, whether you’re roasting, frying, or pan-searing.
Food-Safety Must-Knows
- Two-Hour Rule: Don’t leave cut or peeled potatoes at room temperature for more than 2 hours. Get them into the fridge, submerged in cold water, promptly.
- Fridge Target: Keep your refrigerator at or below 40°F. Warmer fridges speed bacterial growth and browning.
- Cooked Potatoes: If you’re par-cooking or fully cooking potatoes, cool quickly and refrigerate. Never keep foil-wrapped baked potatoes at room temp; remove foil before chilling.
Quality Tips & Why They Work
- Acidulated water slows browning: A tiny bit of lemon juice or vinegar lowers pH and keeps cut surfaces bright.
- Shorter soaks retain more nutrients: Vitamin C and some B vitamins are water-soluble. If nutrition is a priority, limit the soak to a couple of hours and cook soon after.
- Avoid long-term fridge storage of whole raw potatoes: Very cold temps convert starches to sugar, affecting flavor and browning during cooking. (Short-term storage of peeled potatoes in cold water is fine.)
SEO note & LSI naturally covered: keep potatoes from browning, store peeled potatoes in water, acidulated water, refrigerate potatoes safely, 2-hour rule, blanch and freeze potatoes, freezing hash browns, best fridge temperature.
Beyond 24 Hours: Blanch & Freeze (Best for Meal Prep)
If you need to store prepped potatoes for more than a day or two, freezing is the reliable route. Raw potatoes don’t freeze well (they turn mealy). Instead, par-cook (blanch) first to lock in color and texture, then freeze.
- Cut potatoes as desired (cubes, wedges, fries).
- Blanch in rapidly boiling water for about 2–5 minutes depending on size/thickness (thinner cuts need less time; small “new” potatoes often need ~3–5 minutes). Start timing when the water returns to a boil.
- Shock immediately in ice water to stop cooking; drain very well.
- Pre-freeze on a baking sheet until firm, then pack into airtight bags or containers. Label and date.
- Store at 0°F / −18°C. Use within a few months for best quality (up to ~10–12 months is common guidance).
FAQ & Troubleshooting
My potatoes still turned graywhat happened?
Likely some slices weren’t fully submerged, the water was warm, or the bowl sat out too long before refrigeration. Next time, add a splash of acid, use colder water, and refrigerate promptly.
Can I store peeled potatoes without water?
Dry storage after peeling isn’t ideal; surfaces brown quickly. If you must, coat with a thin layer of water plus a bit of acid and keep the container cold and covered.
Is salty water better than plain water?
Plain cold water works well. Salt can slightly season but isn’t necessary for browning control. If you’re brining for texture, do it intentionally and cook soon after.
Is it safe to refrigerate whole raw potatoes?
For long-term storage, keep them cool, dark, dry, and ventilatednot in the fridge, which can sweeten them. The fridge is appropriate only for short-term storage of peeled potatoes in water before cooking.
How do I know if peeled potatoes have gone bad?
Discard if you notice off smells, sliminess, mold, or discoloration that doesn’t rinse off. When in doubt, toss them.
Common Mistakes to Avoid
- Letting the bowl sit on the counter: Even in water, room-temp storage invites bacterial growth and browning.
- Forgetting the acid for big batches: It’s a small tweak with a big visual payoff when prepping a mountain of potatoes.
- Not drying before roasting/frying: Excess moisture = steaming, not browning.
- Leaving foil on baked potatoes during cooling: That creates a low-oxygen pocketcool and store without foil.
Conclusion
For crisp, creamy, and safe results later, submerge freshly peeled potatoes in cold (optionally acidulated) water, refrigerate cold (≤ 40°F), and cook within about 24 hours. Need to go longer? Blanch and freeze for meal-prep magic. With a little planning and a splash of lemon, you’ll never serve sad, gray spuds again.
500-Word Experience Add-On: Real-World Scenarios & Pro-Level Tips
Holiday marathon (mashed-potato edition): For big meals, many home cooks peel in the morning and mash in the afternoon. The winning workflow: peel, submerge in cold water with a teaspoon or two of lemon juice per quart (or 1 Tbsp per gallon), refrigerate, and set a phone timer to cook within 6–12 hours. This window balances bright color and better vitamin retention while freeing up oven space for roasts and pies. When it’s go-time, drain well, simmer in fresh salted water, and dry the potatoes briefly over low heat after draining (this cooks off surface moisture so butter and cream absorb more evenly). The payoff is fluffier, brighter mash that holds up well.
Batch-roast Sundays: If you love sheet-pan dinners, do a weekly prep: peel, cut into 1-inch chunks, and store submerged and refrigerated for the day. Before roasting, drain, then toss with a teaspoon of cornstarch per pound plus oil, salt, and spices. Dry surfaces + a bit of starch = glassy-crisp exteriors. For extra crunch, preheat the pan and oil in the oven first, then add the dried potatoes to the hot fat.
Fry-night strategy: For fries or hash browns, a quick cold-water soak rinses excess surface starch that can cause clumping or uneven browning. If you’re storing cut potatoes for a few hours before frying, keep them cold and submerged; then drain, really dry (a salad spinner plus towels works wonders), and fry in batches. Moisture is the enemy of crisp. If you like ultra-golden fries, try a brief par-cook (either a low-temp oil “blanch” or a short simmer in lightly acidulated water), dry thoroughly, and chill before the final fry.
Meal-prep beyond a day: Families that cook once and eat twice swear by blanch-and-freeze. Cube or shred, blanch briefly, shock in ice, press very dry, and tray-freeze before bagging. Label by cut (“1-inch cubes,” “shreds for hash,” “wedges for roasting”) and by weight. Frozen prepped potatoes pour straight onto hot pans for weeknights. Expect slightly different textures than fresh, but the convenience is unbeatable.
When the water turns cloudy: That’s normal: starch diffuses out. Cloudy water doesn’t mean spoilage, but changing it keeps flavors cleaner. If the potatoes seem slick or smell off, toss them. It’s not worth risking a side dishespecially when potatoes are cheap.
Color control for potato salad pros: Waxy potatoes (Yukon Golds, reds) hold shape best. Keep them submerged and cold after peeling, and cook soon. For pristine cubes, spread cooked potatoes on a sheet pan to steam off moisture before dressing; water-logged cubes break and look dull. While you’re at it, dress warm potatoes with part of the vinaigrette to absorb flavor, then finish with mayo-based dressing after they cool.
Gear that helps: A fridge thermometer (they’re inexpensive) confirms you’re really at ≤ 40°F. A large glass bowl makes it easy to see whether pieces are fully submerged. And a simple timer habit (set one as soon as the bowl goes into the fridge) prevents “oops, I forgot these for two days.”
Bottom line from countless home kitchens: Submerge, chill cold, cook soon, and dry well. That simple rhythm keeps your potatoes bright, tasty, and safeno gray edges, no mush, and no stress.


