Table of Contents >> Show >> Hide
- What You Need Before You Start
- How Wii Remote Synchronization Works
- How to Synchronize a Wii Remote to the Console in 10 Steps
- Step 1: Turn on the Wii console
- Step 2: Open the SD card slot cover
- Step 3: Check the Wii Remote batteries
- Step 4: Remove the battery cover on the Wii Remote
- Step 5: Press and release the SYNC button on the Wii Remote
- Step 6: Quickly press and release the SYNC button on the console
- Step 7: Wait for one player light to stay lit
- Step 8: Repeat the process for additional remotes
- Step 9: Test the controller on the Wii Menu
- Step 10: Use one-time reconnect mode when needed
- What to Do If the Wii Remote Still Will Not Sync
- Standard Sync vs. One-Time Sync
- Best Practices for a Smoother Wii Setup
- Conclusion
- Real-World Experiences With Syncing a Wii Remote
- SEO Tags
If your Wii Remote is blinking like it is trying to send Morse code to outer space, do not panic. In most cases, the fix is simple. Synchronizing a Wii Remote to the console usually takes just a minute or two, and once it is done, you can get back to bowling strikes, flailing through sword fights, or proving to your family that yes, you are still oddly good at Mario Kart.
This guide walks you through exactly how to sync a Wii Remote to a Wii console in 10 clear steps, plus what to do if the remote refuses to cooperate. You will also learn the difference between a full sync and a temporary reconnect, common syncing mistakes, and a few real-world tips that can save you from a lot of unnecessary button mashing.
What You Need Before You Start
Before you begin, take a quick breath and check the basics. Make sure your Wii console is powered on, your Wii Remote has working AA batteries, and you are standing reasonably close to the TV. If you are using a standard Wii console, the console’s red SYNC button is located behind the SD card slot cover on the front. If you are using a Wii mini, the sync button is located on the side of the console instead.
Also, do not confuse syncing with pointing. Syncing lets the remote communicate with the console. Pointing accuracy depends on the sensor bar and your room setup. In other words, if your Wii Remote turns on but the cursor is acting like it had three energy drinks, that is probably a sensor bar issue rather than a syncing problem.
How Wii Remote Synchronization Works
The Wii uses a simple pairing system. When you sync the controller, the console recognizes that specific Wii Remote and assigns it a player number from 1 to 4. If one light stays solid after syncing, that means the connection worked. If the lights keep flashing and then go dark, the pairing did not stick.
There are two common ways to connect a Wii Remote. The first is standard synchronization, which is the main method you will use for your own console. The second is one-time mode, which is handy when you want to temporarily use a friend’s remote on your Wii or change player order without shutting the system down. For most people, standard sync is the star of the show.
How to Synchronize a Wii Remote to the Console in 10 Steps
-
Step 1: Turn on the Wii console
Press the Power button on the console so the system boots up. Wait until the Wii is fully on and displaying the startup or menu screen. Starting with the console on is important because the Wii Remote cannot pair with a sleeping console from thin air. Sadly, it has no telepathic mode.
-
Step 2: Open the SD card slot cover
On a standard Wii, open the small flap on the front of the console. Inside, you will see the red SYNC button. This is the button the console uses to pair with the controller. If you have a Wii mini, look for the sync button on the left side next to the battery compartment area instead of behind an SD flap.
-
Step 3: Check the Wii Remote batteries
Before you do anything else, make sure the remote has a fresh or fully charged pair of AA batteries. Weak batteries are one of the most common reasons a Wii Remote will not sync properly. If the lights do not come on at all, start here. It is the least glamorous fix, but also one of the most effective.
-
Step 4: Remove the battery cover on the Wii Remote
Flip the Wii Remote over and remove the battery cover. Under the batteries, you will find another red SYNC button. Some Wii Remote models have a small hole in the battery cover that lets you press the sync button without fully removing the cover. If yours has that design, congratulations, Nintendo saved you a tiny amount of effort.
-
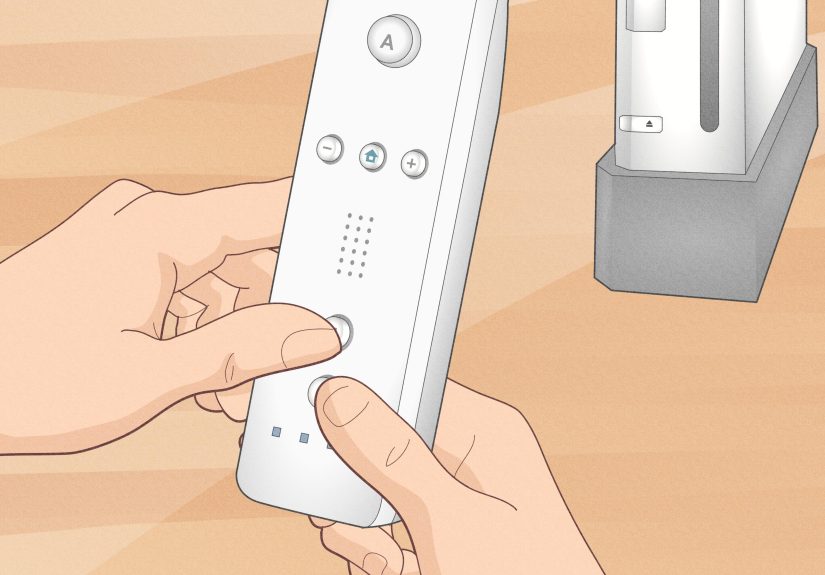
Step 5: Press and release the SYNC button on the Wii Remote
Press the red sync button on the remote once. The blue player LEDs on the front should begin blinking. That blinking means the remote is actively searching for the console and waiting to complete the handshake.
-
Step 6: Quickly press and release the SYNC button on the console
While the lights on the Wii Remote are still blinking, press the red sync button on the console. Timing matters here. You do not need lightning reflexes, but do not take a scenic detour either. The console and remote should now recognize each other.
-
Step 7: Wait for one player light to stay lit
Once the remote is successfully paired, the blinking will stop and one blue light will remain solid. That light shows the assigned player number. If the first light stays on, you are Player 1. If another light stays on, the console assigned a different slot based on the order of connected controllers.
-
Step 8: Repeat the process for additional remotes
If you want to connect more Wii Remotes, repeat the same process one controller at a time. The Wii can pair with up to four remotes at once. Sync each one individually so the console can assign player numbers in the order you want.
-
Step 9: Test the controller on the Wii Menu
Press a few buttons and point at the screen to make sure everything works. If the buttons respond but the pointer is jerky, upside down, or not appearing properly, the problem is probably not the sync itself. In that case, check your sensor bar placement, room lighting, and sensitivity settings.
-
Step 10: Use one-time reconnect mode when needed
If you only need to temporarily connect a Wii Remote or change player order during a multiplayer session, press the HOME button on a synced remote, open Wii Remote Settings, choose Reconnect, and then press 1 + 2 on the remote you want to add. This mode is great for quick changes, but only a remote synced in standard mode can turn the console on or off later.
What to Do If the Wii Remote Still Will Not Sync
Sometimes the standard pairing process does not work the first time. Annoying? Yes. Unfixable? Usually not. Here are the most common reasons your Wii Remote is not syncing and how to deal with them.
1. Replace the batteries first
Start with a fresh set of high-quality AA batteries. If the lights do not appear at all, weak batteries are the most likely culprit. Even if the lights blink, poor battery power can still interrupt the pairing process before it finishes.
2. Clear old sync data
If the console has old or confused pairing data, clear all existing Wii Remote pairings and start fresh. On a Wii, wait until the Health & Safety screen appears, open the front flap, then hold the console’s red sync button for about 15 seconds. After that, sync each remote again one by one. This is the Wii equivalent of saying, “Everybody out, we are starting over.”
3. Make sure you are using a licensed remote
Nintendo’s official support also notes that licensed Wii Remotes are less likely to cause pairing problems. If you are using an older third-party controller and syncing keeps failing, the accessory itself may be the issue rather than the console.
4. Check the sensor bar if the pointer is the real problem
If the remote seems connected but the cursor acts wild, verify that the sensor bar is placed correctly above or below the TV and that there are no bright light sources or reflective glare confusing the setup. The Wii works best when you are roughly 3 to 10 feet directly in front of the screen.
5. Adjust the sensor bar sensitivity
Inside Wii settings, you can fine-tune the sensor bar sensitivity. Nintendo’s guidance is to adjust it until you see only two blinking lights on the sensitivity screen. If you see too many dots, your room likely has extra light interference. If you see one or none, the sensor bar or remote may not be being detected correctly.
6. Recalibrate if you are using Wii Remote Plus
If you are using a Wii Remote Plus and movement feels off, place the remote on a flat horizontal surface with the buttons facing down for a few seconds. That can help recalibrate motion behavior, especially during games that rely heavily on pointer and motion accuracy.
Standard Sync vs. One-Time Sync
This part confuses a lot of people, so let us make it simple. Standard sync is the full pairing method using the red sync buttons on both the console and the remote. This is the main connection your Wii remembers. One-time sync is a temporary reconnect started through the HOME menu and completed by pressing the 1 and 2 buttons together.
Use standard sync when the remote belongs to your console, when you are setting up a new controller, or when the controller needs a full reset. Use one-time sync when a friend brings over a remote, when you want to switch player order without powering down, or when you just need a quick temporary connection for the current session.
Best Practices for a Smoother Wii Setup
- Keep spare AA batteries nearby. A surprising amount of “broken” Wii gear is just hungry for new batteries.
- Sync remotes in player order. If you care who gets Player 1, pair that controller first.
- Reduce glare and bright light. Sunlight, candles, heaters, and strong lamps can mess with pointer behavior.
- Clean the pointer lens. Smudges or residue on the Wii Remote lens can make the cursor act unreliable.
- Do not assume blinking means success. Blinking only means the remote is trying. A solid light means it actually worked.
Conclusion
Learning how to synchronize a Wii Remote to the console is one of those tiny tech skills that pays off immediately. Once you know where the red sync buttons are and how the player LEDs behave, the whole process feels much less mysterious. For most setups, the fix is straightforward: turn on the console, press the sync button on the remote, press the sync button on the console, and wait for one steady blue light.
If the pairing does not work the first time, do not assume your Wii has retired itself to a quiet life in the attic. Fresh batteries, a cleared sync history, proper sensor bar placement, and the right sync mode usually solve the problem. And once everything is connected, your Wii is ready to do what it does best: make normal living rooms feel like miniature sports arenas and accidental comedy clubs.
Real-World Experiences With Syncing a Wii Remote
In real life, syncing a Wii Remote is rarely a dramatic technical event. It usually happens in one of three situations: you dug the console out of storage, you bought an extra remote for multiplayer night, or something stopped working five minutes before someone wanted to play Wii Sports. That last scenario, of course, is the most emotionally intense.
One common experience is the “I forgot where the sync button was” moment. A lot of people remember the batteries, the wrist strap, and maybe the Nunchuk, but not the tiny red buttons hidden like Nintendo was designing a scavenger hunt. The moment you open the SD card flap and battery compartment and find both sync buttons, the process suddenly feels much less magical and much more logical.
Another very normal experience is assuming the remote is broken when the real problem is old batteries. This happens constantly. The remote flashes, then stops, then flashes again, and everyone starts giving the controller a suspicious look like it has betrayed the family. Put in fresh batteries, repeat the sync steps, and suddenly the so-called broken remote is back in business like nothing happened. Classic Wii behavior.
Multiplayer setups are where syncing gets especially memorable. Someone always wants to be Player 1. Someone else presses buttons too early. Another person waves the remote at the TV like enthusiasm can speed up Bluetooth-adjacent wizardry. When it finally works and four remotes are lined up with four solid lights, there is a small but very real sense of victory before the actual game even starts.
People also run into pointer issues and think syncing failed, when the remote is technically connected just fine. The buttons work, but the cursor floats, disappears, or shoots toward the corner of the screen like it is late for an appointment. In those cases, the fix is usually environmental. Moving the sensor bar, closing curtains, shifting a bright lamp, or adjusting sensitivity often solves the problem faster than repeated syncing attempts.
There is also a special kind of nostalgia attached to this process. Syncing a Wii Remote is not just a tech chore. For many players, it is the opening ritual before a familiar kind of fun. It is the tiny setup step before tennis matches in the living room, chaotic family bowling, fitness games that seemed like a great idea, and party games where everyone became wildly competitive for no good reason. That is why people still care about getting it right. The sync is not the fun part, but it is the gateway to the fun part.
And honestly, once you have done it a couple of times, it becomes second nature. You know where the buttons are. You know the flashing lights are not enough. You know the sensor bar can be fussy. Most of all, you know that the Wii is old-school in the best possible way: simple, quirky, and usually fixable without needing a degree in computer engineering. A few button presses later, you are back in the game.


