Table of Contents >> Show >> Hide
- Why DIY Tile Tables Are Everywhere Right Now
- The Under-$100 Game Plan
- Materials and Tools You’ll Need
- Choose Your Adhesive: The “Easy” Option vs. The “Extra Durable” Option
- Step-by-Step: How to Build a Trendy DIY Tile Table
- Step 1: Pick the right table base (and don’t ignore wobble)
- Step 2: Plan your layout like a lazy genius
- Step 3: Prep the surface (this is where the “pro” look is born)
- Step 4: Apply adhesive in small sections (do not freestyle a whole tabletop at once)
- Step 5: Set the tile (press, align, and keep your lines clean)
- Step 6: Let it cure (yes, patience is part of the aesthetic)
- Step 7: Grout the tabletop (the “messy magic” moment)
- Step 8: Seal (optional, but usually a smart move)
- Step 9: Finish the edges (this is what separates “DIY” from “designer”)
- Design Ideas That Look High-End (Without High-End Prices)
- Common Mistakes (and How to Avoid Them)
- Conclusion
- Bonus: of Real-World Lessons (a.k.a. “What You’ll Learn the Fun Way”)
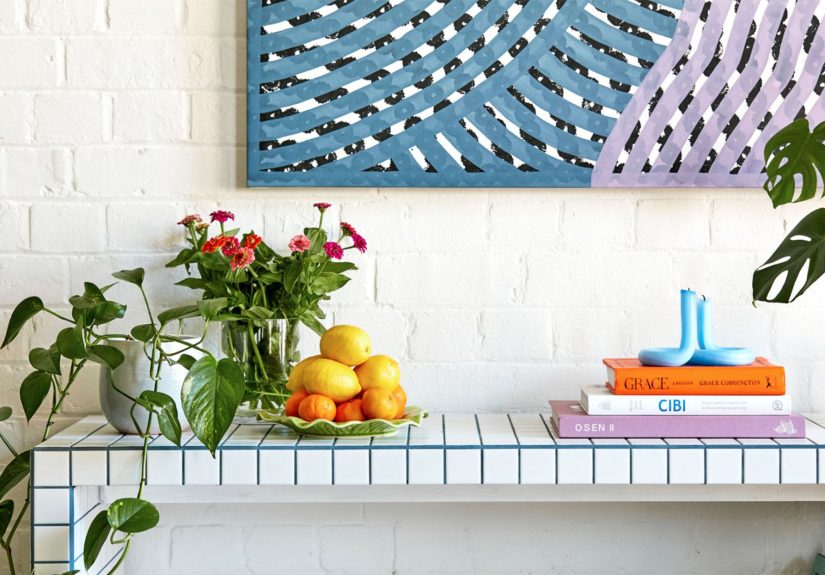
Tile tables are having a full-on main character moment. They’re colorful, a little bit retro, oddly expensive when a “designer” makes them…
and hilariously achievable when you do it. The best part? You can build a sturdy, Instagram-ready DIY tile table for under $100 using
big-box-store supplies (and a table base that might have started life as “sad and beige”).
This guide walks you through the whole thingplanning, prepping, tiling, grouting, sealing, and avoiding the classic mistakes that make people
swear off grout forever. We’ll keep it beginner-friendly, budget-conscious, and just opinionated enough to save you from a wobbly, cracked,
“why is the tile sliding?” situation.
Why DIY Tile Tables Are Everywhere Right Now
A tiled tabletop hits the sweet spot between practical and artsy: it’s durable, heat-tolerant, easy to wipe clean, and it can look high-end with
surprisingly low effort. The “trend” part comes from the finishescheckerboard layouts, bold grout colors, chunky mosaics, and that handmade vibe
that makes a room feel collected instead of catalog.
Also, tile has something paint doesn’t: texture and depth. Even simple square mosaic sheets can read as custom when you choose a fun color palette
and finish the edges cleanly.
The Under-$100 Game Plan
To keep this project under $100, you’ll want to do two things: choose a budget base and pick tile that’s sold in small quantities (or use mosaic sheets
so you don’t need a wet saw). A tiny side table is the easiest place to start: less surface area, fewer cuts, fewer regrets.
Budget snapshot (typical ranges)
- Table base: $15–$35 (budget new, thrifted, or “I’ve had this forever”)
- Tile: $15–$45 (mosaic sheets or small-format ceramic/porcelain)
- Adhesive: $10–$25 (thinset mortar, mastic, or an adhesive tile mat)
- Grout: $10–$20
- Optional sealer: $10–$20
- Small tools/supplies: $0–$25 (depending on what you already own)
Prices vary by region and store, but the math usually works outespecially if you already have basics like a utility knife, a bucket, and a sponge.
Materials and Tools You’ll Need
Materials
- Table base with a reasonably flat top (square edges are easiest to finish)
- Tile (mosaic sheets are the most beginner-friendly; porcelain/ceramic both work well)
- Tile adhesive (choose one approach below)
- Grout (sanded or unsanded depending on your grout joints and tile type)
- Optional grout sealer (recommended for most cement-based grouts)
- Backer option (recommended for flimsy tops): 1/4″ cement backer board or a piece of plywood + backer board
- Painters tape and plastic drop cloth (because grout haze is sneaky)
Tools
- Measuring tape and pencil
- Notched trowel (small V-notch for mosaics; 1/4″ square-notch is common for backer board bedding)
- Tile nippers (great for small cuts) or a manual tile cutter (optional)
- Rubber grout float
- Grout sponge + microfiber cloth
- Bucket and mixing stick (or a drill + mixing paddle if you’re feeling professional)
- Safety gear: gloves, eye protection, and a dust mask when mixing powders
Choose Your Adhesive: The “Easy” Option vs. The “Extra Durable” Option
The biggest DIY tile-table fork in the road is how you stick tile to the top. Both methods can workyour best choice depends on where the table will live
and how much you enjoy the phrase “working time.”
Option A: Adhesive tile mat (fast, clean, beginner-friendly)
Adhesive mats are basically double-sided sticky sheets designed for tile. They’re popular for small indoor projects because there’s no mixing and no wait
time between setting tile and grouting. The trade-offs: limited adjustability, tile size/weight limits, and they’re generally not recommended outdoors or in
constantly wet areas.
Option B: Thinset mortar (strong, forgiving, best for longevity)
Thinset is cement-based mortar made for tile installations. It’s the go-to when you want maximum bond strength and durabilityespecially if your tabletop
will see heat, heavy use, or temperature swings (near a sunny window, on a porch, etc.). You’ll mix it to a peanut-butter consistency and work in small sections.
Option C: Premixed mastic (convenient, but choose carefully)
Mastic is premixed and super “grabby,” which can be helpful for vertical surfaces and quick indoor projects. But it’s not the hero for outdoor use or truly wet
environments. For an indoor side table, it can be finejust make sure your surface is clean, flat, and stable.
Step-by-Step: How to Build a Trendy DIY Tile Table
Step 1: Pick the right table base (and don’t ignore wobble)
Start with a table that’s stable and doesn’t flex when you press down on the top. Tile and grout don’t love movement. If your table has a hollow top, soft
laminate, or noticeable bounce, plan to reinforce it. A budget table can still workyou’re just giving it a better “skin” to wear.
Step 2: Plan your layout like a lazy genius
Dry-fit your tile before you open any adhesive. Find the visual center of the tabletop and decide what you want your cuts to look like. The goal is to avoid
ending up with weird slivers on one side and full tiles on the other. If you’re using mosaic sheets, check how the pattern repeats so seams don’t create
awkward “grid lines.”
- Pro tip: If your tile has a strong pattern (checkerboard, stripes, color blocks), take a quick photo of your dry layout. Your future self will thank you when everything is covered in mortar.
Step 3: Prep the surface (this is where the “pro” look is born)
Tile sticks best to clean, flat, stable surfaces. Wipe the tabletop thoroughly and remove grease or residue. If the top is glossy, lightly scuff-sand to help
adhesion. Fill dents or chips so the tile doesn’t telegraph bumps.
When to add a backer board (highly recommended for flimsy tabletops)
If your tabletop flexes or is made of thin material, add a layer of 1/4″ cement backer board cut to the same size as your top. This gives you a strong,
tile-friendly substrate. You can also add plywood first if you need extra thickness/rigidityjust keep the edges neat.
- Cut the backer board to size (score-and-snap works for many cement boards).
- Spread a thin bed of mortar under it for support, then fasten it down with appropriate screws in an even pattern.
- Keep edges tidy; a clean edge makes finishing the sides much easier.
Step 4: Apply adhesive in small sections (do not freestyle a whole tabletop at once)
Whether you’re using a mat, mastic, or thinset, work in manageable areas. Adhesives have an “open time”a window where tile will bond properly. If the
surface skins over before tile goes down, you’ll get weak adhesion and heartbreak.
If using thinset
- Mix to a thick, spreadable consistency (think creamy peanut butter, not soup).
- Use a notched trowel to comb ridges in one direction for consistent coverage.
- Don’t make the layer too thickjust enough for full contact.
If using an adhesive tile mat
- Apply the mat smoothly, pressing out bubbles and creases.
- Plan your placement carefullymany mats have limited repositioning once tile touches down.
Step 5: Set the tile (press, align, and keep your lines clean)
Place your tile sheets or individual tiles into the adhesive, following your layout lines. Press them firmly so the tile makes full contact. With mosaics,
a grout float is a great “pressing tool” because it spreads pressure evenly without bruising the tile.
- Check alignment often: Step back and look at the surface from multiple angles.
- Clean squeeze-out now: If adhesive oozes into grout lines, scrape it out before it hardens. Future You does not want to chip mortar out of tiny joints.
Step 6: Let it cure (yes, patience is part of the aesthetic)
If you used thinset or mastic, let the tile set fully before grouting. Many products require about a day, but always follow the instructions on your specific
adhesive. Rushing this step can shift tile and weaken the bond.
Step 7: Grout the tabletop (the “messy magic” moment)
Grout fills the joints, locks tiles in place, and gives the piece that finished, intentional look. Choose your grout type based on joint width and tile material:
sanded grout is often used for wider joints; unsanded is smoother for narrow joints and delicate tile surfaces.
- Mix grout in small batches so it doesn’t stiffen before you can spread it.
- Hold your grout float at an angle and press grout into the joints thoroughly.
- Work in small areas, then wipe gently with a damp (not dripping) sponge to shape joints and remove excess.
After an initial wipe, you’ll usually see a dull film (grout haze). Let it dry slightly, then buff with a microfiber cloth until the tile looks crisp again.
Step 8: Seal (optional, but usually a smart move)
Many cement-based grouts are porous and can stainespecially on a table that might meet coffee, red sauce, or that one friend who sets down a sweating
iced drink like it’s their job. A penetrating grout sealer helps resist stains and makes cleanup easier.
Wait until grout has cured based on the sealer and grout instructions (commonly a day or two). Apply evenly, wipe off excess, and let it dry fully before heavy use.
Step 9: Finish the edges (this is what separates “DIY” from “designer”)
Clean edges make the whole piece look expensive. You’ve got a few solid options:
- Wood trim: A simple stained or painted frame around the tabletop.
- Metal edge profile: Sleek and modern (great if you want a minimalist look).
- Overhanging tile edge: Works best with thicker tile and careful planning.
Design Ideas That Look High-End (Without High-End Prices)
1) Checkerboard without the drama
Use two colors of the same tile and keep grout lines consistent. A mid-tone grout can soften contrast and hide minor spacing quirks (because real life is not a CAD drawing).
2) “One tile, bold grout”
Choose an affordable white or neutral tile, then use a colored grout to make it pop. It’s the cheapest way to get a custom look. Bonus: grout color can shift the whole vibeplayful, retro, modern, you name it.
3) Mosaic sheets for a texture-rich finish
Mosaic sheets are basically a shortcut to a boutique look. They’re easier to place than dozens of individual tiles, and they’re perfect for small tops where cutting is minimal.
Common Mistakes (and How to Avoid Them)
- Skipping surface prep: Adhesive doesn’t bond well to dust, grease, or glossy finishes. Clean and scuff-sand when needed.
- Using the wrong adhesive for the location: Indoor-only products shouldn’t be used outdoors. When in doubt, thinset is the safer choice for durability.
- Letting adhesive fill grout joints: Clear joints make grouting faster and cleaner. Scrape squeeze-out while it’s fresh.
- Over-wetting the sponge: Too much water can weaken grout and wash it out of joints. Damp is the goal, not “small rainstorm.”
- Rushing cure times: Adhesives and grouts need time to reach strength. Your table will last longer if you let chemistry do its thing.
Conclusion
A DIY tile table is one of those rare projects that feels fancy, costs little, and actually holds up in real lifeif you build it on a stable base, use the right adhesive,
and take your time with grouting and cleanup. Keep it small for your first try, choose a tile you genuinely love, and finish the edges like you mean it.
The result: a trendy, durable accent piece that looks like you paid “boutique prices,” without the boutique panic.
Bonus: of Real-World Lessons (a.k.a. “What You’ll Learn the Fun Way”)
Here’s the funny thing about tiling a table: you think the hard part is the tile. It’s not. The hard part is deciding you’re the kind of person who owns grout now.
But once you start, the project turns into a series of tiny victorieseach one slightly messier than the last.
First lesson: layout is everything. DIYers who skip dry-fitting usually end up doing a frantic tile shuffle with sticky hands, trying to keep lines straight while
the adhesive quietly ages into a less-forgiving mood. Dry-fitting feels slow, but it’s the fastest way to avoid the “why do I have a 1/2-inch gap on the back corner?”
surprise. Take a picture of your layout. It’s basically a cheat code when the real work starts.
Second lesson: small tiles are emotionally easier than big tiles. This sounds backward until you remember that big tiles require big cuts, and big cuts require
big tools (or big confidence). Mosaic sheets? They’re the friendly golden retriever of tile. They cover area quickly, they’re forgiving on tiny tabletops, and they rarely
demand a wet saw. The one thing they do demand is attention at seamsif one sheet is slightly off, your eyes will spot the “grid” from across the room like it’s a crime scene.
A light touch and frequent check-ins keep it seamless.
Third lesson: grout will test your personality. The first time you spread grout, it looks like you made a mistake. A big one. Everything gets cloudy. Your beautiful tile becomes a
dusty blur. This is normal. It’s grout haze, and it’s basically tile’s way of saying, “Relax, I’m not done yet.” The trick is wiping in stages: a gentle initial clean to shape joints,
then a later buff once the surface dulls. People who panic-wipe with too much water often end up with low joints (washed-out grout) and a finish that looks tired instead of crisp.
Damp sponge, light pressure, patience. That’s the mantra.
Fourth lesson: the “feel” of the table matters as much as the look. A tile top should feel solidno hollow thud, no flex. DIYers who reinforce a flimsy tabletop with backer board
almost always say the same thing afterward: “I should’ve done this sooner.” It’s not the glamorous step, but it’s what keeps grout lines from cracking and tiles from popping loose after a few months
of real life (hot mugs, bumped corners, moving the table one inch to vacuum, you know… existence).
Fifth lesson: finishing touches are the difference-maker. The edges are where a DIY project either levels up or whispers, “I was made in a weekend.” A clean trimwood, metal, or
a neatly painted bordermakes the piece look intentional. Same for grout color: choose it like you’d choose paint. White grout is classic, but it also shows everything; mid-tone grays and warm neutrals
are forgiving; bold colors can look designer if the tile is simple.
And the final lesson: you don’t have to be perfect for it to look expensive. Tile is handmade-looking by naturetiny variations read as character, not failure. If your lines are
consistent, your surface is solid, and your edges are clean, you’ll end up with a table that looks like it wandered out of a cool home boutique and decided to live with you. For under $100.
That’s not just a trend. That’s a power move.


