Table of Contents >> Show >> Hide
- Why No-Carve Pumpkins Are a Smart (and Still Spooky) Choice
- Quick Safety Checklist Before You Start
- Supply Shortcuts: What to Keep on the Table
- 19 No-Carve Pumpkin Ideas
- 1) The Classic Painted Jack-o’-Lantern (Zero Knife Edition)
- 2) Polka-Dot Party Pumpkin
- 3) Drip-Paint “Mad Scientist” Pumpkin
- 4) Emoji Pumpkin Squad
- 5) Mummy Pumpkin with Gauze Wrap
- 6) “Stitched Up” Pumpkin with Washi Tape
- 7) Glitter-Dipped Pumpkin (Sparkle, Contained)
- 8) Decoupage Napkin Pumpkin (Fancy Without the Fuss)
- 9) Pressed-Leaf Silhouette Pumpkin
- 10) Woodland Critter Pumpkin (Owl, Fox, HedgehogPick Your Animal)
- 11) Bat Swarm Pumpkin
- 12) Starry Night Galaxy Pumpkin
- 13) Candy “Treat Jar” Mini Pumpkins
- 14) Plaid or Patterned Pumpkin with Paint Pens
- 15) “Button Eyes” Cozy Sweater Pumpkin
- 16) Floral Crown Pumpkin (Pretty, Not Precious)
- 17) “Monster Mouth” Felt Face
- 18) Gold Foil or Metallic Accent Pumpkin
- 19) Light-Up “Window” Pumpkin (No Carve, Still Glowing)
- How to Help Your No-Carve Pumpkin Last Longer
- Wrap-Up: Your Porch Can Be Cute, Spooky, and Safe
- Extra Experiences: What Really Happens When Families Decorate No-Carve Pumpkins (About )
Pumpkin carving is a Halloween classic… and also a classic way to end up with a sticky kitchen, a mysterious orange smear on the dog,
and someone saying, “Wait, where did the lid go?” If you love the cozy fall vibes but want to skip the knives (and the drama),
no-carve pumpkin ideas are your new best friend.
This guide is built for real families: short attention spans, curious kids, distracted adults, and that one person who insists glitter is “a lifestyle.”
You’ll get 19 no-carve pumpkin decorating ideas that are safer, less messy, and honestly just as impressive on the porch.
Plus: practical safety tips, supply shortcuts, and a big “what I wish I knew last year” experience section at the end.
Why No-Carve Pumpkins Are a Smart (and Still Spooky) Choice
No-carve projects are perfect when you want a safe family Halloween craft that doesn’t require a first-aid kit on standby.
Since the pumpkin stays intact, it often looks better longer, especially if you keep it cool and dry. And because you’re not scooping,
scraping, and carving, cleanup becomes: “put the markers away,” not “why is there pumpkin goo in my shoelace?”
Quick Safety Checklist Before You Start
- Pick the right pumpkin: firm, no soft spots, no cracks. (Soft spots are basically rot’s RSVP.)
- Wash it first: a quick scrub and dry helps paint and glue stick better and reduces gunk on hands.
- Choose kid-friendly tools: washable paint, markers, stickers, and craft glue for most projects.
- Skip open flames: use LED tea lights or battery fairy lights for that cozy glow.
- Ventilate for sprays: if you use spray paint or sealant, do it outdoors and keep kids away until it’s dry.
Supply Shortcuts: What to Keep on the Table
You don’t need a craft store haul to make these work. Start with what you have, then add a few “high impact” items:
- Acrylic paint + a couple of brushes (one wide, one small)
- Paint pens or permanent markers
- Glue options: tacky glue, Mod Podge, and/or a hot glue gun (adult-only)
- Googly eyes (the universal language of “this is now a character”)
- Felt scraps, construction paper, ribbon, washi tape
- Battery tea lights or fairy lights
19 No-Carve Pumpkin Ideas
Each idea below is designed to be doable, adaptable, and family-friendly. Mix-and-match concepts (paint + stickers + ribbon = instant masterpiece).
And if something turns out goofy? Congratulations: you just made it memorable.
1) The Classic Painted Jack-o’-Lantern (Zero Knife Edition)
Paint the pumpkin orange (or leave it natural), then draw a face using paint pens or a permanent marker. Add dimension with foam shapes:
triangles for eyes, a zig-zag mouth, or a toothy grin. For littles, outline the shapes in pencil first so the “face” doesn’t drift sideways
like it got spooked mid-project.
2) Polka-Dot Party Pumpkin
Dip the end of a sponge brush, cotton swab, or even a pencil eraser into paint and stamp dots all over. Choose one color for modern minimal,
or go full confetti for maximum joy. This is one of the best pumpkin decorating ideas for kids because it’s hard to mess up
and even “mess ups” look like intentional whimsy.
3) Drip-Paint “Mad Scientist” Pumpkin
Pour slightly thinned paint over the top and let it drip down the sides. Use two or three colors for a marbled, potion-brew effect.
Put the pumpkin on a baking sheet or cardboard, because this one is basically “Halloween meets abstract art meets gravity.”
4) Emoji Pumpkin Squad
Paint small pumpkins yellow, then add emoji faces with markers: heart eyes, goofy tongue, shocked facewhatever your household is feeling
on a Monday. Bonus: set them in a row on the porch like they’re reacting to trick-or-treaters in real time.
5) Mummy Pumpkin with Gauze Wrap
Wrap the pumpkin with gauze or torn strips of white fabric. Secure with tacky glue or a few carefully placed hot-glue dots (adult-only).
Pop on googly eyes peeking out from the wrap. Instant mummy. Minimal effort. Maximum “spooky-cute.”
6) “Stitched Up” Pumpkin with Washi Tape
Use black washi tape to create fake stitches and seams. Add X-shapes, zig-zags, or “patches” like your pumpkin is a lovable plush toy.
This is perfect for families who want a clean, no-mess craft (and for anyone who considers glitter an act of chaos).
7) Glitter-Dipped Pumpkin (Sparkle, Contained)
Paint the bottom half with glue or decoupage medium, then dip or sprinkle glitter on just that section. Keeping glitter to a “designated zone”
helps avoid your house twinkling until Easter. Seal with a clear coat (outdoors) if you want it to survive enthusiastic porch breezes.
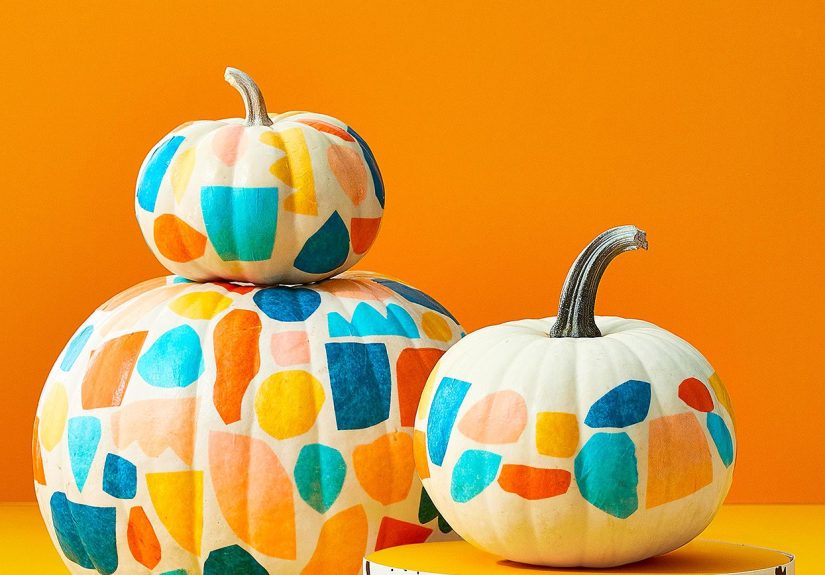
8) Decoupage Napkin Pumpkin (Fancy Without the Fuss)
Separate the top decorative layer of a paper napkin (florals, fall leaves, cute patterns), then apply with decoupage medium and a soft brush.
It looks boutique, like you paid someone named “Marigold” to do it. It also makes a beautiful centerpiece if you’re leaning more autumn than horror.
9) Pressed-Leaf Silhouette Pumpkin
Glue pressed leaves onto the pumpkin, then paint over the entire pumpkin in a single bold color. Once dry, gently peel off the leaves to reveal
a leaf silhouette. It’s simple, high-contrast, and gives “fall gallery wall,” but on a gourd.
10) Woodland Critter Pumpkin (Owl, Fox, HedgehogPick Your Animal)
Cut felt shapes for ears, eyes, and a belly patch; attach with glue. Use buttons for eyes or a little triangle nose.
For a hedgehog vibe, layer candy corn or paper “spikes” starting from the back and moving forward. It’s adorable and surprisingly porch-worthy.
11) Bat Swarm Pumpkin
Paint the pumpkin matte black or deep purple. Cut small bats from black paper and attach them as if they’re flying up and off the pumpkin.
Add a few bats to the wall behind it for a mini scene. This one looks especially cool at night with soft LED lighting nearby.
12) Starry Night Galaxy Pumpkin
Paint the pumpkin dark blue or black. Sponge on purples and blues in soft patches, then flick white paint with a toothbrush for stars.
Add a few bigger “constellations” with a paint pen. It’s spooky-season cosmic energylike your pumpkin is also into astronomy podcasts.
13) Candy “Treat Jar” Mini Pumpkins
Use mini pumpkins as characters around clear jars: add ribbon, felt, buttons, and tiny accessories (like paper hats) to make them look like
they’re guarding candy. Great for a party table. Even better for bribing your own children: “Decorate the pumpkin, earn a gummy.”
14) Plaid or Patterned Pumpkin with Paint Pens
Draw a simple plaid grid using paint pens over a solid color base. Or do stripes, chevrons, or gingham.
This is a fantastic “older kids and adults” project because it’s relaxing and looks polishedlike seasonal décor from a catalog, but funnier.
15) “Button Eyes” Cozy Sweater Pumpkin
Wrap the pumpkin in an old sweater sleeve or knit scarf. Secure underneath with safety pins (adult) or glue.
Add oversized buttons, felt cheeks, and a tiny bow tie. Your pumpkin will look like it’s ready to host Thanksgiving dinner and judge everyone’s pie.
16) Floral Crown Pumpkin (Pretty, Not Precious)
Glue faux flowers around the stem like a crown. Paint the pumpkin a soft neutral (white, blush, sage) for a modern look,
or leave it natural for rustic charm. This one’s great for front porches, baby showers, fall weddings, and anyone who wants Halloween-lite vibes.
17) “Monster Mouth” Felt Face
Cut a big felt mouth with goofy teeth, add mismatched eyes, and make it delightfully ridiculous. Use yarn for “hair,”
pipe cleaners for eyebrows, and pompoms for warts. The goal here is not perfection. The goal is: your pumpkin looks like it has opinions.
18) Gold Foil or Metallic Accent Pumpkin
Add metallic leaf (gold foil) in patches or stripes for instant glam. If that feels advanced, use metallic paint or a paint pen around the stem,
then add a few geometric lines on the sides. This one screams “I decorate for fall” in the best way.
19) Light-Up “Window” Pumpkin (No Carve, Still Glowing)
Instead of carving holes, create “windows” with translucent vellum paper panels glued on the outside, then place battery fairy lights
around the base or behind the pumpkin. You’ll get a soft glow effect without cutting into the pumpkin. It’s cozy, safer, and way less work than
turning your dining table into a pumpkin surgery ward.
How to Help Your No-Carve Pumpkin Last Longer
A no-carve pumpkin usually lasts longer than a carved one because the skin stays intact. Still, pumpkins are living things with big “fall mood” energy,
which means they can also decide to get weird overnight. Help them behave:
- Wash and fully dry before decorating so paint and glue stick well.
- Keep it cool: shaded porch beats sunny windowsill.
- Use LED lights, not candlesheat speeds up breakdown.
- Seal paint (optional): a light clear coat outdoors can protect designs from moisture.
Wrap-Up: Your Porch Can Be Cute, Spooky, and Safe
The best Halloween crafts aren’t the ones that look like a professional prop studio. They’re the ones where everyone actually participates,
laughs, and ends the night with all fingers accounted for. With these no-carve pumpkin ideas, you can build a tradition that’s
safer for kids, easier on your kitchen, and still totally Instagram-worthyif that’s your thing. (If it’s not, your pumpkin won’t mind.)
Extra Experiences: What Really Happens When Families Decorate No-Carve Pumpkins (About )
Let’s talk about the part no one puts in the “perfect craft” photos: the real-life chaos. No-carve pumpkin night sounds calm in theory.
You imagine soft music, smiling children, and a tastefully placed cup of cider. In reality, someone will ask for a snack every six minutes,
somebody else will attempt to paint a spider with the emotional intensity of a courtroom drama, and you’ll discover that glitter can travel
faster than light when carried by small hands.
The biggest win I’ve seen (in many households) is setting expectations early: this is not a museum exhibit, it’s a memory. That mindset shift
makes everything easier. When your five-year-old’s “cat” pumpkin looks more like a confused potato with eyes, you can call it a “Halloween creature”
and move on. Perfection is overrated; porch personality is not.
Another practical lesson: your supply choices decide your stress level. If you want a peaceful evening, put out paint pens, stickers, and washi tape.
Save hot glue for after bedtime or for adult-only jobs like attaching heavier decorations. And if you’re doing anything involving drips, splatter,
or “just a little glitter,” put the pumpkin on a tray or cardboard first. You will feel wildly competent, like you planned ahead, even if you didn’t.
You’ll also learn which projects match your family’s attention span. Some kids love detail workplaid lines, tiny bats, carefully placed gems.
Others are happiest with bold, quick wins like polka dots and monster faces. If you pick the wrong style, the pumpkin ends up half-finished and you end
up finishing it while pretending you “love crafting at night.” Choose designs that can look done in 15 minutes, then add optional upgrades for anyone
still engaged.
And here’s the sneaky best part: no-carve pumpkins encourage teamwork. One person can hold the pumpkin steady, another can place features,
and a third can be the official “googly eye chooser,” a role that is somehow both crucial and deeply serious. When you take a photo at the end,
what you’re really capturing isn’t the pumpkinit’s the shared moment where everyone made something together, and it didn’t involve a knife.
Finally, the porch test. A pumpkin can look amazing indoors under bright lights and then look… questionable outside at night. Before you declare it done,
carry it to the porch and check it in real lighting. Add contrast if needed: darker outlines, brighter shapes, or a soft LED nearby.
That tiny step turns “cute craft” into “wow, our house looks festive,” and it’s incredibly satisfying. Plus, it buys you at least 24 hours
of family bragging rights, which is priceless in October.


