Table of Contents >> Show >> Hide
- Before You Start: A 10-Minute Cabinet Reality Check
- Quick Wins (Projects You Can Finish Before You Forget Where You Put the Screws)
- Deep Clean + Degrease Like You Mean It
- Swap the Hardware (The “New Shoes” of Cabinet Updates)
- Add Backplates to Cover Old Holes
- Adjust Hinges and Fix Saggy Doors
- Upgrade to Soft-Close Hinges (Goodbye, Cabinet Door Slam)
- Install Soft-Close Drawer Slides
- Line the Shelves (Pretty + Practical)
- Add LED Under-Cabinet Lighting
- Replace (or Paint) Visible Hinges
- Refresh the Kick Plate with a Simple Detail
- Weekend Makeovers (Bigger Visual Impact Without New Cabinets)
- Paint the Cabinets (The Classic for a Reason)
- Go Two-Tone (A Designer Trick That Feels Custom)
- Stain or Gel-Stain Wood Cabinets
- Fill Oak Grain for a Smooth, Modern Look
- Add Trim to Create DIY Shaker Doors
- Dress Up Doors with Beadboard (Real or Faux)
- Add Cane Webbing or Mesh Inserts for Texture
- Install Glass Door Inserts (Instant “Kitchen Upgrade” Energy)
- Wallpaper or Wrap the Door Panels (Renters, This One’s for You)
- Paint the Cabinet Interiors a Surprise Color
- High-Impact Upgrades (Still Cheaper Than Replacing Cabinets)
- Add Crown Molding to the Top
- Install a Light Rail (A Small Trim That Looks Expensive)
- Extend Cabinets to the Ceiling (The “Luxury” Illusion)
- Remove a Few Upper Doors for “Mostly-Closed” Open Shelving
- Add Roll-Out Shelves (The Best Upgrade You’ll Feel Every Day)
- Create a Pull-Out Trash + Recycling Center
- Upgrade Interior Storage: Dividers, Spice Pull-Outs, and Door Racks
- When “DIY” Should Mean “Do It… with a Professional”
- Conclusion: Your Cabinets Don’t Need to Be NewThey Need to Be Loved
- Real-World Experiences: What DIYers Learn After Updating Cabinets
- SEO Tags
Replacing kitchen cabinets is like deciding to “just trim your bangs” at 1 a.m.it sounds simple until you’re
surrounded by regret, dust, and a suspicious number of receipts. The good news: if your cabinet boxes are still
sturdy (no sagging, no waterlogged particleboard, no “this door is held on by vibes”), you can get a high-end
kitchen cabinet makeover with DIY cabinet updates that cost a fraction of a full rip-and-replace.
Below are 26 cabinet refresh ideassome are quick Saturday wins, others are “clear your weekend and order pizza”
projectsbut all are designed to help you upgrade kitchen cabinets without replacing them. Expect paint and
prep, trim and molding, lighting, storage fixes, and a few “how did I not do this sooner?” tricks.
Before You Start: A 10-Minute Cabinet Reality Check
DIY is most satisfying when it’s applied to cabinets that deserve it. Do this quick assessment first:
- Boxes: Open a few doors and push on the sides. If the boxes flex like cereal-box cardboard, consider refacing or replacing.
- Smell test: Musty odor or swollen bottoms can mean water damage. Fix the leak before anything else.
- Layout: If you hate the cabinet layout (not the style), upgrades won’t solve a traffic-jam kitchen.
- Safety: Ventilate for paint and adhesives; use eye protection when cutting; hire an electrician if wiring makes you nervous.
If your boxes are solid, you’re in the sweet spot: update the “face” and function, keep the expensive structure,
and enjoy the smug satisfaction of not paying for a dumpster.
Quick Wins (Projects You Can Finish Before You Forget Where You Put the Screws)
-
Deep Clean + Degrease Like You Mean It
Grease is the silent villain of cabinet projects. Start with a strong degreaser, rinse well, and let
everything dry. Even if you’re not painting, clean cabinets make hardware swaps and touch-ups look ten times
better.Pro tip: Pay extra attention around pulls and near the stovethose areas collect the most grime.
-
Swap the Hardware (The “New Shoes” of Cabinet Updates)
New knobs and pulls are the fastest visual upgrade. Keep it cohesive: match finishes across the kitchen, and
choose a size that feels intentional (tiny pulls on big drawers can look like an afterthought).Pro tip: Use a hardware jig or a simple cardboard template so every hole lines up like you have your life together.
-
Add Backplates to Cover Old Holes
If you’re changing hardware styles and the old holes don’t match, backplates can hide the evidence while
adding a finished, furniture-like detailespecially on shaker doors. -
Adjust Hinges and Fix Saggy Doors
Many cabinet doors just need alignment. Tighten loose screws, adjust hinges so reveals are even, and replace
any stripped screws with slightly longer ones. It’s shockingly satisfying. -
Upgrade to Soft-Close Hinges (Goodbye, Cabinet Door Slam)
Soft-close hinges make a kitchen feel instantly more “custom.” Most installs are a straightforward swap:
remove the old hinge, position the new hinge, drill pilot holes if needed, and rehang the door.Pro tip: If full hinge replacement is too much, add-on dampers can provide a quieter close with less effort.
-
Install Soft-Close Drawer Slides
Drawer slams are the soundtrack of chaos. Soft-close slides calm everything down. Label drawers as you
remove them, and install one drawer at a time so nothing gets mixed up. -
Line the Shelves (Pretty + Practical)
Add shelf liner or removable paper to protect surfaces and make interiors look clean. Choose wipeable
liners for under-sink cabinets and pantry areas. -
Add LED Under-Cabinet Lighting
Under-cabinet lighting is one of the most dramatic upgrades for the money. LED tape or puck lights make
countertops brighter for cooking and add a warm glow at night. Plug-in kits are DIY-friendly; hardwired
options can look cleaner but may require an electrician. -
Replace (or Paint) Visible Hinges
If your hinges are visible and dated, swapping them can modernize cabinets fast. If replacement isn’t
possible, specialty spray paint for metal can help them blend. -
Refresh the Kick Plate with a Simple Detail
The toe-kick is often ignored, which is exactly why upgrading it makes the whole kitchen feel more refined.
Paint it to match, add a subtle trim, or clean and touch up scuffed areas so the base looks crisp.
Weekend Makeovers (Bigger Visual Impact Without New Cabinets)
-
Paint the Cabinets (The Classic for a Reason)
Painting kitchen cabinets can look like a total remodelif you prep correctly. Remove doors, label them,
clean thoroughly, scuff-sand, prime, then paint with a durable cabinet-grade enamel. Let paint cure before
heavy use; cabinets get handled constantly, so durability matters.Pro tip: Use a bonding primer for slick surfaces like laminate, and don’t skip sanding between coats for a smoother finish.
-
Go Two-Tone (A Designer Trick That Feels Custom)
Two-tone cabinetslike lighter uppers and deeper lowersadd depth and make a kitchen feel more intentional.
Keep the contrast tasteful: think warm white + sage, or soft greige + navy. -
Stain or Gel-Stain Wood Cabinets
If you like the wood grain but hate the color, refinishing can bring cabinets back to life. Gel stains can
be more forgiving than traditional stains because they sit closer to the surface and offer richer coverage.Pro tip: Test in an inside corner firstwood tones can shift dramatically depending on species and existing finish.
-
Fill Oak Grain for a Smooth, Modern Look
Painting oak cabinets often telegraphs the grain. If you want a sleek finish, use a grain filler before
priming. It’s extra work, but it’s the difference between “DIY painted cabinets” and “wait… are these new?” -
Add Trim to Create DIY Shaker Doors
Flat or basic doors can become shaker-style by adding thin trim pieces to the perimeter. Measure carefully,
glue and nail the trim, fill seams, then paint. This is a favorite upgrade because it changes the style,
not just the color. -
Dress Up Doors with Beadboard (Real or Faux)
Beadboard adds cottage or farmhouse character. For a simpler route, use beadboard-look wallpaper in the
center panel and frame it with trim for a “how is that not wood?” effect. -
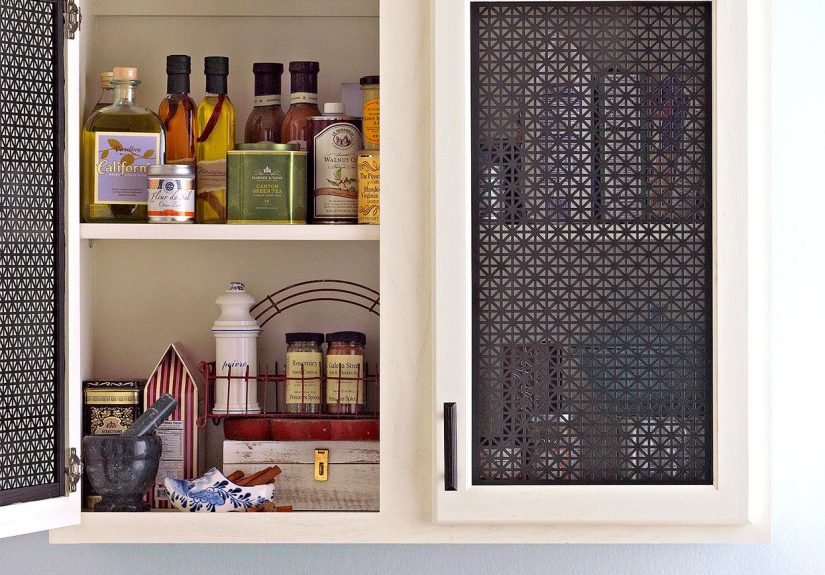
Add Cane Webbing or Mesh Inserts for Texture
Cane webbing (or metal mesh) adds texture and a boutique feel. Many DIYers soak cane briefly to make it
pliable, attach it neatly, and cover edges with slim trim for a finished look.Pro tip: Use this on just a few doors (like uppers) so it reads as a feature, not a theme park.
-
Install Glass Door Inserts (Instant “Kitchen Upgrade” Energy)
Glass inserts lighten up the room and let you show off your prettiest dishes (and quietly hide the mismatched
plastic containers behind closed doors elsewhere). You can cut an opening in select doors and add glass, or
buy replacement glass-ready doors sized to your existing boxes.Pro tip: Frosted or reeded glass gives the airy look without forcing you to organize like a magazine stylist.
-
Wallpaper or Wrap the Door Panels (Renters, This One’s for You)
Peel-and-stick wallpaper or vinyl wraps can refresh cabinetsespecially on flat or shaker-style doorswithout
committing to paint. It’s also a smart option for surfaces that are tough to refinish.Pro tip: Start on a less-visible door to practice. You’ll learn the “squeegee dance” quickly.
-
Paint the Cabinet Interiors a Surprise Color
Want personality without repainting the whole kitchen? Paint the inside of a few cabinets (or a glass-door
cabinet) a contrasting color. It’s a small move with big style payoff.
High-Impact Upgrades (Still Cheaper Than Replacing Cabinets)
-
Add Crown Molding to the Top
Crown molding makes cabinets look taller and more built-inespecially if your cabinets stop short of the
ceiling. Paint it to match for a seamless look, or use it as a subtle highlight.Pro tip: If there’s a gap above your cabinets, molding helps eliminate the “dust shelf” zone.
-
Install a Light Rail (A Small Trim That Looks Expensive)
Light rail molding sits under upper cabinets, hiding under-cabinet lighting and creating a finished edge.
It’s one of those details that quietly whispers, “custom kitchen.” -
Extend Cabinets to the Ceiling (The “Luxury” Illusion)
If you have a big empty gap above cabinets, consider adding an extensionlike a simple wood “bridge” and trim
or even stacked small cabinetsso everything reaches the ceiling. It makes the kitchen look taller and more
intentional (and gives you more storage for the stuff you only use twice a year). -
Remove a Few Upper Doors for “Mostly-Closed” Open Shelving
If you like the idea of open shelving but fear dust and chaos (valid), remove doors from just one or two
cabinet sections instead of going fully open. Paint the interior, style it simply, and keep the rest of your
cabinets doing their job: hiding your snack stash. -
Add Roll-Out Shelves (The Best Upgrade You’ll Feel Every Day)
Roll-out trays turn deep base cabinets into usable storage. Install full-extension slides, build or buy a
tray sized to your opening, and suddenly you can reach the back without performing a yoga pose.Pro tip: Measure the inside opening carefullyface frames and hinges can steal space.
-
Create a Pull-Out Trash + Recycling Center
A pull-out trash cabinet reduces visual clutter and makes cleanup easier. Many kits attach to an existing
base cabinet, using slides and a frame to hold bins. It’s a functional upgrade that feels surprisingly
“new-kitchen” for the effort. -
Upgrade Interior Storage: Dividers, Spice Pull-Outs, and Door Racks
Organization upgrades are the cabinet update nobody posts on social mediaand yet they’re the ones that
make you love your kitchen daily. Add vertical dividers for trays, a door-mounted rack for wraps, a spice
pull-out, or a lazy Susan in corner cabinets. Better storage makes old cabinets feel new.
When “DIY” Should Mean “Do It… with a Professional”
Most of these kitchen cabinet updates are solid DIY projects. But consider calling in help if:
- You need hardwired electrical work for lighting and aren’t confident in code-safe wiring.
- Your cabinet boxes are out of square (doors never line up no matter what you do).
- You’re tackling a full veneer refacing on multiple runs and want a factory-level finish.
Conclusion: Your Cabinets Don’t Need to Be NewThey Need to Be Loved
You don’t have to replace your kitchen cabinets to get a fresh, modern look. With the right DIY kitchen cabinet
updatespaint, new cabinet hardware, soft-close hinges, trim details, lighting, and smart storageyou can make a
dated kitchen feel custom, cleaner, and easier to use. Start with one high-impact upgrade (hardware or lighting),
then layer in the bigger changes when you’re ready. Your wallet will thank you, and your kitchen will stop
looking like it’s stuck in a time capsule.
Real-World Experiences: What DIYers Learn After Updating Cabinets
The first thing most people discover is that cabinet projects aren’t hardthey’re fussy. Cabinets are
the most touched surface in a kitchen. They get grabbed with wet hands, bumped by grocery bags, and exposed to
heat and grease. That’s why the “boring” parts (cleaning, sanding, priming, curing) matter more here than almost
anywhere else. Many DIYers go in excited about color and come out with deep respect for degreaser.
Another common experience: labeling saves your sanity. Even if your doors look identical, they’re rarely
interchangeable. A small piece of painter’s tape on each door and hinge location prevents the classic finale:
“Why does this door suddenly hate me?” It’s also normal to underestimate how many screws live in a kitchen.
Plan a container systemcups, zip bags, or a muffin tinso hardware doesn’t wander off like it has somewhere
better to be.
Painting brings its own rite of passage: impatience. Most people want to rehang doors the moment paint feels dry.
But cabinet paint often needs time to cure and harden. A door can feel dry and still be soft enough to dent when
bumped by a pot handle. The DIY win is learning to stage the kitchen: keep a few doors off for airflow, use
temporary knobs if needed, and treat the space gently for a bit. It’s annoying, yesbut it’s also how you get a
finish that lasts.
Storage upgrades are where people feel the biggest day-to-day payoff. Roll-out shelves and drawer organizers
don’t photograph like a moody navy island, but they change how the kitchen works. DIYers often say the most
satisfying moment isn’t the revealit’s the first time they grab a pan without clanging ten others, or the first
time recycling has a “home” that isn’t the corner of the floor. These are the updates that make a kitchen feel
calmer.
Finally, many people walk away with a new design instinct: restraint. You don’t need to do all 26 updates to
get a transformation. In fact, the most “expensive-looking” results usually come from picking a tight set of
changeslike hardware + lighting + paint, or trim + glass inserts + organizationand executing them cleanly.
Cabinets don’t need a full replacement to look refreshed. They need a plan, a little patience, and (occasionally)
a reminder that the screws are in the cup… not in your pocket.


