Table of Contents >> Show >> Hide
- Why make your own curtain rod?
- Pick your “affordable rod personality”
- Before you buy anything: the measuring rules that make it look expensive
- Materials and tools for an EMT conduit curtain rod
- Step-by-step: build an affordable DIY conduit curtain rod
- Step 1: Decide the finished rod length
- Step 2: Cut the conduit cleanly
- Step 3: Prep the surface (this is what separates “DIY” from “DIY but make it nice”)
- Step 4: Prime and paint
- Step 5: Add end caps or finials
- Step 6: Choose brackets that match your plan
- Step 7: Mark bracket locations (measure twice, drill onceyes, really)
- Step 8: Mount brackets securely
- Step 9: Hang the rod and test the slide
- Step 10: Adjust for the final look
- Installation tips that prevent wobble, sag, and regret
- Style upgrades on a small budget
- Common DIY curtain rod mistakes (and how to avoid them)
- Quick FAQ
- Real-world experiences: what people actually run into (and how to win anyway)
- The “my measurements were correct… so why is it wrong?” moment
- The “paint looked great until I touched it” disappointment
- The “I used the anchors that came in the box and now the bracket wiggles” saga
- The “my curtains don’t slide; they shuffle angrily” situation
- The “center sag appeared overnight” surprise
- The “my window looks bigger and I didn’t even renovate” victory
- Conclusion
Store-bought curtain rods have a special talent: they look basic, cost weirdly a lot, and somehow still come with
screws that feel like they were made from recycled soda cans. The good news? You can build a sturdy, custom-fit
DIY curtain rod that looks intentional (not “temporary apartment chaos”), costs less, and actually fits your
windowwithout needing a woodworking degree or a side hustle in metal fabrication.
This guide walks you through an easy, budget-friendly buildplus smart measuring, installation tips, and
real-world lessons that keep your curtains from doing the dreaded midnight thunk.
Why make your own curtain rod?
A DIY curtain rod isn’t just about saving money (though you usually will). It’s about control: you decide the
length, the finish, the style, and how sturdy it needs to be for your curtainswhether they’re airy sheers or
thick blackout panels that could double as a soundproofing experiment.
What you get with DIY
- Perfect sizing: No awkward “almost fits” rods that leave your curtains covering half the window.
- Better style per dollar: Industrial, modern, minimalist, farmhousepick your vibe.
- Stronger hardware choices: You choose brackets and anchors rated for the real weight.
- Room-enhancing placement: Hang curtains “high and wide” to make windows look larger and ceilings taller.
Pick your “affordable rod personality”
There are a few popular DIY approaches. All can look great; the best one depends on your budget, tools, and whether
you want a polished look or an industrial edge.
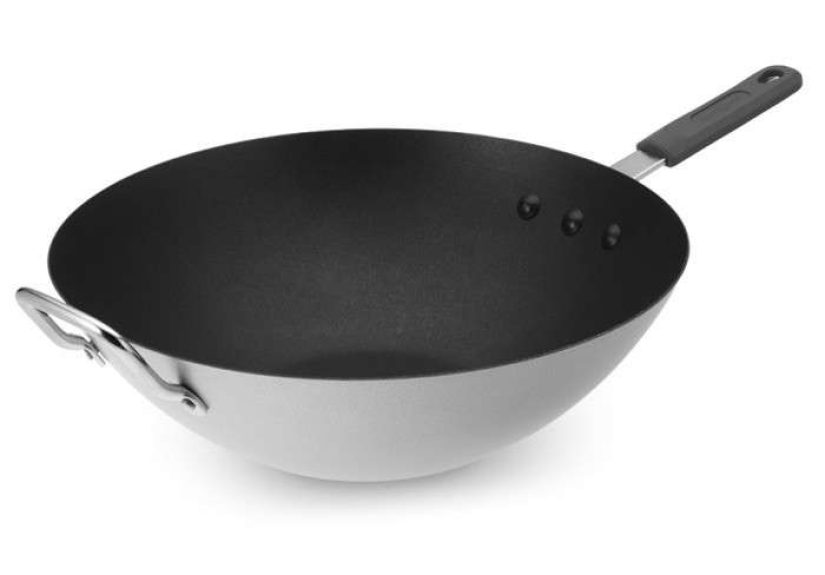
Option A: EMT conduit (best budget + surprisingly stylish)
EMT conduit is lightweight metal tubing from the electrical aisle. It’s straight, inexpensive, easy to cut, and
looks excellent painted matte black, brass, or “I definitely paid for this” bronze.
- Pros: Cheap, strong enough for most curtains, easy to customize, easy to paint.
- Cons: Needs end caps/finials for a finished look; you’ll want to sand/prime for best paint adhesion.
Option B: Wooden dowel (classic, clean, renter-friendly)
A thick wooden dowel (or closet rod) is the simplest build: cut to length, paint or stain, and rest it on standard
curtain rod brackets. Great for lightweight to medium curtains.
Option C: Black pipe (industrial and nearly indestructible)
Black plumbing pipe with flanges and elbows creates a bold industrial rod that’s very sturdyexcellent for heavy
curtains. It’s also heavier and can require more careful mounting.
Option D: Copper pipe (sleek, modern, “hello, design magazine”)
Copper looks high-end. It’s usually pricier than conduit and can patina over time (which is either “character”
or “why is my rod turning into a penny?” depending on your mood).
In this article, we’ll build Option A (EMT conduit) because it’s the sweet spot: affordable, sturdy,
and easy for beginners.
Before you buy anything: the measuring rules that make it look expensive
Most curtain problems aren’t fabric problemsthey’re measuring problems. Follow these rules and your windows will
instantly look more “designer” and less “I hung this in a hurry during a minor life crisis.”
1) Hang the rod higher than you think
A common baseline is mounting the rod a few inches above the window frame. If you have space between the window
trim and the ceiling, you can often go higher to visually stretch the wall.
2) Go wider so the curtains clear the glass
Extend the rod past the window frame so open curtains sit mostly on the wallnot blocking light. This also helps
reduce side light gaps if you’re using room-darkening panels.
3) Plan for “no-sag living”
Long spans and heavier curtains need a center support bracket. If you skip it, your rod will eventually bow in the
middle like it’s doing yoga without warming up.
4) Don’t forget curtain fullness
For curtains to look full when closed, you generally want more fabric width than the window itself. Under-buying
width is the fastest path to sad, flat curtains that look like they’re being punished.
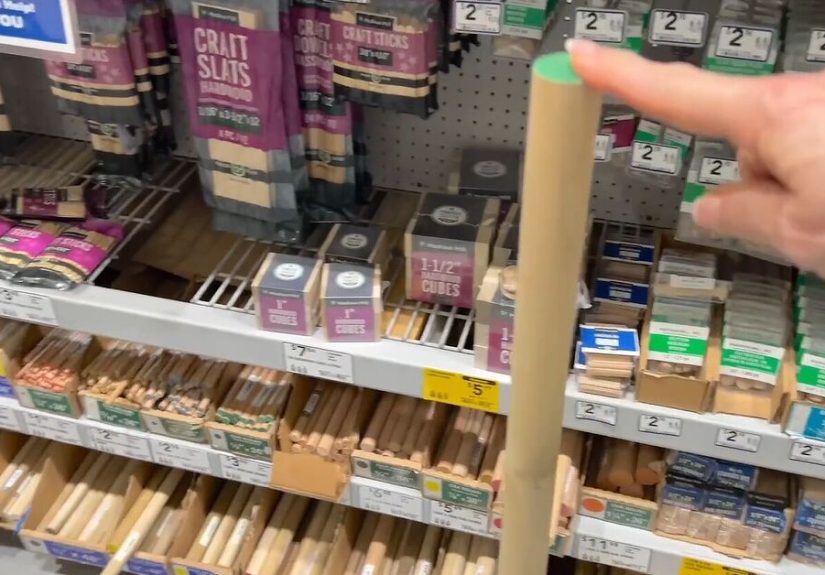
Materials and tools for an EMT conduit curtain rod
Materials (for one window)
- EMT conduit (commonly 1/2″ or 3/4″): choose based on rod rings/brackets size and the look you want
- 2 end caps (rubber chair leg tips, knockout seals, or decorative finials adapted to fit)
- 2–3 brackets (two end brackets + optional center support)
- Mounting screws (use what matches your bracket holes and wall type)
- Drywall anchors (if you can’t hit studs; pick anchors rated for the weight)
- Spray primer + spray paint (optional but highly recommended for a pro finish)
- Curtain rings (optional; useful if your curtains don’t slide easily on the rod)
Tools
- Measuring tape
- Pencil
- Level
- Stud finder (helpful, not magical, but helpful)
- Drill/driver + bits
- Conduit cutter, hacksaw, or the hardware store cutting service
- Sandpaper (medium grit)
- Step stool or ladder
Step-by-step: build an affordable DIY conduit curtain rod
Step 1: Decide the finished rod length
Measure your window width (including trim if you have it). Then decide how far you want the rod to extend past the
window on each side. A common “looks good in most rooms” range is several inches beyond the frame so curtains can
stack on the wall. If you’re trying to block light, going wider helps.
Example: Window + trim is 48″ wide. If you extend 6″ on each side, your rod span becomes about 60″
(before considering finials/end caps and bracket placement).
Step 2: Cut the conduit cleanly
You have three easy options:
- Hardware-store cut: Often the simplestbring your measurement and let them cut it.
- Conduit cutter: Makes a clean cut with less mess.
- Hacksaw: Works finejust sand the cut edge well afterward.
After cutting, lightly sand the ends so they’re smooth (and so your end caps fit without a wrestling match).
Step 3: Prep the surface (this is what separates “DIY” from “DIY but make it nice”)
Wipe the conduit to remove dust and oils. Then scuff-sand the surface lightly so primer and paint grip better.
This step is boring, yesbut it’s also the reason your paint won’t chip if your curtains slide back and forth every day.
Step 4: Prime and paint
If you want the rod to look store-bought, don’t skip primer (especially on metal). Use light coats, let each coat
dry, and rotate the conduit as you spray so you don’t miss a side.
- Matte black: modern/industrial, hides imperfections, goes with everything
- Warm brass or champagne: soft glam without screaming “I just discovered gold accents”
- White: blends into trim for a clean, minimal look
Step 5: Add end caps or finials
End caps make the rod look finished and prevent sharp edges from snagging fabric. Budget-friendly options include
rubber caps (like chair leg tips) sized to fit snugly. For a more decorative look, you can use finials or knobs
with adaptersjust make sure they’re secure.
Step 6: Choose brackets that match your plan
You can mount conduit using:
- Standard curtain rod brackets: simplest if the bracket cradle fits your conduit diameter
- Conduit straps: inexpensive and very sturdy (often used for a tighter, minimal look)
- Decorative brackets: if you want the hardware to stand out as part of the design
Step 7: Mark bracket locations (measure twice, drill onceyes, really)
Use a pencil to mark where each bracket will go. Use a level so the marks align. If you’re going “high and wide,”
you’ll likely place the brackets above the window and several inches out from the frame on each side.
If your rod will be long (or your curtains heavy), mark a center point for a middle support bracket to prevent sagging.
Step 8: Mount brackets securely
The strongest method is screwing into studs. If you can’t hit studs, use drywall anchors rated for the load.
Pre-drill pilot holes where appropriate, install anchors cleanly, and tighten screws until the bracket feels solid.
“Sort of tight” is how rods end up on the floor.
Step 9: Hang the rod and test the slide
Place the conduit on the brackets, tighten any bracket set screws, and test how your curtains move. If the curtains
snag, consider curtain ringsespecially for thicker fabrics or painted rods with a slightly grippy finish.
Step 10: Adjust for the final look
Step back. Check height, width, and curtain length. Tiny tweaks (moving brackets slightly wider, leveling again,
adjusting curtain rings) can take the result from “fine” to “wow.”
Installation tips that prevent wobble, sag, and regret
Use a center support when needed
If your span is wide or the curtains are heavy, a center bracket is your friend. It prevents bowing and reduces
stress on the end brackets.
Pick anchors like an adult (future you will be grateful)
Not all drywall anchors are equal. Choose anchors based on the combined weight of the rod, brackets, rings, and
curtains. When in doubt, upgrade the anchoror add a mounting board secured into studs and attach brackets to that.
Account for curtain headers
Grommet tops, clip rings, rod pockets, and pleated headers all hang differently. Before drilling, hold the curtain
up where you want it to land so you don’t end up with curtains hovering awkwardly above the floor like they’re afraid of commitment.
Go “high and wide” without blocking the trim
A common mistake is mounting the rod barely above the window, which visually shrinks the window. Hanging the rod
higher makes the window look larger and the room feel tallerespecially when the curtains skim the floor.
Style upgrades on a small budget
- Make it look custom: Match rod finish to your hardware (door handles, cabinet pulls, lighting).
- Double up: Add a second rod for sheers + blackout panels (layered look, better function).
- Add statement ends: Even simple end caps look cleaner than exposed hollow tubing.
- Rings for the win: Curtain rings improve slide and protect your paint from constant friction.
Common DIY curtain rod mistakes (and how to avoid them)
Mistake: Rod too short
If the rod ends near the window edge, your curtains cover part of the glass when open. Plan extra width so the
fabric stacks on the wall.
Mistake: Rod mounted too low
Low rods make ceilings feel shorter. Raising the rod (when possible) gives a more polished, room-lifting effect.
Mistake: Skipping the center bracket
The rod may look fine on day one. Then gravity remembers it exists. Center supports prevent the slow-motion sag.
Mistake: Weak anchors for heavy curtains
A heavy rod + thick curtains + tiny anchors = future floor decor. Match anchors to the load and use studs when you can.
Mistake: Painting without prep
Metal needs scuffing and often primer. Skipping prep is why paint chips when you slide curtains like you’re opening a theater show.
Quick FAQ
Can I do this as a renter?
Yesespecially with a dowel or conduit rod. Use existing holes when possible, keep bracket placement minimal, and
patch small holes with spackle when moving out (check your lease).
Will conduit hold blackout curtains?
Often, yesespecially with the right diameter and solid mounting. For very heavy curtains or very wide spans,
add a center bracket and use strong anchors or studs.
What if my window is extra wide?
Use a center support (or even two, depending on span), and consider a thicker conduit diameter. You can also use
a mounting board secured into studs, then attach brackets where you want them.
Do I need curtain rings?
Not always. But rings can make curtains glide smoothly and reduce paint wearespecially for thicker fabrics or
rod-pocket curtains that tend to drag.
Real-world experiences: what people actually run into (and how to win anyway)
The first time you build a DIY curtain rod, it can feel like a perfectly normal home project right up until the moment
you realize you’ve been holding a level for five minutes and still can’t decide if the bubble is “centered enough.”
That’s normal. Here are the most common real-life moments DIYers describeand how to handle them without spiraling.
The “my measurements were correct… so why is it wrong?” moment
Windows aren’t always square, floors aren’t always level, and trim isn’t always consistent. A rod can be level and still
look slightly off if the ceiling line is crooked or the window casing is uneven. The trick is to prioritize what the eye
notices most. If your ceiling line is visibly slanted (older homes love this), aligning the rod visually with the ceiling
can look better than a perfectly level rod that highlights the wonkiness.
The “paint looked great until I touched it” disappointment
Spray paint on metal is a relationship that thrives on prep. People who skip scuff-sanding or primer often report chipping
near the curtain rings first. If you want a finish that lasts, lightly sand, prime, apply thin coats, and let it cure
longer than you think you need. “Dry to the touch” is not the same as “ready for daily friction.”
The “I used the anchors that came in the box and now the bracket wiggles” saga
Many curtain hardware kits include anchors that are fine for lightweight panels, but questionable for heavier curtains.
DIYers often fix this by upgrading to stronger anchors, hitting studs, or adding a mounting board. A simple painted board
(matched to the wall color) lets you anchor into studs where they exist and place brackets exactly where you want them
and it can look surprisingly intentional.
The “my curtains don’t slide; they shuffle angrily” situation
Painted rods, thick fabrics, and rod pockets can create drag. People usually solve this with curtain rings or clip rings,
which glide more easily. Another low-drama improvement is lightly waxing the rod (using a small amount of furniture wax)
so the rings move smoothly. If you’ve ever yanked curtains open like you’re revealing a plot twist, you’ll appreciate
anything that reduces friction.
The “center sag appeared overnight” surprise
Sag is sneaky. A rod may look straight immediately after installation, then slowly bow under the combined weight of curtains,
rings, and gravity. DIYers consistently report that a center support bracket is the simplest prevention. If you’re spanning a
wide window or using heavy panels, just add the support up frontit’s cheaper than replacing bent materials later.
The “my window looks bigger and I didn’t even renovate” victory
This is the best part: once people hang curtains higher and extend the rod wider, the whole room often looks more polished.
The window feels larger, the ceiling appears taller, and the curtains look more tailoredwithout changing the window at all.
It’s one of those rare home upgrades that delivers a visible “before and after” without requiring demolition, dust masks, or
living in a renovation zone for weeks.
Bottom line: DIY curtain rods are beginner-friendly, but the “nice” result comes from a few unglamorous stepsmeasuring thoughtfully,
mounting securely, and letting paint cure properly. Do those, and your curtains will hang smoothly, look intentional, and stay
off the floor at 2 a.m. (which is when gravity loves to test your decisions).