Table of Contents >> Show >> Hide
- What Is a Daith Piercing?
- Before You Clean: The Golden Rules of Daith Piercing Aftercare
- Way 1: Clean Your Daith Piercing with Sterile Saline Spray
- Way 2: Rinse Your Daith Piercing in the Shower
- Way 3: Keep the Area Clean Between Cleanings
- How Often Should You Clean a Daith Piercing?
- How Long Does a Daith Piercing Take to Heal?
- Signs Your Daith Piercing Is Healing Normally
- When to Get Medical Help
- Daith Piercing Cleaning Mistakes to Avoid
- Practical Example: A Simple Daily Routine
- Experience Notes: What Cleaning a Daith Piercing Is Really Like
- Conclusion
A daith piercing is tiny, stylish, and tucked into one of the most dramatic little corners of your ear. It also has the personality of a houseplant with trust issues: treat it gently, keep it clean, and do not poke it every five minutes “just to check.” Because a daith piercing goes through cartilage, it usually needs more patience than a simple earlobe piercing. The good news? Cleaning it does not require a bathroom cabinet full of mysterious potions. In fact, the best daith piercing aftercare is simple, boring, and surprisingly effective.
This guide covers 3 easy ways to clean a daith piercing using realistic, safe, and beginner-friendly steps. You will learn how to use sterile saline, how to rinse and dry the area without turning your ear into a science project, and how to keep everyday irritation from slowing the healing process. Whether your piercing is brand-new or still acting moody months later, the goal is the same: clean, calm, and let your body do its job.
What Is a Daith Piercing?
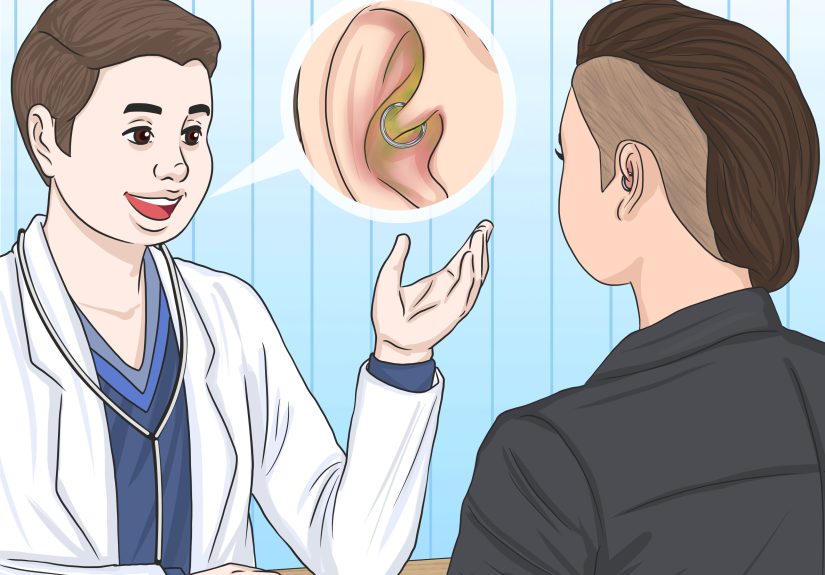
A daith piercing passes through the small fold of cartilage just above the ear canal. Because of its location, it is protected from some bumps, but it is also harder to see and clean than an earlobe piercing. That means you need a careful routine, not an aggressive one. More scrubbing does not mean better healing. Your piercing is not a dirty frying pan.
Cartilage piercings can take several months to fully heal, and some may take close to a year depending on your body, jewelry quality, aftercare, and lifestyle. During that time, it is normal to see mild tenderness, light swelling, and small amounts of clear or pale fluid that dries into crust. What you do not want is worsening pain, spreading redness, heat, heavy swelling, yellow or green discharge, fever, or a piercing that suddenly feels much worse after improving. Those signs deserve professional attention.
Before You Clean: The Golden Rules of Daith Piercing Aftercare
Wash Your Hands First
Before touching the area, wash your hands with soap and warm water. Dry them with a clean towel or disposable paper towel. Your hands meet keyboards, door handles, phones, snack bags, and who knows what else. Your fresh piercing does not need that social network.
Use the Right Product
The safest everyday cleaning product is usually sterile saline wound wash. Look for a simple formula, commonly 0.9% sodium chloride and sterile water, with no fragrance, oils, preservatives, or “extra healing” ingredients. Extra ingredients often mean extra irritation.
Do Not Twist the Jewelry
Old advice often told people to twist earrings while cleaning. For a daith piercing, do not twist, spin, tug, or flip the jewelry. Movement can irritate healing tissue and may drag dried buildup through the piercing channel. Clean around the jewelry gently and let it stay put.
Avoid Harsh Cleaners
Skip rubbing alcohol, hydrogen peroxide, antibacterial soap, iodine, ointments, tea tree oil, and homemade salt mixtures unless a qualified medical professional gives different instructions. These products can dry, irritate, or damage healing skin. When in doubt, keep it simple: sterile saline, clean water, clean hands, patience.
Way 1: Clean Your Daith Piercing with Sterile Saline Spray
This is the easiest and most recommended method for everyday daith piercing cleaning. Sterile saline helps rinse away crust, sweat, and light buildup without being too harsh. It is gentle enough for regular use and easy to aim at a tricky inner-ear placement.
What You Need
You need sterile saline wound wash, clean gauze or a disposable paper towel, and a mirror if you want a better view. Avoid cotton balls if they shed fibers. A daith piercing can catch lint like it is collecting souvenirs.
Step-by-Step Saline Cleaning Routine
First, wash your hands thoroughly. Then tilt your head slightly so the saline can reach the piercing without running directly into your ear canal. Spray the front and back area of the daith jewelry, letting the saline soften any dried crust for about 30 to 60 seconds. Do not pick at hard crust. If it is not ready to come away, let it be. Forcing it off can irritate the piercing.
Next, use clean gauze or the edge of a disposable paper towel to gently blot away softened debris. The keyword here is gently. You are not polishing silverware. Pat the area dry afterward, because leaving moisture trapped around cartilage jewelry can make the area feel irritated and sticky.
Most people do well cleaning once or twice daily, depending on the piercer’s instructions and how the piercing feels. Over-cleaning can be just as annoying as under-cleaning. If your ear becomes dry, tight, flaky, or extra tender, you may be cleaning too often or using too much product.
Common Saline Mistakes
One common mistake is using a homemade saltwater mix. The problem is that kitchen salt and tap water are not sterile, and it is easy to make the mixture too salty. Too much salt can dry out the skin and make your daith piercing feel angry. Another mistake is spraying saline and walking away while the area stays wet. A quick dry with clean gauze can make a big difference.
Way 2: Rinse Your Daith Piercing in the Shower
A clean shower rinse is another easy way to care for a daith piercing, especially when crust has built up around the jewelry. Warm running water can soften debris and remove residue from hair products, sweat, or skin oils. This method is simple, but it needs a light touch.
How to Shower-Rinse Safely
Let clean, warm water run near the piercing for a short time. Do not blast the area with high pressure. You want a gentle rinse, not a theme-park water cannon. If shampoo or conditioner touches the piercing, rinse the area well afterward so no residue stays trapped in the folds of the ear.
After the shower, dry the area carefully. Use clean gauze or a disposable paper towel to pat around the jewelry. You can also use a hair dryer on a cool or low setting from a safe distance if your piercer says that is okay, but do not use heat close to the ear. The goal is to remove trapped moisture, not roast your cartilage like a marshmallow.
When Shower Rinsing Works Best
Shower rinsing is especially helpful after workouts, hot weather, or days when hair products may have touched your ear. It is also useful when saline alone is not loosening crust. Think of the shower as a gentle reset button. It should support your saline routine, not turn into a long soaking session.
What to Avoid in the Shower
Do not scrub your daith piercing with a washcloth. Do not aim strong water pressure directly into the piercing. Do not use face wash, body wash, acne cleanser, or scented soap on the jewelry. Those products are made for general skin cleansing, not for a healing cartilage piercing. Also, be careful when washing and rinsing your hair. A towel, brush, or wet strand of hair can snag the jewelry if you move too quickly.
Way 3: Keep the Area Clean Between Cleanings
The third easy way to clean a daith piercing is not only about what you do during your official cleaning routine. It is about keeping the area from getting dirty or irritated in the first place. A daith piercing can be perfectly cleaned in the morning and still get annoyed by earbuds, dirty pillowcases, hair products, or constant touching by lunchtime.
Change Pillowcases Often
Your pillowcase collects oil, sweat, hair products, and skin cells. Change it frequently while your daith piercing heals. If you sleep on the pierced side, try to avoid direct pressure. A travel pillow can help by letting your ear rest in the center opening instead of being squished against fabric all night. Your ear gets comfort; your piercing gets peace; everybody wins.
Be Careful with Earbuds and Headphones
Because a daith piercing sits near the ear canal, earbuds can bump or press against it. Avoid using earbuds on that side while the piercing is healing if they touch the jewelry. Over-ear headphones may also cause pressure depending on the fit. If your audio setup makes your piercing sore, it is not worth it. Switch sides, lower the pressure, or take a break.
Keep Hair and Products Away
Hair spray, dry shampoo, gel, conditioner, and fragrance can irritate a healing piercing. Cover your ear carefully when applying products, or apply products away from the piercing. If something gets on the area, rinse with clean water or sterile saline and dry gently.
Do Not Touch It for Fun
This may be the hardest rule because new piercings are weirdly tempting to check. But touching, spinning, or “testing” the jewelry introduces bacteria and causes movement. If you are not cleaning it, leave it alone. Your daith piercing does not need motivational speeches or surprise inspections.
How Often Should You Clean a Daith Piercing?
Many piercers recommend cleaning a healing daith piercing once or twice a day with sterile saline. The best schedule depends on your skin, your environment, and your piercer’s instructions. If you work out, sweat a lot, wear hats, use hair products, or live in a humid climate, you may need a gentle rinse after those exposures. However, more cleaning is not always better.
Signs you may be over-cleaning include dryness, flaking, burning, tightness, or redness that appears after each cleaning. If that happens, review your product and technique. Make sure the saline has no additives, stop using harsh products, and dry the area after rinsing. If irritation continues, check in with a reputable piercer or healthcare professional.
How Long Does a Daith Piercing Take to Heal?
Daith piercings are cartilage piercings, and cartilage usually heals slowly. Some people feel comfortable after a few months, but full healing may take much longer. The outside can look calm before the inside is fully healed, which is why changing jewelry too early can restart irritation. Do not remove or change your daith jewelry until a professional piercer confirms it is ready.
Healing speed can depend on jewelry material, jewelry fit, your immune system, sleeping habits, cleaning routine, and how often the piercing gets bumped. High-quality implant-grade titanium, solid gold that is appropriate for body jewelry, or other hypoallergenic materials are often preferred because nickel and low-quality metals can trigger irritation or allergic reactions in some people.
Signs Your Daith Piercing Is Healing Normally
Normal healing may include mild swelling, slight tenderness, occasional itching, and a small amount of clear or pale fluid that dries into crust. These symptoms should gradually improve. Some days may be more sensitive than others, especially after sleeping on it, wearing headphones, or accidentally bumping it.
A healing piercing should not become dramatically worse over time. It should not feel hot, throb intensely, or produce thick yellow or green discharge. A small irritation bump can happen with cartilage piercings, often from pressure, movement, or jewelry issues. Do not attack the bump with random internet remedies. Instead, reduce irritation and ask a skilled piercer to check jewelry angle, size, and material.
When to Get Medical Help
Because a daith piercing passes through cartilage, do not ignore possible infection signs. Contact a healthcare professional if you notice increasing pain, spreading redness, warmth, severe swelling, fever, darkening skin, or thick discharge. Also seek help if the jewelry feels embedded, the area becomes extremely tender, or symptoms improve and then suddenly return worse than before.
Do not remove jewelry from a possibly infected cartilage piercing unless a medical professional tells you to. Removing jewelry at the wrong time may allow the outside to close while trapping infection inside. A doctor or qualified clinician can tell you whether medication or another treatment is needed.
Daith Piercing Cleaning Mistakes to Avoid
Using Alcohol or Hydrogen Peroxide
These products can be too harsh for healing tissue. They may dry or irritate the piercing and delay healing.
Picking Crust Off Before It Softens
Crust is common, but picking it off dry can create tiny injuries. Soften it with saline or shower water first, then remove only what comes away easily.
Changing Jewelry Too Soon
A daith piercing may look healed before it truly is. Early jewelry changes can cause swelling, irritation, or closure.
Sleeping Directly on the Piercing
Pressure can cause soreness and irritation bumps. Try sleeping on the other side or using a travel pillow.
Using Earbuds Too Early
If earbuds press against the jewelry, they can slow healing. Clean headphones regularly and avoid anything that touches the piercing.
Practical Example: A Simple Daily Routine
In the morning, wash your hands and spray the daith piercing with sterile saline. Let the saline soften any buildup, then blot gently with clean gauze and dry the area. During the day, avoid touching it, keep hair products away, and skip earbuds if they press on the jewelry. At night, rinse in the shower if needed, dry carefully, and sleep without pressure on that ear. That is it. No complicated ritual. No moonlight chanting required.
Experience Notes: What Cleaning a Daith Piercing Is Really Like
The first thing many people notice about cleaning a daith piercing is that visibility is the real challenge. Unlike an earlobe piercing, which sits out in the open like it is posing for a yearbook photo, a daith piercing hides in the inner fold of the ear. You may feel like you need three mirrors, perfect lighting, and the flexibility of a yoga instructor just to see what you are doing. This is normal. The trick is not to chase perfection. You do not need to scrub every microscopic corner. You need to rinse, soften buildup, gently dry, and avoid irritation.
Another common experience is the “Is this normal?” phase. A daith piercing can feel calm one day and tender the next, especially if you slept on it or accidentally caught it while brushing your hair. Mild ups and downs can happen during cartilage healing. The important part is watching the overall trend. If the piercing slowly becomes less swollen, less sore, and easier to clean, you are probably moving in the right direction. If it becomes hotter, more painful, more swollen, or starts producing concerning discharge, that is not a “wait and vibe” situation. Get it checked.
Many people also learn that less is more. The instinct is to clean more when a piercing looks irritated, but over-cleaning can make things worse. Spraying saline five times a day, poking at crust, and twisting the jewelry can turn a mild irritation into a dramatic ear tantrum. A steady routine usually works better: sterile saline once or twice daily, shower rinses when needed, careful drying, and no unnecessary touching. Healing is not a race; it is more like convincing a tiny cartilage tunnel that everything is fine.
Hair and headphones are two sneaky troublemakers. Long hair can wrap around jewelry. Earbuds can press directly against the piercing. Over-ear headphones can create pressure without you noticing until your ear feels sore later. If your daith piercing keeps getting irritated, look at what touches it every day. Sometimes the “mystery problem” is not your saline or your skin; it is your favorite headphones acting like tiny villains.
Finally, the best experience comes from having a reputable piercer involved. A good piercer can check whether the jewelry is the right size, whether the angle looks healthy, and whether irritation might be caused by pressure or metal sensitivity. Cleaning matters, but jewelry quality and fit matter too. If your daith piercing is stubborn, do not blame yourself immediately. Sometimes the solution is not a new cleaning product; it is a professional opinion and a small adjustment.
Conclusion
Cleaning a daith piercing is not complicated, but it does require consistency and restraint. The three easiest methods are using sterile saline spray, rinsing gently in the shower, and keeping the area clean between cleanings by avoiding pressure, dirty fabrics, hair products, and unnecessary touching. The best aftercare routine is simple: clean hands, gentle saline, careful drying, and patience.
Remember that a daith piercing is a cartilage piercing, so healing can take time. Do not rush jewelry changes, do not attack irritation with harsh chemicals, and do not ignore signs of infection. Treat your piercing like a tiny VIP guest in your ear: keep things clean, calm, and drama-free.


