Table of Contents >> Show >> Hide
- Why Arborvitae Struggle in Winter (Even When They’re “Hardy”)
- Before You Cover Anything: 5 Winter-Prep Moves That Make Covers Work Better
- Way #1: Build a Burlap Windbreak Screen (The “Coat Rack” Method)
- Way #2: Loosely Wrap the Whole Arborvitae in Burlap (The “Breathable Sleeping Bag”)
- Way #3: Create a Deer-and-Wind Cover Cage (Netting or Wire “Armor”)
- Do Anti-Desiccant Sprays Count as “Cover”?
- Quick Troubleshooting: What If My Arborvitae Still Browns?
- Conclusion: Your Winter Cover Game Plan (Without the Drama)
- 500+ Words of Real-World Experiences: What Gardeners Learn After One Winter Too Many
Arborvitae are the “privacy fence” that doesn’t need a permituntil winter shows up with a
hair-dryer wind, a sunbeam magnifier, and a deer that treats your hedge like an all-you-can-eat salad bar.
The good news: you don’t need a complicated contraption to protect them. You just need the right kind of
cover, installed the right way, at the right time.
This guide breaks down three practical ways to cover arborvitae for winterfrom breathable burlap
windbreaks to full wraps and wildlife-proof cagesplus the real-world “oops” moments that can make the
difference between spring-green and crispy-bronze.
Why Arborvitae Struggle in Winter (Even When They’re “Hardy”)
Many arborvitae varieties are cold-tough, but winter injury isn’t always about “too cold.” It’s often about
drying. Arborvitae keep their foliage in winter, and foliage loses watereven when the roots can’t
replace it because the soil is frozen. That mismatch can cause winter burn (winter desiccation):
bronzing, browning, and dieback that shows up in late winter or early spring.
Add in these common stressors, and your evergreen starts to look less “ever” and more “eh”:
- Wind exposure that accelerates moisture loss (especially on the windward side).
- Bright winter sun that warms foliage and increases transpiration on cold, dry days.
- Snow and ice that can splay or snap upright formsarborvitae are notorious for snow-load damage.
- Salt spray near roads, driveways, or sidewalks that can scorch foliage.
- Wildlife browsing (deer and rabbits), especially late winter when food is scarce.
Before You Cover Anything: 5 Winter-Prep Moves That Make Covers Work Better
1) Water like you mean it (until the ground freezes)
Drought stress going into winter is like starting a marathon already thirsty. Deep watering in fallespecially
for newer plantingshelps reduce winter burn because the plant has more moisture in reserve.
2) Mulch the root zone (but don’t “volcano” it)
A 2–3 inch layer of mulch over the root area helps hold soil moisture and buffers temperature swings. Keep
mulch pulled back from the trunk/stems to avoid rot and pest issues.
3) Do a quick structural check
If your arborvitae are narrow and upright (think ‘Emerald Green’ types), snow can pry them open like a
wishbone. A simple tie-up (covered below) can prevent permanent splaying.
4) Choose breathable materials
Winter covers should block wind and sun while still letting air move. Generally, burlap, landscape fabric,
and purpose-made frost cloth are good choices. Avoid plastic sheeting directly on evergreensit can
trap moisture, overheat on sunny days, and invite disease.
5) Timing: install after hard frosts, remove in early spring
Put covers up in late fall or early winter once plants have hardened off. Remove them in early spring when
severe weather eases and the soil begins to thawkeeping covers on too long can reduce airflow and create
problems of its own.
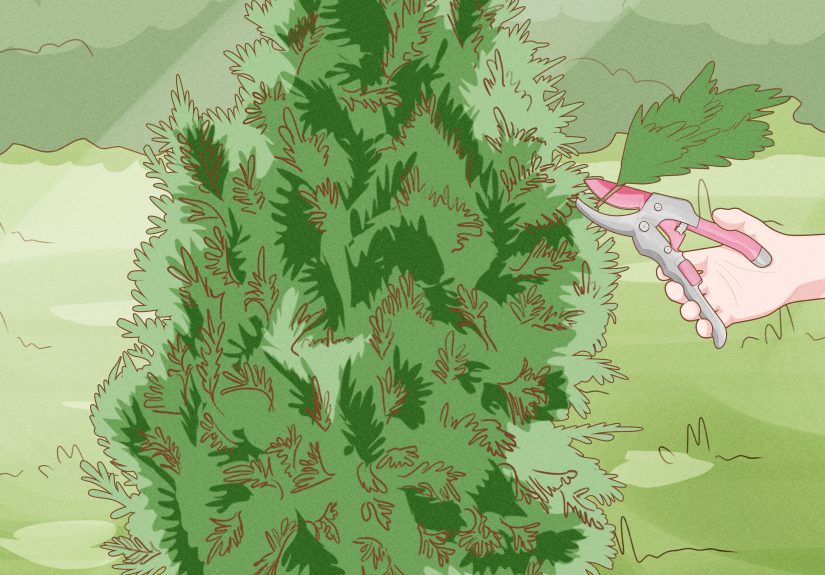
Way #1: Build a Burlap Windbreak Screen (The “Coat Rack” Method)
If you want one method that works for most situations, start here. A burlap screen blocks harsh wind and
reduces sun exposure without smothering the plant. The trick is not wrapping burlap tightly against the
foliage. Think “wind shield,” not “mummy.”
Best for
- Arborvitae in windy, open areas (corner lots, exposed fences, hilltops).
- Plants that bronze on the south/west side each year.
- Sites with road/sidewalk salt spray.
What you’ll need
- Burlap (or breathable landscape fabric)
- 3–5 sturdy stakes (wood or metal)
- Staple gun or zip ties/twine
- Optional: hammer, wire cutters, gloves
How to do it (step-by-step)
-
Identify the problem side (usually the prevailing wind side, often northwest; or the sun-baked
south/west side). -
Set stakes 12–24 inches away from the outer foliage line (the drip line), forming a partial circle
or “fence” on the exposed side. -
Attach burlap to the stakes so it forms a vertical wall that blocks wind. Secure it wellwinter wind
loves improvisational kite-making. - Leave the top open so snow doesn’t collapse the burlap onto the plant and airflow can continue.
-
For extra protection, double-layer the burlap on the windiest side (not all the way around unless
conditions are severe).
Common mistakes (aka “How to accidentally annoy your arborvitae”)
- Wrapping burlap directly against foliage: wet burlap can freeze and abrade needles.
- Sealing the plant like a sandwich bag: no airflow = moisture + temperature swings.
- Putting burlap on top: snow load can sag it into the plant and cause breakage.
Pro example: If a row of ‘Emerald Green’ arborvitae browns every year on the street-facing side,
a burlap screen placed on that windward/salt-exposed edge often reduces bronzing dramatically by spring.
Way #2: Loosely Wrap the Whole Arborvitae in Burlap (The “Breathable Sleeping Bag”)
Full wraps make sense when the plant is small-to-medium, compact, and consistently takes a beating from wind,
sun, or salt. The key words are loose and breathable. You’re not trying to compress the plant into a
topiary cone; you’re trying to reduce moisture loss and shield it from punishing conditions.
Best for
- Compact arborvitae shrubs (especially newly planted or in their first 1–3 winters).
- Foundation plantings where reflected sun and wind tunnel effects hit hard.
- Areas with repeated winter burn despite good watering/mulch.
What you’ll need
- Burlap roll or burlap sheets
- Soft twine (jute twine works well)
- Optional: 2–4 stakes to keep burlap off foliage
- Scissors, gloves
How to do it (step-by-step)
-
Gently tie branches upward first with soft twine (spiral up the plant), just enough to keep the
form tidy and reduce snow splay. Don’t cinch tightlyno girdling allowed. - If the plant is tall, place stakes around it slightly taller than the shrub to create a frame.
-
Wrap burlap around the frame or loosely around the shrub, overlapping edges like a jacket.
Secure with twine. Aim for a snug wind buffer, not compression. - Leave some breathing room at the top and along the wrap so air can circulate.
- Remove in early spring once severe weather subsides. Let the plant enjoy fresh air again.
When full wraps are especially smart
-
Snow-prone regions: Tying and wrapping helps prevent the classic “split down the middle” look
that can haunt arborvitae for years. -
Deer pressure: Burlap adds a minor barrier (though determined deer may still browse). Pair with
a wildlife cage if deer are bold.
Reality check: Burlap doesn’t “heat” a plant like insulation. Its superpower is reducing wind and sun
stress so the plant loses less water during freezing weather.
Way #3: Create a Deer-and-Wind Cover Cage (Netting or Wire “Armor”)
If deer treat your arborvitae like a winter buffet, windbreaks alone won’t solve the problem. You need a
physical barrier. This method uses a sturdy cage (wire fencing or strong netting) that can double as a support
structure for breathable fabric on the windward side.
Best for
- Neighborhoods with regular deer browsing.
- Young, tender arborvitae (deer especially love fresh growth).
- Plants near woods, greenbelts, or known deer paths.
Two cage options
Option A: Wire fencing cylinder (strongest)
- Use welded wire or sturdy garden fencing.
- Create a cylinder around the plant, leaving 6–12 inches of space from foliage.
- Stake it firmly so snow and wind don’t topple it.
Option B: Heavy-duty deer netting (easier, but check it often)
- Wrap netting around stakes so it doesn’t press into foliage.
- Secure tightly to avoid tangles and gaps.
- Monitor after stormsnetting can sag under ice.
Upgrade: add a burlap “panel” on the windward side
Once the cage is in place, attach burlap (or breathable fabric) to the outside of the cage on the prevailing-wind
side. Now you’ve got a combo system: wildlife protection + reduced winter burn risk.
Height matters (especially with deer)
For individual shrubs, taller is better. Deer can reach surprisingly high and will browse from the sides and top
if they can. If deer pressure is intense, consider a broader strategy (multiple plants, perimeter fencing, and
repellents) rather than relying on a short barrier.
Bonus move: tie-up for snow protection
Even with a cage, lightly tying arborvitae with soft twine (spiraling upward) helps prevent snow and ice from
prying branches apart. Remove ties in spring to prevent long-term constriction.
Do Anti-Desiccant Sprays Count as “Cover”?
Not exactlythey’re more like a “top coat” than a jacket. Anti-desiccant (anti-transpirant) products form a
thin film that can reduce moisture loss. Many gardeners use them as an add-on when winter burn is persistent,
especially on evergreens in exposed sites.
If you use one, treat it as a supporting actor:
- Best paired with good fall watering and a windbreak screen.
- Apply at the right time (typically late fall/early winter, following label directions).
- Don’t use it to excuse bad siting (if a plant is getting blasted every winter, a windbreak helps more).
Quick Troubleshooting: What If My Arborvitae Still Browns?
If browning is on one side
That’s often wind/sun exposure. Next winter, focus protection on the prevailing wind side and the sunniest side
(south/west), and confirm fall watering.
If the top is split or bent
That’s usually snow/ice load. Tie the plant up before heavy snow season and avoid letting wet burlap or fabric
sag onto branches.
If tips are missing or ragged
That’s often deer browsing. Upgrade to a cage system and consider a broader deterrent plan for your yard.
In spring: prune patiently
Don’t rush to prune the moment you see bronzing. Some arborvitae re-green as temperatures stabilize. Wait until
you see clear signs of dead tissue and new growth before making big cuts.
Conclusion: Your Winter Cover Game Plan (Without the Drama)
Covering arborvitae for winter isn’t about building a tiny evergreen fortressit’s about reducing stress.
Pick the method that matches your biggest threat:
- Wind + sun + salt: a burlap windbreak screen is the simplest, most versatile fix.
- Small/compact shrubs in tough sites: a loose, breathable full wrap can help prevent winter burn.
- Deer pressure: a cage system is the most reliable “cover,” and you can add burlap panels for wind.
Pair your cover with smart prepfall watering, proper mulch, and a spring removal planand your arborvitae will
be much more likely to look like a lush hedge in April instead of a row of sad, bronzed traffic cones.
500+ Words of Real-World Experiences: What Gardeners Learn After One Winter Too Many
Ask a group of homeowners why they started covering arborvitae for winter and you’ll hear the same origin story:
“They were gorgeous in October… and then by March they looked like they’d been blow-dried on ‘volcano.’”
Winter protection often starts as a reaction, but it becomes a routine once people see which small tweaks actually
move the needle.
One common experience is the one-sided bronzing mystery. A row of arborvitae can brown mostly on the
street side or the open-yard side, while the sheltered side stays greener. Gardeners often assume disease, but the
pattern tends to match prevailing winds or a sun-baked exposure. After trying a full wrap and getting only
modest improvement, many people switch to a simple burlap screen placed 12–24 inches away on the problem
side. That small gapairflow plus protectionoften makes the shrubs look noticeably better by spring.
Another lesson shows up after a big snow year: structure matters as much as color. Even if the foliage
survives, heavy snow can pry upright arborvitae open. Gardeners describe the heartbreak of seeing a favorite hedge
split into a permanent “V.” The fix is surprisingly low-tech: a gentle spiral of soft twine to keep leaders together
before snow season. People who start tying early (before the first heavy storm) tend to have fewer splitsand they
also discover that spring removal is non-negotiable. Leave ties on too long and you can get awkward growth patterns
or constriction.
Then there’s the deer escalation phase. Some winters, deer ignore arborvitae. Other winters, they act like
your hedge is the last salad on earth. A lot of gardeners try repellents first and feel great… right up until the
next thaw washes everything off and the deer return for “seconds.” That’s why many experienced folks end up with a
physical barriera wire cylinder or sturdy netting on stakesespecially for young plants. The “aha” moment
is realizing that a barrier has to be tall and secure enough to resist both deer curiosity and winter storms.
Flimsy netting pressed against foliage can sag, freeze, and create tangles, so the more successful setups keep
netting off the plant using stakes or a rigid frame.
Finally, lots of gardeners learn that winter cover works best when it’s part of a whole-season strategy.
They water more deeply in fall, mulch properly, and install covers after the plant hardens off. The most satisfied
“I finally figured it out” stories usually include a spring habit too: removing covers early enough to restore airflow,
then waiting to prune until they can clearly see what’s truly dead versus temporarily bronzed.
The overall vibe from these experiences is refreshingly simple: the best winter protection is breathable,
well-timed, and matched to the real threat. When gardeners stop guessing and start targeting wind, snow, or deer
with the right cover, arborvitae tend to reward them with that dense, green privacy screen they wanted in the first place.


