Table of Contents >> Show >> Hide
- Before You Cut: What to Know About Mirror Glass
- Way #1: Score and Snap With a Glass Cutter
- Way #2: Use Running Pliers for More Controlled Breaks
- Way #3: Use a Wet Saw or Professional Glass-Cutting Setup
- How to Get a Cleaner Mirror Cut
- When Not to Cut a Mirror Yourself
- Which Mirror Cutting Method Is Best?
- Real-World Experiences With Cutting Mirror
- Conclusion
Cutting a mirror sounds like one of those projects that begins with confidence and ends with someone saying, “Well, that escalated quickly.” But the truth is much less dramatic. If you use the right tools, work slowly, and respect the fact that glass does not care about your weekend plans, you can get a clean cut and a custom-sized mirror without turning your garage into a sparkle-filled crime scene.
Whether you’re trimming a mirror for a frame, making smaller decorative tiles, or resizing a piece for a bathroom or craft project, there are a few mirror cutting methods that actually work. The trick is knowing which one matches your project. In this guide, we’ll cover three practical ways to cut mirror, when to use each method, and how to avoid the classic mistakes that lead to chips, cracks, and words you should not say around children.
Before You Cut: What to Know About Mirror Glass
A mirror is basically glass with a reflective backing, so the cutting process is similar to cutting standard glass. You do not “saw” through it like wood. Instead, you score the surface with a glass cutter, then apply pressure so the mirror breaks cleanly along that line. That score line is the star of the show. If it’s uneven, hesitant, or repeated too many times, the final break can wander off like a shopping cart with one bad wheel.
Before using any mirror cutting technique, make sure the mirror is not tempered. Tempered glass is designed for safety and usually cannot be cut after tempering without shattering or failing unpredictably. If you’re working with a large wall mirror, a shower mirror, or a mirror from furniture or a door, verify the material first. When in doubt, ask a glass shop. That small question can save a very large mess.
Safety Gear You Should Actually Wear
Yes, safety goggles are not optional here. Neither are sturdy gloves. Add long sleeves, closed-toe shoes, and a stable work surface. A clean, flat table topped with a soft blanket, cardboard, or thin drop cloth helps cushion the mirror while keeping it level. Tiny grit under the mirror can create pressure points, and pressure points are how a simple project becomes a surprise puzzle with 47 sharp pieces.
Basic Tools for Cutting Mirror
- Glass cutter or mirror cutter
- Straightedge or metal ruler
- Marker or wax pencil
- Cutting oil
- Running pliers or breaking pliers
- Fine-grit sandpaper or a sanding stone
- Painter’s tape
- Safety glasses and work gloves
Way #1: Score and Snap With a Glass Cutter
This is the classic method and the best option for most straight cuts. If you searched for how to cut a mirror at home, this is probably the technique you had in mind. It is inexpensive, relatively beginner-friendly, and perfect for small to medium mirrors.
Best for
Straight cuts on standard, non-tempered mirror glass.
How It Works
You mark the cut line, place a straightedge over it, and drag the glass cutter across the mirror in one smooth pass. That creates a shallow score line. Then you apply pressure to snap the mirror along the line. You are not trying to cut all the way through. Think “convince the glass where to break,” not “fight the glass like it owes you money.”
Step-by-Step
- Clean the mirror. Wipe both sides so dust and grit do not interfere with the score.
- Mark the line. Measure carefully and use a marker or wax pencil.
- Apply tape if desired. Painter’s tape along the cut area can help with visibility and may reduce minor chipping on some pieces.
- Lubricate the cutter. A little cutting oil helps the wheel move smoothly.
- Score once. Place the straightedge firmly and pull the cutter in one continuous motion with even pressure.
- Snap the mirror. Position the score line over the edge of a table or use running pliers. Apply controlled pressure until the mirror breaks along the line.
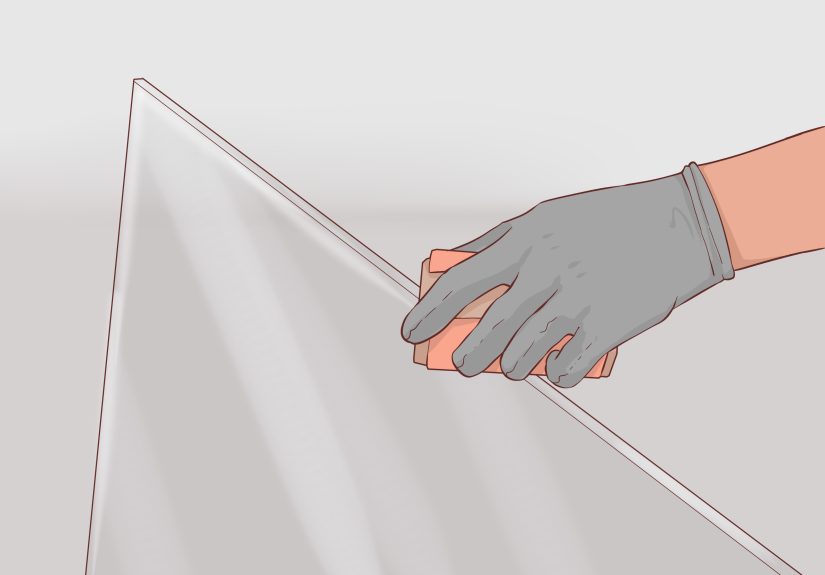
- Smooth the edge. Use fine-grit sandpaper, a rubbing stone, or an abrasive pad to dull the sharpness.
Pros
- Affordable and accessible
- Great for clean, straight cuts
- Ideal for DIY mirror projects and frames
Cons
- Not great for curves
- Takes practice to get the pressure right
- Large mirrors can be awkward and risky to snap
Way #2: Use Running Pliers for More Controlled Breaks
Technically, you still score the mirror first, but running pliers deserve their own spot because they can make the difference between a clean break and a dramatic failure worthy of slow-motion replay. These pliers are designed to apply even pressure on both sides of the score line, which helps guide the break exactly where you want it.
Best for
Shorter mirror cuts, narrow strips, and projects where snapping by hand feels too risky.
Why This Method Helps
After scoring, many DIYers try to break the mirror by hand over a table edge. That works, but it can be tricky if the mirror piece is small, thin, or stubborn. Running pliers reduce guesswork. You align the center mark on the pliers with the score line, squeeze gently, and let the tool distribute pressure. It is the difference between cracking a glow stick properly and bending it like a confused breadstick.
How to Do It
- Score the mirror with a glass cutter as described above.
- Check that the score line is visible and continuous from edge to edge.
- Place the running pliers so the jaw is centered over the score line.
- Squeeze gradually rather than going full superhero on the handles.
- Allow the crack to run along the line. Reposition if needed on longer pieces.
- Sand the cut edge to make it safer to handle.
When to Choose Running Pliers
If you’re cutting mirror tiles, trimming small decorative mirrors, or making multiple repeated cuts, this method gives you more control. It also reduces the chance of cracking beyond the score. For many beginners, adding running pliers to the toolkit is the upgrade that turns “I hope this works” into “Oh, that was actually satisfying.”
Common Mistakes to Avoid
- Scoring the same line more than once
- Squeezing too hard too fast
- Trying to break a mirror that never got a clean, continuous score
- Ignoring tiny chips at the edge before starting the cut
Way #3: Use a Wet Saw or Professional Glass-Cutting Setup
If your project involves thicker material, multiple identical pieces, specialty shapes, or you simply do not trust yourself with a fragile reflective panel and caffeine in your bloodstream, a wet saw or professional glass shop is worth considering. Some experienced DIYers use a wet saw designed for glass tile or specialty glass work, especially when the project calls for precision and repetition.
Best for
Large projects, repeated cuts, certain specialty mirror pieces, and DIYers with experience using power tools around glass or glass-like materials.
How It Works
A wet saw uses a diamond blade and a stream of water to reduce heat and help produce smoother cuts. While it is more commonly associated with tile, it can be useful for some mirrored materials and certain craft applications when the blade and setup are appropriate. This is not the best first date for a beginner and a random garage saw, though. Mirror backing can chip, and the wrong blade can ruin the piece faster than you can say, “Why is everything sparkling?”
Why a Pro Shop May Be Better
For oversized bathroom mirrors, furniture inserts, or expensive mirrored panels, professional cutting is often the smartest route. Many hardware stores and glass shops can cut glass or mirror to size, which saves time and reduces waste. If your mirror is large, valuable, or needed for a visible install where every edge matters, paying for precision may be cheaper than replacing a broken panel and your dignity.
Pros
- Good for larger or repeated projects
- Can offer cleaner results in experienced hands
- Professional services reduce risk and save time
Cons
- Higher cost
- More setup and equipment
- Not necessary for most simple DIY mirror cuts
How to Get a Cleaner Mirror Cut
If you want the finished mirror edge to look neat instead of vaguely chewed, a few small details matter a lot.
Measure Twice, Then Double-Check Your Brain
Mirrors are not forgiving. A cut that is off by even an eighth of an inch can make installation frustrating. Measure the frame, opening, or wall space carefully, and account for any trim or adhesive clearance if needed.
Use Firm, Even Pressure
The scoring pass should be confident and continuous. Too light, and the mirror will not break well. Too heavy, and you can create chips or a rough edge. The goal is steady pressure from one end to the other in a single pass.
Support the Mirror Properly
A flat, rigid work surface matters more than many people realize. An uneven setup invites stress fractures. Put simply, your mirror should not feel like it is lounging in a hammock while you try to score it.
Finish the Edge
After cutting, always smooth the raw edge. Even if the mirror looks fine, the edge can be razor-sharp. Light sanding makes it safer to handle and often improves the final appearance, especially for exposed-edge mirror decor.
When Not to Cut a Mirror Yourself
DIY mirror cutting is practical, but it is not always the right call. Skip the home method and call a pro if:
- The mirror is tempered or you cannot identify the type
- The piece is very large or heavy
- The mirror is expensive or antique
- You need polished, highly visible edges
- You need complex shapes or intricate curves
- You are already nervous and your “steady hand” disappears under pressure
Which Mirror Cutting Method Is Best?
For most readers, the best way to cut mirror is the first method: score and snap with a glass cutter. It is simple, cheap, and effective for straight cuts. If you want more control, add running pliers. If the project is large, repetitive, or expensive, go with a wet saw setup in expert hands or pay for professional cutting.
The right choice depends on your project, your tools, and your comfort level. There is no prize for doing a risky cut the hard way. Sometimes the most expert DIY move is knowing when to let a glass shop handle the fragile chaos.
Real-World Experiences With Cutting Mirror
The funny thing about mirror cutting is that it looks terrifying until you do it correctly once. Then it becomes oddly satisfying. Many DIYers describe the first successful score-and-snap as a tiny confidence explosion. The cutter makes that crisp grating sound, the pliers apply pressure, and suddenly the mirror separates right where it should. It feels a bit like magic, except the magic requires safety glasses and cleanup.
One common experience is underestimating how important the work surface is. People often focus on the cutter, the oil, the tape, and the ruler, then try to work on a wobbly folding table that has seen things. That usually leads to uneven pressure and disappointing results. A rigid surface changes everything. Once the mirror is lying flat and supported, the score line becomes more consistent and the break behaves far better. In other words, the glamorous secret behind a clean mirror cut is not glamour at all. It is boring setup.
Another frequent lesson is that patience beats force every single time. Beginners tend to think, “If a little pressure is good, extra pressure must be better.” Glass disagrees. Hard. The people who get the best results are usually the ones who slow down, mark carefully, and make one deliberate score instead of five nervous ones. Mirror cutting rewards calm hands, not heroic improvisation.
There is also a very relatable emotional journey that happens during mirror projects. It begins with optimism. Then comes the measuring phase, where you suddenly distrust every tape measure you have ever owned. Then there is the score itself, followed by a brief silence where you wonder whether you just did it right or ruined a perfectly good mirror. Then comes the snap. When it works, you feel like a genius craft wizard. When it does not, you gain a sudden deep respect for professional glaziers and the phrase “cut to size.”
People working on bathroom updates often discover that cutting a mirror is not the hardest part of the project. The hardest part is figuring out whether the wall, frame, or installation area is actually square. Spoiler: sometimes it is not. A mirror can be cut beautifully and still seem “wrong” if the surrounding trim or wall lines are slightly off. That is why experienced DIYers often dry-fit everything and recheck the opening before making the final cut. The mirror is honest. It reflects your room and your measuring mistakes with equal enthusiasm.
Craft projects bring their own adventures. Smaller decorative cuts can feel easier because the pieces are lighter, but they also leave less room for error. Tiny strips, mosaic-style pieces, and narrow trims can crack unexpectedly if the score does not reach edge to edge. Many hobbyists find that running pliers make these projects far less frustrating. It is not that the pliers perform miracles. They just apply pressure more evenly than human fingers can, and that extra control matters when the piece is delicate.
Then there is the cleanup experience, which deserves a small but sincere mention. Even successful cuts can leave tiny shards or slivers. The job is not done when the mirror breaks. It is done when the workspace is vacuumed, wiped, and checked carefully. Anyone who has ever found a glittering speck of glass with their sock later in the day learns this lesson exactly once.
Perhaps the most useful experience shared by people who cut mirrors regularly is this: not every project should be a DIY project. That is not a failure. It is judgment. If the mirror is expensive, oversized, or headed to a prominent spot where every edge will be visible, having it professionally cut can be the smartest move. Plenty of skilled home improvers still outsource mirror cutting when the stakes are high. Confidence is great. So is knowing when to keep your money, your mirror, and your blood inside your body.
In the end, cutting mirror is one of those practical skills that feels intimidating mostly because glass looks dramatic. But with the right method, it becomes manageable. And once you have done it successfully, you may start looking around your house thinking, “Interesting… what else could use a custom mirror?” That is how one mirror project becomes three, and how a simple DIY skill turns into a suspiciously specific personality trait.
Conclusion
If you want to cut mirror successfully, keep it simple: choose the right method, confirm the mirror is not tempered, use a quality glass cutter, score once with confidence, and break the piece with control. For straight DIY cuts, score-and-snap is usually the winner. Running pliers add precision for smaller pieces, and professional or wet-saw setups make sense for larger or more demanding projects.
The bottom line is this: mirror cutting is less about bravery and more about technique. Work carefully, respect the material, and let the tools do their job. Do that, and you can turn a plain sheet of mirror into a custom piece that looks intentional, polished, and far more expensive than it probably was.


