Table of Contents >> Show >> Hide
- Before You Start: The 5 Rules of Successful Chocolate Shapes
- What You Need
- Method 1: Use Molds for Clean, Professional Chocolate Shapes
- Method 2: Pipe or Spread Chocolate on Parchment for Freeform Shapes
- Method 3: Make Cutout and Sculpted Shapes with Modeling Chocolate
- Common Problems and How to Fix Them
- Which Method Is Best?
- What You Learn After Making Chocolate Shapes a Few Times
- Final Thoughts
- SEO Tags
Chocolate has a funny way of acting like a diva. One minute it is silky, glossy, and ready for its close-up. The next, it is dull, streaky, and clinging to your spatula like it is offended by your kitchen. The good news is that making chocolate shapes at home is absolutely doable once you know which method fits the look you want. If you want clean hearts, stars, or mini seashells, molds are your best friend. If you want letters, swirls, leaves, or abstract decorations, piping on parchment works beautifully. And if you want cut-out flowers, bows, or little sculpted toppers, modeling chocolate is the move.
This guide breaks down three practical ways to make chocolate shapes without turning your kitchen into a cocoa crime scene. You will learn when to use real chocolate, when candy melts or coating wafers make life easier, how to avoid bloom and grainy texture, and how to get shapes that release cleanly instead of looking like they survived a minor earthquake. Whether you are decorating cupcakes, making party favors, or just trying to impress people with a tray of homemade treats, these methods will help you get there with style and only a small amount of dramatic sighing.
Before You Start: The 5 Rules of Successful Chocolate Shapes
Before you melt a single piece of chocolate, a few basics matter more than any fancy tool.
- Keep everything dry. Chocolate and water do not have a healthy relationship. Even a small splash can make melted chocolate seize and turn thick or grainy.
- Use gentle heat. Chocolate melts easily, so it does not need aggressive heat. Slow melting gives you better texture and better control.
- Know your chocolate. Real chocolate gives the best flavor and, when tempered, the best shine and snap. Candy melts and coating wafers are easier for beginners because they do not require tempering.
- Use a thermometer when possible. If you are tempering real chocolate, temperature control makes the difference between glossy perfection and a sad gray finish.
- Work in a cool room. Warm kitchens make chocolate soft, slow to set, and more likely to smudge.
If you are using real dark, milk, or white chocolate, tempering is worth learning because it helps the finished shapes stay shiny, firm, and less tacky at room temperature. If you are using melting wafers or candy melts, you can skip tempering and focus on shaping. That convenience is why so many home bakers use them for quick candy projects, especially for molded shapes and colorful decorations.
What You Need
- Chocolate bars, couverture chocolate, candy melts, or coating wafers
- Microwave-safe bowl or heatproof bowl for a double boiler
- Silicone spatula
- Parchment paper or acetate
- Chocolate molds, piping bags, or cookie cutters depending on the method
- Offset spatula or spoon
- Digital thermometer for real chocolate
- Baking sheet or tray
One useful tip: chop chocolate into small, even pieces before melting. Smaller pieces melt more evenly, which makes your life easier and your chocolate less likely to scorch. And yes, this is one of those moments where laziness is punished immediately.
Method 1: Use Molds for Clean, Professional Chocolate Shapes
If you want the neatest results, chocolate molds are the easiest path. This is the best method for hearts, stars, shells, dinosaurs, letters, coins, geometric tiles, and seasonal designs. Silicone molds are beginner-friendly because they release easily. Plastic or polycarbonate-style molds can produce sharper details and a shinier finish, but they can be a little fussier.
Best For
- Uniform chocolates for gifts or party trays
- Detailed designs
- Filled chocolates or layered colors
- Beginners who want reliable shapes
How to Do It
- Melt your chocolate gently. The microwave is great for small batches. Heat in short bursts, stirring often. If you prefer a double boiler, keep the water at a gentle simmer and make sure no steam or droplets get into the bowl.
- Temper it if you are using real chocolate. This step helps molded pieces look glossy and release better. If you are using candy melts or coating wafers, simply melt until smooth.
- Fill the mold. Spoon or pipe the chocolate into each cavity. Tap the mold on the counter to release air bubbles. This matters more than people think. Tiny bubbles can ruin the front of an otherwise perfect shape.
- Scrape the top clean. Use an offset spatula or bench scraper to level the chocolate so the backs of the shapes look neat.
- Let the shapes set. For simple solid pieces, let them set in a cool, dry place. For shells or filled chocolates, you may chill briefly between layers.
- Unmold carefully. Silicone molds can be flexed gently. For harder molds, turn them over and tap lightly if needed.
Want filled chocolate shapes? Coat the mold cavity with chocolate, let it partially set, add your filling, then cap it with more chocolate. Ganache, peanut butter filling, caramel, and cookie butter all work well, as long as the filling is not hot. Pouring warm filling into a chocolate shell is basically asking the shell to resign.
Pro Tips
- For layered colors, pipe one color first, chill briefly, then add the next.
- For lollipop molds, twist the stick slightly in the melted chocolate so it sets securely.
- If pieces do not release easily, give the mold a little more setting time rather than forcing it.
Method 2: Pipe or Spread Chocolate on Parchment for Freeform Shapes
If molds give you precision, parchment gives you freedom. This method is perfect for chocolate letters, hearts, zigzags, snowflakes, leaves, drizzles, and abstract decorations. It is a favorite for cake toppers and dessert garnishes because it looks elegant without requiring a specialty mold drawer that takes over half your kitchen.
Best For
- Custom initials and words
- Organic shapes like branches or curls
- Cake and cupcake toppers
- Quick decorative pieces
How to Do It
- Prepare a template. Draw shapes, letters, or simple outlines on paper, then place parchment over the top so you can trace without turning your dessert into a graphite project.
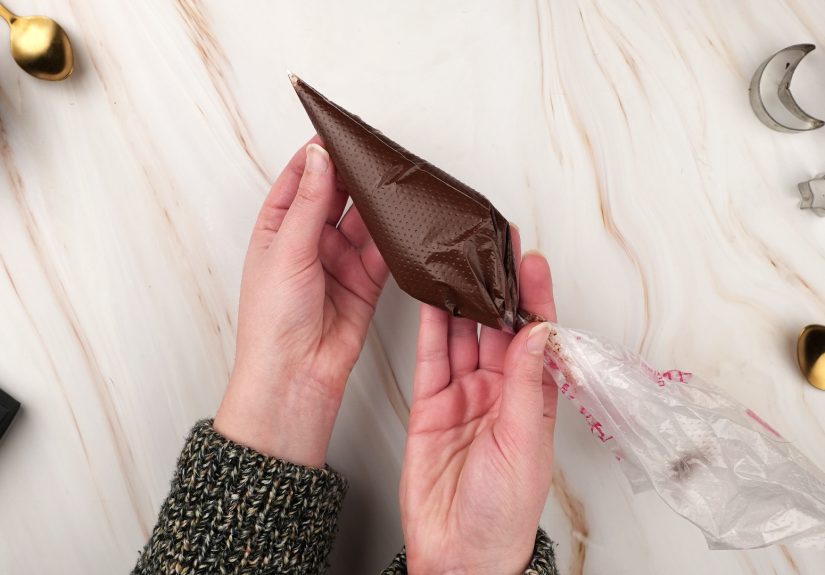
- Fill a piping bag. Once the chocolate is melted and smooth, transfer it to a small piping bag or zip-top bag with a tiny corner snipped off.
- Pipe steadily. Trace your design slowly and keep the thickness fairly even. Thin lines can break when lifted, especially if you are making letters.
- Set the shapes. Leave them flat until firm. Once set, peel the parchment away carefully rather than lifting the chocolate too fast.
You can also spread chocolate into a thin sheet on parchment or acetate, let it start to firm, then cut shapes with cookie cutters or a small knife. This is a smart method for stars, rectangles, tags, and rustic shards. If you wait too long, the chocolate may crack instead of cutting cleanly. If you cut too early, it will smear. Chocolate, once again, enjoys timing games.
Creative Ideas
- Pipe loops and swirls for cake tops
- Make chocolate leaves by brushing chocolate onto clean edible herb leaves, then peeling the leaf away once set
- Create monograms for cookies or party favors
- Spread white and dark chocolate together lightly for a marbled effect
This method is also fantastic when you want a handmade look. Molds are polished. Piped shapes feel a bit more personal. A slightly imperfect chocolate heart still says, “I made this for you.” It just says it with more charm and less factory precision.
Method 3: Make Cutout and Sculpted Shapes with Modeling Chocolate
If you want chocolate that behaves more like edible clay, modeling chocolate is your answer. It is made by combining melted chocolate with corn syrup, then letting the mixture rest until it becomes pliable. Once ready, you can roll it out, stamp it, cut it with small cutters, or sculpt it by hand. That makes it ideal for flowers, bows, ribbons, characters, and custom toppers.
Best For
- 3D shapes and sculpted decorations
- Cutout flowers, leaves, and plaques
- Detailed cake toppers
- People who want control without the fragility of thin tempered chocolate pieces
Basic Method
- Melt chopped chocolate slowly. Use bar chocolate rather than chips when possible, since chips often contain stabilizers that make them less cooperative.
- Warm corn syrup slightly. It should be warm, not scorching.
- Stir the corn syrup into the melted chocolate. The mixture may look odd for a moment, then come together.
- Wrap and rest. Let it sit at room temperature until firm enough to handle.
- Knead before using. The warmth of your hands softens it and makes it workable.
Once your modeling chocolate is ready, roll it out between parchment sheets and cut shapes with small cookie cutters. You can emboss textures, press in patterns, or form petals by hand. It is especially good for decorations that need a little thickness and flexibility. Thin piped chocolate can snap. Modeling chocolate bends before it breaks, which is why it is so useful for decorative work.
When to Choose Modeling Chocolate Instead of Melted Chocolate
Use modeling chocolate when you want shapes that are more sculptural than snappy. For example, if you need little roses for cupcakes, name plaques for a birthday cake, or edible bows for favor boxes, this method is easier than trying to build everything from tempered chocolate alone. The flavor is still chocolate-forward, but the texture is softer and more confection-like.
Common Problems and How to Fix Them
My Chocolate Turned White or Streaky
That is usually bloom, which can happen from temperature swings or moisture. It is still safe to eat, but it loses that glossy finish. Re-melting and properly tempering can help restore the appearance.
My Melted Chocolate Is Thick and Grainy
You likely overheated it or got water into it. Melt more gently next time and keep tools completely dry. If you are working with coating chocolate, a small amount of vegetable shortening can sometimes loosen it for shaping, but do not add water.
My Shapes Broke When I Lifted Them
The chocolate may have been piped too thin, or it may not have fully set before you moved it. Make lines slightly thicker for letters and delicate designs, and let them firm up completely.
My Molded Pieces Will Not Release
Give them more time to set. Also make sure you tapped out air bubbles and scraped the mold clean. With real chocolate, proper tempering improves release and shine.
Which Method Is Best?
Here is the easy answer:
- Choose molds if you want crisp, uniform shapes and candy-shop vibes.
- Choose piping or spreading on parchment if you want custom decorations, letters, or artsy pieces.
- Choose modeling chocolate if you want sculpted or cut-out toppers with more flexibility.
If you are brand-new to working with chocolate, start with molds or candy melts. If you already bake often and want prettier, shinier results, learn to temper real chocolate. If you like decorating cakes and cookies, modeling chocolate might become your edible craft material of choice.
What You Learn After Making Chocolate Shapes a Few Times
There is a certain kind of optimism that shows up before someone makes chocolate shapes for the first time. It usually sounds like this: “How hard can it be?” Then five minutes later, the chocolate is on the counter, on the spatula, somehow on one elbow, and the person has learned a powerful new respect for confectionery. That is part of the experience. Chocolate is simple in theory, but in practice it teaches patience faster than a crossword puzzle with no vowels.
One of the first real lessons is that the room matters almost as much as the recipe. On a cool, dry day, chocolate behaves like it wants to help. It firms up neatly, releases from molds with confidence, and lets you feel like a dessert genius. On a hot or humid day, it starts acting like a moody celebrity with an unreasonable contract rider. You learn quickly to clear counter space, gather tools in advance, and avoid wandering off mid-project. Chocolate rewards focus. It also punishes distractions with fingerprints.
Another common experience is discovering that less rushing equals better results. Beginners often stir too aggressively, overheat the bowl, or try to unmold shapes before they are ready. After a batch or two, most people settle down. They start tapping molds to remove bubbles. They use parchment instead of whatever random plate was nearby. They realize that a few extra minutes of setting time is cheaper than remaking an entire tray of broken stars. That shift is where the fun starts, because suddenly the process feels intentional instead of chaotic.
You also learn that different chocolate projects create different kinds of satisfaction. Molded shapes are deeply pleasing because they look polished and precise. Piped shapes are satisfying in a more artistic way, especially when you make custom initials or a dramatic swirl for a cake. Modeling chocolate has its own charm because it feels almost playful. It brings out the crafty side of baking. Even adults who claim they are “not decorative people” somehow end up making tiny leaves and arguing with themselves about whether one bow looks cuter than another.
Then there is the moment every chocolate maker remembers: the first batch that works exactly the way you hoped. The molds release cleanly. The letters stay intact. The little hearts are shiny. You set them on cupcakes or cookies and suddenly they look store-bought in the best possible way, except better, because they did not come from a store and you know exactly how much effort went into them. That feeling is why people keep coming back to chocolate work, even after the occasional streaky mishap or snapped-off letter.
Over time, the experience becomes less about following steps and more about reading the chocolate itself. You notice when it looks too thick. You learn when it has cooled enough to cut clean shapes. You understand that a brief pause can save a whole batch. That is the real reward of making chocolate shapes at home. It turns a fancy-looking dessert skill into something personal, repeatable, and surprisingly relaxing once you stop expecting perfection on the first try. Or the second. Chocolate likes a confident third attempt.
Final Thoughts
Making chocolate shapes is one of those kitchen skills that looks advanced from the outside but becomes very manageable once you break it into methods. Use molds for clean detail, parchment for custom designs, and modeling chocolate for sculpted decorations. Keep your tools dry, your heat gentle, and your expectations realistic, especially the first time around. With a little practice, you can turn plain melted chocolate into decorations that look polished, taste fantastic, and make even a simple dessert feel special.
In other words, chocolate shapes are not just pretty extras. They are edible proof that a bit of technique can turn dessert into a full personality trait.


