Table of Contents >> Show >> Hide
- Before You Start: A Two-Minute Setup That Saves Your Labels
- Method 1: Label Lifter Sheets (The “Laminate-and-Peel” Collector Favorite)
- Method 2: Hair Dryer (or Heat Gun) Lift (Controlled Heat, Big Results)
- Method 3: Steam Lift (Moist Heat Without the Soak)
- Method 4: Warm Water + Booster Soak (For Bottles That Refuse to Cooperate)
- Sticky Stuff Cleanup: Removing Residue Without Ruining Your Label
- How to Store Wine Labels So They Don’t Look Like a Crumpled Receipt
- Troubleshooting: When Labels Fight Back (Because Some Will)
- Quick Decision Guide: Which Method Should You Try First?
- of Real-World Experience From the Wine Label Rabbit Hole
- Conclusion: Keep the Memory, Not the Mess
Some people collect baseball cards. Some people collect vinyl. And some of usapparently destined to hoard anything
rectangular and paper-basedcollect wine labels. Maybe it’s nostalgia (“That was the anniversary bottle!”),
maybe it’s research (“Was that the Pinot with the suspiciously perfect cherry note?”), or maybe you just enjoy a
good-looking label more than you enjoy folding laundry (valid).
The only catch: wineries do not design labels with the intention that you’ll peel them off like a Post-it note and
preserve them in a pristine scrapbook. Labels are glued on to survive condensation, ice buckets, damp cellars, and
the occasional overly enthusiastic toast. So if your goal is to remove wine bottle labels intact,
you need the right method for the right label.
Below are four reliable ways to remove wine labels for collectingplus pro-level storage tips, troubleshooting, and
a final “experience section” from the sticky-fingered trenches.
Before You Start: A Two-Minute Setup That Saves Your Labels
Gather your basics
- Microfiber cloths (paper towels can shed and abrade)
- Plastic scraper or an old gift card (avoid metal unless you love scratches)
- Painter’s tape (optional, for “hinge” alignment when using lifter sheets)
- Wax paper or parchment (for drying/pressing labels)
- A heavy book (the bigger the better; textbooks finally earn their keep)
- Nitrile gloves (especially if you use solvents)
Know your label type (this matters)
- Uncoated paper: absorbs water fast; best with lifter sheets, gentle heat, or steam (short exposure).
- Coated/glossy labels: often peel more cleanly with heat; soaking can still work but may smear ink if rushed.
- Textured or thick stock: can be stubborn; steam helps; lifter sheets sometimes struggle to bond evenly.
- Back labels: usually thinner and more cooperative… until they aren’t.
Quick rule: if the label looks like it would cry during a light drizzle, keep it away from long soaks.
If it looks like it could survive a minor flood, you’ve got options.
Method 1: Label Lifter Sheets (The “Laminate-and-Peel” Collector Favorite)
If you’re serious about collecting and want a method that’s tidy, repeatable, and doesn’t involve turning your kitchen
into a science fair, wine label lifter sheets are the move. These are clear adhesive sheets designed
to bond to the printed face of a label so it lifts off as a laminated keepsake.
Best for
- Keeping labels intact for journals, scrapbooks, tasting logs
- Thin paper labels that would fall apart in water
- People who hate mess (or share a home with someone who hates mess)
What you’ll need
- Label lifter sheets (sold by wine accessory brands and specialty retailers)
- A spoon or burnishing tool (the back of a spoon is perfect)
- Microfiber cloth
Step-by-step
- Dry the bottle completely. Any moisture weakens adhesion and creates bubbles.
- Wipe the label gently to remove dust or wine drips. Let it air dry for a minute.
- Peel the backing off the lifter sheet and align it over the label.
- Smooth from the center outward to push out air bubbles. Think “phone screen protector,” but with higher stakes.
- Burnish firmly with the curved back of a spoon for 60–90 seconds, focusing on edges and corners.
- Peel slowly from one corner. Keep the sheet close to the glass (low angle) to reduce tearing.
- Press the lifted label onto wax paper or directly into your journal (if the sheet is meant to stay on).
Pro tips
- Warm hands help. If your room is cold, rub the lifter sheet between your hands first to make it more pliable.
- For textured labels, burnish longer and more firmly, or switch to steam/heat methods if the sheet won’t bond evenly.
- Don’t panic if only the printed layer lifts (that’s normal). Many lifters separate the inked face from the backing paper.
Method 2: Hair Dryer (or Heat Gun) Lift (Controlled Heat, Big Results)
Heat is the universal language of adhesive. Warm the glue, and it relaxes its grip. A hair dryer is the safest
“household heat” option because it’s gradual. A heat gun works fasterbut it can also cook a label into sadness if you get reckless.
Best for
- Glossy or coated labels that resist soaking
- Stubborn adhesive on newer bottles
- Anyone who wants minimal water exposure
Step-by-step
- Start with a clean, dry bottle. Wipe condensation and residue away.
-
Heat the label evenly for about 30 seconds with a hair dryer on high, holding it a few inches away.
Keep the airflow moving so you don’t scorch one spot. - Test a corner using a plastic scraper or your fingernail. If it resists, heat another 15–30 seconds.
- Peel slowly, keeping the label close to the glass (low angle). If you feel tearing, stop and reheat.
- Handle residue afterward with a mild solvent (see “Sticky Stuff Cleanup” below) while keeping the label safe and flat.
Pro tips
- Use patience, not brute force. If the label fights, heat more; don’t yank. Wine labels are not Band-Aids.
- Watch for ink softening. Some inks can smear if overheated. If you smell “hot paper,” you’re flirting with disaster.
- Try “peel and pause.” Lift a little, reheat the newly exposed area, then peel again.
Method 3: Steam Lift (Moist Heat Without the Soak)
Steam is the underrated hero of label removal. It warms the adhesive and adds just enough moisture to loosen glue
without dunking the label in water like you’re trying to make papier-mâché.
Best for
- Older labels and delicate paper stock
- Labels that wrinkle or dissolve in long soaks
- Collectors who like a “gentle but effective” approach
Step-by-step (clothes steamer or kettle)
- Prepare a safe steam source. A clothes steamer is easiest; a kettle works if you’re careful.
- Hold the bottle so steam hits the back of the label area (or the label itself) for 20–40 seconds.
- Test a corner with a plastic scraper. If it lifts cleanly, keep going slowly.
- Peel steadily. If the label stiffens again mid-peel, re-steam for another 10–20 seconds.
- Immediately press the label between wax paper and a heavy book to keep it flat as it dries.
Pro tips
- Avoid soaking the face. Steam should soften adhesive, not turn your label into soup.
- Use tongs or a glove. Bottles can get hot fast, and nobody wants a scar shaped like a Chardonnay.
- Great for “partial peelers.” Steam is ideal when a label starts well but tears halfway through other methods.
Method 4: Warm Water + Booster Soak (For Bottles That Refuse to Cooperate)
Soaking is the classic method because it’s simple and effectiveespecially for labels with water-soluble glues. The challenge for collectors is
keeping the label intact. The trick is using time and temperature control, plus a booster like dish soap, baking soda,
or an oxygen-based cleaner, and getting the label out before it turns into a wet tissue.
Best for
- Back labels that peel easily
- Sturdy paper labels and bottles with “slide-off” adhesives
- Collectors who don’t mind a little hands-on drying and pressing
Step-by-step (collector-friendly soak)
-
Fill a basin with hot water (not boiling) and add a squirt of dish soap. For tougher glue, add baking soda
or an oxygen cleaner per package directions. - Submerge the bottle so the label is underwater. If you’re nervous about ink, do a short test soak: 3–5 minutes.
- Watch the edges. When a corner starts lifting, remove the bottle and try peeling gently.
- Peel slowly. If it resists, put it back for a few more minutesdon’t force it.
- Press and dry the label between wax paper under a heavy book for several hours (overnight is best).
Pro tips
- Short soaks win. Collectors don’t need the label to “fall off.” They need it to release before it disintegrates.
-
Try a partial soak. If you only care about the front label, position the bottle so only that section gets wet,
then rotate if needed. - Don’t mix random cleaners. If you use ammonia-based products, never combine them with bleach-based productsventilation matters.
Sticky Stuff Cleanup: Removing Residue Without Ruining Your Label
Sometimes the label comes off beautifully and leaves behind a gummy outline that looks like the ghost of Merlot Past.
Clean the bottle separately from the label. Your label should already be drying flat; your bottle can now take the tougher treatment.
Safer residue options (start mild)
- Rubbing alcohol: dissolves many adhesives cleanly; apply to a cloth, not directly to the label you’re saving.
- Warm soapy water + baking soda: gentle abrasive buffing for glass.
- Cooking oil (or peanut butter in a pinch): softens sticky residue; wash thoroughly afterward.
- Commercial adhesive removers: effective on glass, but follow label directions and wash the bottle afterward.
Collector warning
Solvents can smear inks and stain paper. Keep them away from labels you’re preserving.
If you must use a solvent near a label area, remove the label first, then clean residue from the glass only.
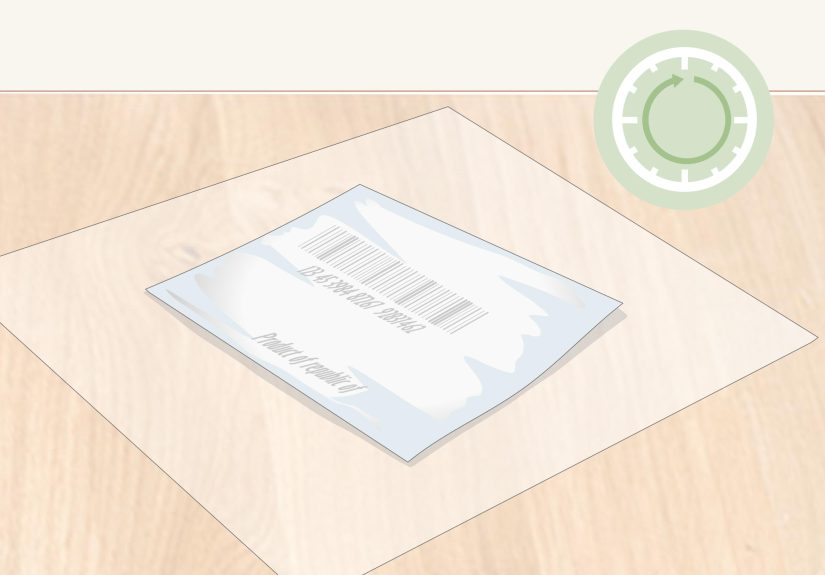
How to Store Wine Labels So They Don’t Look Like a Crumpled Receipt
Flattening (the unglamorous secret to “nice” labels)
- Place the label between two sheets of wax paper or parchment.
- Put it inside a heavy book.
- Leave it alone for at least 6–12 hours (overnight is better).
Mounting options
- Wine journal or tasting notebook: add date, producer, varietal, region, and your notes.
- Acid-free scrapbook pages: best for long-term preservation (paper matters).
- Clear photo corners: keeps labels removable without glue.
- Full-page sleeves: protect labels like trading cards, but classier.
Troubleshooting: When Labels Fight Back (Because Some Will)
The label tears immediately
- Switch to a lifter sheet method, or use steam instead of soaking.
- Slow down and reduce your peel angle; low and steady is the goal.
The label peels, but the ink smears
- Reduce heat exposure (hair dryer farther away, shorter bursts).
- Avoid rubbing the face of the label while it’s warm or damp.
The label comes off… with half the paper left behind
- This is common with lifter sheets: you’re lifting the printed layer. Embrace the laminateit’s still collectible.
- If you want the full paper thickness, try steam or controlled heat instead.
The bottle has a “plastic-y” film label
- Use heat (hair dryer/heat gun) and peel slowly.
- Soaking often does little for plastic films, and you’ll just waste time and water.
Quick Decision Guide: Which Method Should You Try First?
- Want the cleanest collectible with the least fuss? Start with label lifter sheets.
- Glossy label, stubborn glue, low water exposure? Try the hair dryer heat method.
- Delicate paper, “I fear the soak” energy? Use steam.
- Back label won’t budge and you’re okay pressing it afterward? Use a warm booster soak.
of Real-World Experience From the Wine Label Rabbit Hole
If you stick with wine label collecting long enough, you’ll learn something important: labels have personalities.
Some are effortless angels that slide off at the first hint of warm water. Others behave like they signed a lifetime lease
with the bottle and plan to enforce it in court.
My first “collector mistake” was assuming one method would work for everything. I tried soaking a thin, uncoated label
from a sentimental bottle (the kind of paper that looks artisanal and feels like it was handmade by a poet). Five minutes later,
it didn’t peelit melted. What I removed was less “label” and more “sad papier-mâché.” Lesson learned: delicate labels need
lifter sheets or steam, not a spa day.
The second lesson was that “slow” is not optional. The temptation is to peel like you’re opening a snack wrapper. Don’t.
The best labels I’ve saved came off in a series of tiny victories: heat 30 seconds, lift a corner, heat again, peel a half-inch,
pause, repeat. It feels ridiculouslike performing surgery on paperbut it works. And if you’re keeping a tasting journal, the label
is the trophy. Treat it like one.
The third lesson: pressing is everything. Even a perfectly removed label can dry into a curled, wavy shape that looks like it spent the night
in a humid basement (because it did). Wax paper plus a heavy book overnight is the difference between “collector” and “person who stuffs labels
in a drawer.” I once skipped pressing because I was impatient, glued a slightly damp label into a notebook, and ended up with a warped page that
forever resembles a tiny topographic map. It’s charming in the same way a dented fender is “charming.”
And finally: accept that some labels will defeat you. Certain adhesives are basically industrial-grade commitment. When a label starts tearing no matter
what, stop escalating your tactics like a movie villain. Switch methods. Try lifter sheets. Try steam. Or, if it’s truly a lost cause, take a high-quality
photo of the bottle and label, write your tasting notes, and move on. Collecting should feel like storytelling, not combat.
Conclusion: Keep the Memory, Not the Mess
Wine label collecting is part scrapbook, part sensory diary, and part “I swear I’m not hoarding, I’m curating.”
The good news is you don’t need fancy equipmentjust the right method for the right label:
lifter sheets for clean keepsakes, controlled heat for stubborn adhesives, steam for delicate paper, and a booster soak
when the bottle is simply being dramatic.
Pick your method, go slow, press your labels flat, and you’ll build a collection that’s both meaningful and genuinely fun to flip through.
And if someone asks why you’re saving wine labels, you can tell them the truth: it’s like a travel journal, but with better dinners.


