Table of Contents >> Show >> Hide
- Why Painted Pumpkins Are a Fall Decor Cheat Code
- Quick Supply Checklist
- Prep & Pro Tips (So Your Pumpkin Doesn’t Betray You)
- 46 Easy Pumpkin Painting Ideas for Fall Decorations
- How to Make Your Painted Pumpkins Look “Store-Bought” (Without the Store)
- Display Ideas That Make Your Pumpkins Feel Like Real Decor
- Experience Notes: What Pumpkin-Painting Nights Usually Teach You (Plus How to Enjoy Them More)
Carving pumpkins is iconic… until you’re elbow-deep in pumpkin guts wondering why your kitchen now smells like a
seasonal candle got into a bar fight with compost. Painting pumpkins is the no-carve, low-mess, high-payoff option:
you get the cozy fall vibe, the cute factor, and the “wow, you made that?” reactionswithout the “where did I put the
bandages?” energy.
Whether you’re decorating a front porch, dressing up a dining table, or hosting a pumpkin-painting party that ends
in glitter in places glitter has no business being, this guide brings you 46 easy pumpkin painting ideas
(plus practical tips that keep your designs looking crisp longer).
Why Painted Pumpkins Are a Fall Decor Cheat Code
- No knives required: Great for families, classrooms, and anyone who prefers their crafts without power tools.
- More style options: From modern minimal to spooky chic to “my kid invented a new color,” paint can do it all.
- They tend to last longer than carved pumpkins: Carving opens the pumpkin up to faster breakdown, while paint keeps things intact longer (especially if you keep them cool and dry).
- Faux pumpkins are forever: Paint a foam pumpkin and you can store it and reuse it next year like the practical fall icon you are.
Quick Supply Checklist
You don’t need a craft room the size of a small airport. Start simple and upgrade if you catch the pumpkin-painting bug.
Basics
- Pumpkins: Real pumpkins (any size) or faux/foam pumpkins for long-lasting decor.
- Acrylic craft paint: Easy to use, fast-drying, good coverage.
- Paintbrushes + sponge daubers: Brushes for details, sponges for smooth base coats.
- Paint pens/markers: Perfect for lines, lettering, dots, and quick “I can’t draw” confidence boosts.
- Painter’s tape: The MVP of crisp stripes, color blocking, and geometric designs.
- Sealer (optional): Clear acrylic spray or brush-on sealer to protect paint (especially for handling).
Nice-to-Haves
- Spray paint: Fast, smooth base coats (use outdoors or in a very well-ventilated area).
- Stencils: Letters, leaves, stars, numbersinstant polish.
- Glue + extras: Googly eyes, small bows, faux flowers, metallic leaf, glitter (use responsibly).
Prep & Pro Tips (So Your Pumpkin Doesn’t Betray You)
1) Clean and dry the pumpkin
Wipe your pumpkin with a damp cloth to remove dirt. Dry it well. Paint sticks better to a clean surface, and you’ll
avoid that sad moment when your masterpiece peels like a sunburn.
2) Choose the right paint approach
- Acrylic paint: Great all-around option for real and faux pumpkins.
- Spray paint: Best for quick coverage and bold, even color; let it fully dry before adding details.
- Paint pens: Ideal for outlines, lettering, and kid-friendly projects (especially washable versions).
3) Base coat (when it helps)
If you’re painting a bright color over a dark orange pumpkin (hello, white and pastel), a base coat makes your design
pop. Two thin coats beat one thick coat every time.
4) Let layers dry like you mean it
Most “oops” moments happen because someone touched wet paint “just to see.” Give each layer time to dry before you
add stripes, dots, or details.
5) Seal for durability (optional, but helpful)
A clear sealer can protect your design from smudges and light scuffs. Choose the finish you wantmatte, satin, or
glossythen apply in light coats.
46 Easy Pumpkin Painting Ideas for Fall Decorations
Below are 46 no-carve pumpkin painting ideas, grouped by style so you can find your vibe fastwhether
you’re going for “modern farmhouse,” “cute but spooky,” or “I have 30 minutes and a dream.”
Modern & Minimal (1–8)
- Matte White + Botanical Line Art: Paint the pumpkin matte white, then draw simple leaves or vines with a black paint pen.
- Half-and-Half Color Block: Tape a clean line down the middle; paint one side a bold color and the other side neutral.
- Soft Ombre Fade: Blend two or three related shades (like cream → peach → rust) using a sponge for a sunset effect.
- Tone-on-Tone Polka Dots: Use a slightly darker shade of your base color for subtle, designer-looking dots.
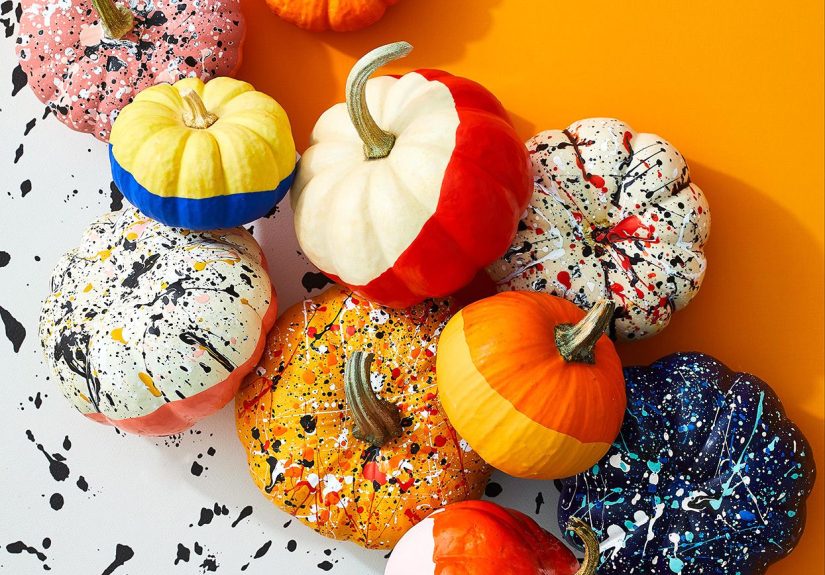
- Terrazzo Speckle Pumpkin: Base coat in off-white, then flick tiny specks of black, tan, and muted orange for a terrazzo vibe.
- Minimal Typography Pumpkin: Paint a neutral base and write “hello fall” or “gather” in a neat script with a paint pen.
- Gold Geometric Lines: Use painter’s tape to create triangles or diamonds; paint inside with metallic gold.
- Chalkboard Message Pumpkin: Use chalkboard paint, then change your message daily: jokes, menus, or gratitude notes.
Classic Patterns That Always Win (9–18)
- Buffalo Plaid Pumpkin: Paint a base color, then layer stripes to build that cozy, flannel look.
- Herringbone or Chevron: Tape zig-zag sections and alternate two shades for a clean pattern.
- Checkerboard: Tape a grid (or freehand if you’re brave); paint alternating squares for modern drama.
- Pinstripes: Thin stripes look fancyeven if you did them while sipping cider like a multitasking legend.
- Argyle Diamonds: Paint diamonds in soft fall tones, then add thin crossing lines with a paint pen.
- Leopard Print (Muted): Use tan and brown on a cream base for a classy animal print moment.
- Swirl “Marble” Pumpkin: Create marbled swirls by dragging a toothpick through wet paint (works best on faux pumpkins).
- Paint-Drip Top: Paint the top edge thickly and let it drip down like melting candle waxmessy in the best way.
- Mandala Dots: Use a dotting tool (or pencil eraser) to build a simple mandala on the front.
- Confetti Splatter: Cover your area, then splatter small dots of bright fall colors for party energy.
Cute Characters & Critters (19–28)
- Friendly Ghost Face: White base, simple black oval eyes, and a tiny “boo!”cute, not creepy.
- Bat Silhouette: Paint the pumpkin black and add a bat shape in gray or metallic for a sleek Halloween look.
- Black Cat Pumpkin: Add pointy ears (paper or foam), paint whiskers, and give it confident cat energy.
- Wide-Eyed Owl: Big circles for eyes, a small triangle beakeasy, adorable, and very fall-woodland.
- Fox Face: Orange base, white cheeks, and a small noseinstant autumn charm.
- Hedgehog Pumpkin: Paint a cute face and add “spines” as short brushstrokes or dotted lines.
- Unicorn Pumpkin: White base, pastel mane strokes, and a glittery paper horn (because fall can be magical too).
- Goofy Monster Faces: One eye, three eyes, big teeththis is where “perfect” takes a day off.
- Ladybug Pumpkin: Red base with black dots; add a simple face near the stem.
- Bumblebee Pumpkin: Yellow base with black stripes; tiny wings optional but highly encouraged.
Food-Inspired & Playful (29–34)
- Donut Pumpkin: Paint the top “frosting,” add sprinkles with a paint pensweet without the calories.
- Candy Corn Bands: White, orange, yellow stripessimple, classic, and instantly recognizable.
- Pineapple Pumpkin: Yellow base, draw diamond lines, add green “leaves” from foam or paper for a tropical twist.
- Watermelon Pumpkin: Green outside stripes and a pink “slice” panel with black seed dots.
- Pumpkin Spice Latte Pumpkin: Paint a cozy cup graphic (or just “PSL”) with foam-like swirls on top.
- Campfire S’mores Pumpkin: Tan base, chocolate-drip detail, and tiny “marshmallow” dotsfall treats, but make it decor.
Spooky (But Make It Stylish) (35–40)
- Spiderweb Front: Black base with a crisp white webbonus points for a tiny spider dot.
- Galaxy Night Sky: Navy/black base, then sponge on purples and whites with star splatters.
- Skull Silhouette: Keep it graphic: a simple skull shape on a matte base looks edgy and clean.
- Haunted House Skyline: Paint a sunset gradient and add a black haunted house silhouette along the bottom.
- Mummy Wrap Look: Paint off-white “bandage” strips and add two glowing eyes peeking through.
- Witchy Stars & Moon: Dark base + metallic stars + a crescent moonspooky, but Pinterest-polished.
Harvest & Thanksgiving-Ready (41–46)
- Fall Leaf Stencil Pumpkin: Paint a base coat, then stencil leaves in copper, gold, or deep red.
- Wheat Stalks & Fields: Soft tan base with thin wheat strokessubtle and elegant for Thanksgiving tables.
- House Number Pumpkin: Paint the pumpkin a solid color and add your address numbers for a welcoming porch display.
- “Thankful” Word Collage: Write gratitude words all overfamily, friends, cozy, pie. Yes, pie counts.
- Place-Card Pumpkins: Mini pumpkins painted in neutral tones; write each guest’s name for a table that looks styled.
- Faux Wood-Grain Pumpkin: Base coat in light tan, then drag a darker shade in thin lines to mimic wood for farmhouse flair.
How to Make Your Painted Pumpkins Look “Store-Bought” (Without the Store)
Use fewer colors, but stronger contrast
A tight palette (like black + white + gold) looks intentional and elevated. Too many colors can read chaotic unless
you’re intentionally going for “whimsical explosion,” which is also valid.
Swap brushes for sponges on base coats
Sponge daubers and makeup sponges can give smoother coverage than a brush, especially on bumpy pumpkin surfaces.
Painter’s tape is your best friend
Clean lines are the secret to modern designs. Press tape down firmly, paint away from the edge, then peel slowly.
Make the stem a feature
Paint the stem metallic gold, wrap it with twine, or leave it natural for contrast. It’s the pumpkin’s little hatlet
it have its moment.
Display Ideas That Make Your Pumpkins Feel Like Real Decor
- Front porch cluster: Mix sizes, stack small pumpkins on crates, and repeat a color palette for a cohesive look.
- Dining table runner: Line mini painted pumpkins down the center with candles and leaves.
- Bookshelf accents: Use two or three small pumpkins as warm pops of color among books and frames.
- Entryway “hello fall” moment: One statement pumpkin, one candle, one small vasesimple and stylish.
Experience Notes: What Pumpkin-Painting Nights Usually Teach You (Plus How to Enjoy Them More)
People tend to imagine pumpkin painting as a calm, wholesome fall activitysoft music, tidy tables, everyone quietly
crafting like it’s a commercial. In reality, pumpkin painting often plays out more like a cozy comedy: someone can’t
find the black paint, someone else is “just testing” a paint pen on the table, and there’s always one person who
proudly announces, “I’m doing something simple,” then starts planning a galaxy gradient with constellations and a
moon that somehow needs shading.
One of the biggest surprises is how much pumpkin size changes the whole experience. Mini pumpkins are
the “quick win” optiongreat for place cards, polka dots, and tiny faces. They also match real-life attention spans,
especially when kids are involved (or adults who swear they’re adults until a glitter bottle shows up). Larger
pumpkins, on the other hand, are where bold patterns shine: buffalo plaid, chunky stripes, big typography, and
dramatic color blocking. Most people find that a mix of sizes creates the best resultsand the best photos.
Another common lesson: the base coat is where patience gets tested. White paint on an orange pumpkin
can take multiple thin coats, and the urge to rush is powerful. But letting layers dry is the difference between
crisp stripes and a smeared “abstract interpretation of a stripe.” A good trick is setting up a “drying zone” (a
spare tray or cardboard sheet) and rotating pumpkins like they’re on a tiny craft runway. It feels silly, but it
worksand it keeps wet paint away from curious hands.
If you’re painting with friends or family, the most enjoyable setups usually include a few “confidence builder”
options: stencils, tape designs, and paint pens. Not everyone wants to freehand a fox face, and that’s okay.
Pattern-based pumpkins (checkerboard, herringbone, pinstripes) let people create something impressive without needing
advanced drawing skills. Meanwhile, kids often love the fast payoff projectsmonster faces, candy corn stripes, big
dots, and googly eyesbecause they look “done” quickly and don’t require perfect symmetry.
People also discover that themes save time and make everything look intentional. Instead of 10 random
pumpkins, choose one vibe: modern monochrome, spooky night sky, harvest neutrals, or bright playful characters.
Suddenly, even simple designs look like part of a curated set. A tiny detaillike painting all stems gold, or using
the same accent color (black, copper, or sage)can pull the whole collection together.
Finally, pumpkin painting usually proves one important truth: fall decorating is more fun when it’s a little
imperfect. A lopsided ghost face becomes the funniest pumpkin on the porch. A “simple” polka-dot design
turns into confetti splatter after someone sneezes (it happens). The best displays often include a mix of polished
pumpkins and goofy onesbecause that’s what makes them feel personal. And when you’re done, you don’t just have
decorationsyou have a little collection of fall memories that looks great next to candles and a bowl of snacks.


