Table of Contents >> Show >> Hide
- Before You Start: A 90-Second “Don’t Make It Worse” Checklist
- 1) Baking Soda + Simmer: The “Lift-Off” Boil
- 2) Vinegar + Baking Soda: The Fizz Bath (Aka “Kitchen Volcano, But Useful”)
- 3) Baking Soda Paste: The “Burnt Spot Face Mask”
- 4) Boiled Lemons: A Citrus Simmer That Smells Like You Planned This
- 5) Salt + Aluminum Foil: The “Gentle Scrub Ball” Trick
- 6) Cream of Tartar: The Quiet Overachiever in Your Spice Cabinet
- How to Pick the Right Method for Your Pot
- What If Nothing Works? Use Strategy, Not Anger
- Preventing Burnt Pots Next Time (Because Future-You Deserves Nice Things)
- Real-Life Burnt-Pot Stories and Lessons (Extra )
- Conclusion
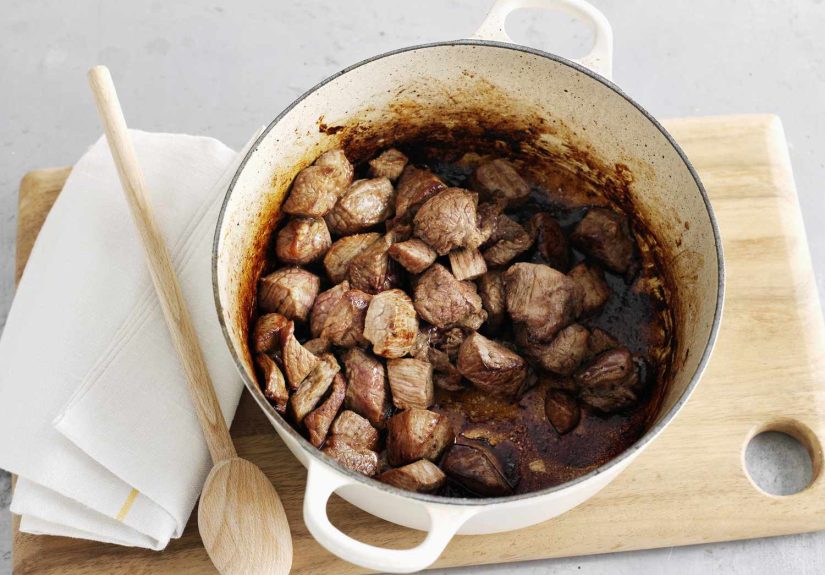
You look away for one minute. Suddenly your “gentle simmer” turns into a
“charcoal audition,” and your pot is wearing a crunchy black sweater that will not come off.
The good news: you don’t need harsh chemicals (or a new identity) to fix this.
With a few pantry staples and the right method for your cookware, you can clean a burnt pot,
lift scorched-on residue, and get back to cooking without turning your kitchen into a science lab.
Below are six practical, low-drama ways to clean a burnt pot without harsh chemicalsplus
how to pick the safest method for stainless steel, nonstick, enamel, cast iron, aluminum, and more.
We’ll also talk about why each method works (so you’re not just scrubbing and praying),
and how to prevent the “burnt-bottom surprise” next time.
Before You Start: A 90-Second “Don’t Make It Worse” Checklist
Burnt food is basically carbon + stuck-on sugars/proteins + whatever oil was in the pot.
To remove it, you need one (or more) of these forces: heat to soften, water to hydrate,
mild abrasion to lift, and gentle chemistry (acids/bases) to loosen bonds.
- Let the pot cool first. Thermal shock (hot pan + cold water) can warp cookware and crack enamel.
- Scoop out loose debris. The less “bulk burn” you have, the faster everything else works.
- Start with a soak. Even 10–20 minutes in hot water makes stubborn residue less stubborn.
- Match the method to the material. The “best” method is the one that won’t scratch or strip your pot.
- Skip metal tools on delicate surfaces. Nonstick and ceramic coatings hate aggressive scrapers.
Pro mindset shift: You’re not trying to “muscle” burnt food off. You’re trying to
persuade it to releaselike a stubborn sticker, but less cute.
1) Baking Soda + Simmer: The “Lift-Off” Boil
If your pot is stainless steel or sturdy enamel and the burn is mostly on the bottom,
simmering water with baking soda is often the quickest way to loosen the layer without harsh chemicals.
Heat softens the burnt residue, while baking soda (a mild base) helps break down greasy, stuck-on gunk.
Best for
Stainless steel, enamel-coated cookware, and many aluminum pots (use gentle scrubbing).
What you’ll need
- Water
- Baking soda
- Wooden spoon or silicone spatula
- Non-abrasive sponge or nylon brush
Steps
- Fill the pot with enough water to cover the burnt area by 1–2 inches.
- Add 2–4 tablespoons of baking soda (more for wider pots or heavier burns).
- Bring to a gentle boil, then reduce to a simmer for 5–10 minutes.
- Turn off the heat. While the water is hot (but not boiling), use a wooden spoon to gently scrape and lift softened bits.
- Let the pot cool. Pour out the liquid, then scrub lightly with a non-abrasive sponge.
- Rinse and dry. Repeat once if the burn was truly committed to the bit.
Why it works: The simmer rehydrates and softens the carbonized layer; baking soda adds mild alkalinity and gentle abrasion.
You’re basically turning “baked-on” into “soaked-off.”
2) Vinegar + Baking Soda: The Fizz Bath (Aka “Kitchen Volcano, But Useful”)
This is the classic one-two punch: vinegar (mild acid) helps loosen mineral deposits and stuck-on food,
and baking soda adds scrubbing power. The fizzing action helps lift debristhink of it as tiny bubbles doing tiny chores.
Best for
Stainless steel and many enamel pots. Use caution on cast iron and uncoated aluminum (see notes below).
What you’ll need
- White vinegar
- Water
- Baking soda
- Non-abrasive sponge
Steps
- Add equal parts vinegar and water to cover the burnt area.
- Bring the mixture to a boil for a minute or two, then turn off the heat.
- Carefully add 1–2 tablespoons of baking soda (it will fizz upgive it space).
- Let it sit 10–15 minutes while the fizz does its thing.
- Pour out the liquid, then scrub gently with a sponge. Rinse well and dry.
Important: Avoid acidic methods on seasoned cast iron (vinegar and lemon can strip seasoning).
For cast iron, stick with salt-based scrubs and quick hot-water cleaning.
3) Baking Soda Paste: The “Burnt Spot Face Mask”
When the burn is patchy (or you’re cleaning a nonstick pan and want to keep things gentle),
a baking soda paste is a controlled, low-scratch way to target the worst areas.
No boiling needed. Minimal mess. Maximum “I can’t believe that worked.”
Best for
Nonstick, ceramic-coated pans, stainless steel, and enamel (use a soft sponge).
What you’ll need
- Baking soda
- Warm water
- Soft sponge or dishcloth
Steps
- Mix about 3 parts baking soda with 1 part water to form a thick paste (like toothpaste, not soup).
- Spread the paste over the burnt areas.
- Let it sit 15–30 minutes (longer for stubborn scorch marks).
- Wipe and gently scrub with a soft sponge. Add a splash of water if it dries out.
- Rinse thoroughly and dry.
Why it works: Baking soda is mildly abrasive and helps lift residue without the sandpaper vibes.
The rest time matterslet the paste soften the burnt layer so you don’t have to.
4) Boiled Lemons: A Citrus Simmer That Smells Like You Planned This
Lemons bring citric acid (gentle but effective) and a little aromatic confidence.
This method is surprisingly good for loosening browned-on bits and cutting through odors
especially when the pot smells like last week’s “experimental” curry.
Best for
Stainless steel and aluminum; can also help enamel. Avoid on seasoned cast iron.
What you’ll need
- 2–3 lemons, quartered
- Water
- Non-abrasive sponge
Steps
- Add lemon quarters to the pot.
- Add 2–3 inches of water (enough to cover the burnt area).
- Bring to a boil, then simmer 5–10 minutes.
- Turn off heat, let cool slightly, then discard lemons and water.
- Wipe and scrub gently. Rinse and dry.
Extra tip: If you don’t have enough lemons, lemon juice can workjust keep it mild and don’t leave it sitting for hours on delicate finishes.
5) Salt + Aluminum Foil: The “Gentle Scrub Ball” Trick
Sometimes you need abrasionbut not the kind that permanently redecorates your cookware with scratches.
Coarse salt provides gritty traction, and crumpled aluminum foil works like a controlled scrubber on tougher surfaces.
It’s a great option when you’re dealing with stubborn blackened spots and you want immediate results.
Best for
Stainless steel and some uncoated metals. Use caution on enamel; skip on nonstick.
What you’ll need
- Coarse kosher salt
- A small piece of aluminum foil (crumpled into a ball)
- A little warm water
Steps
- Sprinkle a generous layer of coarse salt over the burnt area.
- Add a splash of warm water to make a gritty paste.
- Crumple foil into a loose ball and scrub in small circles with light pressure.
- Rinse often to check progress. Stop once the residue lifts.
- Wash with mild dish soap, rinse, and dry.
Don’t use this on: Nonstick or ceramic-coated pans (foil can scratch coatings). For those, stick to the paste or soak methods.
6) Cream of Tartar: The Quiet Overachiever in Your Spice Cabinet
Cream of tartar is mildly acidic and gently abrasivekind of like baking soda’s cousin who wears cardigans and gets things done.
It’s often recommended as a gentle alternative for cleaning scorched stainless steel or aluminum without resorting to harsh chemicals.
Best for
Aluminum and stainless steel cookware.
What you’ll need
- Cream of tartar
- Water
- Nylon brush or sponge
Steps
- Mix 1 tablespoon of cream of tartar with 1 cup of water in the pot (scale up as needed).
- Bring to a boil, then turn off the heat.
- Let it cool, then scrub gently with a sponge or nylon brush.
- Rinse well and dry.
Why it works: Mild acidity helps loosen cooked-on residue, and the fine powder adds just enough abrasion to lift without gouging.
How to Pick the Right Method for Your Pot
Here’s the fastest way to avoid “cleaning success” that turns into “why is my pan scratched forever?”
Use the material as your guide.
| Cookware Type | Best Methods | Avoid |
|---|---|---|
| Stainless Steel | Simmer + baking soda; vinegar + baking soda; salt + foil; cream of tartar | Steel wool on polished finishes (can scratch) |
| Nonstick / Ceramic-Coated | Baking soda paste; gentle soak; mild vinegar wipe (quick) | Foil scrubs; abrasive pads; aggressive scraping |
| Enameled Cast Iron | Simmer + baking soda; baking soda paste; lemon simmer (short) | Metal scouring; thermal shock; leaving acids for hours |
| Seasoned Cast Iron | Salt scrub (with minimal water); quick hot-water cleaning; re-oil afterward | Vinegar/lemon soaks; long soaking; harsh detergents |
| Aluminum (Uncoated) | Cream of tartar; gentle simmer methods; lemon simmer | Long vinegar soaks (can dull); heavy abrasion |
What If Nothing Works? Use Strategy, Not Anger
If the burn is extreme (think: “I forgot it on the stove during a whole TV episode”),
you may need a second roundor a longer sit time. Try this escalation ladder:
- Soak in hot water (15–30 minutes).
- Simmer with baking soda to lift the bulk.
- Spot-treat with baking soda paste for what remains.
- Finish with a gentle scrub (never jump to scratching first).
Also: burnt residue often comes off in layers. If the top layer loosens, dump, rinse, repeat.
You’re peeling an onion of regretone layer at a time.
Preventing Burnt Pots Next Time (Because Future-You Deserves Nice Things)
- Use lower heat than you think. Many burns come from high heat + distraction.
- Stir early, stir often. Starches and sugars settle and scorch fast.
- Deglaze right after cooking. Add a little water to a warm pot and scrape gently with a wooden spoonbefore it cools into cement.
- Match the pot to the job. Thin pots scorch faster; heavy-bottom cookware spreads heat more evenly.
- Set a timer. Not for the food. For your attention span.
Real-Life Burnt-Pot Stories and Lessons (Extra )
The first truly burnt pot I ever “earned” was a stainless steel saucepan full of rice.
Not fancy riceweeknight rice. The kind you make while answering a text, refilling your water,
and thinking, “I can totally hear when it’s done.” Spoiler: you cannot.
By the time I smelled the warning sign, the bottom had transformed into a crunchy disc of toasted regret.
I did what most people do: I tried to scrub immediately, got nowhere, and briefly considered
burying the pot in the yard like it was evidence.
Here’s what I learned: burnt food is stubborn when it’s dry and bonded. It becomes cooperative when you rehydrate it.
Once I simmered water with baking soda and used a wooden spoon to lift the softened layer, the pot went from “ruined”
to “fine, just a little humbled” in about 15 minutes. The funniest part? The cleaning wasn’t hard.
My initial approach was just… emotionally loud.
Another time, a friend made a sugary barbecue sauce in an enamel pot and walked away “for just a second.”
The sauce didn’t just burnit caramelized into a glossy, black patch that looked like it had been kiln-fired.
We tried a quick soak. Nothing. Then we did the vinegar-and-water boil, added baking soda, and watched it fizz like a tiny volcano.
The magic wasn’t instant, but the texture changed: the burnt layer went from sharp and glassy to dull and crumbly.
That was the moment I realized the fizz isn’t just for showit’s a useful signal that the residue is loosening.
Two gentle rounds beat one aggressive scrub, and the enamel stayed scratch-free.
My favorite “why didn’t anyone tell me this” experience, though, was the lemon simmer.
After a pot of lentils scorched, the smell wouldn’t quiteven after washing. I boiled lemon quarters with water,
and the kitchen went from “burnt mystery” to “fresh, vaguely optimistic.” The burnt bits loosened, sure,
but the odor improvement was the real win. If you’ve ever cooked something aromatic (fish, curry, garlic-heavy sauces)
and then burnt it, you know the smell can cling like a needy houseguest. Lemons help evict it politely.
Finally, the salt-and-foil method taught me a key boundary: every cookware material has a personality.
Stainless steel can handle more scrubbing. Nonstick wants a spa day and a soft sponge.
Cast iron wants minimal water and a quick re-oil like it’s moisturizing after a shower.
Once you start treating each pot like it has rules (because it does), cleaning gets easier and your cookware lasts longer.
The main lesson across all these mishaps: don’t panic-scrub. Soften first, then lift.
Your arms will thank you, your pans will look better, and your kitchen won’t sound like a raccoon fight club.
Conclusion
Cleaning a burnt pot without harsh chemicals is mostly about choosing the right combo of
heat, soak time, and gentle abrasion. Start with the least aggressive option for your cookware,
escalate in smart steps, and remember: burnt residue usually loses the fight once you soften it.
Keep baking soda, vinegar, lemons, salt, and cream of tartar on standby, and you’ll be ready the next time dinner gets… ambitious.


