Table of Contents >> Show >> Hide
- 1. Swap the Plain Diffuser for a Decorative Cover
- 2. Add Trim or Molding Around the Fixture
- 3. Soften the Room with Layered Lighting
- 4. Change the Color Temperature for a Better Mood
- 5. Upgrade to LED Tubes or an LED Retrofit
- 6. Disguise the Fixture with a Decorative Surround
- 7. Replace the Fixture Entirely When It Is Beyond Saving
- Styling Tips That Make a Bigger Difference Than People Expect
- How to Choose the Best Fix for Your Space
- Real-Life Experiences: What Actually Changes After You Upgrade Fluorescent Lighting
- Conclusion
- SEO Tags
Fluorescent lights are the cargo shorts of home design: practical, dependable, and not exactly invited to star in a photo shoot. They brighten kitchens, laundry rooms, basements, garages, offices, and workshops without complaint. But style? That is usually where the relationship gets a little strained.
The good news is that you do not have to rip open your ceiling and launch a dramatic renovation just because your fluorescent fixture looks like it was cast in a 1997 break-room remake. In many cases, a few smart changes can soften the glare, improve the look of the fixture, and make the whole room feel more intentional. Some fixes take less than an hour. Some cost less than a dinner out. And a few can make fluorescent lighting look surprisingly polished.
If your goal is to make fluorescent lights look more stylish without losing the bright, useful light you actually need, start with these seven easy ideas.
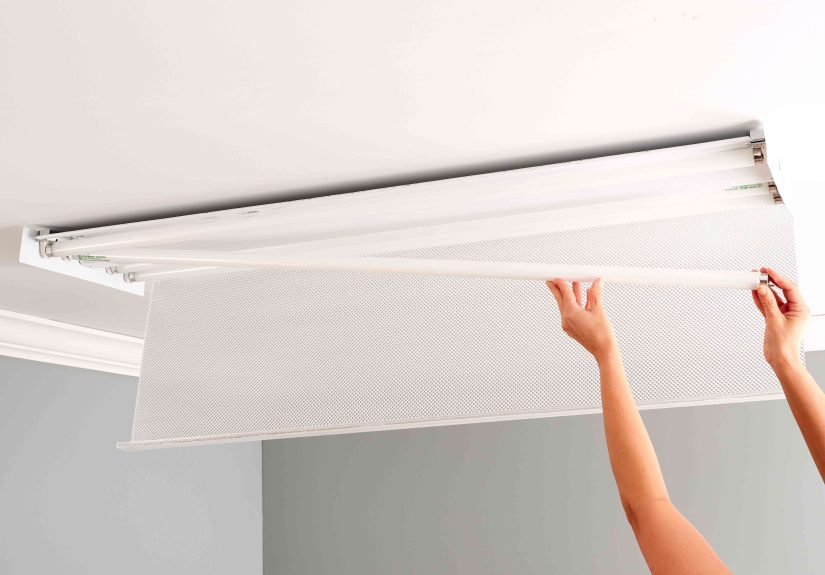
1. Swap the Plain Diffuser for a Decorative Cover
If your fixture has a cloudy plastic lens that now looks yellowed, brittle, or aggressively boring, replacing that diffuser is often the quickest visual upgrade. A fresh cover immediately makes the fixture look cleaner. A decorative cover can go further and make it look intentional.
Today’s options are much better than the old “institutional frost rectangle” look. You can find acrylic diffuser panels, subtle patterned covers, faux stained-glass styles, and magnetic decorative films for certain metal-framed fixtures. Some create a soft linen-like look. Others mimic etched glass. The best ones tone down the harshness without making the room feel dim and gloomy, like a laundry room with emotional baggage.
Where this works best
- Kitchens with large fluorescent ceiling boxes
- Drop-ceiling basements
- Laundry rooms
- Home offices with older troffer fixtures
Choose a cover that complements the room instead of screaming for attention. In a modern room, go with a simple white or softly textured diffuser. In a cottage-style space, a frosted pattern or faux leaded-glass look can add charm. In a workspace, a clean matte cover can still feel stylish while keeping the room bright.
One practical note: make sure the product is designed for lighting use and fits your fixture type. You want style, not a melted craft experiment clinging to the ceiling.
2. Add Trim or Molding Around the Fixture
Sometimes the problem is not the light itself. It is the giant fluorescent box looming in the ceiling like a rental-apartment plot twist. Adding trim around the fixture can make that awkward light box look more architectural and much less accidental.
Lightweight trim, molding, or a clean frame can visually “finish” the perimeter of the fixture. Instead of reading as a fluorescent panel, it starts to read as a built-in design feature. This is especially helpful in kitchens, hallways, and laundry rooms where fluorescent boxes tend to interrupt otherwise nice ceilings.
Easy trim ideas
- Simple flat stock painted to match the ceiling
- Thin picture-frame molding for a classic look
- A shallow wood frame stained to match cabinets or shelving
- PVC or lightweight polyurethane trim for humid rooms
If you have a large recessed fluorescent box, a framed border can make the light feel more custom. If you have a flush-mounted wraparound fixture, even a subtle trim ring or nearby ceiling detail can help it blend into the room. This approach works because it gives the eye something deliberate to notice other than “Ah yes, the overhead rectangle of doom.”
3. Soften the Room with Layered Lighting
One reason fluorescent lights look harsh is that they are often doing all the work alone. A single overhead source can flatten a room, wash out color, and make everybody look like they are about to confess to a very minor crime.
The fix is simple: stop asking one ceiling fixture to create beauty, mood, and task lighting at the same time. Add other light sources so the fluorescent fixture becomes part of a lighting plan instead of the entire plan.
What to layer in
- Table lamps for warm ambient light
- Floor lamps in corners to reduce contrast
- Under-cabinet lighting in kitchens
- Wall sconces in finished basements or offices
- LED strip lighting on shelves or work surfaces
This works beautifully because the room feels softer even before you touch the fluorescent fixture. In a kitchen, for example, under-cabinet lighting can take pressure off the overhead light and make the whole room feel more expensive. In a home office, a desk lamp and a floor lamp can make the fluorescent ceiling fixture feel less clinical and more balanced.
If you do nothing else from this list, do this. Layered lighting is one of the easiest ways to make fluorescent lights look better without changing the fixture at all.
4. Change the Color Temperature for a Better Mood
Sometimes fluorescent lights look bad because the color is bad. Not morally bad. Decoratively bad. Many older fluorescent tubes cast a cool, flat, slightly blue light that can make a room feel stark and uninviting. Even a stylish room can end up looking like a dentist’s side quest under the wrong bulb color.
If your fixture allows it, switching to a warmer light source can make a dramatic difference. For many living spaces, a warm white look around 2700K to 3000K feels more welcoming. For task-heavy areas like kitchens, some people prefer a slightly brighter neutral tone, but the key is choosing a color temperature that feels consistent with the rest of the room.
How to choose
- 2700K: Cozy and warm, great for finished basements and den-like spaces
- 3000K: Clean but still inviting, a strong all-purpose choice
- 3500K to 4000K: Better for utility areas where visibility matters most
If the room already has warm lamps and warm finishes, an icy overhead fluorescent tube can fight the whole design. Matching or harmonizing color temperature across the room makes everything look more polished. Your paint color looks better. Wood tones look richer. And your kitchen no longer feels like it is being interrogated.
5. Upgrade to LED Tubes or an LED Retrofit
If you want a bigger improvement in both style and performance, consider replacing fluorescent tubes with compatible LED tubes or using an LED retrofit kit. This is one of the most effective ways to modernize an older fluorescent fixture while keeping the general footprint of the light.
Why it helps: LED replacements often offer better color consistency, less flicker, more diffuser-friendly light, and a more current appearance overall. Many are available in warmer color temperatures, frosted finishes, or selectable color settings. In other words, they are less likely to make your ceiling look like it belongs to a storage room at a forgotten insurance office.
Benefits of going LED
- Softer-looking light with better color options
- Potential energy savings
- Less maintenance over time
- No aging fluorescent tubes fading unevenly
- A cleaner, more updated look
There is one important catch: compatibility matters. Some LED tubes work with existing ballasts, some bypass the ballast, and some require rewiring. If you are not experienced with electrical work, this is a good place to bring in a licensed electrician. Stylish lighting should never begin with “So I watched half a tutorial and guessed.”
6. Disguise the Fixture with a Decorative Surround
When a fluorescent light is physically bulky, sometimes the best move is to disguise the form. A decorative surround can visually reshape a plain fixture so it feels more like decor and less like utility equipment.
Think shallow drum-style skirts, clean-lined valances, box frames, or custom wood collars that wrap the edges of a fluorescent fixture without blocking access, ventilation, or light output. In the right room, this can make a basic fixture look almost custom.
Good style matches
- Modern: Thin, square wood frame painted matte black or ceiling white
- Farmhouse: Simple wood surround in a natural or painted finish
- Traditional: Trimmed frame with subtle molding detail
- Minimalist: Crisp flush border in the same tone as the ceiling
This is a particularly smart trick in laundry rooms, mudrooms, craft rooms, and finished basements. Those spaces still need bright light, but they also benefit from a more finished look. A decorative surround says, “Yes, this is a utility space, but it still deserves some dignity.”
7. Replace the Fixture Entirely When It Is Beyond Saving
Some fluorescent lights can absolutely be improved. Others are too yellowed, too noisy, too bulky, too flickery, or too awkwardly placed to justify the effort. If the fixture is dragging the room down no matter what you do, replacement may be the most stylish and surprisingly simple solution.
A modern flush-mount LED fixture, slim panel light, or semi-flush fixture can completely change the feel of a room. You still get the brightness you need, but the ceiling immediately looks cleaner and more current. This can be a great option in kitchens, hallways, and laundry rooms where the fluorescent fixture is the first thing people notice.
Replacement styles worth considering
- Low-profile LED flush mounts
- Modern drum lights
- Edge-lit flat panel fixtures
- Semi-flush fixtures for more decorative rooms
- Linear LED fixtures with a cleaner silhouette
If your old fixture hums, flickers, has a cracked diffuser, or makes the room feel chronically outdated, replacement can save time and frustration. There is a point where “making it work” becomes a full-time hobby, and frankly, your ceiling deserves better.
Styling Tips That Make a Bigger Difference Than People Expect
Even after you improve the fixture itself, a few surrounding design choices can help fluorescent lighting look better:
- Use lighter, more reflective paint finishes carefully: Bright walls can help bounce light more attractively.
- Add texture: Wood, woven materials, matte ceramics, and fabric shades soften the room visually.
- Reduce ceiling clutter: A cleaner ceiling makes even a basic fixture look more deliberate.
- Keep metals and finishes consistent: Matching nearby hardware, shelving brackets, or cabinet pulls helps the lighting feel intentional.
- Replace yellowed accessories nearby: Sometimes the fixture looks worse because everything around it is tired, too.
And if you are removing old fluorescent tubes, handle them carefully and recycle them according to local rules. Fluorescent lamps contain mercury, so they should not be tossed loosely into regular household trash like a defeated party decoration.
How to Choose the Best Fix for Your Space
Not every room needs the same solution. Here is the quick version:
For kitchens
Start with a decorative diffuser, warmer light, and under-cabinet lighting. If the box is huge, add trim or replace the fixture entirely.
For laundry rooms
Try a fresh diffuser cover, a trim frame, or a full swap to a flush-mount LED fixture. This room gets a huge style payoff from even one upgrade.
For basements
Layer lamps and sconces first, then consider warmer LED tubes or a decorative surround so the room feels less like a storage annex.
For garages or workshops
Focus on function first, then upgrade color temperature and diffuser quality. Clean, bright, modern-looking light usually beats decorative fuss in work zones.
Real-Life Experiences: What Actually Changes After You Upgrade Fluorescent Lighting
One of the most interesting things about improving fluorescent lights is how often people expect a small cosmetic change and end up feeling like the whole room got renovated. That sounds dramatic, but it happens all the time because lighting changes the way everything else reads. Cabinets look different. Wall color looks different. Countertops look different. Even clutter looks slightly less offensive, which is not magic, but it is close.
In older kitchens, the most common experience is relief. Homeowners replace a yellowed diffuser or shift to a warmer LED tube, turn the light on, and immediately realize the room no longer feels cold and flat. White cabinets stop looking gray. Wood cabinets stop looking orange. Stainless steel looks intentional instead of vaguely cafeteria-adjacent. The change may be simple, but the mood shift is huge.
In laundry rooms, the improvement often feels more emotional than expected. A lot of laundry rooms are practical but neglected, with one glaring fluorescent fixture and all the charm of an airport hallway. When that harsh light gets softened with a new cover, a fresh fixture, or some trim around the box, the room suddenly feels cleaner and more finished. It becomes a place you can tolerate instead of a place you sprint through carrying mismatched socks.
Finished basements are another big one. People often spend money on rugs, sofas, storage, wall paint, and art, but leave the original fluorescent ceiling panels untouched. Then they wonder why the room still feels off. Once the lighting gets layered with lamps and the overhead light is softened, the room starts behaving like a living space instead of a provisional setup. This is one of those design lessons that sounds obvious only after you see it happen.
Home offices benefit in a different way. The experience there is less about coziness and more about visual comfort. Older fluorescent fixtures can create glare, flat skin tones, and that mildly annoying “something feels bad in here” sensation during long work sessions. Changing the diffuser, improving the color temperature, and adding a desk lamp can make the room feel more focused and much less fatiguing. Suddenly video calls look better, papers are easier to read, and your office no longer gives substitute-teacher energy.
There is also the surprisingly satisfying experience of making a cheap fix look expensive. A simple trim border around a fluorescent kitchen box, for example, can look far more custom than its cost suggests. That is part of why these upgrades are so popular: they deliver visible results without forcing a full electrical overhaul. You are not trying to fool anyone into thinking a fluorescent fixture is a chandelier. You are simply helping the room look finished, intentional, and nice to be in.
And that is really the point. Stylish lighting is not always about drama. Sometimes it is about removing the one visual element that has been quietly making the room feel worse for years. Fix that, and everything else gets a chance to look better.
Conclusion
If you want to make fluorescent lights look more stylish, start with the easiest high-impact improvements: replace an outdated diffuser, add trim, layer in other light sources, and choose a warmer, more flattering light color. If the fixture still looks stubbornly stuck in another era, move up to LED retrofits, decorative surrounds, or full replacement. The goal is not to overcomplicate a ceiling light. The goal is to make the room feel better the second you flip the switch.
Fluorescent lighting may have a reputation for being harsh and purely practical, but with the right adjustments, it can look cleaner, softer, and much more at home in a stylish space. Even the most awkward ceiling fixture can improve with a little strategy, a little restraint, and a firm refusal to let ugly lighting win.


