Table of Contents >> Show >> Hide
- Why Transferring Photos From Android to iPhone Can Feel Weirdly Complicated
- Quick Comparison: Which Free Photo Transfer Method Is Best?
- 1. Use Move to iOS for the Smoothest Start
- 2. Use Google Photos if Your Pictures Are Already Backed Up
- 3. Use Google Drive, OneDrive, or Dropbox for Selected Photo Transfers
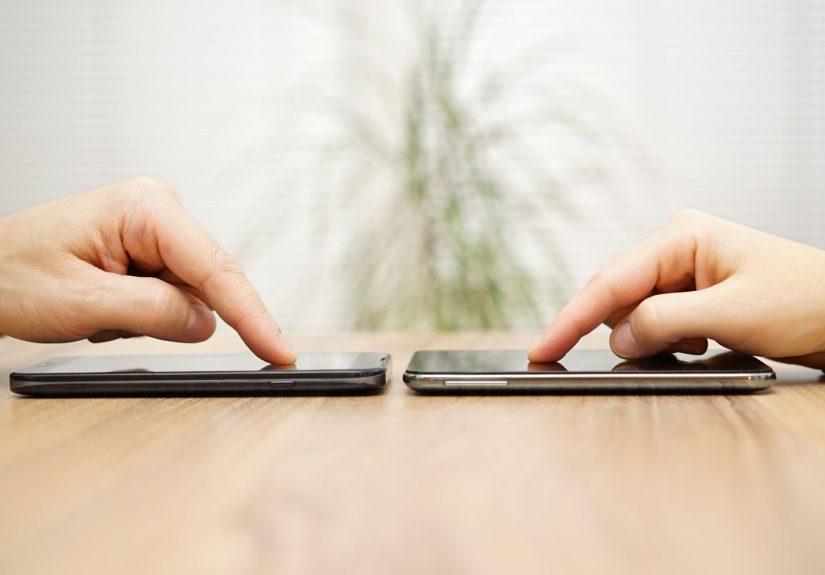
- 4. Use LocalSend for Free Direct Wireless Transfer
- 5. Use a Computer if You Want Maximum Control
- Common Mistakes to Avoid During Photo Transfer
- Which Free Photo Transfer Method Should You Choose?
- Final Thoughts
- Real-World Experiences With Transferring Photos From Android to iPhone
- SEO Tags
Switching from Android to iPhone is exciting right up until you realize your photo library is basically your life story in digital form. Vacations, screenshots you swore were important, 47 versions of the same sunset, and that one blurry dog photo you refuse to delete because it has “energy.” The good news is that moving pictures from Android to iPhone does not have to cost money, require wizard-level tech skills, or involve whispering threats at two phones on a kitchen table.
If you are looking for the best free ways to transfer photos from Android to iPhone, you have several solid options. Some are best for a brand-new iPhone, some are better if your iPhone is already set up, and some are perfect if you only want to move selected albums instead of your entire camera roll. The trick is choosing the method that matches your situation, your storage space, and your patience level.
In this guide, we break down the smartest free photo transfer methods, explain who each one is best for, and help you avoid the common mistakes that turn a simple move into a three-hour technology soap opera. By the end, you will know exactly how to move your pictures without paying for sketchy software, losing image quality, or accidentally transferring six copies of your lunch.
Why Transferring Photos From Android to iPhone Can Feel Weirdly Complicated
On paper, moving photos sounds easy. They are just files, right? In reality, photo transfer can get messy because Android and iPhone organize media differently, cloud services handle syncing in their own ways, and some methods are designed for complete phone setup while others are better for one-off transfers.
That is why the phrase best free ways to transfer photos from Android to iPhone does not have one single answer. The best method depends on whether your new iPhone is still on the setup screen, whether your Android photos already live in Google Photos, whether you want the pictures inside Apple Photos, and how large your library is.
Here is the simple version: if your iPhone is brand new, use Apple’s switching tool. If your iPhone is already set up, a cloud service or local transfer app is usually easier. If you want the most control, use a computer. Welcome to modern convenience, where there are many easy options and also somehow too many options.
Quick Comparison: Which Free Photo Transfer Method Is Best?
| Method | Best For | Cost | Main Drawback |
|---|---|---|---|
| Move to iOS | Brand-new iPhone setup | Free | Best used during setup, not after |
| Google Photos | People already using Google backup | Free to start | Large libraries may hit storage limits |
| Google Drive / OneDrive / Dropbox | Selected albums or folders | Free to start | Can be slower for huge libraries |
| LocalSend | Fast direct transfers over Wi-Fi | Free | Requires both phones on the same network |
| Computer transfer | Large libraries and maximum control | Free if you already have a computer | Takes more steps |
1. Use Move to iOS for the Smoothest Start
If your iPhone is brand new and still being set up, this is usually the easiest answer. Apple’s Move to iOS app is designed specifically for switching from Android to iPhone, and it can transfer photos along with other data during setup.
Why this method works well
It is built for the job. Instead of moving photos piece by piece, it helps migrate your important content in one session. If your goal is to switch phones, not collect a side quest, this is the most straightforward route.
How to do it
- Turn on your new iPhone and begin setup.
- When you reach the transfer screen, choose the option to move data from Android.
- Install Move to iOS on your Android phone.
- Keep both phones nearby and connected to power if possible.
- Follow the prompts, enter the code shown on the iPhone, and select photos and videos to transfer.
- Wait. Seriously, wait. This is not the moment to poke random buttons.
Best for
This method is ideal for people who have not fully set up their iPhone yet and want an all-at-once switch.
Watch out for this
If your iPhone is already set up and full of apps, wallpapers, and emotional commitment, this route is less convenient. At that point, another free method will probably be better.
2. Use Google Photos if Your Pictures Are Already Backed Up
If you used an Android phone for a while, there is a decent chance your photos are already living in Google Photos. If so, congratulations: half the battle is over, and you did not even know you were fighting. This is one of the most practical ways to access your pictures on iPhone without physically moving files first.
Why people love this option
Google Photos is simple, familiar, and great for people who mainly want access to their photo library across devices. Install the app on your iPhone, sign in to the same Google account, and your backed-up images should appear.
How to do it
- On your Android phone, open Google Photos and make sure backup is complete.
- Download Google Photos on your iPhone.
- Sign in with the same Google account.
- Give the app permission to access photos on your iPhone.
- View your existing library and save selected images locally if needed.
Best for
This method is best if you already rely on Google Photos and want to see your images quickly on your new iPhone without plugging anything in.
The catch
If you have a huge photo collection and limited cloud storage, you may need to clean up, transfer in batches, or upgrade storage later. Also, some users want all photos physically inside Apple Photos right away, not just viewable through the Google Photos app. If that is you, a local or computer-based method may feel more complete.
3. Use Google Drive, OneDrive, or Dropbox for Selected Photo Transfers
Sometimes you do not want to move every photo you have taken since 2016. Maybe you only need vacation pictures, work images, or the folder containing your cat’s best dramatic poses. In that case, cloud storage apps like Google Drive, Microsoft OneDrive, and Dropbox are excellent free choices.
Why this method makes sense
It is flexible. You can upload just the folders or photos you need from Android, then open the same cloud app on your iPhone and download or save them there. This is especially useful if your photo transfer needs are more “curated gallery” than “digital moving truck.”
How to do it
- Choose a cloud service you already use or trust.
- Upload the photos from your Android phone.
- Install the same app on your iPhone and sign in.
- Open the uploaded images and save or download them to your iPhone if desired.
What makes each one useful
- Google Drive: Great if you already live in the Google ecosystem.
- OneDrive: Handy for Microsoft users and organized folder structures.
- Dropbox: Good for quick uploads and simple cross-device access.
Best for
This is ideal for smaller transfers, selective albums, or people who want a backup copy in the cloud anyway.
Downside
Uploading and downloading a huge library can take a while, especially on slower Wi-Fi. Free storage limits can also show up like an uninvited guest at the worst possible moment.
4. Use LocalSend for Free Direct Wireless Transfer
If you want something that feels more like cross-platform AirDrop without paying a dime, LocalSend is one of the most interesting free options right now. It lets Android and iPhone transfer files over the same local network, which means your photos can move directly between devices without needing a cloud account.
Why this method stands out
It is fast, private, and surprisingly painless. Both devices need the app installed and connected to the same Wi-Fi network, then you choose the pictures and send them directly. No syncing drama, no upload queue, and no “your storage is full” jump scare.
How to do it
- Install LocalSend on your Android phone and iPhone.
- Connect both devices to the same Wi-Fi network.
- Open the app on both phones.
- Select the photos on Android and choose the nearby iPhone as the destination.
- Accept the transfer on the iPhone.
Best for
People who want a free, direct photo transfer without cloud storage, especially for medium-size batches or repeated transfers.
What to know before you start
This method depends on a stable local network. If your Wi-Fi behaves like it was trained by raccoons, you may prefer a cloud or computer method instead.
5. Use a Computer if You Want Maximum Control
If you want a classic, reliable, no-nonsense method, a computer is still one of the best free ways to transfer photos from Android to iPhone. It takes a few more steps, but it also gives you better control over folders, duplicates, and exactly what gets moved.
How it works
First, connect your Android phone to your computer and copy your photos from the usual camera folder. Then connect your iPhone and sync the pictures onto it using the appropriate Apple software.
Basic steps
- Connect your Android phone to a PC or Mac.
- Find your photos, usually in the DCIM folder.
- Copy the images to a folder on your computer.
- Disconnect Android and connect your iPhone.
- Use Finder, iTunes, or the Apple Devices app on Windows to sync photos to the iPhone.
Best for
This is great for large libraries, careful organization, and people who do not want to depend on internet speed or cloud limits.
Drawback
It is more manual. On the bright side, manual methods are often what save the day when “easy” apps suddenly decide this is the perfect time to be difficult.
Common Mistakes to Avoid During Photo Transfer
Even the best method can go sideways if you rush through it. Here are a few mistakes worth avoiding:
- Not checking storage first: Make sure your iPhone has enough room for incoming photos.
- Skipping backup verification: Do not assume your Android photos are backed up. Confirm it.
- Using mobile data for huge transfers: Unless you enjoy unnecessary stress, use Wi-Fi.
- Interrupting the process: Many transfer failures happen because someone starts tapping around halfway through.
- Transferring duplicates: If you use multiple methods at once, your library may become a clone army.
Which Free Photo Transfer Method Should You Choose?
Here is the honest recommendation:
- Choose Move to iOS if your iPhone is new and not fully set up.
- Choose Google Photos if your Android pictures are already backed up there and you mainly want easy access.
- Choose Google Drive, OneDrive, or Dropbox if you want to move selected folders or albums.
- Choose LocalSend if you want a free direct transfer over Wi-Fi without using the cloud.
- Choose the computer method if you want the most control over a large library.
For most people, the best free way to transfer photos from Android to iPhone is the one that matches where they are in the switching process. A brand-new iPhone calls for Move to iOS. An already-active iPhone often works better with Google Photos or LocalSend. A giant media library usually behaves best with a computer. Technology, as always, rewards context and punishes guessing.
Final Thoughts
The best free ways to transfer photos from Android to iPhone are better than they used to be. You do not need expensive third-party software, weird cables from a mystery brand, or a deep belief in miracles. Whether you use Apple’s migration tool, a cloud service, a local Wi-Fi app, or a computer, you can move your pictures safely with a little planning.
The smartest move is to decide what you actually need before you start. Do you want your whole library, just a few albums, or simple access to old pictures on a new phone? Once you answer that, the right method becomes much easier to pick. And once your photos arrive safely on your iPhone, you can get back to the important things, like taking 14 nearly identical brunch photos and pretending you will delete the extra 13 later.
Real-World Experiences With Transferring Photos From Android to iPhone
In real life, most people do not switch phones in a calm, lab-tested environment with perfect Wi-Fi and a full cup of coffee. They switch phones during a lunch break, late at night, before a trip, or right after buying a shiny new iPhone they absolutely could not stop thinking about. That is why real-world experience matters just as much as the official method.
One common experience is that Move to iOS feels fantastic when it works on the first try. For many users, it really is the easiest path because it bundles photos with the rest of the setup process. But people also learn quickly that it rewards patience. If both phones are charged, left alone, and connected properly, the transfer usually feels smooth. If someone gets bored halfway through and starts checking messages, the mood can change fast.
Google Photos tends to be the crowd favorite for people who already used it on Android. The experience is less about “moving” and more about “showing up and finding your stuff already there.” That feels magical the first time. The only downside is that some users expect every image to instantly appear inside Apple Photos, when in fact they may first appear inside Google Photos unless saved locally. Once people understand that difference, the process is much less confusing.
Users who prefer Google Drive, Dropbox, or OneDrive usually like the control. They can move only the photos they care about, keep folders organized, and avoid dumping years of memes into their new device. This feels especially useful for work images, family albums, or event folders. The tradeoff is time. Uploading, waiting, downloading, and organizing can feel a little like running a tiny digital shipping company out of your pocket.
LocalSend wins points with people who want something fast and modern without paying for storage. The experience is often described as refreshingly simple: both devices on the same network, a few taps, and done. It feels like the kind of tool people wish had existed years earlier. The biggest lesson from users is to make sure both phones stay connected to the same Wi-Fi and remain awake during the transfer.
The computer method often ends up being the hero for people with massive libraries. It is not flashy, but it feels dependable. Many users say that once they stop looking for “the easiest” option and use a computer instead, the process becomes more predictable. It also helps people clean up duplicates, rename folders, and start fresh on the iPhone with a more organized library.
The shared lesson from almost every experience is simple: the best method is not the one with the fanciest promise. It is the one that matches your situation, your storage, and how many photos you actually need to move.


