Table of Contents >> Show >> Hide
- Before You Start: Know What You’re Growing
- Step 1: Decide Your Goal Before You Buy Anything
- Step 2: Choose a Safe, Reliable Starter Culture
- Step 3: Pick the Right Container and Keep It Simple
- Step 4: Prepare the Right Water and Nutrient Medium
- Step 5: Sanitize Like You Mean It
- Step 6: Inoculate the Culture Without Overthinking It
- Step 7: Give It Light, But Don’t Roast It
- Step 8: Control Temperature, pH, and Carbon Supply
- Step 9: Mix, Aerate, and Watch the Culture Daily
- Step 10: Harvest at the Right Time and Keep the Culture Going
- Common Mistakes When Growing Algae
- Final Thoughts
- Experiences and Lessons From Growing Algae in Real Life
Growing algae sounds like one of those projects that starts as science and ends as a kitchen-counter experiment with suspicious green bottles. The good news is that algae really can be grown at small scale if you treat the process like a controlled culture instead of a swampy surprise. The better news is that you do not need a giant industrial pond, a futuristic lab, or a villain’s lair with glowing tubes. You need a plan.
This guide focuses on small-scale, controlled algae cultivation, especially for beginners who want to learn how algae grows, test a starter culture, or produce biomass for observation, compost experiments, aquaculture feed research, or non-food hobby use. It does not encourage collecting random pond scum and hoping for the best. Wild algae can include harmful species, contamination, and toxins. Think “clean culture” instead of “mystery slime.”
If you want the short version, algae needs six things to thrive: the right strain, the right water, nutrients, light, carbon, and steady conditions. Miss one of those and your culture may limp along. Miss three and it may collapse with the quiet drama of a canceled TV series.
Before You Start: Know What You’re Growing
“Algae” is a giant umbrella term. Some algae grow in freshwater, others in saltwater. Some prefer cooler conditions, others like it warm. Some are used in aquaculture, some in research, some in wastewater treatment, and some become the reason a lake suddenly looks like green paint. That means the first rule of algae growing is simple: match the species to the system.
For a beginner, a known starter culture from a reputable culture collection or research supplier is the smartest move. A controlled starter culture gives you something much more valuable than luck: predictability. It also helps you avoid harmful algal bloom species or mixed contaminants that can ruin the project.
Step 1: Decide Your Goal Before You Buy Anything
Start with the purpose. Are you growing algae to learn basic cultivation? To observe photosynthesis? To test biomass production? To keep a small educational photobioreactor on a shelf? Your goal determines the strain, container, medium, and level of monitoring you need.
If your goal is beginner-friendly cultivation, choose a strain known for relatively straightforward culture conditions. Freshwater green microalgae are often easier for hobby-scale setups than jumping straight into a marine system that requires salinity management. If your goal is marine aquaculture research, you will need saltwater media, tighter contamination control, and closer attention to aeration and pH.
A common beginner mistake is choosing a species first because it sounds cool, then trying to force it into the wrong setup. That is like buying a cactus and then being surprised it hates your fern terrarium. Pick the mission first. The algae comes second.
Step 2: Choose a Safe, Reliable Starter Culture
Do not scoop algae out of a random pond and call it a starter culture. That approach is cheap, yes, but so is regret. Wild samples often contain bacteria, protozoa, fungi, rotifers, competing algae, and sometimes harmful cyanobacteria. In a controlled culture, those unwanted guests can outcompete your target strain or turn the project into a health risk.
Instead, begin with a verified starter culture from a reputable culture bank, university collection, or research supplier. This gives you a known strain with documented growth needs. It also makes troubleshooting far easier because you are not guessing whether your “algae” is actually three algae, two bacteria, and something that looks like it came from outer space.
Example: if you choose a freshwater strain, pair it with a freshwater medium such as a standard lab culture medium designed for freshwater algae. If you choose a marine strain, use marine medium and the appropriate salinity from day one. Freshwater algae in salty water and marine algae in plain water both tend to respond with the biological equivalent of “absolutely not.”
Step 3: Pick the Right Container and Keep It Simple
At small scale, you do not need a commercial raceway pond. A clean clear bottle, flask, jar, or small transparent culture vessel can work well for learning. What matters most is that the container allows light penetration, can be cleaned thoroughly, and gives you some control over contamination and gas exchange.
For beginners, a simple closed or semi-closed setup is usually easier than an open tub. Open systems are cheaper, but they are more vulnerable to contamination, evaporation, temperature swings, and wandering airborne troublemakers. A bottle or flask with filtered aeration offers better control and fewer heartbreaks.
Choose a container size you can manage. Small cultures are easier to watch, easier to clean, and cheaper to restart if something goes wrong. Scaling too fast is one of the fastest ways to learn that “more algae” can quickly become “more problems.” Start small. Earn your way into a bigger setup.
Step 4: Prepare the Right Water and Nutrient Medium
Algae cannot grow on vibes alone. It needs water plus nutrients. The big nutritional players are usually nitrogen and phosphorus, along with other minerals and trace elements. Some strains also need additional components such as silicate or vitamins. This is why growers use prepared culture media instead of plain tap water and optimism.
Use a medium designed for your strain and water type. Freshwater media and saltwater media are not interchangeable. If your water source contains chlorine, chloramine, heavy minerals, or unpredictable impurities, your algae may struggle or crash. Distilled, dechlorinated, filtered, or otherwise treated water is usually the safer starting point, depending on the protocol you are following.
The medium should be mixed accurately. More nutrients do not always mean faster growth. Too little nutrition starves the culture, but too much can stress cells, shift pH, or invite contamination. In other words, do not season your algae medium the way your uncle seasons chili.
Step 5: Sanitize Like You Mean It
Clean technique is the difference between “I’m cultivating algae” and “I’m hosting microorganisms.” Your container, tubing, tools, and water all need to be as clean as reasonably possible for the scale of your project. At lab scale, this may mean sterilization or pasteurization. At hobby scale, it means thoroughly washing, disinfecting, rinsing correctly, and avoiding sloppy transfers.
Contamination often enters through the water, the air supply, the vessel, or the starter culture itself. If you are using aeration, filtered air is a smart upgrade. If you are transferring cultures, work quickly, keep tools clean, and avoid touching surfaces that contact the medium.
This step feels boring until you skip it. Then suddenly your nice green culture turns weirdly clear, brown, foamy, or smelly. Cleanliness may not be glamorous, but it is one of the best algae-growing tips you will ever get.
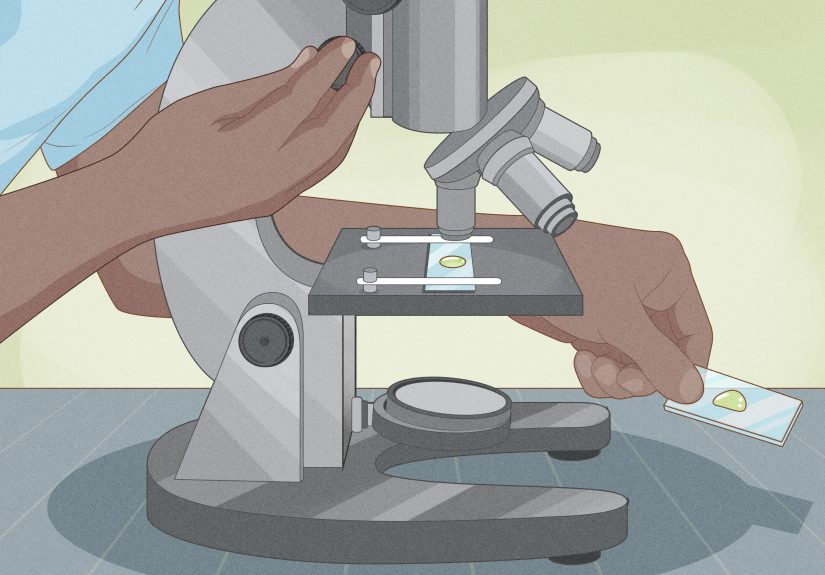
Step 6: Inoculate the Culture Without Overthinking It
Once your medium is ready and your vessel is clean, add the starter culture. This is called inoculation, which sounds dramatic but mostly means “put the algae in the good water.” The key is to add enough starter culture to help the cells establish quickly without shocking them.
A stronger inoculum usually helps the culture move through the lag phase faster. Too tiny a starter amount can leave cells struggling to adapt, while contaminants or unstable conditions gain the upper hand. Follow the recommendations for your strain or supplier when possible. A culture that begins with healthy density usually has a much better chance of becoming a dense, bright green suspension rather than a sad faint tint.
After inoculation, label the culture with the strain, date, medium, and any other useful notes. Future you will appreciate this. Future you will also be less likely to stare at two nearly identical bottles and ask, “Which one is the good algae?”
Step 7: Give It Light, But Don’t Roast It
Because algae is photosynthetic, light is a main energy source. But light has a sweet spot. Too little and growth crawls. Too much and cells can become stressed through photoinhibition. A bright, steady setup often works better than intense light that turns your culture into a tiny solar punishment chamber.
For indoor cultivation, fluorescent or LED lighting can work well when placed at a controlled distance from the culture. Many small-scale systems use long daily light periods instead of round-the-clock intensity. If you are using artificial light, a long photoperiod with moderate intensity is often more stable than trying to imitate the surface of the sun.
Also remember that dense cultures self-shade. As cell density increases, inner cells receive less light. That means the lighting setup that worked in week one may become less effective in week two. If growth slows, the issue may not be laziness. It may be simple light limitation.
Step 8: Control Temperature, pH, and Carbon Supply
Algae likes consistency. Many common microalgae strains grow best in moderate temperatures rather than extreme heat or cold. If the culture gets too hot, growth may stall or cells may die. If it gets too cold, the culture often slows dramatically. A stable indoor location away from direct overheating is usually better than a sunny windowsill that turns into a greenhouse at noon and a refrigerator by midnight.
pH matters too. In many algae systems, pH rises as photosynthesis pulls carbon dioxide from the water. If the pH drifts too far upward, growth can weaken and the culture may collapse. Gentle aeration and carbon supply can help stabilize the system. Some growers use ordinary filtered air; others use controlled CO2 input for larger or faster-growing cultures.
The important thing is balance. Carbon is food, but pH is the referee. Ignore either one and the culture may protest in silence until it suddenly goes off a cliff.
Step 9: Mix, Aerate, and Watch the Culture Daily
Algae does better when cells are kept in suspension and exposed more evenly to light and nutrients. Gentle mixing or aeration helps prevent settling, improves gas exchange, and reduces stagnant zones. In some systems it also helps remove excess oxygen produced during photosynthesis, which can otherwise interfere with growth.
Daily observation is one of the smartest habits you can build. Watch for color change, smell, clumping, foam, surface films, sudden clearing, or unexpected invaders. Healthy cultures often become denser and more evenly colored over time. Warning signs include bad odor, strange color shifts, heavy sediment, or a rapid drop in density.
Think of yourself as a calm algae detective. You are not just waiting for growth; you are reading the culture. It will usually tell you something is wrong before it fully crashes. You just need to notice.
Step 10: Harvest at the Right Time and Keep the Culture Going
The best time to harvest is usually before the culture enters decline. During active exponential growth, cells are dividing quickly and conditions are still favorable. Wait too long and the culture may move into stationary phase, where nutrients are lower, self-shading is worse, pH may drift, and waste products accumulate.
For a small culture, harvesting may be as simple as removing part of the dense suspension and leaving enough behind to restart or scale up the next batch. This is where algae growing becomes a rhythm: grow, observe, split, refresh, repeat. If you harvest everything every time, you keep starting from scratch. If you manage part of the culture as a healthy line, future batches become much easier.
In short, do not treat harvest as the end. Treat it as the handoff to the next round.
Common Mistakes When Growing Algae
Using random natural water
Natural water can contain contaminants, competing organisms, and chemical variability. It may look harmless, but it can turn a controlled project into a biological lottery.
Using the wrong medium
If the nutrients or salinity do not match the strain, growth suffers. Algae is adaptable, but it is not magic.
Too much light
More light is not always better. Excess intensity can stress cells and reduce growth.
Ignoring pH drift
A culture can look fine while its chemistry quietly moves out of range. By the time the visual symptoms show up, the damage is already underway.
Scaling up too soon
A healthy 250 mL culture does not automatically mean a healthy 5-liter culture. Scale gradually and learn what stable growth looks like first.
Final Thoughts
If you have been wondering how to grow algae, the real answer is not “add water and sunshine.” It is “build a small, stable system and respect the biology.” The process becomes much easier when you choose a known strain, use the right medium, manage light and temperature, keep the culture clean, and harvest before decline begins.
Algae growing is part science, part observation, and part humility. Some days you will feel like a biotech genius. Other days you will stare at a bottle and wonder why your beautiful green culture suddenly looks like diluted pea soup. That is normal. The goal is not perfection on day one. The goal is learning enough to make each batch better than the last.
And honestly, once you get the rhythm down, watching a culture go from pale green to rich emerald is weirdly satisfying. It is like gardening, but for organisms that never ask for a bigger pot and never complain about the weather out loud.
Experiences and Lessons From Growing Algae in Real Life
One of the most memorable things about growing algae is how quickly it teaches patience. On day one, the culture often looks underwhelming. You inoculate the medium, set up the light, maybe add gentle aeration, and then stand there expecting a dramatic emerald bloom by breakfast. Instead, the bottle looks almost the same for a while. That early quiet period can make beginners think nothing is happening. In reality, the cells are adjusting, and algae is basically saying, “Please stop hovering over me. I’m working.”
By the next few days, the experience changes. A healthy culture often shifts from faint green to a more even, richer color. That is the moment many growers get hooked. It feels like the culture suddenly decided to reward your restraint. You start noticing small details you ignored at first: the way bubbles move through the liquid, how light angle changes the color, how a culture looks denser in the morning than it did two days before. Growing algae turns you into the kind of person who studies a bottle like it contains the secrets of the universe. To be fair, it kind of does.
There are also the classic learning moments. Many people put cultures too close to a bright window and accidentally cook them during the hottest part of the day. Others use water that seemed fine but was not actually a good match for the strain. Some forget how important clean transfers are and end up culturing a surprise community instead of one target organism. Almost every small-scale grower has had a “Why does this smell weird?” moment, followed by a swift lesson in contamination control.
Another common experience is realizing that algae does not always fail dramatically. Sometimes it simply slows down. The color stops deepening. Sediment becomes more obvious. The culture seems tired. That is often the point where growers learn to read the system instead of waiting for a disaster. They start checking whether the pH has drifted, whether the light is now blocked by self-shading, or whether the culture has entered a phase where it needs to be split and refreshed. In that sense, algae growing becomes less about reacting and more about noticing.
Perhaps the best experience of all is the moment a second or third batch works better than the first. That is when the process begins to feel repeatable rather than mysterious. You understand why a known starter culture matters. You appreciate why cleanliness is not just a lab obsession. You realize that “steady conditions” is not boring advice at all; it is the whole game. And when a fresh culture takes off because you corrected the mistakes from the last round, the satisfaction is real. It is nerdy, green, slightly ridiculous, and absolutely earned.


