Table of Contents >> Show >> Hide
- So… can you paint over silicone caulk?
- Quick decision guide (pick your path)
- Step 1: Identify what caulk you actually have
- Easy Solution #1 (best overall): Remove silicone and replace with paintable caulk
- Easy Solution #2: Use the “paintable caulk skim coat” trick
- Easy Solution #3 (last resort): Prime and paint siliconecarefully
- Why paint “fisheyes,” beads, or peels around silicone
- Timing matters: “dry to paint” vs. “fully cured”
- When silicone is the right call (and paint is the wrong goal)
- FAQ: fast answers to common silicone-and-paint headaches
- Final checklist for a clean, paint-ready caulk line
- Real-world experiences (the “I learned this the hard way” section)
- Experience #1: The baseboard line that kept “rejecting” paint
- Experience #2: The bathroom “beautification” that turned into peeling confetti
- Experience #3: The “I removed the silicone, why do I still get fisheyes?” mystery
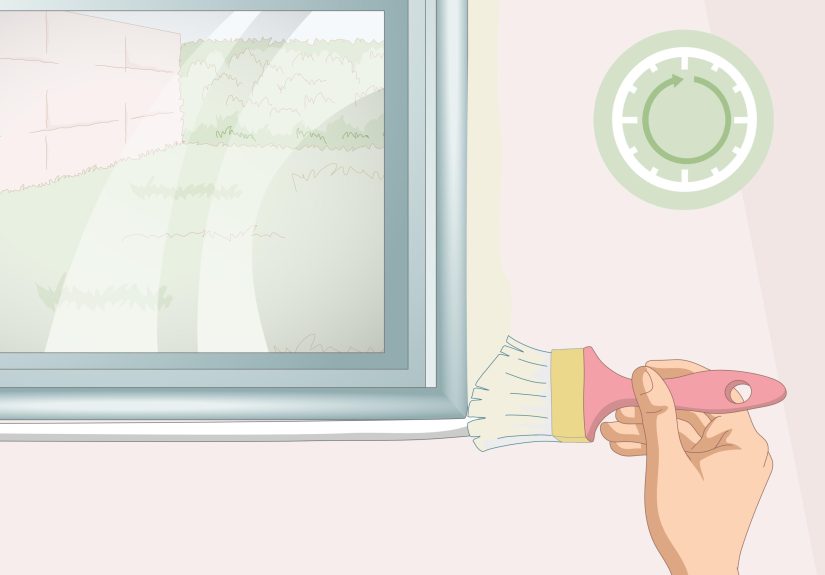
- Experience #4: Exterior window trim where flexibility mattered more than perfection
- Conclusion
You know that feeling when you try to stick a Post-it to a dusty wall and it falls off with the confidence of a cat knocking your glass off the table?
That’s paint on silicone caulk. Silicone is basically the “no thanks” of the sealant world: waterproof, flexible, long-lasting… and famously uninterested in bonding with paint.
The good news: you still have options. Some are easy. Some are a little messy. None require summoning a home-improvement wizard at midnight.
This guide breaks down what works, what doesn’t, and what to do when your caulk line is already silicone and your paint is already judging you.
So… can you paint over silicone caulk?
In most cases, nonot reliably. Traditional 100% silicone caulk is considered non-paintable.
Paint tends to bead up, crawl, or peel because silicone has low surface energy (translation: it’s too “slippery” for paint to grab).
Even if you convince paint to stick today, a flexible joint can crack the paint film later.
But you can still solve itusually by removing and replacing the silicone with a paintable caulk, or by using a workaround when removal is impractical.
Quick decision guide (pick your path)
| Situation | Best Solution | Why |
|---|---|---|
| You haven’t caulked yet | Use paintable caulk (acrylic latex / siliconized acrylic / hybrid) | Paint bonds normally and looks clean |
| It’s already 100% silicone and you need paint | Remove & replace with paintable caulk | Most durable, least drama long-term |
| Removal is difficult (tile edge, delicate surface) | Clean + test bonding primer + paint (or skim with paintable caulk) | Can work, but results varytest first |
| Wet area (tub/shower) where paint isn’t required | Use color-matched silicone or “paintable silicone/hybrid” | Waterproofing matters more than paint |
Step 1: Identify what caulk you actually have
Before you do anything heroic, confirm the caulk type. People call a lot of things “silicone” the way they call every tissue a “Kleenex.”
The label (or a few clues) can save you hours.
Clue #1: Read the tube (if you can)
- 100% Silicone: usually says it loudly and proudly. Often labeled “Kitchen & Bath” and “waterproof.” Typically non-paintable.
- Acrylic latex: typically paintable, easy water cleanup, common for trim and drywall gaps.
- Siliconized acrylic: paintable but more flexible than plain latex. Good compromise for many spots.
- Hybrid / polyurethane / STPE / MS polymer: often paintable, durable, and more water-resistant than latex.
Clue #2: The finish and feel
- Silicone often dries with a slightly rubbery, slick feel and can look a bit glossy.
- Paintable acrylic/latex typically feels less slick once cured and may look more matte.
Clue #3: Paint behavior is a clue
If you already tried painting and the paint beads, separates, or “crawls” away, that’s classic silicone behavior.
It can also happen from silicone contamination left behind after removing old caulk (more on that in a minute).
Easy Solution #1 (best overall): Remove silicone and replace with paintable caulk
If you want a clean, paint-ready finish that lasts, this is the grown-up answer. Not the most fun answer, but the one that doesn’t come back to haunt you.
What you’ll need
- Utility knife or caulk remover tool
- Plastic scraper (helps avoid gouging)
- Rags + non-oily cleaner (soap and water; then a solvent wipe if needed)
- Painter’s tape (optional but neat)
- Paintable caulk (acrylic latex, siliconized acrylic, or hybrid)
- Caulk gun
How to remove silicone without wrecking the surface
- Slice both edges of the bead with a sharp utility knife. Keep the blade shallow so you don’t dig into drywall, trim, or tub finishes.
- Peel and scrape. Pull out as much of the bead as possible in long strips. Scrape leftovers gently.
- Clean the residue. Silicone can leave an invisible film that causes paint defects (like fisheyes/craters). Wash first, then wipe as appropriate for the surface.
- Let it dry. Moisture and solvent need to evaporate fully before you recaulk.
Important: Don’t just caulk over failing old caulk and hope it turns into a stable relationship.
Layering over loose, moldy, or peeling caulk usually fails faster than your phone battery at 2%.
Choosing the right paintable caulk (so you don’t redo this twice)
-
Acrylic latex caulk:
Great for baseboards, trim, crown molding, and small interior gaps that won’t see constant water.
Paint-friendly and easy cleanup. -
Siliconized acrylic caulk:
Still paintable, but typically more flexible and weather-resistant than plain latex.
Useful around windows/doors and some damp-adjacent spots. -
Hybrid / polyurethane / STPE / MS polymer sealants:
Often paintable and tougher than latex, with better movement capability.
Nice when you want a “silicone-like” seal but still need paint.
Easy Solution #2: Use the “paintable caulk skim coat” trick
If removing silicone is risky (say, you’ll scratch tile glaze or damage a fragile edge), there’s a workaround:
apply a thin, continuous layer of paintable caulk over the silicone, then paint the new surface once it’s ready.
How to do it
- Clean extremely well. Remove soap scum, oils, and any mildew residue. Dry completely.
- Lightly scuff the silicone bead (if the surface allows) using fine sandpaper, just enough to reduce gloss. Wipe dust away.
- Apply paintable caulk over the silicone in a smooth bead. Tool it so it fully covers the silicone and feathers neatly at edges.
- Wait for “paint-ready” time listed on the tube, then paint.
This method can look great, but it’s not magic: adhesion depends heavily on cleaning and whether the underlying silicone is stable, fully cured, and free of residue.
If the joint moves a lot, choose a flexible paint and a higher-movement caulk.
Easy Solution #3 (last resort): Prime and paint siliconecarefully
If you’re determined to paint silicone directly (or you can’t remove it), you’ll need to treat it like a “difficult surface” project.
This means serious prep, a bonding primer, and a test patch before committing.
Step-by-step: the least-bad way to attempt it
-
Degrease like you mean it:
Clean the area thoroughly. Any soap residue, oils, or silicone film can trigger paint defects. -
Scuff-sand gently:
Use fine sandpaper to dull the sheen (don’t shred the bead). Remove dust completely. -
Apply a high-adhesion primer:
Use a bonding primer designed for “tough-to-paint” surfaces. In some cases, shellac-based primers are used to help with contamination issuesalways follow product directions and ventilation guidance. -
Test patch (non-negotiable):
Paint a small section. Let it dry, then do a simple adhesion check (light fingernail scratch after full dry).
If it peels easily, stop and switch to the remove/replace method. -
Topcoat with a durable paint:
Use the paint appropriate for the room (bath paint for humidity, trim enamel for baseboards, exterior paint outside).
Expect that movement at the joint may still crack the paint film over time.
Real talk: this method can succeed in low-stress areas (small decorative seams), but it’s the least reliable optionespecially in wet zones.
Why paint “fisheyes,” beads, or peels around silicone
If your paint develops tiny craters (fisheyes) or pulls away into bare spots, the surface is usually contaminatedoften by silicone, wax, grease, or oil.
Silicone residue is notorious because it changes surface tension, so wet paint can’t lay down evenly.
Quick fixes (depending on when you notice it)
- While paint is still wet: wipe off the affected area, clean properly, and restart.
- After paint dries: sand smooth, clean thoroughly, then prime (bonding primer) and repaint.
Timing matters: “dry to paint” vs. “fully cured”
Even with paintable caulk, painting too soon can cause problems: cracking, crazing, or a wrinkled paint film.
Many paintable caulks become paint-ready in a few hours, but full cure often takes longer.
Always follow the tubetemperature and humidity can stretch the timeline.
A practical rule of thumb
- Trim or baseboards: wait until the caulk is clearly paint-ready (and not cool/tacky).
- Deep gaps or thick beads: wait longer than the minimum. Thick beads shrink more as they cure.
- Bathrooms: let caulk cure fully before heavy water exposurerushing this step can shorten the life of the seal.
When silicone is the right call (and paint is the wrong goal)
In tubs, showers, and other continuously wet areas, waterproofing beats paintability.
Silicone remains a top choice for durability and flexibility when paint isn’t required.
If aesthetics matter, consider:
- Color-matched silicone (blend with tile, grout, or fixtures)
- Paintable silicone/hybrid products when you truly need paint compatibility
FAQ: fast answers to common silicone-and-paint headaches
Can I paint over “siliconized acrylic” caulk?
Usually, yes. Siliconized acrylic is generally formulated to remain paintable.
Still, let it reach paint-ready time and use the right paint for the surface (trim enamel for trim, wall paint for walls).
Will oil-based paint stick to silicone better than latex paint?
Not reliably. Silicone’s issue is adhesion, not just water content. Some coatings may cling briefly, but peeling is common as the joint moves.
If you need a painted finish, replacing silicone is the smarter play.
Can I caulk over silicone with paintable caulk?
Sometimes, yesif the silicone is firmly bonded, cleaned thoroughly, and fully covered by the new paintable caulk.
But if the old silicone is failing, moldy, or separating, removal is the better fix.
What’s the most “foolproof” solution?
Remove silicone and re-caulk with a high-quality paintable caulk appropriate for the location.
It’s the one solution that doesn’t rely on hoping chemistry changes its mind.
Final checklist for a clean, paint-ready caulk line
- ✅ Confirm you’re using paintable caulk where paint is required
- ✅ Remove failing caulk instead of layering over it
- ✅ Clean and dry surfaces thoroughly
- ✅ Tool the bead neatly (a smooth bead looks better and paints better)
- ✅ Respect paint-ready and cure times
- ✅ Test primer/paint adhesion if silicone is involved
Real-world experiences (the “I learned this the hard way” section)
Below are common, real-life scenarios that come up in homes all the time. Consider them “field notes” you can borrowwithout sacrificing your own weekend.
Experience #1: The baseboard line that kept “rejecting” paint
A classic: someone paints a room, then notices a messy gap between the baseboard and the wall. They grab whatever caulk is in the garage,
lay down a bead, and paint over it immediately. The next day, that caulk line looks like it has bare spotspaint has crawled away in little islands.
What happened? In many cases, the caulk was 100% silicone (or the area had silicone residue). Paint can’t wet the surface evenly, so it pulls back as it dries.
The fix that actually holds up is simple: cut out the silicone, wipe the area clean, then re-caulk with a paintable acrylic or siliconized acrylic.
Once the caulk is paint-ready, the paint lays down smoothly and the baseboard line looks crisp instead of chaotic.
Bonus lesson: if you’re caulking trim, buy a tube that literally says “paintable” on the label and you’ll avoid the entire soap opera.
Experience #2: The bathroom “beautification” that turned into peeling confetti
Bathrooms tempt people into painting everythingwalls, trim, sometimes even the tiny seam where tile meets drywall. But the seam near a tub or shower
is a wet-area joint, and silicone is often used there for a reason. When someone paints over that silicone, it might look okay for a week,
then humidity and movement start the breakup: peeling edges, cracking paint, and an overall “why is my bathroom shedding?” vibe.
The reliable solution is to decide what matters most. If the joint is truly wet, prioritize waterproofing:
remove the painted-over silicone mess, recaulk with quality silicone (in a color that blends), and stop trying to make paint happen in a place that basically lives in a rainforest.
If you absolutely must have a painted look (for a non-wet seam near the vanity, for example), use a paintable hybrid sealant and follow cure times carefully.
Experience #3: The “I removed the silicone, why do I still get fisheyes?” mystery
This one confuses people because they did the “right” thingremoved the siliconeyet paint still develops tiny craters near the old caulk line.
That’s often silicone residue. Silicone can leave behind a film that’s invisible but powerful enough to ruin the paint’s surface tension.
Homeowners describe it as the paint “running away” from the spot. Which is honestly accurate: the paint is fleeing contamination.
The practical fix is a deeper clean and a controlled reset:
wash, rinse, dry, then use a bonding primer suited for tough-to-paint surfaces. After priming, repaint and check results.
The big takeaway is that removal is step one, not the finish linecleaning is what makes the paint behave.
Experience #4: Exterior window trim where flexibility mattered more than perfection
Outside, the joint around windows moves with temperature swings. People often want a perfect painted seam, but exterior movement can crack a brittle paint film.
In these cases, the best “experience-based” strategy is to use a high-quality, paintable exterior caulk with good movement capability,
tool it neatly, and paint after it reaches paint-ready time (not five minutes after application, no matter how motivated you feel).
The result is less cracking, fewer touch-ups, and a caulk line that doesn’t look like it survived a small earthquake.
The consistent theme across these projects is boring but true: use the right caulk for the job, clean like it matters (because it does), and don’t rush cure times.
Do those three things and you’ll spend more time admiring your clean paint linesand less time Googling “why is my paint peeling off caulk” at midnight.
Conclusion
Painting over 100% silicone caulk is usually a losing battle, but you’re not stuck. The most dependable fix is to remove silicone and replace it with a paintable caulk.
If removal is tricky, a paintable-caulk skim coat or a carefully tested bonding-primer approach can helpjust keep expectations realistic.
When the area is constantly wet, silicone may be the correct choice, and matching color is often smarter than forcing paint to stick.


