Table of Contents >> Show >> Hide
- What Is a Brick House-Inspired Ceiling Medallion?
- Why Make Your Own Ceiling Medallion?
- Best Rooms for a DIY Ceiling Medallion
- Materials and Tools You May Need
- How to Choose the Right Ceiling Medallion Size
- Step-by-Step: How to Make a DIY Ceiling Medallion
- Design Ideas for a Brick House-Style Medallion
- Common Mistakes to Avoid
- How to Make the Finished Project Look Expensive
- Budget Breakdown
- of Real-World Experience: What This Project Teaches You
- Conclusion
Editor’s note: This guide is written for decorative DIY planning. Any work involving a ceiling electrical box, light fixture, or wiring should follow local electrical codes. Turn power off at the breaker before any fixture is removed, and call a licensed electrician if you are not fully confident. A ceiling medallion is decorative; it should never support the weight of a light fixture or ceiling fan.
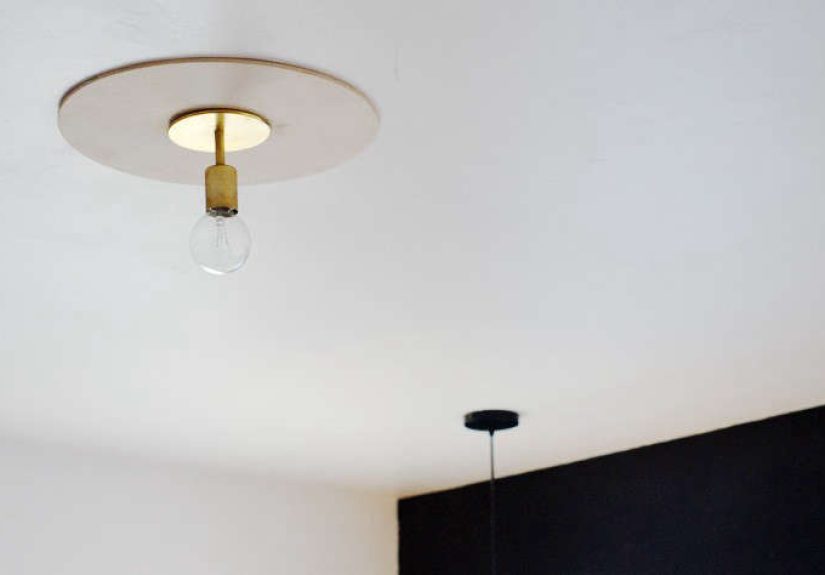
A ceiling medallion is one of those home upgrades that looks fancy enough to make guests whisper, “Did they hire a designer?” while secretly being the kind of project you can complete with a modest budget, a little patience, and the emotional support of coffee. The Brick House version became popular because it skipped the ornate plaster scrolls and went straight for something clean, modern, and clever: a simple plywood disk used to hide an awkward ceiling electrical box and make a light fixture look intentional.
That is the real magic of this project. It is not about turning your ceiling into Versailles. It is about solving a practical problem beautifully. Maybe your ceiling has an off-center box, a messy cutout, old paint scars, or a builder-grade fixture that looks like it was selected during a 4:55 p.m. hardware-store emergency. A DIY ceiling medallion can cover the visual clutter, frame the light, and add architectural character without requiring a full ceiling renovation.
In this guide, we will walk through how to create a Brick House-inspired ceiling medallion using plywood, how to choose the right size, how to finish it so it looks professional, and how to avoid the common mistakes that make DIY projects turn into “well, at least we learned something” stories.
What Is a Brick House-Inspired Ceiling Medallion?
The phrase “ceiling medallion” usually brings to mind decorative plaster circles with flowers, acanthus leaves, and enough curves to make a wedding cake jealous. A Brick House-inspired medallion goes in the opposite direction. It is minimalist, flat, architectural, and often made from plywood or another paintable sheet material. Instead of acting like a period detail, it behaves more like a clean design solution.
The concept is simple: create a round disk, cut a center opening for the fixture canopy, paint or finish it, and mount it around the light so the ceiling looks cleaner and more deliberate. The result works especially well in midcentury homes, modern spaces, rentals with personality, small rooms, and older houses where the ceiling has been patched one too many times.
Why Make Your Own Ceiling Medallion?
Store-bought ceiling medallions are widely available in polyurethane, foam, plaster, wood, and PVC. Many are beautiful, lightweight, and paintable. So why make one yourself? Because DIY gives you control. You can choose the diameter, thickness, finish, edge profile, and level of detail. You can make it modern instead of ornate. You can match the ceiling color for a subtle look or paint it a contrasting shade for drama. You can also save money, especially if you already have scrap plywood from another project.
A DIY ceiling medallion is also a smart fix when your fixture canopy is too small to cover old damage around the junction box. Instead of staring at a rough ring of drywall every time you turn on the light, you can cover it with a clean disk that looks like it was always part of the design. That is the type of home improvement that feels deeply satisfying, like organizing a junk drawer but on the ceiling.
Best Rooms for a DIY Ceiling Medallion
This project can work almost anywhere, but it shines in rooms where the light fixture acts as a focal point. Dining rooms are a natural choice because the pendant or chandelier already draws attention. Bedrooms benefit from a medallion because it adds softness and detail overhead. Entryways, hallways, reading corners, and small living rooms can also use a medallion to make a simple light fixture look more finished.
For kitchens and bathrooms, choose materials and finishes carefully. Moisture, steam, and grease can affect wood over time, so sealed plywood, PVC, or polyurethane may be better options. If the room has a ceiling fan, remember that the fan must be supported by an approved fan-rated electrical box, not by the medallion. The medallion is there to look good, not to do heavy lifting. It is decorative, not a ceiling superhero.
Materials and Tools You May Need
For a Brick House-style plywood medallion, the basic materials are refreshingly simple. You may need a piece of smooth plywood, a pencil, measuring tape, compass or string-and-pencil circle guide, jigsaw, drill, hole saw or spade bit, sandpaper, primer, paint, paintable caulk, construction adhesive or adhesive caulk, finishing nails or screws, wood filler, and safety glasses.
Baltic birch plywood is a popular choice because it has a smooth surface and stable layers, which helps reduce chipping and warping. Standard project plywood can also work if it is flat and sanded well. For a subtle look, choose a thinner panel. For a stronger architectural presence, choose a slightly thicker one, but make sure the fixture canopy and mounting hardware can still sit correctly.
If you do not own a jigsaw or do not feel comfortable cutting a circle, many home centers or local woodshops can help cut material to size. A perfectly round medallion is ideal, but perfection is not the point. Once it is painted and installed overhead, tiny imperfections usually disappear. Ceilings are forgiving from eight feet away. They are basically the Instagram filter of home improvement.
How to Choose the Right Ceiling Medallion Size
Size is where many DIY medallions either win the room or quietly become a ceiling pancake. A medallion should feel proportional to both the room and the light fixture. Too small, and it looks like a coaster. Too large, and it may overwhelm the ceiling.
For small rooms, a medallion between 12 and 18 inches often works well. For medium bedrooms, dining nooks, and living rooms, 18 to 24 inches is a common sweet spot. Larger rooms, tall ceilings, or statement chandeliers can handle 26 inches or more. The medallion should usually be larger than the fixture canopy and visually related to the light fixture’s overall width.
One practical approach is to cut a paper circle or cardboard template and tape it to the ceiling before cutting wood. Step back, look from the doorway, and check the scale. If it looks dramatic in your hands but shy on the ceiling, go bigger. Ceiling details tend to appear smaller once installed.
Step-by-Step: How to Make a DIY Ceiling Medallion
1. Measure the Fixture Canopy
Start by measuring the canopy of your light fixture. The canopy is the cover plate that sits against the ceiling. Your medallion’s center hole should allow the fixture hardware to pass through while still being covered by the canopy. Do not cut the hole larger than the canopy unless your design intentionally exposes the opening, which is rarely the goal.
2. Draw the Circle
Lay the plywood on a stable work surface. Mark the center point. Use a compass, trammel, or a string tied to a pencil to draw a clean circle. For example, if you want a 20-inch medallion, set your radius at 10 inches. Draw slowly and check the line before cutting. This is the ceiling version of “measure twice, cut once,” also known as “measure once, regret loudly.”
3. Cut the Outer Shape
Clamp the plywood securely and use a jigsaw to cut along the circle. Move slowly, keep the saw steady, and avoid forcing the blade. After cutting, sand the edge until it feels smooth. If you want a softer profile, lightly round over the edge with sandpaper. A softened edge helps the medallion look less like raw plywood and more like intentional millwork.
4. Cut the Center Opening
Drill a starter hole at the center, then cut the opening using a hole saw, spade bit, or jigsaw, depending on the size needed. Sand the inside edge smooth. Dry-fit the canopy against the opening before painting. This small check can save you from discovering later that the hole is too small, too large, or positioned like it had a personal disagreement with geometry.
5. Prime and Paint
Prime the plywood before installation. Primer seals the surface, reduces blotchiness, and helps the paint finish look smoother. Paint both the front and the edges. If the back is unfinished wood, sealing it can help reduce moisture movement. For a seamless look, use the same paint as the ceiling. For contrast, try matte black, warm white, soft beige, clay, olive, or a stained wood finish.
6. Test the Placement
Before adhesive enters the chat, hold the medallion in place and confirm that it is centered around the ceiling box and fixture canopy. If the ceiling box is slightly off from the visual center of the room, decide whether you want the medallion centered on the box or aligned with the room’s main sightline. In most cases, it must align with the fixture location, but you can still adjust the visual balance with size and finish.
7. Attach the Medallion
Apply paintable adhesive caulk or construction adhesive to the back, keeping adhesive away from the center opening. Press the medallion flat against the ceiling. For larger or heavier wood medallions, use finishing nails or screws into ceiling joists where appropriate. Fill fastener holes, sand smooth, and touch up with paint. The goal is a clean edge and a medallion that looks built-in rather than stuck on during a late-night burst of ambition.
8. Reinstall or Install the Light Fixture Safely
The light fixture should be mounted to the electrical box or approved support hardware according to the fixture manufacturer’s instructions and local code. The medallion should not carry the fixture’s weight. If wiring is involved, hire a licensed electrician unless you are qualified to do the work safely. This is one of those moments when confidence is good, but professional help is better.
Design Ideas for a Brick House-Style Medallion
The classic minimalist look is a plain round disk painted the same color as the ceiling. It quietly hides flaws and makes a modern pendant look polished. But you can take the idea further without losing the simple charm.
Painted White for a Seamless Look
White is the safest choice when you want the medallion to feel architectural instead of decorative. It blends into the ceiling and lets the light fixture remain the star. This approach works beautifully with brass, black, chrome, or opal-glass lights.
Natural Wood for Warmth
If your room includes wood furniture, leather, woven shades, or midcentury pieces, a clear-coated plywood medallion can add warmth. Sand carefully, use a quality finish, and choose plywood with an attractive face grain. The result can feel custom without becoming fussy.
Dark Contrast for Drama
A black, charcoal, or deep green medallion can frame a light fixture like artwork. This works especially well in dining rooms, moody bedrooms, and spaces with dark trim or bold wallpaper. Keep the shape simple so the color does the talking.
Layered Plywood for Dimension
For more depth, stack two plywood circles in different diameters. The larger disk sits against the ceiling, while the smaller disk sits below it, creating a stepped profile. This gives the medallion more presence and can make a basic pendant look much more expensive.
Common Mistakes to Avoid
The first mistake is choosing a medallion that is too small. A tiny disk around a large pendant can look accidental. Use a paper template and test the size before cutting.
The second mistake is skipping primer. Raw plywood absorbs paint unevenly, especially on the edges. Primer helps create the smooth, finished look that makes the medallion feel professional.
The third mistake is relying on adhesive alone for a larger wood medallion. Lightweight polyurethane may be easier to secure, but wood has more weight. Use appropriate fasteners when needed, and make sure they go into solid structure or proper backing.
The fourth mistake is ignoring the canopy depth. A medallion adds thickness between the fixture and ceiling. Sometimes longer fixture screws or adjusted hardware may be necessary. Do not force parts together. If the canopy does not sit snugly, pause and solve the fit before finishing.
The fifth mistake is treating the medallion like electrical hardware. It is not. It does not replace a junction box, fan-rated box, mounting bracket, or canopy. It is a decorative cover that makes the finished installation look better.
How to Make the Finished Project Look Expensive
The difference between “DIY” and “designer” is often in the last 10 percent. Caulk the outer edge where the medallion meets the ceiling. Fill nail holes neatly. Sand rough spots. Touch up paint after installation. Wipe away dust before the final coat. Use a light fixture that complements the medallion’s shape and scale.
If your ceiling is textured, a medallion can still work, but the edge may need extra caulk to hide gaps. Smooth ceilings create the cleanest result. For older ceilings with cracks or uneven patches, the medallion can hide a surprising amount of chaos, but it cannot fix structural problems. If the ceiling is sagging, damp, cracked, or unstable, repair that first.
Budget Breakdown
A simple DIY plywood ceiling medallion can be very affordable. A small plywood panel may cost far less than a decorative plaster medallion. Primer, paint, caulk, and sandpaper are inexpensive if you already have some supplies on hand. The biggest cost variable is the light fixture. A simple pendant can keep the entire update budget-friendly, while a statement chandelier can turn the project into a full room refresh.
Compared with installing crown molding, replacing a ceiling, or hiring a finish carpenter, a ceiling medallion offers a high visual return for a relatively small investment. It is the home improvement equivalent of putting on a blazer over a plain T-shirt: suddenly, everything looks more intentional.
of Real-World Experience: What This Project Teaches You
A Brick House-inspired ceiling medallion is one of those DIY projects that teaches you more than you expect. At first, it looks almost too simple. Cut a circle, paint it, put it on the ceiling. Easy, right? Then you discover the ceiling is not perfectly flat, the electrical box is not perfectly centered, the fixture canopy is smaller than expected, and your arms are apparently not designed to hold objects above your head for more than seventeen seconds. Welcome to home improvement, where every project includes a surprise guest.
The biggest lesson is that preparation matters more than speed. A paper template can save the project before you even touch plywood. When you tape a circle to the ceiling and step back, you immediately see whether the size feels balanced. This simple test prevents the classic mistake of making a medallion that looks great on the workbench but oddly tiny once it is overhead. Ceilings change scale. What looks large at eye level can look modest once installed.
The second lesson is that finish quality makes the project. Plywood can look modern and beautiful, but only if the edges are sanded, sealed, and painted with care. Rushing the primer step almost always shows. The edges may drink paint like they have been wandering through the desert. A good primer coat, light sanding, and patient painting make the disk look like a design feature rather than leftover craft material.
The third lesson is that simple shapes demand accurate placement. An ornate medallion can distract the eye with detail. A plain circle has nowhere to hide. If it is crooked, you will see it. If it is off-center around the canopy, you will definitely see it. Marking the center, dry-fitting the piece, and checking the view from the doorway all help create that calm, intentional look.
The fourth lesson is safety. Ceiling projects involve ladders, overhead work, tools, and often electrical fixtures. That is a lot of ways for a “quick project” to become a memorable family story for the wrong reasons. Use a stable ladder, wear eye protection, do not work tired, and do not guess with wiring. Calling an electrician for the fixture portion does not make the project less DIY. It makes it smarter.
The final lesson is that small architectural details can change how a room feels. A ceiling medallion adds a sense of completion. It gives the light fixture a visual base. It hides awkward ceiling scars. It makes a plain room feel considered. And because the Brick House version is so minimal, it does not scream for attention. It simply makes the ceiling look like someone cared.
That is the charm of this project. It is practical, stylish, and a little bit sneaky. Guests may not know exactly what changed, but they will sense that the room feels more finished. You, meanwhile, will know the truth: it was plywood, paint, patience, and maybe one dramatic sigh from the ladder.
Conclusion
A DIY ceiling medallion from the Brick House idea proves that great design does not always need to be complicated, expensive, or covered in decorative flourishes. A simple plywood disk can hide an awkward ceiling box, frame a beautiful light fixture, and add architectural polish to a room in a single weekend. The key is thoughtful sizing, clean cutting, careful finishing, and safe installation.
Whether you choose a white painted disk, a natural wood finish, or a bold contrasting color, this project is a smart way to make your ceiling feel intentional. It is especially useful for modern, midcentury, eclectic, and budget-friendly interiors where a traditional ornate medallion might feel too formal. Done well, it looks custom. Done carefully, it lasts. Done safely, it lets you enjoy the glow-up without any shocking plot twists.


