Table of Contents >> Show >> Hide
- What “Under $150” Really Means (So Nobody Throws a Pizza Peel at Me)
- Design Overview: A Compact “Stacked Brick Tunnel” Pizza Oven
- Important Safety Rules Before You Build
- Materials List (Budget Version)
- Sample Budget Breakdown (How to Stay Under $150)
- Step-by-Step: How to Build a DIY Outdoor Pizza Oven for Under $150
- Step 1: Choose the Location
- Step 2: Build the Stand (or Use an Existing Masonry Surface)
- Step 3: Create the Oven Platform
- Step 4: Lay the Firebrick Cooking Floor
- Step 5: Build the Side Walls and Back of the Chamber
- Step 6: Form the Roof (Tunnel Style)
- Step 7: Let It Set and Dry
- Step 8: First Firing and Heat Management
- How Hot Should a DIY Pizza Oven Get?
- Cooking Tips for Better Pizza (Without a Culinary Identity Crisis)
- Common Mistakes to Avoid
- Easy Upgrades Later (When You “Accidentally” Fall in Love With the Project)
- Final Thoughts
- Real-World Experience Notes (Extra 500+ Words)
If your backyard dreams include blistered crust, bubbling cheese, and a crowd of neighbors suddenly “just happening to stop by,” this project is for you. The good news: you can build a functional DIY outdoor pizza oven on a tight budget. The better news: you do not need a masonry degree, a forklift, or a reality TV film crew to pull it off.
This guide shows you how to build a compact, no-frills outdoor pizza oven for under $150 if you use a smart mix of new heat-safe materials and low-cost/reclaimed structural materials. That last part matters. If you buy every single item brand-new, the price can climb fast. But if you already have a patio slab, can reuse concrete blocks, or score solid bricks secondhand, the budget stays realistic.
We’ll focus on a small, beginner-friendly design that can cook personal pizzas beautifully, heat up faster than a giant backyard oven, and still look like a proper “I built that” project.
What “Under $150” Really Means (So Nobody Throws a Pizza Peel at Me)
Let’s be honest: a full permanent brick dome oven with all-new firebrick, insulation, stucco, and chimney parts usually costs more than $150. The budget version works by keeping the oven compact and using the right materials in the right places:
- Hot zone (must be heat-safe): firebrick cooking floor + high-heat mortar/refractory product
- Support/base (can be budget-friendly): concrete blocks, patio pavers, gravel, sand, or an existing masonry surface
- Insulation and shell (optional/basic): simple clay-sand shell, metal cover, or stacked brick surround
The big trick is this: don’t cheap out where the flame and heat live, and do save money on the stand and outer structure.
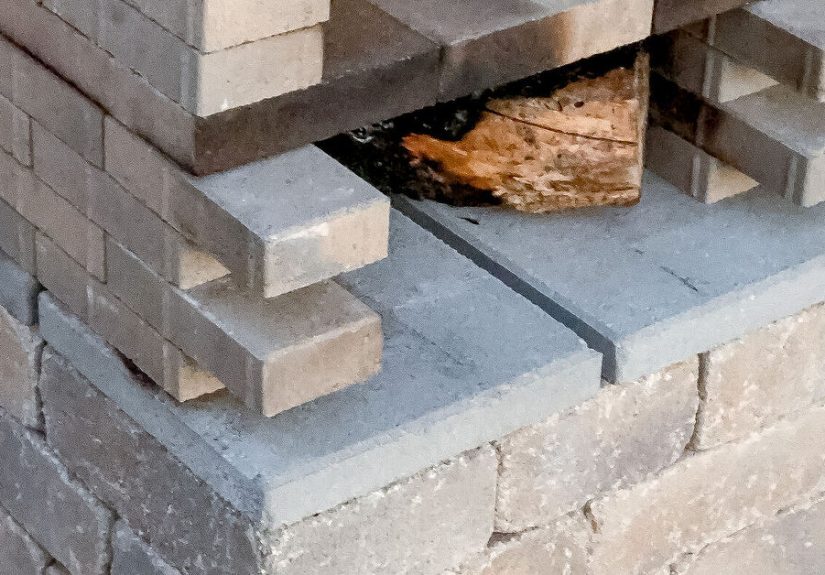
Design Overview: A Compact “Stacked Brick Tunnel” Pizza Oven
This DIY outdoor pizza oven is a compact, stacked design built on a noncombustible base. Think of it as a mini masonry oven: a firebrick floor for cooking, a small brick tunnel chamber for heat retention, and a front opening for managing the fire and pizzas. It’s not a forever heirloom oven, but it is a fantastic first build.
Why This Design Works for Beginners
- Simple geometry (rectangles and stacks, not a perfect dome)
- Smaller footprint means faster heat-up
- Easy to repair or upgrade later
- Budget-friendly if you reuse materials
Important Safety Rules Before You Build
Before the fun part, let’s talk safety. Pizza is joy. Backyard fires are only joy when they stay where they belong.
- Build on a level, noncombustible surface (patio, pavers, concrete slab, compacted gravel with pavers).
- Keep the oven well away from fences, dry plants, low branches, siding, and anything flammable.
- Leave open airflow around the ovendon’t tuck it into a tight corner.
- Keep a fire extinguisher or hose nearby (but do not spray water into a hot oven chamber).
- Check local fire rules, HOA rules, and burn restrictions before your first cook.
Very important: avoid using regular concrete products directly in the hottest part of the oven chamber. Concrete can trap moisture, and rapid high heat can lead to cracking or spalling. Use firebrick and high-heat mortar where the flames and cooking floor are hottest.
Materials List (Budget Version)
This list assumes you’re building a compact oven with a small cooking deck (good for 10–12 inch pizzas) and you already have a safe place to set it, or you’re making a very simple block stand.
Hot-Zone Materials (Don’t Substitute with Random Stuff)
- 1 box firebricks (6 pieces) for the cooking floor (buy a second box if you want a larger floor)
- High-heat mortar or refractory cement (small tub or bag)
- A few extra solid clay bricks (reclaimed is fine for outer/non-direct-flame areas)
Base and Structure Materials
- Concrete blocks (reclaimed or low-cost new) for a stand, or use an existing masonry table/patio surface
- Patio pavers or a concrete cap stone for the platform
- Leveling sand
- Gravel (if making a simple base pad)
- Optional: metal sheet/cover for weather protection
Tools
- Work gloves
- Level
- Tape measure
- Rubber mallet
- Trowel
- Bucket for mixing (if mortar is dry mix)
- Wire brush
- Infrared thermometer (optional but highly recommended)
Sample Budget Breakdown (How to Stay Under $150)
Here’s a realistic budget path for a small DIY outdoor pizza oven. Prices vary by store and location, so treat this as a planning guide, not a courtroom exhibit.
- Firebrick (1 box): about $39.99
- High-heat mortar/refractory: $20–$45 (depending on product size/type)
- Concrete blocks (reclaimed/free to low-cost): $0–$25
- Patio pavers / cap stones (reclaimed or new): $10–$25
- Sand + gravel: $10–$20
- Misc. (gloves, bucket, etc. if needed): $10–$20
Total: roughly $90–$150 if you reuse or source low-cost support materials.
If you want a larger cooking floor, prettier finish, insulation blanket, or a chimney kit, that’s where the budget grows. (And yes, it grows quickly. Ask me how I know. Actually don’t. I’m still emotionally recovering from “optional” upgrades.)
Step-by-Step: How to Build a DIY Outdoor Pizza Oven for Under $150
Step 1: Choose the Location
Pick a spot that is level, open, and noncombustible. Keep enough working space in front of the oven so you can turn pizzas, add wood, and avoid doing the awkward “hot peel tango” with guests standing too close.
If you’re building on grass or dirt, create a simple pad: dig out a shallow area, add compacted gravel, top with leveling sand, and set patio pavers. This gives you a stable working surface and keeps the structure from shifting.
Step 2: Build the Stand (or Use an Existing Masonry Surface)
A basic stand can be made from stacked concrete blocks. Keep it simple and sturdy. Dry-stack the blocks on your level base, checking with a level as you go. You’re aiming for a comfortable working height so you’re not making pizzas while crouched like a goblin.
If you already have a concrete patio, masonry counter, or a safe outdoor surface that can support weight, you can skip the stand and save money.
Step 3: Create the Oven Platform
Place patio pavers or a concrete cap on top of the stand to form the platform. Make sure it is stable and flat. This platform supports the oven structure, but remember: the platform itself should not be your cooking floor.
If you poured a small slab for this project, allow proper curing time before loading it or heating anything near it. Rushing concrete is a classic DIY move that leads to regret, cracks, and dramatic sighing.
Step 4: Lay the Firebrick Cooking Floor
Set the firebricks tightly together on the platform to create the cooking deck. Keep the surface as flat and even as possible so the pizza peel glides without catching on gaps.
For a true budget build, 6 firebricks can make a compact floor. If you want more room, use 2 boxes and enlarge the chamber later. Either way, the firebrick floor is the heart of the oven and where your best crusts are born.
Step 5: Build the Side Walls and Back of the Chamber
Use solid bricks (reclaimed clay brick is fine for the outer shell and cooler zones) to build low side walls and a back wall around the firebrick floor. Keep the chamber compactsmall ovens heat faster and use less wood.
For the inner joints and hot areas, use high-heat mortar/refractory. For outer structural areas that don’t face direct flame, standard masonry methods may be acceptable, but if you’re unsure, keep using high-heat mortar in the chamber zone.
Step 6: Form the Roof (Tunnel Style)
This is the part that turns “pile of bricks” into “pizza oven.” You have a few budget-friendly options:
- Option A (easiest): Span the top with additional firebrick and/or solid brick over a small opening, supported by side walls and mortar.
- Option B (reclaimed-friendly): Build a shallow arch using solid bricks and a temporary support form.
- Option C (hybrid): Use a small steel support plate outside the direct flame path and line the hot interior with firebrick.
Keep the front opening smaller than the chamber width so heat stays inside. You want enough room for a small pizza peel and fire management, but not a garage door.
Step 7: Let It Set and Dry
Once the structure is complete, let the mortar cure based on the product instructions. Then do a series of small break-in fires over several sessions instead of blasting it with a giant bonfire on day one.
Gradual heating helps drive out moisture and reduces the risk of cracking. Translation: don’t introduce your oven to fire like it owes you money.
Step 8: First Firing and Heat Management
Start with kindling and small pieces of dry wood in the center. Use seasoned hardwood for the best heat and cleaner burn. Avoid treated wood, plywood, particleboard, and mystery scrap lumber. If you don’t know what it is, don’t burn it next to your food.
As the fire catches, add small pieces of hardwood to build a lively flame. Once the oven is hot, push the fire and embers to one side (or split to both sides in a wider oven) and keep a small active flame going while you cook.
An infrared thermometer is incredibly helpful here. It takes the guesswork out of “Is this pizza-ready?” and replaces it with science and smug confidence.
How Hot Should a DIY Pizza Oven Get?
Your DIY outdoor pizza oven does not need to hit commercial-oven insanity to make great pizza. For most backyard builds, aim for:
- Stone/floor temperature: roughly 550–700°F for great results
- Higher heat: faster bakes, more leopard spotting, smaller margin for error
- Lower heat: easier control, longer bake, less drama
In plain English: if your first pizza cooks in 90 seconds and the top is gorgeous while the bottom is charcoal, you’re too hot. If it takes 8 minutes and tastes like a regular kitchen-oven pizza, you need more heat or better heat retention.
Cooking Tips for Better Pizza (Without a Culinary Identity Crisis)
Use the Right Wood
Seasoned hardwoods (oak, maple, ash, etc.) burn hotter and cleaner than softwoods. Softwoods and sappy woods can produce smoke flavors you probably didn’t order.
Preheat Patiently
Small ovens heat faster, but they still need time. Let the floor and walls absorb heatdon’t judge readiness by flames alone. Fire is flashy; thermal mass is what cooks pizza well.
Launch Small Pizzas First
A 10-inch pizza is easier to turn and manage in a compact oven than a giant 14-inch pie trying to drag itself into the embers.
Go Light on Toppings
Heavy toppings can make the center soggy before the crust finishes. In a hot oven, less is more. This is pizza, not a lasagna cosplay.
Don’t Add Water to a Hot Oven Floor
Let the oven cool before cleaning. Use a brush or scraper for ash and debris. Sudden water on hot masonry or stone can cause damage.
Common Mistakes to Avoid
- Using the wrong bricks in the hot zone: use firebrick for the cooking floor and flame-facing areas.
- Putting the oven too close to combustibles: heat and sparks travel farther than your optimism.
- Overbuilding the chamber: bigger ovens cost more and take longer to heat.
- Skipping curing/break-in fires: trapped moisture and rapid heat are crack’s best friends.
- Burning scrap wood: treated wood and engineered wood products are a hard no.
- No thermometer: you can cook without one, but you’ll learn faster with one.
Easy Upgrades Later (When You “Accidentally” Fall in Love With the Project)
Once your budget build is working, you can improve it over time:
- Add a simple insulated outer shell for better heat retention
- Increase the firebrick floor size for larger pizzas
- Build a better stand with storage for wood and tools
- Add a removable door for heat control during preheat
- Add a weather cover to extend life
This is one of those DIY projects where version 1 teaches you exactly what version 2 should be. That’s not failurethat’s advanced pizza strategy.
Final Thoughts
A DIY outdoor pizza oven for under $150 is absolutely doable if you build small, prioritize heat-safe materials in the hot zone, and get creative with reclaimed blocks and bricks. The result won’t be a luxury showpiece on day one, but it will turn out smoky, crisp, wildly satisfying pizzasand that’s the whole point.
Build it safely. Break it in gently. Use dry hardwood. Take notes on each cook. And prepare yourself for the moment when someone bites into a pizza from your homemade oven and says, “Wait… you built this?”
Yes. Yes, you did.
Real-World Experience Notes (Extra 500+ Words)
The first time I helped build a budget DIY outdoor pizza oven, we made the classic beginner mistake: we designed it in our heads like a tiny Roman monument and built it like we were paid by the brick. It looked fantastic. It also took forever to heat up. We had unintentionally created a beautiful monument to delayed dinner. That experience taught us the most important lesson for an under-$150 pizza oven: compact wins.
On the second build, we kept the chamber smaller and focused on the cooking floor first. We used a few new firebricks for the base and scrounged the rest of the structure from leftover masonry materials. It wasn’t magazine-pretty, but it heated faster, used less wood, and cooked better pizza. That’s when the project stopped being a “backyard experiment” and became a real outdoor cooking tool.
Another thing we learned the fun way (meaning slightly chaotic): airflow matters more than people think. If the oven opening is too big, heat escapes and the oven feels sluggish. Too small, and you’ll wrestle the fire and struggle to turn pizzas. The sweet spot is an opening that lets you work comfortably while still holding heat. It may take a couple of cook sessions to figure out your oven’s personality. Yes, ovens have personalities. Some are calm and steady. Some are tiny volcanoes with opinions.
Wood choice made a huge difference, too. We tried whatever scraps were around at firstbad idea. Once we switched to seasoned hardwood, the oven heated more predictably and the flavor improved. The smoke smelled cleaner, the fire was easier to manage, and the pizza crust stopped tasting like a campfire with trust issues. If you only change one thing to improve performance, use better wood.
The learning curve with heat management is real, but it’s also part of the charm. The first pizza is often a “sacrifice pie.” It tells you whether your floor is too hot, too cool, or uneven. One session, we got a beautifully blistered top and a black-bottomed crust in under two minutes. The fix was simple: let the floor cool slightly, keep a smaller live flame, and move the pizza more often. Another session, the crust took forever and dried out before the cheese browned. That taught us to give the oven more preheat time and build stronger heat in the walls before launching.
We also started keeping notesnothing fancy, just a small pad near the prep table: wood type, preheat time, floor temp, where the fire sat, and how long each pizza took. It sounds nerdy, but it shortened the learning curve a lot. By the third or fourth cook, we could repeat good results instead of guessing. Backyard pizza night became less “survival challenge” and more “host with confidence.”
One of the best surprises was how social the whole thing became. A budget outdoor pizza oven naturally pulls people in. Someone stretches dough, someone handles toppings, someone watches the fire like they’re in charge of a steam locomotive, and someone always volunteers to “test” the first slice. It turns dinner into an event. Even when a pizza comes out weirdly shaped, a little over-charred, or suspiciously triangular, people love it because it came out of a live-fire oven you built with your own hands.
If you’re on the fence about this project, start small. Don’t wait for a perfect backyard or a giant budget. Build the practical version. Learn how your oven behaves. Make a few imperfect pizzas. Then improve it later. That’s the real magic of DIY: not perfection on day one, but progress you can taste.


