Table of Contents >> Show >> Hide
- Why Pizza Stones Need Special Care
- First, Identify Your Pizza Stone Type (Because Rules Change)
- What You’ll Need
- The Core Method: Clean a Pizza Stone After Each Use
- How to Remove Stains (Without Losing Your Mind)
- How to Remove Burnt-On Gunk: “Bake It Off” Method
- Biggest Mistakes That Shorten a Pizza Stone’s Life
- Special Cases: Glazed Stones, Pizza Steels, and Cast Iron
- How to Store a Pizza Stone So It Doesn’t Crack (or Smell Like the Cabinet)
- Troubleshooting: Quick Fixes for Common Pizza Stone Problems
- Best Practices That Make Your Stone Last for Years
- Conclusion
- Real-Life Experiences: What Actually Helps a Pizza Stone Last (And What Absolutely Doesn’t)
A pizza stone is basically the cast of characters that makes great pizza possible: it’s the heat bank, the moisture thief,
and the reason your crust turns crisp instead of “sadly steamed.” The catch? Pizza stones don’t want to be cleaned like
regular cookware. If you treat one like a nonstick pansoap, soaking, dishwasheryou’ll shorten its life fast (and possibly
season your next pizza with “Eau de Dish Detergent,” which is not a vibe).
The good news: cleaning a pizza stone the right way is simpler than most kitchen chores. The even better news: “perfectly
clean” is not the goal. Longevity is. A well-used stone will get darker over time, and that’s normal. Your mission is to
remove stuck-on food, manage odors, avoid cracking, and keep the stone dry and ready to bake.
Why Pizza Stones Need Special Care
Most traditional pizza stones (cordierite or unglazed ceramic) are porous. That means they absorb moistureand they can also
absorb soap or chemicals. So when you wash a porous stone like it’s a dinner plate, you’re basically pushing cleaners into
the stone’s tiny holes. Then the next time you crank the oven, those trapped residues can come back out… into your food.
Delicious, right?
Porosity is also why soaking is a bad idea. Water can seep in, and if the stone heats up before it’s fully dry, trapped
moisture can expand. At best, you get a weaker stone. At worst, you get cracking from thermal stress.
First, Identify Your Pizza Stone Type (Because Rules Change)
“Pizza stone” can mean a few different surfaces, and cleaning depends on what you own:
- Cordierite or unglazed ceramic stone: No soap, no soaking, no dishwasher. Minimal water only.
- Glazed ceramic stone: Less porous. Some manufacturers allow mild detergent and gentle scrubbing.
- Pizza steel: Not porous. Clean like steel cookware; keep it dry to prevent rust. Some need seasoning.
- Cast iron pizza pan/stone: Clean like cast iron; avoid soaking; dry thoroughly; maintain seasoning.
If you’re unsure, check for a shiny glazed surface. A matte, chalky surface is usually porous. When in doubt, treat it like
an unglazed stone (the stricter rules won’t hurt).
What You’ll Need
- Bench scraper or plastic scraper (a spatula can work)
- Stiff brush (pizza stone brush is ideal)
- Microfiber cloth or paper towels
- Coarse salt (optional, as a gentle abrasive)
- Baking soda (optional, for a spot-cleaning paste)
- Warm water (small amountthink “sip,” not “bath”)
The Core Method: Clean a Pizza Stone After Each Use
This routine keeps your stone in great shape without over-washing it.
Step 1: Let the Stone Cool Completely
This is not negotiable. Rapid temperature changes can crack a stone. The safest move is to let it cool inside the turned-off
oven. If you need it out of the way, move it only once it’s fully cool.
Step 2: Dry Brush Off Loose Bits
Use a stiff brush to sweep away flour, cornmeal, and crumbs. If the surface is otherwise clean, you can stop here. Truly.
Many stones need nothing more after most bakes.
Step 3: Scrape Stuck-On Food (Gently, but Like You Mean It)
Use a bench scraper, plastic scraper, or a dull spatula to lift off burned cheese, baked-on sauce, or stubborn dough.
The goal is to remove raised, crusty bits so they don’t transfer flavors or snag your next pizza.
Pro tip: Hold the scraper at a low angle and push steadily. Think “ice scraper,” not “wood chisel.”
Step 4: Use Minimal Moisture Only If Needed
If scraping leaves a grimy spot (especially from oily toppings), dampen a cloth with warm water and wipe the area. Do not
run the stone under water unless the manufacturer specifically says it’s okayand never soak it.
Step 5: Dry Thoroughly
Air-dry for several hours (or overnight). If you used any water, you can also place the stone in the oven and warm it at a
low temperature (around 200–250°F) for 20–30 minutes to drive off moisture, then let it cool.
How to Remove Stains (Without Losing Your Mind)
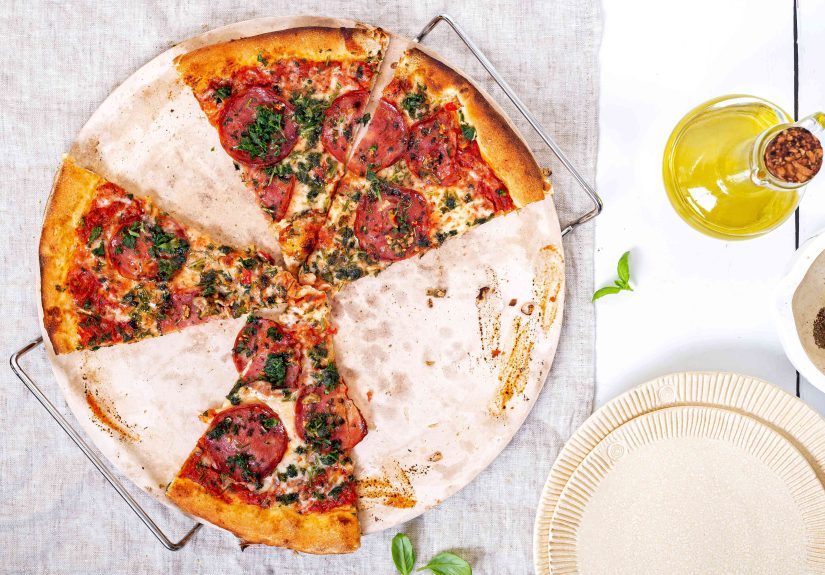
Here’s the truth: stains are normal. A pizza stone is like denimsome discoloration means it’s doing its job. If the stone is
performing well and doesn’t smell weird, you can leave cosmetic stains alone.
But if you want to lighten sticky or tacky residue, use a targeted approach:
Option A: Baking Soda Paste for Stubborn Spots
- Mix baking soda with a small amount of water to form a thick paste.
- Apply only to the problem area (no need to coat the entire stone).
- Let it dry completely on the stone.
- Brush or scrape off the dried paste, then wipe lightly with a barely damp cloth if needed.
- Air-dry thoroughly before storing.
Why this works: baking soda is mildly abrasive and helps lift residue without the perfume-y drama of harsh cleaners.
Option B: Coarse Salt Scrub (Quick and Low-Water)
- Sprinkle coarse salt over the stuck area.
- Use a damp cloth or brush to scrub gently.
- Wipe away salt and residue with a barely damp cloth.
- Dry thoroughly.
Salt is great when you want a little grit without turning the stone into a sponge.
How to Remove Burnt-On Gunk: “Bake It Off” Method
If scraping isn’t enough and the stone has stubborn carbonized bits, you can burn off residue with heat:
- Place the stone in a cold oven.
- Heat to about 500°F and bake for roughly 45–60 minutes.
- Turn off the oven and let the stone cool inside completely.
- Brush and scrape away loosened residue.
This method is especially useful for odor control and dried-on drips. It’s also the least “wet” deep-cleaning option.
One caution: extremely high heat cycles can stress some stones, so keep this as an occasional resetnot an after-every-pizza
habit.
Biggest Mistakes That Shorten a Pizza Stone’s Life
- Using soap on porous stones: Soap can absorb into the stone and affect flavor.
- Soaking or submerging: Trapped water + high heat = cracking risk.
- Dishwasher cleaning: Too much water, too much heat, too much chaos.
- Thermal shock: Putting a hot stone on a cold surface, rinsing it with cool water, or moving it from fridge-cold to blazing hot.
- Oiling a porous stone “to season it”: Many manufacturers warn against adding oil to a stone; it can smoke, go rancid, or create sticky buildup.
Special Cases: Glazed Stones, Pizza Steels, and Cast Iron
Cleaning a Glazed Pizza Stone
A glazed stone has a non-porous coating. That means it’s typically easier to clean, and some brands allow mild dish soap and
gentle scrubbing with non-abrasive tools. Still: avoid harsh abrasives that could scratch the glaze, and don’t shock it with
sudden temperature changes.
Cleaning a Pizza Steel
Pizza steels aren’t porous, so cleaning is more straightforward: scrape off residue, wipe, and dry thoroughly. If your steel
is seasoned (like cast iron), keep water minimal and maintain the seasoning as needed. If it’s bare steel, drying is crucial
to avoid rust.
Cleaning a Cast Iron Pizza Pan/Stone
Treat it like cast iron: scrape, rinse quickly if needed, dry fully, and apply a whisper-thin coat of oil if your routine
calls for it. If it’s pre-seasoned, your goal is to protect that surfacenot strip it.
How to Store a Pizza Stone So It Doesn’t Crack (or Smell Like the Cabinet)
- Store it completely dry. If you used any water, give it extra drying time.
- Store flat, not wedged on edge (unless the manufacturer says it’s fine).
- Avoid cold garages or outdoor storage where temperature swings can stress the stone.
- Consider storing it in the oven (if it fits). That keeps it dry and reduces handling.
Troubleshooting: Quick Fixes for Common Pizza Stone Problems
“My stone is dark and blotchy. Is it dirty?”
Probably not. Darkening is normal “patina” from high heat and baked-on oils. If it’s not sticky and doesn’t smell off,
you’re fine.
“It smells weird (garlic/onion/fishhelp).”
Odors usually come from absorbed oils or food bits. Try the bake-it-off method: high heat for an hour, then cool completely
and brush clean.
“I accidentally used soap. Did I ruin it?”
For porous stones, soap is a common “oops.” Rinse thoroughly with warm water (quicklydon’t soak), wipe, then dry for a long
time. After it’s fully dry, heat the stone in the oven to drive off residue. If you still notice a soapy smell or flavor
after a few uses, replacement may be the simplest solution.
“There’s burned cheese welded to it.”
Scrape what you can once it’s cool, then use a baking soda paste spot treatment. Next time, consider parchment for messy
bakes (check your stone’s heat limits) or use a pizza screen for extra-drippy toppings.
Best Practices That Make Your Stone Last for Years
- Use a pizza peel and a light dusting of flour/cornmeal to reduce sticking (and reduce cleanup).
- Prevent spillovers: Don’t overload sauce and wet toppings; they drip and burn.
- Preheat properly: Put the stone in a cold oven, then preheat. This reduces stress and helps performance.
- Clean lightly, often: Brush and scrape after each use. Deep-clean only when necessary.
- Accept the patina: A stone doesn’t need to look new to bake like a champ.
Conclusion
Cleaning a pizza stone isn’t about getting it spotlessit’s about keeping it functional. Let it cool completely, brush and
scrape after each use, use minimal water when needed, and skip soap for porous stones. For stubborn residue or odors, let heat
do the heavy lifting with an occasional bake-it-off session. Treat your stone with a little patience and a lot less moisture,
and it can reward you with years of crisp, bubbly crusts.
Real-Life Experiences: What Actually Helps a Pizza Stone Last (And What Absolutely Doesn’t)
The first time you own a pizza stone, you tend to treat it like a fancy plate that lives in the oven. Then pizza night
happens. Maybe the cheese overflows. Maybe a calzone decides to leak like it has secrets. Suddenly you’re staring at a black
patch and wondering if you should break out the dish soap, a steel wool pad, and your best “I can fix this” energy.
I’ve learned the hard way that the stone doesn’t want heroicsit wants consistency.
One of the most useful habits is the “two-minute cleanup.” After the stone cools, I do a quick brush-off and a gentle scrape,
even if it looks fine. That tiny routine prevents the slow buildup that eventually turns into a crusty geology project.
When I skip it, the next bake tends to fuse flour and drips into a rough patch that catches dough like Velcro. The difference
between “easy to clean” and “why is this welded on” is usually just one lazy night.
Another big lesson: water is not your enemy, but soaking is. I once tried to “be efficient” by running the stone under water
like a baking sheet. It didn’t crack immediately, which made me feel invincible. Then, on a later pizza night, I preheated
fast and heard a subtle tick that my brain pretended wasn’t real. A hairline crack showed up not long after.
Now I treat water like hot sauce: fine in a few drops, disastrous in a puddle.
If you’re dealing with burnt-on cheese, the baking soda paste trick is genuinely practicalespecially if you let it dry
completely before brushing it off. The first time I tried it, I expected a miracle. What I got was something better: the
burned bits softened enough to scrape away without gouging the stone. It didn’t make the stone look brand new, but it made
it smooth again, which is what matters when you’re sliding dough onto it.
Odors are the sneaky problem no one warns you about. The stone can pick up lingering smells from oily toppingsespecially if
you bake strong flavors repeatedly (garlic, sausage, certain cheeses). When the stone starts smelling like last week’s pizza
order, I use the “bake it off” method: high heat for about an hour, then a full cool-down and a thorough brush. It’s not
instant, but it resets the stone better than any wet cleaning ever did.
The biggest “don’t” experience is soap. Someone once “helpfully” cleaned a porous stone with dish soap, and the next pizza
had a faint, confusing aftertastelike bubbles in the wrong sense. We rinsed, dried, heated, and repeated. It improved, but
it took several cycles before the stone felt normal again. If you’re reading this to avoid that exact situation: congratulations,
you’re already smarter than we were.
Finally, storage matters more than people think. The most reliable place I’ve found is simply inside the oven. It stays dry,
it’s flat, and I’m not constantly moving it around (because stones don’t love being bumped). If you store it in a cabinet,
keep it dry and don’t trap it next to anything that smells strongly. Stones are great at bakingsometimes a little too great
at absorbing “kitchen atmosphere.”
Over time, you’ll notice something funny: the stone looks worse, but it performs better. The dark patina builds, the surface
feels more seasoned (in the natural, not-oiled way), and your crust improves. That’s when you stop trying to make it look new
and start treating it like a tool that’s earned its scarslike a well-loved cast iron pan, but with fewer arguments about
soap on the internet.


