Table of Contents >> Show >> Hide
- Why a No-Doughnut Bun Actually Works
- What You Need
- How to Do a Doughnut Bun Without a Doughnut: 10 Steps
- Step 1: Start with dry hair that has a little texture
- Step 2: Brush out tangles and decide where the bun will sit
- Step 3: Pull your hair into a ponytail
- Step 4: Build volume at the ponytail base
- Step 5: Split the ponytail into two sections
- Step 6: Twist the first section and wrap it around the base
- Step 7: Use the second section to round out the bun
- Step 8: Shape the bun with your hands
- Step 9: Secure flyaways and refine the finish
- Step 10: Set everything in place
- Common Mistakes That Make the Bun Fall Flat
- How to Make It Work for Your Hair Type
- Styling Ideas to Keep It From Looking Too Basic
- Experience Section: What It Is Really Like to Learn This Hairstyle
- Final Thoughts
- SEO Tags
If you have ever stared at a picture-perfect doughnut bun and thought, “Cute, but I do not own that mysterious foam pastry,” good news: you do not need one. A sleek, full bun can absolutely be done without a doughnut tool, a sock, or a drawer full of salon gadgets. In most cases, all you really need is a hair elastic, a few bobby pins, and the willingness to twist your hair like you mean it.
The secret is not the accessory. It is the structure. A great no-doughnut bun starts with the right ponytail placement, a little texture for grip, and a wrapping method that makes your hair create the rounded shape on its own. Once you understand that, the style goes from “red carpet magic” to “I did this before coffee.”
This guide walks you through exactly how to do a doughnut bun without a doughnut in 10 simple steps. You will also get practical tips for fine hair, thick hair, curly hair, and shorter lengths, plus real-life advice on what this hairstyle is actually like when you are doing it on a rushed morning with one eye on the mirror and the other on the clock.
Why a No-Doughnut Bun Actually Works
A classic doughnut bun looks polished because it has a rounded shape, smooth surface, and secure base. Most people assume the foam ring creates all the magic, but that is only part of the story. The real magic comes from how the hair is distributed around the ponytail and pinned into place. When you build volume at the base and wrap the ponytail evenly, your own hair can mimic that same soft, circular silhouette.
That is why this style works especially well when your hair has a bit of grip. Super-fresh, slippery hair can slide around like it has its own weekend plans. Slight texture gives the bun hold, body, and a much better chance of surviving humidity, errands, and dramatic wind.
What You Need
- A brush or wide-tooth comb
- One strong hair elastic
- 6 to 10 bobby pins or U-pins
- Dry shampoo, texture spray, or a little styling powder
- Optional: light hairspray, smoothing serum, edge control, or a teasing comb
You do not need a doughnut ring, sock bun, or extra filler. That is the whole point here: the bun is the star, and your hair is doing the heavy lifting.
How to Do a Doughnut Bun Without a Doughnut: 10 Steps
-
Step 1: Start with dry hair that has a little texture
This style is usually easiest on second-day hair, but clean hair can work too. If your hair is freshly washed and silky, spray a little dry shampoo or texture spray through the roots and mid-lengths. This gives your strands grip, which makes the bun easier to shape and pin. Think of it as giving your hair a slightly less slippery personality.
-
Step 2: Brush out tangles and decide where the bun will sit
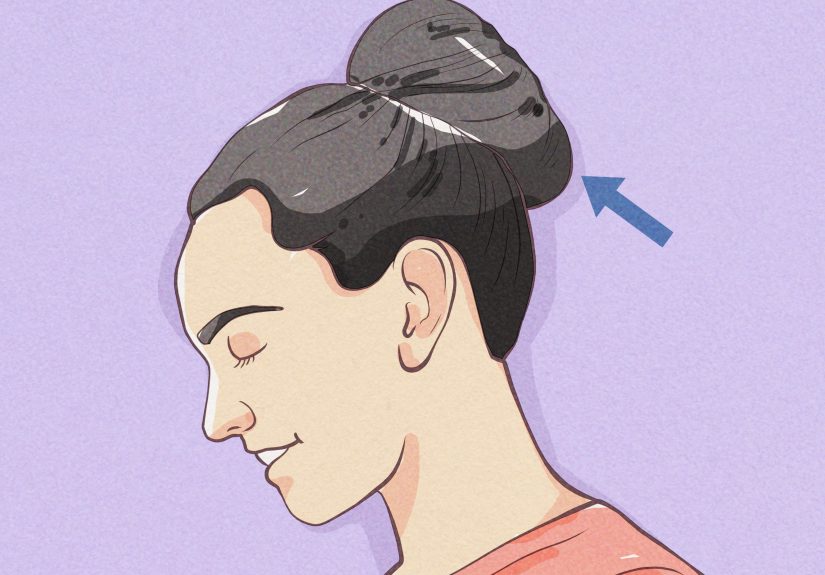
Before you gather your hair, brush through it gently so you are not fighting knots halfway through the style. Then decide on placement. A high doughnut bun looks more ballerina-inspired and polished. A mid-height bun feels modern and wearable. A low version looks softer and a bit more romantic. Choose the spot based on your outfit, face shape, and how dramatic you are feeling that day.
-
Step 3: Pull your hair into a ponytail
Gather all your hair into a ponytail at your chosen height and secure it firmly with an elastic. This ponytail is the anchor for the entire bun, so make sure it feels stable. If you want a sleek doughnut bun, smooth the sides with a brush or a tiny bit of serum before tying it. If you prefer a softer, messier finish, use your fingers instead of a brush and let a few pieces stay loose.
-
Step 4: Build volume at the ponytail base
If your hair is thick, you may be able to skip this step because volume is already on the guest list. If your hair is fine or medium, lightly tease the ponytail near the base with a comb. Do not attack it like it owes you money. A few gentle backcombing strokes are enough. This creates a cushion that helps the bun look fuller and more doughnut-like without an actual doughnut.
-
Step 5: Split the ponytail into two sections
Divide your ponytail into two roughly equal sections. This makes the bun easier to control and helps you distribute the hair more evenly around the base. One section will create the main rounded shape, while the second section helps cover gaps, wrap the base, and fake that neat, donut-style finish.
-
Step 6: Twist the first section and wrap it around the base
Take the first section, twist it loosely, and start wrapping it around the ponytail base. Do not pull too tightly unless you want a tiny, severe bun that says, “I am here to judge your filing system.” Keep the twist soft enough that it looks full. Pin as you go, especially underneath, so the shape holds without collapsing.
-
Step 7: Use the second section to round out the bun
Now take the second section and wrap it around the first in the opposite direction or however it best fills the open spots. This is the step that turns a simple twist bun into a more balanced doughnut bun without a doughnut. Spread the hair slightly with your fingers as you wrap so it fans out instead of forming a skinny rope. Tuck the ends underneath and pin them discreetly.
-
Step 8: Shape the bun with your hands
Once the bun is wrapped, look at it from all angles you can manage without becoming a contortionist. Gently pull at the edges to make the bun rounder and fuller. If one side looks flat, loosen that section slightly and repin it. If the center looks too tight, use your fingers to soften the shape. The goal is a smooth circle, not a cinnamon roll with emotional baggage.
-
Step 9: Secure flyaways and refine the finish
Use bobby pins to catch any loose ends, especially around the base and underside. For a sleek bun, smooth the hairline and add a light mist of hairspray. For a more effortless look, pull out a few face-framing pieces near the temples and nape. This small move makes the style feel softer and more modern, especially if you do not want the full dance-recital effect.
-
Step 10: Set everything in place
Finish with a flexible-hold hairspray or a little more texture spray, depending on the finish you want. If the bun feels loose, add a few more pins before you walk away. Give your head a gentle shake test. If the bun stays put, congratulations: you have just done a doughnut bun without a doughnut, and your wallet can remain blissfully untouched by foam circles.
Common Mistakes That Make the Bun Fall Flat
Using overly clean, slippery hair
Freshly washed hair can look shiny, but it often has the grip of a banana peel on a tile floor. Add texture first if your strands are too silky.
Wrapping too tightly
If you coil the hair too tightly, the bun becomes smaller and flatter. A doughnut bun needs some softness and spread to create that rounded shape.
Skipping the ponytail anchor
Trying to freestyle the whole bun without a firm ponytail often ends in chaos. The ponytail is the structure that keeps everything centered and secure.
Not pinning underneath
The visible part of the bun may look great, but the hidden underside does the real work. Pin there first for the strongest hold.
How to Make It Work for Your Hair Type
Fine hair
Use dry shampoo or texture spray generously and tease the ponytail at the base before wrapping. You can also make the bun appear fuller by fanning out each section as you wrap it.
Thick hair
Sectioning is your best friend. Divide the ponytail into two or even three parts so the bun stays balanced instead of turning into one giant heavy knot. Strong pins matter here.
Curly or coily hair
You do not need to fight your texture to wear this style. A doughnut bun can look gorgeous with natural volume. Use a leave-in product or styling cream for definition, gather your curls gently, and wrap in sections so the bun keeps shape without excess tension.
Short or medium-length hair
If your hair is not long enough for a big, dramatic bun, go for a smaller version at the mid or low back of the head. Pins, a claw clip for backup, and a slightly messier finish can help shorter layers blend in beautifully.
Styling Ideas to Keep It From Looking Too Basic
Once you learn the basic no-doughnut bun, you can change the vibe in seconds. Add a ribbon and you have a soft, romantic look. Wrap a small braid around the base and it feels more dressed up. Keep the top sleek and pull out tendrils for a modern editorial finish. Use a scrunchie around the base for a casual off-duty look. The beauty of this hairstyle is that it can be polished enough for a wedding guest outfit or relaxed enough for grocery shopping in giant sunglasses.
Experience Section: What It Is Really Like to Learn This Hairstyle
The first time most people try to do a doughnut bun without a doughnut, there is a brief period of doubt. You make the ponytail, start wrapping the hair, and then suddenly wonder whether you are creating an elegant bun or a very ambitious knot. That is normal. This hairstyle usually clicks after a couple of attempts because your hands have to learn how tight to twist, how much to spread the hair, and where to pin for balance. It is less about talent and more about repetition.
One of the most common experiences is realizing that the bun looks completely different depending on the state of your hair. On a perfect second-day hair day, the style can come together in five minutes and look like you planned your life beautifully. On a too-clean hair day, it may slip, sag, and test your patience. That does not mean you are doing it wrong. It usually just means your hair needs more grip. Many people find that one little burst of dry shampoo completely changes the result.
Another real-life lesson is that mirror angles are sneaky. From the front, the bun can look chic and balanced, while the back may be giving “survived a wind tunnel.” That is why checking the shape with a second mirror, a phone camera, or pure hopeful instinct is part of the process. Over time, though, you start to know by feel whether the bun is centered and secure. That is when this style becomes wonderfully practical.
There is also a confidence factor that people do not talk about enough. A doughnut bun without a doughnut has that rare quality of making you feel pulled together fast. It works on rushed work mornings, humid afternoons, lazy weekends, and nights when your hair has decided it no longer believes in cooperation. Once you know how to do it, you stop seeing it as a backup style and start seeing it as a reliable favorite.
For many people with fine hair, the experience is especially satisfying because the finished bun can look fuller than expected. For people with thick hair, the win is different: the style gets weight off the neck and creates shape without requiring hot tools. For curly and coily hair, it can be a beautiful low-manipulation option that still looks intentional. In other words, this hairstyle is surprisingly adaptable. It does not belong to one hair type or one aesthetic. It just asks you to work with your hair instead of against it.
And yes, there will probably be a few trial-and-error moments. A pin may poke your scalp. A section may unravel. One side may puff out like it is auditioning for its own solo performance. But that is part of learning any good updo. The payoff is worth it because once you find your version of this bun, it becomes one of those styles you can do almost without thinking. That is the dream, really: a hairstyle that looks polished, feels comfortable, and does not require buying a foam accessory that will disappear into a bathroom drawer forever.
Final Thoughts
Learning how to do a doughnut bun without a doughnut is one of those small beauty skills that pays off again and again. It saves time, works across different occasions, and proves that you do not need fancy tools to create a hairstyle that looks clean, classic, and intentionally styled. Once you get the hang of the ponytail anchor, the soft twist, and the strategic pin placement, you can build a bun that looks full and polished using only your own hair.
So the next time you want a chic updo without hunting down a foam ring, skip the extra accessory and trust the process. Your hair has range. It has ambition. And with the right twist, it can absolutely impersonate a doughnut.


