Table of Contents >> Show >> Hide
- What Is a Dimmer Switch?
- Before You Begin: Safety Comes First
- Choose the Right Dimmer Switch
- Tools and Materials Commonly Used
- How to Install a Dimmer Switch: General Process
- Common Dimmer Switch Problems and Fixes
- Best Places to Use a Dimmer Switch
- When to Call a Licensed Electrician
- Practical Experience: What Installing a Dimmer Switch Teaches You
- Conclusion
Installing a dimmer switch is one of those small home upgrades that feels surprisingly luxurious. One minute your living room has exactly two moods: “interrogation room” and “off.” The next, you can glide from bright task lighting to cozy movie-night glow with a gentle slide, tap, or turn. A dimmer switch can make a dining room feel warmer, a bedroom feel calmer, and a kitchen feel less like a grocery-store freezer aisle at 10 p.m.
That said, a dimmer switch is still an electrical device. It is not a decorative sticker, a throw pillow, or a “let’s just see what happens” weekend experiment. Installing one involves working near household wiring, so safety comes first. This guide explains how to choose the right dimmer, what the installation process generally looks like, what tools are commonly used, and when it is smarter to call a licensed electrician. If you are a minor, a renter without permission, unsure about wiring, or dealing with old, damaged, aluminum, or unfamiliar electrical work, do not attempt the installation yourself. Bring in a qualified adult professional.
What Is a Dimmer Switch?
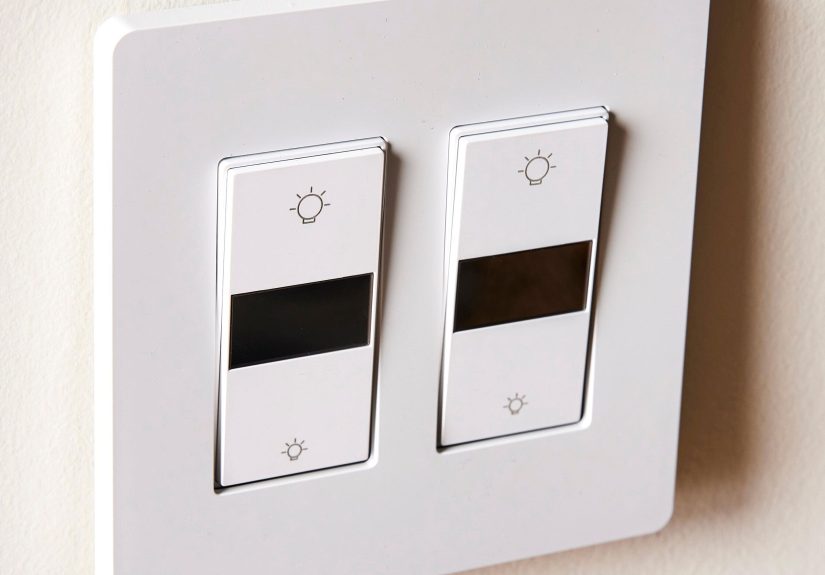
A dimmer switch is a lighting control that adjusts the brightness of a compatible light fixture. Instead of simply flipping lights on or off, a dimmer lets you control the light level. Some dimmers use a slider, some use a rotary knob, some use a rocker with a small adjustment bar, and smart dimmers may work with apps, voice assistants, schedules, or scenes.
The main keyword here is simple: how to install a dimmer switch. But the real success of the project depends on several related details: dimmer compatibility, LED bulbs, single-pole wiring, three-way switch setups, electrical box space, load rating, and local electrical code. Skip those details and your new “ambiance upgrade” may become a flickering, buzzing, mildly haunted wall control. Nobody asked for a disco séance.
Before You Begin: Safety Comes First
Working with electricity can cause shock, fire, or serious injury if done incorrectly. Before any switch replacement, the circuit must be turned off at the electrical panel and verified with a voltage tester. Flipping the wall switch off is not enough. A wall switch only interrupts part of the circuit; the electrical box may still contain energized wires.
If your home has outdated wiring, loose connections, scorch marks, warm switch plates, frequent breaker trips, buzzing sounds, or lights that dim when appliances turn on, stop and call a licensed electrician. Those symptoms can point to a bigger electrical issue, not just a switch that needs a glow-up.
Do Not Install a Standard Dimmer on a Ceiling Fan
A standard light dimmer is made for lighting loads, not fan motors. Installing a regular dimmer on a ceiling fan control can damage equipment and create a hazard. If you want variable fan speed, use a fan-rated speed control that is specifically designed for that purpose. Light dimmers and fan controls may look like cousins, but electrically speaking, they are not interchangeable at the family reunion.
Choose the Right Dimmer Switch
Buying the correct dimmer is half the job. A dimmer must match the type of lighting, the wiring setup, and the electrical load it controls. The package or product page should clearly list compatible bulb types and ratings.
1. Match the Dimmer to the Bulb Type
Not every bulb is dimmable. Not every dimmable bulb works well with every dimmer. LED bulbs are especially picky because they contain electronic circuitry, unlike old incandescent bulbs that behaved more predictably with traditional dimmers.
For LED fixtures or LED bulbs, choose a dimmer labeled for LED use and confirm the bulbs are marked “dimmable.” Using an old incandescent-only dimmer with LED bulbs can cause flickering, buzzing, limited dimming range, delayed startup, or lights that never fully turn off. If your lights act like they are trying to communicate in Morse code, compatibility is often the culprit.
2. Know Whether You Need a Single-Pole or Three-Way Dimmer
A single-pole dimmer switch controls one light or group of lights from one location. This is common in bedrooms, bathrooms, closets, and small rooms.
A three-way dimmer switch is used when one light or group of lights is controlled from two locations, such as both ends of a hallway or two entrances to a dining room. A three-way setup is more complex and requires a dimmer designed for that purpose. Installing a single-pole dimmer where a three-way dimmer is required can make one of the switches stop working correctly.
3. Check the Wattage or Load Rating
Every dimmer has a maximum load rating. Add up the wattage of the bulbs or fixtures the dimmer will control, then choose a dimmer rated for that load. With LED lighting, pay attention to the LED rating, not just the old incandescent rating printed in large friendly numbers on the package. A dimmer may handle hundreds of watts of incandescent lighting but a much smaller LED load.
4. Consider Whether a Neutral Wire Is Required
Some modern dimmers, especially smart dimmers, require a neutral wire in the switch box. Many older homes do not have neutrals in every switch box. Neutral-based dimmers can improve LED performance and reduce issues like flicker or ghosting, but they must be installed only where the wiring supports them. If the dimmer requires a neutral and you do not have one, do not improvise. Choose a compatible no-neutral model or hire an electrician.
Tools and Materials Commonly Used
A typical dimmer switch replacement may involve a compatible dimmer, a matching wall plate, a voltage tester, screwdrivers, wire connectors, electrical tape, a flashlight, and the manufacturer’s instructions. A phone camera is also useful for documenting the existing wiring before anything is disconnected.
Do not skip the instructions that come with the dimmer. Different models have different terminals, wire leads, programming steps, minimum brightness adjustments, and wiring requirements. The tiny folded paper in the box may not be glamorous, but it is the map. Without it, you are basically asking your wall to solve a puzzle under pressure.
How to Install a Dimmer Switch: General Process
The following overview explains the common workflow for replacing a standard wall switch with a compatible dimmer. It is educational, not a substitute for the manufacturer’s wiring diagram, local code, or professional electrical help. If anything does not match the dimmer instructions, stop and consult a licensed electrician.
Step 1: Turn Off Power at the Breaker
Go to the electrical panel and turn off the breaker controlling the light circuit. Do not rely on the wall switch alone. After turning off the breaker, try the light switch and use a voltage tester at the switch box to confirm the power is off. In boxes with multiple switches, test all wires because more than one circuit may be present.
Step 2: Remove the Wall Plate and Existing Switch
Remove the wall plate screws and gently pull the old switch forward from the electrical box. Avoid tugging hard on the wires. If the box looks crowded, damaged, burned, corroded, or unusually confusing, stop. A dimmer is usually bulkier than a basic toggle switch, so cramped boxes may need professional attention.
Step 3: Document the Existing Wiring
Before disconnecting anything, take clear photos of the existing switch and wires. Labeling can also help. The goal is to understand which wires were attached to the old switch, not to guess based on color alone. Wire colors are useful clues, but they are not a universal guarantee, especially in older homes or previously modified wiring.
Step 4: Confirm the Dimmer Type
Compare the existing switch setup with the new dimmer instructions. Is the old switch single-pole or part of a three-way circuit? Does the dimmer require a neutral? Does it support the bulb type? Is the load within the dimmer’s rating? This is the moment to catch a mismatch, before the switch is halfway into the wall and your patience is halfway out the window.
Step 5: Connect According to the Manufacturer’s Diagram
Follow the wiring diagram supplied with the dimmer. Grounding must be handled correctly, and all connections must be secure with no exposed copper outside approved connectors, except where appropriate for grounding. Do not mix up line, load, traveler, ground, or neutral connections. If the diagram does not match what you see in the box, stop and call a pro.
Step 6: Tuck the Wires Carefully and Mount the Dimmer
Once the connections are complete and secure, carefully fold the wires into the electrical box without forcing them. Dimmers often need more room than standard switches because they contain electronics and heat-dissipating parts. Mount the dimmer straight, attach the wall plate, and make sure nothing is pinched.
Step 7: Restore Power and Test
Turn the breaker back on and test the dimmer. The lights should turn on, dim smoothly, and shut off properly. If the lights flicker, buzz, fail to dim low enough, fail to turn off, or behave inconsistently, turn the power off again and review compatibility. Many LED dimmers also have a low-end trim setting that adjusts the minimum brightness level.
Common Dimmer Switch Problems and Fixes
Flickering Lights
Flickering often comes from incompatible LED bulbs, a dimmer not rated for LEDs, loose connections, or an overloaded dimmer. Start by checking whether both the bulbs and dimmer are listed as compatible. If the flicker continues, call an electrician.
Buzzing or Humming
A faint hum can happen with some dimmer and bulb combinations, but loud buzzing is not something to ignore. It may point to incompatible bulbs, an overloaded dimmer, or a transformer issue with low-voltage lighting. The fix may be a different dimmer, different bulbs, or professional troubleshooting.
Lights Do Not Turn Fully Off
Some LED bulbs glow faintly after being switched off, a problem often called ghosting. A neutral-based dimmer or a better-matched dimmer and bulb combination may solve it. Smart dimmers and ultra-low-watt LED loads are common places where this issue appears.
Dimmer Gets Warm
Dimmers can feel slightly warm during normal use because they manage electrical load. However, a switch that feels hot, smells odd, shows discoloration, or trips the breaker should be turned off and inspected by a licensed electrician.
Best Places to Use a Dimmer Switch
Dimmer switches are most useful in rooms where lighting needs change throughout the day. In a living room, bright light helps with cleaning or reading, while lower light makes movies and conversation more comfortable. In a dining room, dimming can make an ordinary Tuesday dinner feel like a restaurant reservation, minus the tiny table and mysterious service fee.
Bedrooms are also ideal for dimmers. Bright light helps with organizing, folding laundry, or finding the one sock that apparently joined a witness protection program. Lower light supports winding down before sleep. Kitchens can benefit too, especially when recessed lights or pendant lights are on separate dimmers so task lighting and mood lighting can be controlled independently.
When to Call a Licensed Electrician
Call a licensed electrician if you see aluminum wiring, cloth-covered wiring, no ground wire, damaged insulation, scorch marks, crowded boxes, confusing multi-switch wiring, or anything that does not match the dimmer instructions. Also call a pro if the switch controls more than lighting, if a breaker trips after installation, or if local code requires professional installation.
Hiring an electrician is not admitting defeat. It is choosing not to turn a simple lighting upgrade into a dramatic household subplot. A professional can confirm compatibility, install the dimmer safely, and spot issues you may not notice.
Practical Experience: What Installing a Dimmer Switch Teaches You
One of the biggest lessons from dimmer switch projects is that “simple” electrical work is only simple when the existing wiring is simple. In a newer home with a clearly labeled single-pole switch, a roomy electrical box, copper wiring, a ground wire, and compatible LED bulbs, the project may be straightforward for a qualified adult following local rules and manufacturer instructions. But older homes often enjoy adding plot twists. A switch box may contain more wires than expected. A light may be controlled from another location. A smart dimmer may need a neutral wire that is not present. Suddenly, the project becomes less “quick upgrade” and more “why are there four cables in this tiny box?”
Another real-world lesson is that bulb compatibility matters more than people expect. Many homeowners replace an old toggle switch with a dimmer and assume the bulbs will cooperate. Then the LEDs flicker at low brightness, buzz softly, or pop on only after the slider passes a certain point. The dimmer is blamed, the bulbs are blamed, the house is blamed, and eventually everyone quietly blames the moon. In reality, dimming is a system: bulb, fixture, dimmer, wiring, and load all have to work together.
A good experience starts before the wall plate comes off. Read the dimmer package. Look for LED compatibility. Check the load rating. Confirm whether the switch is single-pole or three-way. Look up the bulb model if possible. If you are using recessed LED fixtures, check the fixture’s dimming specifications. Spending ten minutes on compatibility can save an hour of troubleshooting and a second trip to the store, where you will absolutely forget the receipt.
Another practical tip is to take photos from more than one angle before disconnecting the old switch. Even professionals document wiring when needed. A photo can help confirm what was connected where, especially in boxes with multiple switches. It also prevents the classic DIY moment where everything is disconnected and the room suddenly becomes a tiny courtroom drama: “Your Honor, I believe this black wire was important.”
Finally, dimmer placement affects how much you enjoy the upgrade. A dimmer in a hallway closet may technically work, but it will not change daily life much. A dimmer in a dining room, bedroom, bathroom vanity area, kitchen island, or living room can make the space feel more flexible immediately. The best dimmer switch installation is not just safe and code-aware; it also solves a real lighting problem. It gives you bright light when you need function and softer light when you want comfort.
In short, the experience of installing a dimmer switch teaches patience, planning, and respect for electricity. The reward is a room that feels more polished with a small adjustment. The risk is assuming every switch box is the same. It is not. Choose the right dimmer, verify compatibility, follow instructions, and bring in a licensed electrician when the wiring tells you, politely or otherwise, that this is no longer a beginner-friendly project.
Conclusion
Learning how to install a dimmer switch starts with understanding the switch, the bulbs, the circuit, and the safety requirements. A dimmer can improve comfort, save energy with compatible lighting, and make a room feel more customizable. But it must be matched to the right bulbs, the right wiring setup, and the right load rating. Turn off power, verify it is off, follow the manufacturer’s diagram, and never guess your way through electrical work.
If the wiring is straightforward and local rules allow homeowner replacement, a dimmer switch can be a satisfying upgrade. If anything looks damaged, outdated, confusing, or incompatible, call a licensed electrician. Great lighting should make your home feel calmer, not make your breaker panel the most exciting part of your weekend.


