Table of Contents >> Show >> Hide
- What a Van Solar Power System Actually Does (and Doesn’t)
- Step 1: Audit Your Power Needs (Before You Buy Anything Shiny)
- Step 2: Choose the Right Components (AKA “The Shopping List With Purpose”)
- Solar panels: rigid vs flexible (and why rigid often wins)
- Mounting hardware: don’t trust “it feels stuck”
- Roof cable entry: the tiny part that prevents big regrets
- Charge controller: MPPT vs PWM (pick the one that makes your roof panels work harder)
- Battery bank: lithium (LiFePO4) vs AGM (and why your back cares)
- Inverter: the AC “bridge” (pure sine wave is your friend)
- Wiring, fuses, disconnects, and distribution: boring parts, exciting safety
- Step 3: Design the System Layout (So Installation Is Mostly “Connect the Dots”)
- Step 4: Install the Solar Power System (A Practical Walkthrough)
- 1) Mount the panels (secure + waterproof)
- 2) Route PV wires through the roof entry
- 3) Install the charge controller
- 4) Build the battery bank and main protection
- 5) Wire the inverter (if using AC power)
- 6) Add DC distribution for your 12V loads
- 7) Install disconnects where they make maintenance easy
- Step 5: Commissioning, Testing, and “Why Is Nothing Working?”
- Step 6: Maintenance and Upgrades (Keep It Happy)
- Safety Notes (Because Fire Is a Terrible Interior Design Choice)
- Example Build: A Balanced “Work + Fridge + Weekend Warrior” System
- Real-World Experience Notes (500-ish Words of “Stuff People Wish They Knew Earlier”)
- 1) Shade is a villain with excellent timing
- 2) Your “daily power use” changes with weather
- 3) Voltage drop is the silent performance thief
- 4) Label everything like you’re handing the van to a stranger (because future-you is)
- 5) Carry spares: fuses, a multimeter, and a few connectors
- 6) Solar isn’t always your only charging methodand that’s okay
- 7) Make it serviceable, not just “Instagram tidy”
- Conclusion
You bought (or built) a van camper for “freedom.” And then you realized freedom is suspiciously dependent on things like charging your phone, running a fridge, and making coffee without sacrificing a goat to the nearest campground outlet. Enter: a solar power systemyour tiny rooftop power plant that quietly turns sunlight into “yes, you can work from the middle of nowhere.”
This guide walks you through installing a reliable van solar setupfrom planning and parts to wiring, fusing, and testingwithout turning your van into a rolling science fair project. We’ll keep it practical, safety-first, and just funny enough to keep you awake while reading about cable lugs.
What a Van Solar Power System Actually Does (and Doesn’t)
A camper van solar power system collects DC electricity from solar panels, uses a charge controller to charge your battery bank safely, and (optionally) uses an inverter to convert DC power to AC so you can run household-style devices. In plain English: panels make power, batteries store it, and the inverter makes it “wall-outlet flavored.”
Solar is amazing at covering daily “background” loadsfridge, lights, fans, devicesand keeping you off-grid longer. Solar is not magic: if you want to run a rooftop air conditioner all day with a modest roof panel setup, you’ll need either a much larger system (and roof) or a new hobby like “lying in the shade and enjoying a book.”
Step 1: Audit Your Power Needs (Before You Buy Anything Shiny)
The #1 reason van solar systems disappoint people is simple: the system was sized based on vibes, not math. Let’s fix that with a quick power audit.
Make a simple daily power list
For each device, estimate watts and hours used per day. Then calculate: Watt-hours (Wh) = Watts × Hours.
- 12V fridge: ~40W average × 24h = 960Wh/day (varies wildly by model and weather)
- LED lights: 10W × 4h = 40Wh/day
- Roof fan: 20W × 8h = 160Wh/day
- Laptop charging: 60W × 2h = 120Wh/day
- Phone + misc: 30Wh/day
Total example: 1,310Wh/day. Now add a buffer (because clouds, shade, and “oops I worked late”): aim for 1,500–1,700Wh/day.
Translate to battery capacity (quick and useful)
Most vans use a 12V battery system. Convert Wh to amp-hours (Ah) with a rough estimate: Ah ≈ Wh ÷ 12. So 1,500Wh/day is about 125Ah/day.
If you want one day of autonomy (no sun, still living your life), you might choose a battery bank that can comfortably provide that. With lithium (LiFePO4), you can use a larger percentage of the rated capacity than with AGM/lead-acid, so lithium often means more usable power in the same space.
Step 2: Choose the Right Components (AKA “The Shopping List With Purpose”)
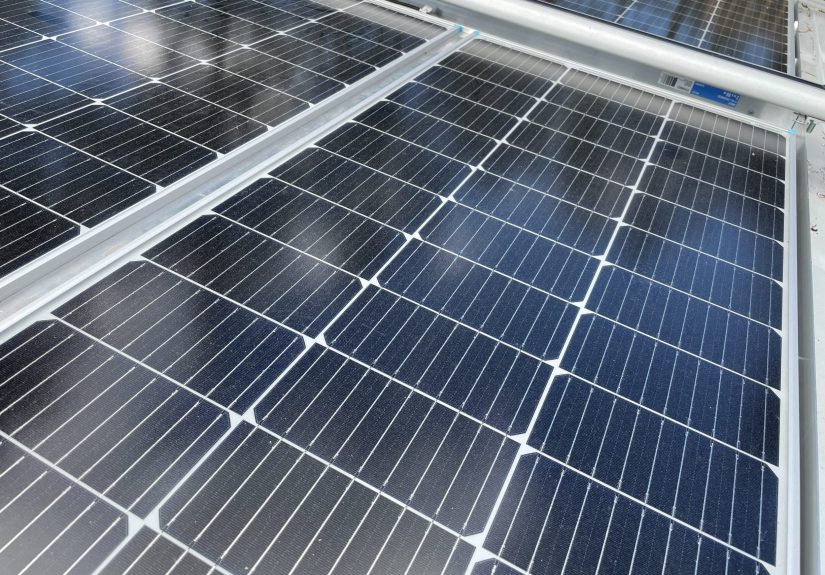
Solar panels: rigid vs flexible (and why rigid often wins)
Rigid monocrystalline panels are the go-to for van roofs because they’re efficient, durable, and typically last longer. Flexible panels can be tempting for low-profile builds, but they often run hotter and may have a shorter lifespan in real-world conditions.
Common van sizes: 200W–600W rooftop solar is typical depending on roof space and power needs. If you’re running a fridge full-time and charging electronics daily, 300W–500W is a sweet spot for many builds.
Mounting hardware: don’t trust “it feels stuck”
You’ve got two jobs: keep panels secure at highway speeds and keep your roof watertight. Use purpose-built mounting feet/rails or a rack system. If you drill, seal like your future self’s sanity depends on itbecause it does.
Roof cable entry: the tiny part that prevents big regrets
You’ll route panel wires through the roof using a weatherproof cable entry gland/plate. The goal is a clean, sealed pass-through with strain relief so vibration doesn’t slowly “saw” your wiring.
Charge controller: MPPT vs PWM (pick the one that makes your roof panels work harder)
The charge controller regulates charging from panels to batteries so you don’t cook your battery bank. For most vans, MPPT (Maximum Power Point Tracking) is worth it because it can harvest more energyespecially in colder conditions, low light, or when you wire panels for higher voltage. PWM can be fine for smaller/simple systems, but MPPT is the common recommendation for modern van builds.
Sizing tip: choose a controller that can handle your array’s max voltage and current. Don’t “barely” meet the specleave headroom for cold-weather voltage increases and future expansion.
Battery bank: lithium (LiFePO4) vs AGM (and why your back cares)
Two popular choices:
- AGM/lead-acid: cheaper upfront, heavier, typically less usable capacity (to preserve battery life).
- LiFePO4 lithium: higher upfront cost, lighter, usually more usable capacity, faster charging, longer cycle life.
Important: many lithium batteries shouldn’t be charged below freezing unless they have a built-in low-temp cutoff or internal heating. If you winter-camp, plan for this (battery location, heating, or battery model choice).
Inverter: the AC “bridge” (pure sine wave is your friend)
If you only run 12V loads (lights, fans, USB, fridge), you may not need an inverteror you may only need a small one. But if you want to power laptops, kitchen gear, or occasional power tools, you’ll likely want a pure sine wave inverter to keep sensitive electronics happy.
Inverter sizing basics: Choose an inverter with a continuous watt rating above your expected load, plus surge capacity if you run motor-driven devices. Also remember: higher inverter wattage means higher battery current drawso wiring and fusing must match.
Wiring, fuses, disconnects, and distribution: boring parts, exciting safety
The “hidden” gear is what makes a system safe and serviceable:
- Proper wire gauge sized for current and distance (to reduce heat and voltage drop)
- Overcurrent protection (fuses or breakers) to protect wiring
- Disconnect switches so you can safely shut off sections of the system
- Busbars for clean positive/negative distribution
- Battery monitor (shunt-based) for accurate state-of-charge tracking
Rule-of-thumb that saves headaches: place overcurrent protection as close as practical to the power source on the positive side, and use a main fuse on the battery bank that protects the big cables feeding your inverter and DC distribution.
Step 3: Design the System Layout (So Installation Is Mostly “Connect the Dots”)
Before you mount anything, sketch your layout. You want short, protected cable runs and components mounted where they can breathe, be inspected, and be serviced.
A common, clean solar flow
- Solar panels on the roof
- PV disconnect/breaker (optional but highly recommended)
- Charge controller (MPPT) mounted near batteries (short battery cables are ideal)
- Fuse/breaker between controller and batteries
- Battery bank (with main fuse near the positive terminal)
- DC distribution/fuse block for 12V circuits (lights, fan, fridge, water pump)
- Inverter (if used) connected to battery through appropriate fuse and disconnect
Series vs parallel panel wiring (the quick intuition)
Series increases voltage (V), keeps current (A) the same. This can reduce losses over longer runs and is often great with MPPT controllers. Parallel increases current, keeps voltage the same. It can be more tolerant of partial shading in some scenarios, but can require thicker wire.
Many van builds use a mixed approach (or choose based on panel model and controller limits). The key is staying within the controller’s maximum input voltage and currentand keeping wiring protected and sized correctly.
Step 4: Install the Solar Power System (A Practical Walkthrough)
1) Mount the panels (secure + waterproof)
- Dry-fit panels to confirm roof clearance (vents, fans, racks, antennae).
- Mark mounting points and cable routing path.
- Use appropriate mounts/rails; torque fasteners to spec if provided.
- Seal any roof penetrations thoroughly with a product suitable for your roof material.
Pro sanity tip: if you drill into your roof, paint/coat exposed metal edges (if applicable) and seal like you’re trying to keep out an angry, persistent raindrop with a law degree.
2) Route PV wires through the roof entry
- Use UV-resistant cable on the roof and protect wires from sharp edges.
- Create drip loops where appropriate (so water doesn’t follow the wire into your van).
- Inside the van, route the cable through conduit or loom in high-wear areas.
3) Install the charge controller
Mount the controller in a cool, dry location with decent ventilation. Controllers can get warm when pushing serious amps.
Common safe connection order: connect the controller to the battery bank first (so it “knows” system voltage), then connect the solar input. Many manufacturers recommend this sequencecheck your manual.
4) Build the battery bank and main protection
Whether you go lithium or AGM, mount batteries securely (no sliding, no tipping). Then add:
- Main battery fuse near the positive terminal
- Battery disconnect switch so you can kill power quickly
- Busbars for tidy distribution (instead of stacking ring terminals like pancakes)
For higher-power systems, you’ll often see robust fuse types (like Class T) used close to the battery on the main positive conductor to protect high-current cables feeding an inverter.
5) Wire the inverter (if using AC power)
- Mount the inverter close to the battery bank to minimize voltage drop.
- Use properly sized cables and a correctly rated fuse/breaker on the positive feed.
- Provide ventilationan inverter stuffed into a sealed box is basically a space heater with ambition.
If you plan to integrate shore power charging or an inverter/charger, the wiring and safety requirements increaseconsider professional guidance for AC systems, transfer switches, and code-compliant installs.
6) Add DC distribution for your 12V loads
Use a fused DC distribution panel or fuse block for circuits like lights, fan, fridge, water pump, and USB outlets. Label circuits. Future-you will thank present-you. (Future-you is also the person who will be troubleshooting in the dark.)
7) Install disconnects where they make maintenance easy
A PV disconnect (between panels and controller) and a battery disconnect (between battery and the rest of the system) make it easier to service, troubleshoot, and safely shut down parts of the system.
Step 5: Commissioning, Testing, and “Why Is Nothing Working?”
Before you celebrate, test like a cautious electriciannot like someone trying to speedrun van life.
Checklist: the smart start
- Polarity check: verify positive and negative on every major cable with a multimeter.
- Battery voltage: confirm the bank voltage matches your system design (12V or 24V).
- Controller settings: set correct battery chemistry (AGM vs LiFePO4) and charging profile per manufacturer guidance.
- PV input: confirm solar voltage at the controller input in sunlight (or at least open-circuit voltage at the roof leads).
- Fuses/breakers: confirm installed values match circuit design and wire gauge.
Common issues (and quick fixes)
- No solar charge: PV disconnect off, reverse polarity, blown PV fuse, or controller not seeing battery voltage first.
- Low harvest: shade (even a small shadow can matter), dirty panels, poor panel angle, or undersized wiring causing voltage drop.
- Inverter shuts off: battery low, undersized cables, weak connections, or inverter overloaded.
- Weird readings: battery monitor shunt wired incorrectly, or loads connected on the wrong side of the shunt.
Step 6: Maintenance and Upgrades (Keep It Happy)
- Clean panels occasionallydust and grime reduce output more than most people expect.
- Check seals around roof entry points and mounts at least a few times per year.
- Tighten connections as appropriate (vibration is real; loose connections create heat).
- Monitor battery health using a shunt monitor and watch for unusual charging behavior.
Popular upgrades later include adding more panel wattage (if roof allows), expanding battery capacity, or adding a DC-DC charger from the alternator so you can charge while driving. Many people end up with a “hybrid charging” setup: solar + alternator + occasional shore power.
Safety Notes (Because Fire Is a Terrible Interior Design Choice)
A van solar install is absolutely DIY-friendly, but it’s still an electrical system in a moving metal box. Respect it.
- Use fuses/breakers sized to protect wiring and placed appropriately.
- Use quality crimping tools for lugs; bad crimps create resistance and heat.
- Protect cables with grommets, loom, and clamps to prevent chafing.
- Follow manufacturer manuals for controller/inverter/battery limits and settings.
- If you’re uncomfortable with AC wiring, transfer switching, or code compliance, hire a qualified pro.
Example Build: A Balanced “Work + Fridge + Weekend Warrior” System
Here’s a realistic example that fits many van campers:
- Solar array: 400W rigid mono panels on roof
- Charge controller: 40A–50A MPPT (matched to array voltage/current)
- Battery bank: 200Ah LiFePO4 (roughly 2,400Wh usable depending on limits)
- Inverter: 1,000W–2,000W pure sine wave (based on appliance needs)
- Distribution: fused DC panel + busbars + battery monitor (shunt)
With decent sun, this kind of setup can comfortably support a 12V fridge, devices, lighting, fans, and moderate inverter use. If you plan heavy AC loads (induction cooking daily, big appliances), scale up battery and solaror adopt a “solar + alternator charging” plan.
Real-World Experience Notes (500-ish Words of “Stuff People Wish They Knew Earlier”)
The internet is full of perfect wiring diagrams and spotless van builds. Reality is more like: it’s 96°F, your sealant is curing faster than your patience, and you just dropped a tiny screw into a parallel universe beneath the flooring. Here are the most useful experience-based lessons van builders consistently share after living with solarnot just installing it.
1) Shade is a villain with excellent timing
Solar panels love direct sun. But shade doesn’t need to be dramatic to be annoyingone roof vent shadow can reduce output in ways that feel personal. When parking, take 30 seconds to look at where shadows will move over the next few hours. You’ll start thinking like a sunflower with a driver’s license.
2) Your “daily power use” changes with weather
Hot day? The fridge works harder, fans run longer, and suddenly your battery drops faster than your phone in a lake. Cold day? Some battery types charge differently, and you may use more lighting and device charging. Build margin into your system. People rarely regret having a little extra battery capacity; they often regret having just barely enough.
3) Voltage drop is the silent performance thief
If your inverter is far from your batteries or your battery cables are undersized, you can get nuisance shutdowns under load. The inverter “thinks” the battery voltage is low (because it’s seeing voltage drop in the cables), even if your battery is fine. Keeping high-current runs short and properly sized is one of the most noticeable real-world improvements you can make.
4) Label everything like you’re handing the van to a stranger (because future-you is)
Every wire you don’t label becomes a mystery novel later. Label both ends of important cables. Keep a simple system diagram in a folder (digital or printed). When something stops working in the middle of nowhere, you’ll want claritynot a scavenger hunt.
5) Carry spares: fuses, a multimeter, and a few connectors
A small kit with spare fuses (the ones you actually used), a cheap multimeter, a few butt connectors, and basic tools can save a trip. Most “solar problems” are really “connection problems” or “a fuse blew because something rubbed through insulation.” If you can test voltage at the battery, controller, and inverter, you can diagnose a lot quickly.
6) Solar isn’t always your only charging methodand that’s okay
Many full-time travelers rely on a mix: solar for daily maintenance, alternator charging while driving, and occasional shore power. This hybrid approach reduces the size (and cost) of the solar array you’d need to cover every possible scenario. Translation: you don’t have to solve every energy problem with roof real estate alone.
7) Make it serviceable, not just “Instagram tidy”
Clean wiring is great, but accessibility matters more. Leave room to tighten a connection. Don’t bury critical fuses behind a cabinet that requires yoga and a blood sacrifice to remove. A system you can service is a system you’ll trust.
Conclusion
Installing a solar power system in a van camper is one of the best upgrades you can make for comfort and independence. The winning formula is simple: size the system for your real daily loads, choose quality components (especially MPPT controller, battery, and inverter), and install with safe wiring practicesproper cable sizing, fusing, disconnects, and clean routing.
Do the planning first, install methodically, and test with a multimeter like you mean it. Your reward is quiet power, fewer campground hookups, and the ability to park somewhere stunning and still have enough juice to make coffee and send that “look where I’m working today” email. (Optional: include a picture of your van. Mandatory: include the coffee.)


