Table of Contents >> Show >> Hide
- What Is a Hanging Canvas Print?
- Why This DIY Project Is So Popular
- Supplies You’ll Need
- Step 1: Choose Your Canvas and Design
- Step 2: Measure and Cut the Wood Slats
- Step 3: Finish the Wood
- Step 4: Attach the Canvas to the Top and Bottom Slats
- Step 5: Add the Hanging Cord
- Step 6: Hang It the Smart Way
- Common Mistakes to Avoid
- Creative Ideas for a Hanging Canvas Print DIY
- How to Style It in Your Home
- Is It Better Than a Traditional Framed Canvas?
- Final Thoughts
- What This Project Is Really Like: Common DIY Experiences and Lessons Learned
If you have ever looked at a simple hanging canvas print and thought, “That’s adorable, but surely I can make that without paying boutique-wall-art prices,” good news: you absolutely can. A DIY hanging canvas print sits in that magical sweet spot between easy craft and legitimate home décor. It looks polished, feels personal, and somehow makes you seem like the kind of person who owns linen napkins on purpose.
Even better, this project is flexible. You can use a favorite family photo, a vintage botanical, a black-and-white quote print, a child’s artwork, or your own painted design. The basic formula stays the same: lightweight canvas, simple wood slats, a hanging cord, and a little patience. The result is casual, stylish, and much less fussy than a traditional heavy frame.
In this guide, I’ll walk you through exactly how to make a hanging canvas print DIY project from start to finish, including the supplies you need, the easiest assembly method, styling ideas, and the little mistakes that can turn a dreamy craft afternoon into a muttered conversation with a glue gun.
What Is a Hanging Canvas Print?
A hanging canvas print is usually a lightweight piece of printed or decorated canvas displayed with wood at the top and bottom instead of a bulky frame. Think of it as the relaxed cousin of a gallery-wrapped canvas. Traditional canvas prints are stretched tightly over a wooden frame for a crisp, permanent look. Hanging canvas prints feel softer, easier to move, and a little more playful.
That laid-back look is exactly why this project works so well for home offices, bedrooms, entryways, kids’ rooms, dorms, and seasonal decorating. You get texture from the canvas, warmth from the wood, and enough personality to make the wall look finished without screaming for attention.
Why This DIY Project Is So Popular
There are a few reasons this style keeps showing up everywhere. First, it is beginner-friendly. You do not need advanced woodworking skills, a fancy studio printer, or a secret membership to the Cool Craft People Club. Second, it is customizable. You can make it rustic, modern, colorful, minimal, farmhouse, vintage, or somewhere in the glorious middle. Third, it is lightweight, which means hanging it is usually much easier than wrestling with a heavy frame that seems determined to lean two degrees to the left forever.
It also solves a common decorating problem: how to make a wall feel personal without making it feel cluttered. A hanging canvas print has visual softness. It adds art without the visual weight of a thick frame, which makes it especially useful in small rooms or layered gallery walls.
Supplies You’ll Need
Main Materials
- A printed canvas sheet, lightweight canvas fabric, or blank artist canvas
- Two wood slats, dowels, or thin trim pieces cut slightly wider than your canvas
- Cotton twine, leather cord, or strong string for hanging
- Staple gun, strong fabric glue, or heavy-duty double-sided mounting tape
- Scissors or craft knife
- Sandpaper
- Ruler or tape measure
- Pencil
Optional but Helpful
- Wood stain, paint, or clear sealer
- Clamps
- Eye screws or small screw hooks
- Level
- Painters tape
- Wall hook, nail, or adhesive hanger rated for your piece
If you are creating the art yourself instead of starting with a printed design, add acrylic paint, watercolor, stamps, fabric, or decoupage supplies to your list. This project is extremely forgiving, which is craft-world code for “you can get creative and still come out looking competent.”
Step 1: Choose Your Canvas and Design
The easiest route is to begin with a lightweight printed canvas sheet or a thin canvas panel. You can print a design at home if your printer supports the material, or you can have a print shop handle the printing and do the hanging portion yourself. That is still a DIY project, and frankly, outsourcing the part your printer hates is not cheating. It is strategy.
If you want a more handmade look, start with blank canvas and create your own artwork. Abstract brushstrokes, simple line art, stenciled text, botanical shapes, maps, and minimalist geometric patterns all work beautifully. The canvas texture automatically makes even simple art feel more intentional.
For beginners, choose a small-to-medium size such as 8 x 10 inches, 11 x 14 inches, or 16 x 20 inches. Larger pieces look dramatic, but smaller pieces are easier to align, glue, hang, and fix if things get slightly wonky.
Step 2: Measure and Cut the Wood Slats
Your top and bottom slats should usually be the same width as the canvas or extend beyond it by about 1/4 to 1/2 inch on each side. If your canvas is 11 inches wide, cutting the slats to about 11.5 or 12 inches creates a nice finished look without drifting into “I accidentally made curtain rods.”
Thin wood trim, square dowels, and flat slats all work. Flat slats look clean and modern. Round dowels feel softer and more casual. For a slightly rustic look, lightly imperfect wood is actually charming. For a modern style, use smoother wood and a darker stain or matte black paint.
Once cut, sand every edge. Do not skip this. Fresh-cut wood has a real talent for snagging canvas, catching twine, and reminding you that “rustic” and “splintery” are not the same thing.
Step 3: Finish the Wood
This is where your project starts looking intentional instead of “temporary until I buy something better.” Stain the wood for warmth, paint it for contrast, or leave it natural and apply a clear protective coat. Light oak tones feel airy and Scandinavian. Walnut looks rich and polished. Black paint makes everything feel more graphic and modern.
Let the finish dry fully before attaching it to the canvas. Half-dry wood stain and fresh canvas are not a charming duo. They are chaos in matching outfits.
Step 4: Attach the Canvas to the Top and Bottom Slats
There are several ways to do this, but the simplest method is to wrap the canvas edge around the slat and secure it on the back. Lay the canvas face down on a clean surface. Place one slat along the top edge, leaving enough canvas to fold over the wood. Pull the canvas snug, then staple or glue it neatly along the back. Repeat with the bottom slat.
The bottom slat matters more than many beginners expect. It gives the canvas weight so it hangs straight instead of curling inward like it is trying to avoid social contact. If your canvas is especially soft or thin, the bottom slat is what transforms it from “fabric with ambitions” into actual wall art.
For very lightweight pieces, strong fabric glue or heavy-duty mounting tape may be enough. For medium pieces, a staple gun usually gives the most secure hold. If you use glue, press firmly and let it cure completely before moving on. Rushing this step is how people end up re-gluing wood while whispering threats into the void.
Step 5: Add the Hanging Cord
You have two easy options. The first is to tie cord directly around the ends of the top slat for a more handmade, casual look. The second is to install small eye screws near each end of the top slat and thread twine or cord through them. That version looks a bit cleaner and usually hangs more evenly.
When you attach the cord, check the balance before calling it done. Hold the piece up by the string and make sure it hangs level. If one side droops, adjust now. This is a great time to be picky, because a tiny tilt on the table becomes a giant personality flaw on the wall.
Step 6: Hang It the Smart Way
Before you hang anything, weigh or at least estimate the finished piece. A small hanging canvas is often light enough for an adhesive canvas hanger or picture strips if you follow the product instructions carefully. A larger piece should go on a proper hook, nail, or screw that matches your wall type and weight.
As a general decorating rule, art looks best when the center lands around eye level. In most homes, that means roughly 57 inches on center, or somewhere in the 56-to-60-inch range depending on the room. If you are hanging the print above furniture, leave enough breathing room so it feels connected but not squashed. Around 8 to 10 inches above a console, sofa, or headboard usually looks balanced.
If you are nervous about placement, use painters tape or paper templates first. It is a low-stress way to see the final position before you commit to holes. It is also far more pleasant than hanging, re-hanging, stepping back, frowning, and repeating that cycle until dinner.
Common Mistakes to Avoid
1. Choosing Canvas That Is Too Flimsy
If the canvas is extremely thin, the finished piece can sag or wrinkle too easily. Lightweight is good. Tissue-paper energy is not.
2. Skipping the Bottom Weight
A top bar alone can work, but the bottom bar usually makes the piece look more polished and hang straighter.
3. Hanging It Too High
This is probably the most common wall-art mistake in America. Your art should not need altitude training.
4. Using the Wrong Hanging Hardware
Adhesive products are convenient, but only when the size, weight, surface, and instructions all line up. Heavy or valuable pieces deserve sturdier hardware.
5. Forgetting About Wall Type
Drywall, plaster, brick, and wallpaper all behave differently. Choose hardware that actually suits the wall instead of hoping optimism will serve as an anchor.
Creative Ideas for a Hanging Canvas Print DIY
This project shines when you make it personal. Here are a few ideas that look great and are easy to pull off:
- Family photo canvas: Use a black-and-white portrait for a timeless look.
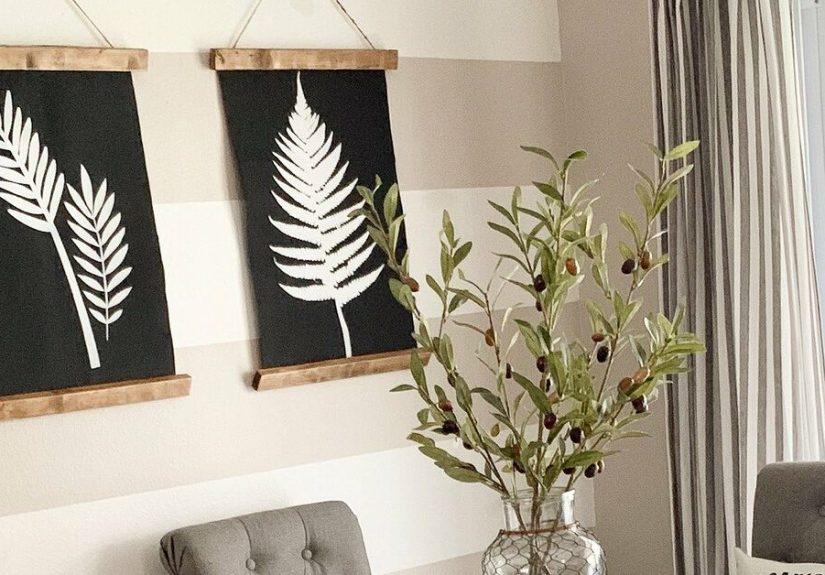
- Botanical art: Vintage plant illustrations look amazing with natural wood slats.
- Minimal quote print: A short phrase in a modern font works well in offices and entryways.
- Kids’ art upgrade: Scan a child’s drawing and print it on canvas for instant charm.
- Seasonal décor: Switch out the canvas with holidays or seasons while reusing the wood hanger style.
- Abstract handmade art: Even simple paint swirls or stamped patterns look elevated on canvas.
You can also make a series instead of one oversized piece. Three small hanging canvas prints in a row can look more curated than one giant print, especially in a hallway or over a desk.
How to Style It in Your Home
In a bedroom, a hanging canvas print looks relaxed and soft, especially with neutral bedding and warm wood tones. In an entryway, it adds personality without taking up depth. In a home office, it helps the space feel less like a spreadsheet cave. In a nursery or kids’ room, it offers all the charm of framed art with less visual heaviness.
If your room already has lots of hard lines, like metal shelving, square furniture, or sharp architecture, a fabric-based hanging canvas adds welcome softness. If your room feels too casual, choose a crisp black-and-white image and dark-stained slats to make it feel more refined.
For gallery walls, mix one or two hanging canvas prints with framed art, photos, or small mirrors. The mix of textures makes the arrangement feel collected over time instead of ordered all at once during a midnight decorating spiral.
Is It Better Than a Traditional Framed Canvas?
Not better. Just different. A traditional framed or gallery-wrapped canvas is more structured and permanent. A hanging canvas print is lighter, easier to update, and often more budget-friendly. If you want formal living room art, go traditional. If you want charm, flexibility, and a project you can actually finish in an afternoon, the DIY hanging version is a winner.
Final Thoughts
If you want a project that looks high-end without requiring advanced skills, a hanging canvas print DIY is a smart choice. It is simple enough for beginners, customizable enough for creative people, and stylish enough to hold its own on a very judgmental wall.
The real secret is not perfection. It is proportion, decent materials, and a little restraint. Choose a design you genuinely like, keep the wood finish consistent with your room, hang it at the right height, and your finished piece will look thoughtful instead of homemade in the macaroni-art sense.
And that is really the charm of this project. You are not just filling blank wall space. You are making something personal, useful, and good-looking with your own hands. Which is deeply satisfying, even if you do end up with a little stain on your sleeve and an irrational dislike of crooked twine by the end.
What This Project Is Really Like: Common DIY Experiences and Lessons Learned
One of the best things about making a hanging canvas print DIY project is how quickly it changes your relationship with a blank wall. Before you start, the wall feels like a decorating problem. After you finish, it feels like an opportunity. That shift sounds dramatic, but it is true. Even a small handmade canvas can make a room feel more lived-in, more intentional, and more yours.
Most people begin this project thinking the hardest part will be the crafting. Surprisingly, it is often the choosing. Picking the image, deciding on the size, and figuring out whether you want natural wood or painted slats can take longer than the actual assembly. That is not wasted time. The more carefully you match the print to the room, the better the finished result tends to feel. A soft landscape works differently from a bold quote. A child’s drawing creates a different mood than a vintage map. The project teaches you very quickly that wall art is not just decoration. It changes the tone of the entire space.
Another common experience is realizing that small measurements matter more than expected. A slat cut slightly too short, a cord tied a little off-center, or a canvas edge folded unevenly can be enough to make the whole piece look off. The good news is that this project is forgiving. You usually do not need to start over. You just need to slow down, adjust, and stop pretending that eyeballing everything is a personality trait instead of a crafting hazard.
People also tend to learn that texture does a lot of heavy lifting. Canvas naturally looks richer than standard paper, even when the design is simple. Wood brings warmth. Twine adds softness. When those materials come together, the final piece feels layered in a way flat poster art often does not. That is why even minimalist designs can feel special in this format. The materials are doing part of the styling for you.
There is also a quiet confidence boost that comes from hanging something you made yourself. It is one thing to buy wall art. It is another thing to point at a piece and say, “I made that,” especially when someone assumes it came from a trendy home shop with very confident pricing. DIY projects do not always deliver that feeling. Some deliver only glue strings and regret. This one usually rewards the effort.
Finally, this project teaches an excellent decorating lesson: walls do not need perfection, they need personality. A handmade hanging canvas print can be clean and polished, but it still feels human. That is part of its appeal. It has a softness and a story to it. So if your first version is not flawless, that is fine. Straighten the cord, smooth the edge, hang it well, and enjoy the fact that your home now has something custom in it. Not custom in the luxury-catalog sense. Custom in the better sense. It looks like you.


