Table of Contents >> Show >> Hide
- What You Need Before You Start
- How to Make a Mosaic Table Top in 15 Steps
- Step 1: Pick the Right Table
- Step 2: Decide Whether the Table Is for Indoors or Outdoors
- Step 3: Choose Your Mosaic Material
- Step 4: Sketch the Design
- Step 5: Dry-Lay the Tiles
- Step 6: Prep the Table Surface
- Step 7: Cut Tiles Safely
- Step 8: Apply Adhesive in Small Sections
- Step 9: Set the Main Tiles First
- Step 10: Fill in the Edges and Gaps
- Step 11: Let the Adhesive Cure Fully
- Step 12: Choose the Right Grout
- Step 13: Grout the Surface
- Step 14: Clean Off the Haze
- Step 15: Seal and Protect the Finished Table
- Tips for a Better-Looking Mosaic Table Top
- Common Mistakes to Avoid
- Extra Experience and Real-World Advice for Making a Mosaic Table Top
- Conclusion
- SEO Tags
If your old side table looks like it has emotionally checked out, a mosaic table top is a brilliant comeback story. This project lets you turn a plain table into something colorful, textured, and genuinely custom. Better yet, it is one of those rare DIY jobs that can look intentionally artsy even when one tile is a tiny bit crooked. In fact, a little imperfection is part of the charm.
Learning how to make a mosaic table top is not difficult, but it does reward patience. The real secret is not some mystical design gene passed down by crafty grandparents. It is choosing a solid base, planning your layout before glue gets involved, using the right adhesive for your surface, and not panicking when grout makes everything look terrible for twenty minutes. That ugly stage is normal. Grout is dramatic before it becomes beautiful.
In this guide, you will get a practical, step-by-step method for making a mosaic table top that holds up to daily use and actually looks polished. You will also learn how to avoid the classic mistakes, choose materials that make sense, and finish the project so it is easy to clean and enjoy.
What You Need Before You Start
Gather your materials first so you are not sprinting around the house with sticky fingers and a half-finished pattern. Most DIY mosaic table projects use a sturdy table, mosaic tiles or broken china, adhesive, grout, a sponge, gloves, safety glasses, a tile nipper or cutter, sandpaper, and sealer. If your table will live outdoors, use materials rated for exterior conditions and a base that can handle moisture, temperature swings, and real life.
How to Make a Mosaic Table Top in 15 Steps
-
Step 1: Pick the Right Table
Start with a table that is sturdy, level, and worth saving. A wobbly thrift-store find can work beautifully, but only if the frame is sound. Side tables, coffee tables, patio tables, and plant stands are all good candidates. The top should be rigid enough to support tile and grout without flexing. If it bends, the finished mosaic may crack later, and nobody wants their masterpiece splitting because the table top behaves like a trampoline.
-
Step 2: Decide Whether the Table Is for Indoors or Outdoors
This choice affects almost every material decision. For an indoor accent table, you can usually use a sealed wood top and a tile adhesive suited to small-format tile. For an outdoor mosaic table top, use an exterior-rated substrate and thinset mortar instead of basic craft glue. Weather is not gentle, and outdoor mosaics need materials that can tolerate moisture and movement.
-
Step 3: Choose Your Mosaic Material
Ceramic mosaic sheets are beginner-friendly because the pieces are already spaced. Broken china gives a romantic, collected look. Glass tile creates a brighter, more reflective surface. Stone has earthy appeal but can be heavier and more porous. If you want a clean geometric design, use uniform tiles. If you want a more artistic, one-of-a-kind table, mix shapes, colors, and even a few odd scraps. Mosaic projects are excellent at making leftovers look intentional.
-
Step 4: Sketch the Design
Before you touch adhesive, make a simple plan. You do not need museum-level drawings. A quick pencil sketch is enough. Decide whether you want a border, a center medallion, a floral pattern, a checkerboard, or a loose abstract layout. This step saves time because it helps you balance colors and keep the design from drifting into “random tile incident” territory.
-
Step 5: Dry-Lay the Tiles
Set the tiles on the table without glue. This is the moment to test spacing, check the pattern, and see how the edges will look. Keep grout lines reasonably consistent unless you are going for a broken-china style with more organic spacing. Dry-laying also shows you where cuts are needed. Think of it as rehearsal before the messy performance begins.
-
Step 6: Prep the Table Surface
Clean the top thoroughly so dust, grease, and mystery residue do not interfere with adhesion. If the surface is glossy, lightly sand it to help the adhesive grip. Wipe it clean and let it dry. For wood tops, seal or prime as needed based on the adhesive and tile you are using. If the table surface is uneven, damaged, or flimsy, add a proper backer before tiling rather than hoping grout will fix your life choices.
-
Step 7: Cut Tiles Safely
Put on safety glasses and gloves before cutting or breaking tile. Tile nippers work well for small adjustments and irregular shapes. If you are using broken china, wrap the dish in a towel before tapping it to help contain shards. Cut only what you need for edges, corners, and detail work. Overcutting leads to a sad little pile of “maybe useful later” pieces that rarely become useful later.
-
Step 8: Apply Adhesive in Small Sections
Spread adhesive over a manageable area rather than coating the whole table at once. This gives you time to place tiles before the adhesive skins over. Use the adhesive recommended for your tile and substrate. For many indoor small-format tile projects, a suitable tile adhesive can work. For exterior conditions or wet exposure, thinset mortar is usually the smarter choice. Apply an even layer and avoid using more than needed, since squeeze-out between tiles creates cleanup headaches.
-
Step 9: Set the Main Tiles First
Begin with your most important design area, usually the center or focal pattern. Press each piece gently into the adhesive and check that the surface stays fairly even. If you are using mesh-mounted mosaics, align the sheets carefully so the seams do not shout for attention. A mosaic table top looks best when the pattern feels deliberate, not like it was assembled during a power outage.
-
Step 10: Fill in the Edges and Gaps
Once the main pattern is in place, add smaller pieces around the edges and in open areas. This is where the design starts to feel finished. Keep checking the visual balance. If one side is packed with dark colors and the other looks washed out, redistribute pieces before the adhesive cures. Little changes here make a big difference in the final look.
-
Step 11: Let the Adhesive Cure Fully
Back away from the table. Seriously. Let the adhesive cure according to the manufacturer’s instructions before grouting. Rushing this step can shift the tiles and weaken the bond. A mosaic table top is a patience project. The tiles may look ready, but they are not asking for your opinion yet. They are asking for time.
-
Step 12: Choose the Right Grout
Grout color changes the personality of the whole table. A matching grout creates a softer, more blended look. A contrasting grout makes each tile stand out. For wider joints, sanded grout is often a solid choice. For very narrow joints or delicate, scratch-prone surfaces, another grout type may be better. If durability and stain resistance are top priorities, some mosaic installers prefer epoxy grout. Always match the grout to the tile material and gap size instead of picking blindly based on a cute label.
-
Step 13: Grout the Surface
Mix the grout according to the instructions, or use a pre-mixed product if the project is small. Apply it with a grout float, rubber spatula, or gloved hand, pushing it firmly into every gap. This part is messy and weirdly satisfying. The entire design will disappear under a muddy layer, and you will briefly wonder whether you have ruined everything. You have not. That is just grout being theatrical.
-
Step 14: Clean Off the Haze
After the grout begins to set, wipe the surface with a damp sponge. Rinse the sponge frequently and avoid flooding the joints with too much water. The goal is to remove excess grout from the tile faces while leaving the joints full and smooth. After the surface dries, buff off the remaining haze with a soft cloth. This is the stage where the mosaic finally reveals itself and starts fishing for compliments.
-
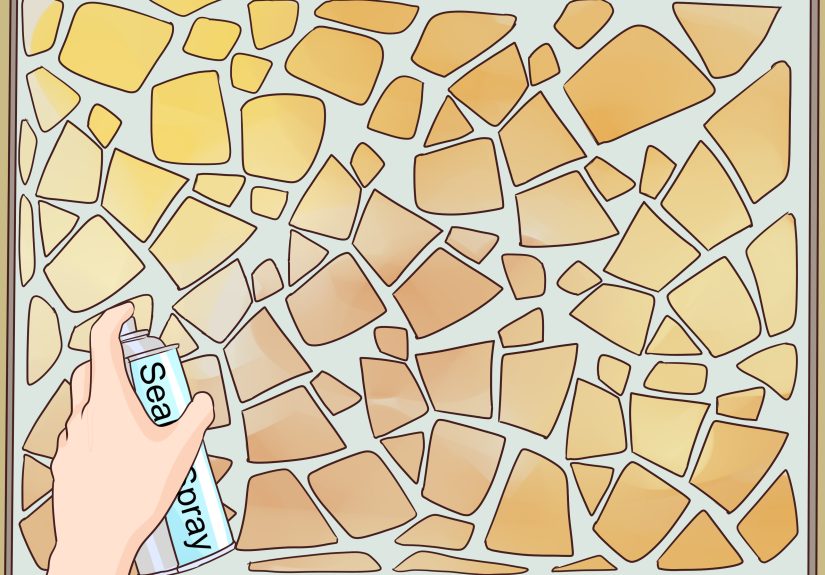
Step 15: Seal and Protect the Finished Table
Once the grout has cured as directed, apply a suitable sealer if your materials call for it. Sealing helps protect grout from stains and makes future cleaning easier. If your tile is porous, sealing can be especially useful. Let the table finish curing before heavy use, and then enjoy your new mosaic creation like the civilized DIY genius you are.
Tips for a Better-Looking Mosaic Table Top
Keep the surface as even as possible
A little texture is normal, but wildly uneven tiles make the table harder to clean and less practical for cups, books, or actual table-like activities.
Use a border when the design feels chaotic
A simple border in one color can make an artsy pattern look polished and intentional. Borders are basically visual punctuation.
Think about grout color early
Do not wait until the end to imagine the grout. It is not background noise. It is part of the design, and on small-format mosaics, it can dramatically change the overall look.
Respect cure times
Adhesive and grout are not suggestions. They need time. Fast projects are fun, but cracked grout is not a personality trait you want in your furniture.
Common Mistakes to Avoid
The biggest mistake in a DIY mosaic table project is using the wrong base. A weak, flexible, or moisture-sensitive surface can cause failure even if the tile work looks perfect on day one. Another common issue is skipping the dry layout. That usually leads to awkward edge cuts and a design that somehow gets more confusing the longer you stare at it. Too much adhesive is another classic problem. It squeezes into grout lines and turns a simple cleanup into a personal vendetta.
Grouting too soon is also risky. If the tile has not bonded properly, pieces can shift while you work. Finally, many beginners clean grout with too much water, which can weaken joints, lighten color, or create a washed-out finish. Gentle, patient cleanup wins every time.
Extra Experience and Real-World Advice for Making a Mosaic Table Top
The part most tutorials do not emphasize enough is how much the table changes as you work on it. On day one, it looks like craft supplies on a piece of furniture. On day two, after cutting and arranging the pieces, it starts to look intentional. After grout, it suddenly feels like a real object you might brag about to visitors while pretending you were totally calm during the process. In reality, most people have at least one moment where they wonder whether they should have just bought a new table and gone for a walk instead.
One of the best practical lessons from making a mosaic table top is that slower design choices usually lead to better results. When people rush, they tend to use every color they own, every shape they find, and every scrap they think they might as well include. The outcome can be fun, but not always beautiful. A tighter color palette often looks more sophisticated. For example, a blue-and-white broken-china mosaic can feel classic and fresh, while warm terracotta, cream, and olive tones can create a Mediterranean look that feels cozy outdoors. Even a black, white, and gray palette can look striking on a modern patio table.
Another real-world tip is to think about the table’s job, not just its looks. A mosaic coffee table should still function as a coffee table. If the surface is too bumpy, drinks wobble, books rock, and anyone trying to write a note ends up performing accidental calligraphy. A plant stand or decorative side table can handle more texture because it is not being asked to host tacos and iced tea every weekend. Matching the design to the table’s use makes the final project much more satisfying.
It also helps to embrace the fact that your first mosaic may not be perfect. Maybe one grout line will be slightly wider. Maybe an edge piece will be a little strange. Maybe you will notice exactly three tiles forever because you know where they misbehaved. Most guests will never see those flaws. What they will see is a custom mosaic table top with color, texture, and character. Handmade work has energy that factory furniture rarely does.
If you catch the mosaic bug after this project, that is normal too. Many people start with one table and then begin eyeing trays, plant pots, mirrors, stepping stones, and random thrift-store furniture like they are all quietly begging for tile. Mosaic work has that effect. It makes you believe that broken pieces still have a purpose, which is either a lovely design philosophy or a very good excuse to keep a box of leftovers in the garage forever.
In the end, the experience of making a mosaic table top is part craftsmanship, part design, and part patience training. You learn to prep well, plan ahead, trust the process, and let messy stages become finished beauty. That is a pretty good return from one old table and a pile of tile.
Conclusion
Making a mosaic table top is one of the most satisfying DIY decor projects because it blends creativity with practical results. With a solid table, the right adhesive, a thoughtful layout, careful grouting, and proper sealing, you can build a piece that looks custom and lasts for years. Whether you choose glossy glass mosaic tile, vintage china, or simple ceramic squares, the finished table becomes more than furniture. It becomes a conversation starter, a design feature, and proof that a weekend project can have real personality.


