Table of Contents >> Show >> Hide
- Why Slime Stops Stretching
- How to Make Slime Stretchy Again: 8 Steps
- Step 1: Figure Out What Kind of “Bad” You Are Dealing With
- Step 2: Warm the Slime With Your Hands First
- Step 3: Knead It Patiently
- Step 4: Add Warm Water a Few Drops at a Time
- Step 5: Mix In a Little Clear Glue or White Glue
- Step 6: Use Lotion or Glycerin Sparingly
- Step 7: Let It Rest, Then Test Again
- Step 8: Store It Properly So You Do Not Have to Repeat the Rescue Tomorrow
- Quick Fix Guide by Symptom
- Mistakes That Make Slime Worse
- When Slime Cannot Really Be Saved
- Extra Experience: What It Is Actually Like to Rescue a Bad Batch of Slime
- Final Thoughts
- SEO Tags
Note: Body-only HTML for web publishing. Source links and editor artifacts have been intentionally omitted.
Slime is a little dramatic. One day it is glossy, stretchy, and oddly satisfying. The next day it feels like a rubbery wad that snaps faster than your patience. If your slime has turned stiff, tough, or weirdly resistant to fun, do not toss it just yet. In many cases, you can rescue it.
The trick is understanding why slime loses stretch in the first place. Sometimes it has too much activator. Sometimes it has dried out. Sometimes it just needs a little warmth, a little moisture, and a little hands-on attention. Think of it like a tiny spa day for a grumpy blob.
This guide walks you through how to make slime stretchy again in eight practical steps, plus common mistakes to avoid, signs your slime is beyond saving, and real-life experiences that show what actually works when you are standing at the kitchen counter with a sad lump of slime and a very hopeful expression.
Why Slime Stops Stretching
Before you fix slime, it helps to know what broke the vibe. Most homemade slime becomes stretchy because glue contains long polymer chains, and the activator helps connect those chains into a flexible network. That balance is important. When the balance gets off, the texture changes.
1. It has too much activator
This is the most common reason slime turns stiff. If you added too much contact solution, borax mixture, or slime activator, the slime may become overactivated. That means the structure is tighter and firmer, so instead of stretching smoothly, it pulls hard and tears.
2. It dried out
Slime left out on a table, stored in a loose container, or played with for too long can lose moisture. Once that happens, it often feels hard around the edges and less elastic overall. Dry slime is basically the clingy houseguest version of slime: still here, but no longer pleasant.
3. It is cold
Temperature matters more than people think. Cool slime tends to feel firmer and less cooperative. Warm slime usually stretches better. That does not mean you should cook it like leftovers. It just means gentle warmth can help.
4. Add-ins changed the texture
Foam beads, clay, glitter, fake snow, and other mix-ins can make slime feel thicker, denser, or drier over time. Butter slime, cloud slime, and crunchy slime all behave differently from a simple clear or white glue slime, so the fix may need to be slightly adjusted.
How to Make Slime Stretchy Again: 8 Steps
If your slime feels stiff, do these steps in order. The biggest mistake people make is panicking and dumping in too many ingredients too fast. Slime responds best to small changes.
Step 1: Figure Out What Kind of “Bad” You Are Dealing With
Pick up the slime and test it for ten to fifteen seconds. Ask these quick questions:
- Does it snap right away when pulled? It is probably overactivated.
- Does it feel rough, dry, or crusty? It probably needs moisture.
- Does it feel cold and tight? It may only need warming and kneading.
- Does it contain lots of add-ins? It may need a more gentle fix.
This matters because not every stiff slime needs the same treatment. Adding lotion to a slime that just needs kneading can make it greasy. Adding more activator to already firm slime is the fastest route to making a tiny bouncy tire.
Step 2: Warm the Slime With Your Hands First
Before adding anything, hold the slime in your hands and slowly stretch, fold, and press it for one to two minutes. Hand warmth can soften the structure enough to improve stretch without changing the recipe at all.
This is the easiest fix and the most overlooked one. Many slimes seem “ruined” when they are simply cold or slightly tense. Yes, slime can apparently have a mood.
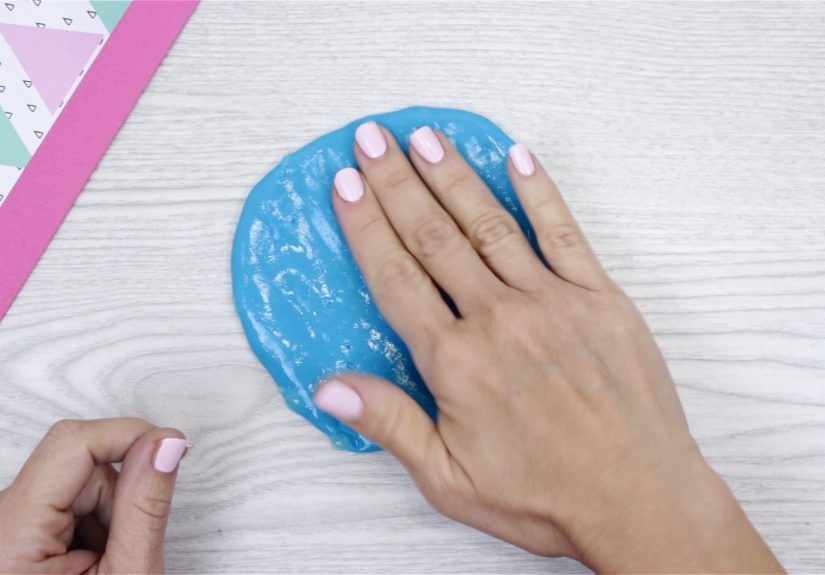
Step 3: Knead It Patiently
Now knead the slime for several minutes. Fold it over itself, press it, pull it gently, and repeat. Do not yank it like you are starting a lawn mower. Slow, repeated kneading helps distribute moisture and loosen the texture.
If the slime starts to improve after a few minutes, keep going. Many slimes need time before they become soft and stretchy again. This is especially true for basic glue slime made with contact solution.
Step 4: Add Warm Water a Few Drops at a Time
If kneading is not enough, add a tiny amount of warm water. Dip your fingertips in warm water and work that moisture into the slime, or add just a few drops directly to the slime and knead thoroughly.
The key phrase here is a few drops. Not a splash. Not a pour. Not “I blacked out and now the slime is soup.” Small amounts let you restore moisture without instantly making the slime sticky.
After each small addition, knead for at least thirty to sixty seconds before deciding whether it needs more. Often one round is enough to make a noticeable difference.
Step 5: Mix In a Little Clear Glue or White Glue
If the slime is clearly overactivated, a bit of glue can help rebalance it. Add a small squeeze of the same type of glue the slime was originally made with, then knead until fully combined.
This works because glue helps restore the softer base material. It is especially useful when slime feels rubbery, firm, and stretchy for only half a second before snapping. Start small. You can always add a little more, but once you turn the slime sticky again, you will need to work back in the other direction.
Example: If your child added way too much activator and the slime now feels like a stress ball with trust issues, a teaspoon-sized amount of glue may be enough to soften it.
Step 6: Use Lotion or Glycerin Sparingly
For slime that feels dry and tough, a tiny pump of unscented lotion or a small drop of glycerin can improve softness and stretch. Work it in completely before adding more.
Lotion can make slime feel silkier and more flexible. Glycerin is often used to help slime stay smooth and stretchy. But both should be used carefully. Too much can make the slime slippery, sticky, or oddly stringy. This is one of those “less is more” situations.
If you are fixing clear slime, glycerin is often the better choice. If you are fixing white glue slime or butter slime, lotion can work nicely. Either way, use the tiniest amount first.
Step 7: Let It Rest, Then Test Again
After you add water, glue, lotion, or glycerin, let the slime sit for five to ten minutes in a sealed container or zip-top bag. Then test it again.
Why wait? Because slime sometimes needs a little time for the ingredients to distribute evenly. If you keep adjusting too fast, you can easily overcorrect. A short pause can save you from turning “almost fixed” into “why is it on the table, the spoon, and my sleeve?”
Step 8: Store It Properly So You Do Not Have to Repeat the Rescue Tomorrow
Once your slime is stretchy again, store it in an airtight container. This step is not glamorous, but it is what keeps the repair from becoming a daily sequel.
Choose a container with a tight lid or a sealed plastic bag. Keep it away from direct sunlight, heaters, and dusty spots. If several slimes are stored together without separation, they may blend colors and textures into one giant mystery batch. Sometimes that is fun. Sometimes it looks like a swamp made a bad decision.
Quick Fix Guide by Symptom
If your slime is hard and snaps
Use warmth, kneading, and a small amount of glue.
If your slime is dry and rough
Use a few drops of warm water and a tiny amount of lotion or glycerin.
If your slime is just slightly firm
Try hand warmth and kneading before adding anything.
If your slime becomes sticky after fixing
Do not panic. Knead longer first. If it still feels very sticky, use the tiniest amount of activator and work slowly.
Mistakes That Make Slime Worse
- Adding too much water at once: This can turn slime into a sticky mess.
- Adding too much activator to “fix” stickiness: This often creates the original problem all over again.
- Skipping kneading time: Slime usually needs working time before you can judge the texture.
- Using random household ingredients without testing: Some can separate the slime or make it slimy in the wrong way.
- Leaving repaired slime uncovered: That is basically inviting it to dry out again.
When Slime Cannot Really Be Saved
Sometimes a slime batch is too far gone. If it has become crumbly, smells strange, has visible dirt throughout, or has dried into a solid chunk, it may be time to let it go. A dramatic farewell is optional.
Also, if the slime has been overmixed with lots of incompatible add-ins, it may never return to that glossy, stretchy texture you want. In that case, it can still be useful for sensory play, poking, or experimenting, but probably not for bubble-popping glory.
Extra Experience: What It Is Actually Like to Rescue a Bad Batch of Slime
Anyone who has made slime more than once has had a “well, that escalated quickly” moment. The recipe looked simple, the measurements seemed close enough, and then somehow the slime came out feeling like a rubber chicken with emotional baggage. That is why fixing slime is almost as important as making it.
One of the most common real-life experiences is overactivating the slime by accident. It usually happens because the mixture still looks sticky in the bowl, so you add more activator, then a little more, then just a tiny bit more for luck. Suddenly the slime pulls away from the bowl beautifully, but when you stretch it, it tears. At that moment, people often assume the batch is ruined. In reality, that kind of slime is often very fixable. A little warmth, patient kneading, and a touch of glue can transform it from stubborn to stretchy in just a few minutes.
Another common experience is finding yesterday’s slime and realizing it now feels like it spent the night in the desert. This usually happens when the lid was left loose or the slime sat out during a long play session. The outside gets slightly tough first, then the whole batch loses that glossy elasticity. The encouraging part is that mildly dried slime often responds well to water and kneading. Not instantly, though. That is the part people underestimate. Slime repairs are rarely dramatic in the first ten seconds. They are more like coaxing than commanding.
Kids also tend to judge slime by one big pull. Adults do it too, to be fair. But a single stretch test can be misleading. Slime often feels better after thirty seconds of folding and warming in your hands. That is why experienced slime makers usually test, knead, pause, and test again. It is less exciting than dumping ingredients in like a TV chef, but it works much better.
Then there is the “I fixed it too much” phase. This is where someone adds water, then lotion, then more glue, then more activator, and by the end the slime has been on a journey no one can fully explain. That experience teaches the golden rule of slime repair: make one change at a time. Small adjustments are boring only until they save your batch.
There is also something surprisingly satisfying about reviving slime instead of tossing it. It turns the process into a mini experiment. You start noticing how different slimes behave, how clear slime reacts differently from fluffy slime, and how storage habits matter more than you thought. Over time, you get better at spotting the problem early. You can tell whether a slime needs moisture, warmth, or less panic.
In other words, learning how to soften slime and how to make slime stretchy again is not just a repair skill. It is part of becoming the person in the room who calmly says, “Wait, do not throw it away yet,” and is usually right. Honestly, that is a pretty fun superpower for something that lives in a plastic container.
Final Thoughts
If your slime is no longer stretchy, the answer is usually not to start over right away. First, diagnose the problem. Then use warmth, kneading, and tiny ingredient adjustments to bring the texture back. In many cases, fixing slime is easier than people expect, as long as you go slowly.
The best strategy is simple: small changes, lots of kneading, and airtight storage. That combination solves a surprising number of slime disasters. So the next time your slime turns stiff and moody, you will know exactly what to do.


