Table of Contents >> Show >> Hide
Note: Menu names can vary a little depending on whether you use Microsoft 365, a perpetual Office version, Windows, Mac, or the web apps. The methods below reflect the current mainstream Word and Excel workflow.
Sometimes you want a document to be hands off, not because it is top secret, but because you would really prefer that nobody “fix” your careful formatting, rewrite your formula, or turn your quarterly report into modern art. That is where read-only settings come in. In Microsoft Word and Excel, you have several ways to make a file read only, and each one serves a slightly different purpose. Some methods simply discourage editing. Others add real protection. And a few are basically the digital version of putting a sticky note on the fridge that says, “Please don’t touch my leftovers.”
If you are trying to learn how to make a file read only in Microsoft Word or Excel, the smartest move is to start with one question: Do you want to prevent accidental edits, or do you want stronger protection? That answer determines whether you should use Always Open Read-Only, Mark as Final, Restrict Editing, sheet/workbook protection, or password-based protection. Microsoft itself treats these as different tools, not one magic lock button.
What “Read Only” Actually Means in Word and Excel
In plain English, a read-only file can usually be opened and viewed, but not easily overwritten in its original form. In Word, Microsoft explains that a read-only document can still be read or copied, but changes usually have to be saved under a different name or in another location. In Excel, Microsoft also notes that an “Always Open Read-Only” workbook is not the same as heavy-duty security, because users with the right privileges can still clear that setting. Translation: read-only is often a speed bump, not a vault door.
That distinction matters because many people assume every read-only setting is permanent. It is not. Mark as Final, for example, makes a file read-only and disables typing, editing commands, and proofing marks, but Microsoft explicitly says it is not a security feature. Anyone with a copy can remove the status and edit again. So if your goal is serious control, you should think beyond the gentle “please behave” options.
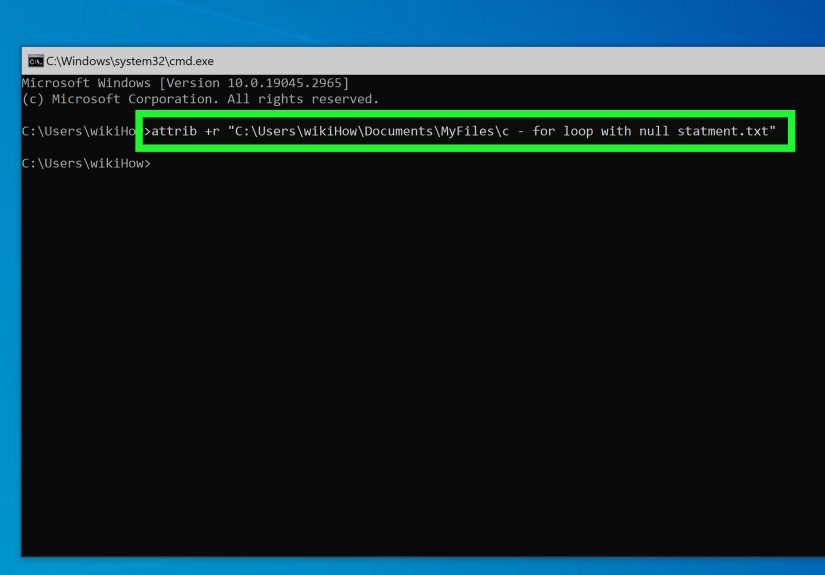
How to Make a Word File Read Only
Method 1: Use “Always Open Read-Only”
This is the easiest Word method when you want people to open the file in view-only mode by default. In Word, go to File > Info > Protect Document > Always Open Read-Only. Save the file, close it, and reopen it to confirm the setting took effect. Microsoft also notes that if you later want to remove the setting, you can return to the same menu and clear it.
This method is perfect for things like a finalized meeting agenda, a policy draft you do not want casually “improved,” or a template you want people to read before they start typing. It is quick, painless, and friendly. It is also not bulletproof. Someone determined to edit can usually save a new copy and keep going like nothing happened. So yes, useful. Invincible? Not even close.
Method 2: Mark the Document as Final
If your goal is to signal, “This is the finished version; please stop poking it,” use Mark as Final. In Word, open the file, go to File > Info > Protect Document > Mark as Final, then confirm. Microsoft says this makes the file read-only, turns off or disables typing and editing commands, and sets the document status to Final.
But here is the catch, and it is a big one wearing a fake mustache: Mark as Final is not security. Microsoft explicitly warns that anyone who receives an electronic copy can remove the “final” status and edit the document anyway. So use this when you want a strong visual cue, not when you need real enforcement. Think of it as office etiquette in button form.
Method 3: Restrict Editing in Word
If you want more control, Word’s Restrict Editing feature is a better choice. Microsoft’s guidance lets you go to the Review tab, open Restrict Editing, and choose No changes (Read only). You can even allow changes to selected parts of the document while locking down the rest. That is extremely useful when, for example, you want a team to fill in one section of a form but leave the legal language untouched.
This is where Word starts acting less like a polite doorman and more like a competent security guard. You can protect the whole document, or protect most of it and leave specific regions editable. For shared contracts, HR forms, report cover pages, and training handouts, this option is often the sweet spot between usability and control.
Method 4: Encrypt the Word File with a Password
If you need stronger protection, use password encryption. In Word, go to File > Info > Protect Document > Encrypt with Password, enter a password, confirm it, and save the file. Microsoft also warns that if you lose or forget the password, Word cannot recover it for you unless an organization already set up special recovery tools in advance. In other words, choose a good password, then do not launch it into the void and forget it.
Password protection is the better option when the file should not be editable by casual recipients or when you want tighter control over who can open or modify it. It is not just a read-only suggestion. It is a real barrier. For sensitive drafts, client material, or internal documents that should not be altered, this is often the smarter move than relying on a simple read-only setting.
How to Make an Excel File Read Only
Method 1: Use “Always Open Read-Only” in Excel
Excel offers a very similar route. Open the workbook and go to File > Info > Protect Workbook > Always Open Read-Only. Microsoft says this locks or unlocks the workbook to make it read-only, but also notes that if the workbook is shared, people with write privileges can clear the status. That means the feature is helpful for preventing accidental changes, but it is not a nuclear bunker.
This is great for things like budget summaries, pricing sheets, project dashboards, or reference tables that coworkers need to consult but not casually “improve.” If your office has ever watched one innocent spreadsheet become a colony of mystery formulas, this setting can save both time and blood pressure.
Method 2: Use Workbook or Sheet Protection
Excel protection can get confusing because file-level read-only and worksheet/workbook protection are not exactly the same thing. Microsoft explains that Protect Sheet helps protect worksheet contents and locked cells, while Protect Workbook helps protect the workbook structure. That is useful when your goal is to stop people from changing formulas, renaming sheets, moving sheets around, or editing locked ranges.
So if you want an Excel file to behave like “look, but do not touch,” ask yourself what exactly you are protecting. If you only care that the workbook opens as read-only, use the Info menu setting. If you want to stop edits to formulas, tabs, or specific cells, use workbook or sheet protection. Excel, being Excel, gives you options. Excel, also being Excel, expects you to choose the correct one like a spreadsheet-themed riddle.
Method 3: Require a Password to Open or Modify the Workbook
For stronger protection, Excel lets you set a password. Microsoft’s guidance covers passwords to open or modify a workbook, and file-level encryption through File > Info > Protect Workbook > Encrypt with Password. Microsoft also warns that if you lose the password, you may lose access because forgotten workbook passwords are not something Microsoft can simply retrieve for you.
If you send an Excel file to clients, external partners, or a large internal group, password protection is often the better answer than a plain read-only toggle. A read-only recommendation says, “Please be careful.” A password says, “No, really.” Those are very different vibes, and your spreadsheet deserves the right one.
Method 4: Share the File as View-Only
If your workbook or document lives in OneDrive, SharePoint, Word for the web, or Excel for the web, you can share it with view-only permissions. Microsoft’s current sharing tools let you adjust permissions so recipients can view instead of edit. For Excel for the web, Microsoft specifically says you can share a workbook as read-only. For Word and Excel sharing more broadly, the permissions menu lets you give edit access or view-only access.
This is often the best solution for modern collaboration because it works at the permission level, not just the file setting level. If your team needs live access but should not change the content, Can view is usually cleaner than emailing out local copies and praying that nobody creates Budget_Final_FINAL_ActuallyFinal_v9.xlsx.
Common Reasons a File Opens as Read Only
Sometimes a file opens read-only even when you did not intentionally set it that way. Office may place files in Protected View, especially when the file came from the internet, email, or another potentially unsafe source. TechRepublic and How-To Geek both describe Protected View as a mode where Office opens the file as read-only and may disable active content until you choose to enable editing. That is a safety feature, not a punishment from the spreadsheet gods.
Another cause is old sharing behavior. Microsoft says the older Shared Workbooks feature has many limitations and has been replaced by co-authoring in Microsoft 365. If you are working with older Excel files, some odd locking or editing restrictions can come from those legacy settings rather than a simple read-only preference.
Best Practices Before You Make a File Read Only
Before flipping any switch, save a clean master copy. That way, if you accidentally apply the wrong protection level, you still have a normal working version. Next, decide whether your audience should view only, comment, edit limited sections, or not touch the file at all. In Word, that usually means choosing between Always Open Read-Only, Restrict Editing, or password protection. In Excel, it means deciding between read-only open behavior, sheet/workbook protection, password protection, or permission-based sharing.
Also, remember that the strongest protection is not always the most convenient. If you send a password-protected workbook to ten people and half of them forget the password by lunch, congratulations: you successfully secured your file from your own team. Sometimes a view-only share link is the better, saner, less coffee-spilling solution.
Practical Examples
Example 1: You wrote a policy memo in Word and want coworkers to read it but not casually rewrite the final wording. Use Mark as Final or Always Open Read-Only if you mainly want to discourage edits. Use Restrict Editing if a few sections should remain editable. Use a password if the file must stay tightly controlled.
Example 2: You built a monthly budget in Excel and want management to review it without breaking formulas. Share it as Can view online or use sheet protection to lock formula cells. If the workbook should not be modified at all without authorization, add password-based protection.
Experience: What People Usually Learn the Hard Way
Here is the part nobody tells you until after the damage is done: most read-only disasters do not happen because the feature failed. They happen because the wrong read-only method was chosen for the situation. Someone marks a Word file as final and assumes that means no one can touch it. Someone sets an Excel workbook to open as read-only and then acts surprised when a determined coworker saves a copy and edits that instead. Someone password-protects a workbook, forgets the password, and suddenly the file is more secure than Fort Knox, including from the person who created it.
In real office life, the best results usually come from matching the method to the goal. If the goal is simply to stop accidental edits, the light-touch options work beautifully. They are fast, they are easy, and they reduce the number of “Oops, I changed the heading styles in every paragraph” moments. If the goal is stronger control, then soft read-only settings are not enough. That is when password protection, restricted editing, or view-only sharing permissions become the better choice.
A lot of teams also learn that cloud sharing changes the game. In the old days, people emailed attachments around like they were passing secret notes in algebra class. Now, many workflows are better handled through OneDrive or SharePoint with view-only permissions. That way there is one live version, fewer duplicates, and less confusion about which file is the “real” one. It is cleaner, safer, and far less likely to produce a folder full of files named things like Report_Final2_UseThisOne_Really.docx.
Another common experience is discovering that Excel protection and Word protection are not twins. Word is great when you want to control sections, comments, and editing behavior in a document. Excel is more granular when it comes to protecting cells, formulas, worksheet structure, and workbook structure. That means users often need a minute to understand what exactly they want to protect. The file? The data? The formulas? The layout? The answer changes the tool.
And then there is the human factor, which deserves its own trophy. The strongest settings in the world cannot fully protect a file from creative coworkers armed with screenshots, copy-paste, or the timeless ability to misunderstand instructions with breathtaking confidence. That does not mean read-only tools are useless. It means they work best when paired with clear communication. Label the document clearly. Tell people whether it is reference-only, final, or editable in certain areas. Add a short note when you share it. Technology helps, but context saves the day.
My favorite lesson from this topic is simple: read-only is not one feature. It is a toolbox. Once you stop looking for a single giant “LOCK EVERYTHING FOREVER” button, Word and Excel start making a lot more sense. And your files become much easier to protect without also making your own life miserable.
Conclusion
If you want to know how to make a file read only in Microsoft Word or Excel, the answer depends on how much control you actually need. Use Always Open Read-Only for a quick default view-only experience. Use Mark as Final when you want to signal that a file is finished. Use Restrict Editing in Word or sheet/workbook protection in Excel when you want more structured control. And when the file truly matters, use password protection or view-only sharing permissions to create a stronger barrier. The best method is not the fanciest one. It is the one that fits the job without turning your workflow into a soap opera.


